1. Introduction
This manual provides comprehensive instructions for the installation, operation, and maintenance of your Fortdows 10-inch Car Radio. This unit is designed for specific Chevrolet Silverado and GMC Sierra models from 2014 to 2018. Please read this manual thoroughly before installation and use to ensure proper function and safety.
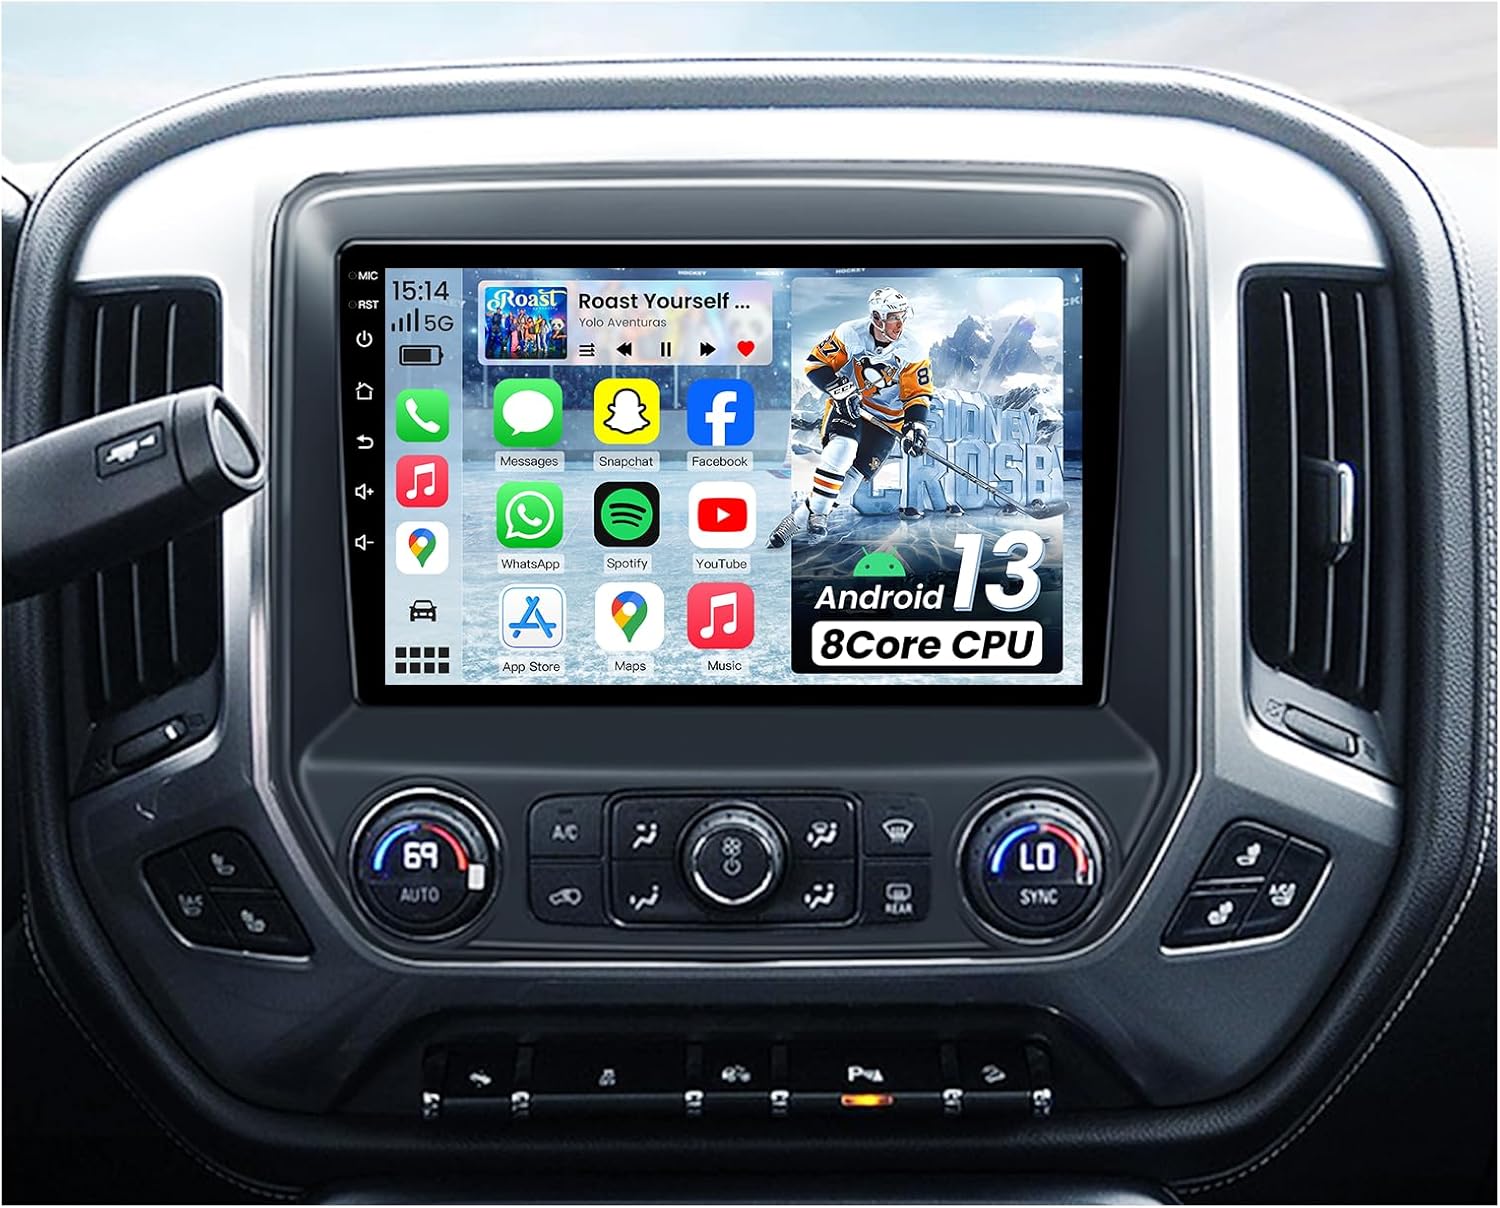
Image 1.1: Fortdows 10-inch Car Radio integrated into a vehicle dashboard.
2. Package Contents
Verify that all items listed below are included in your package:
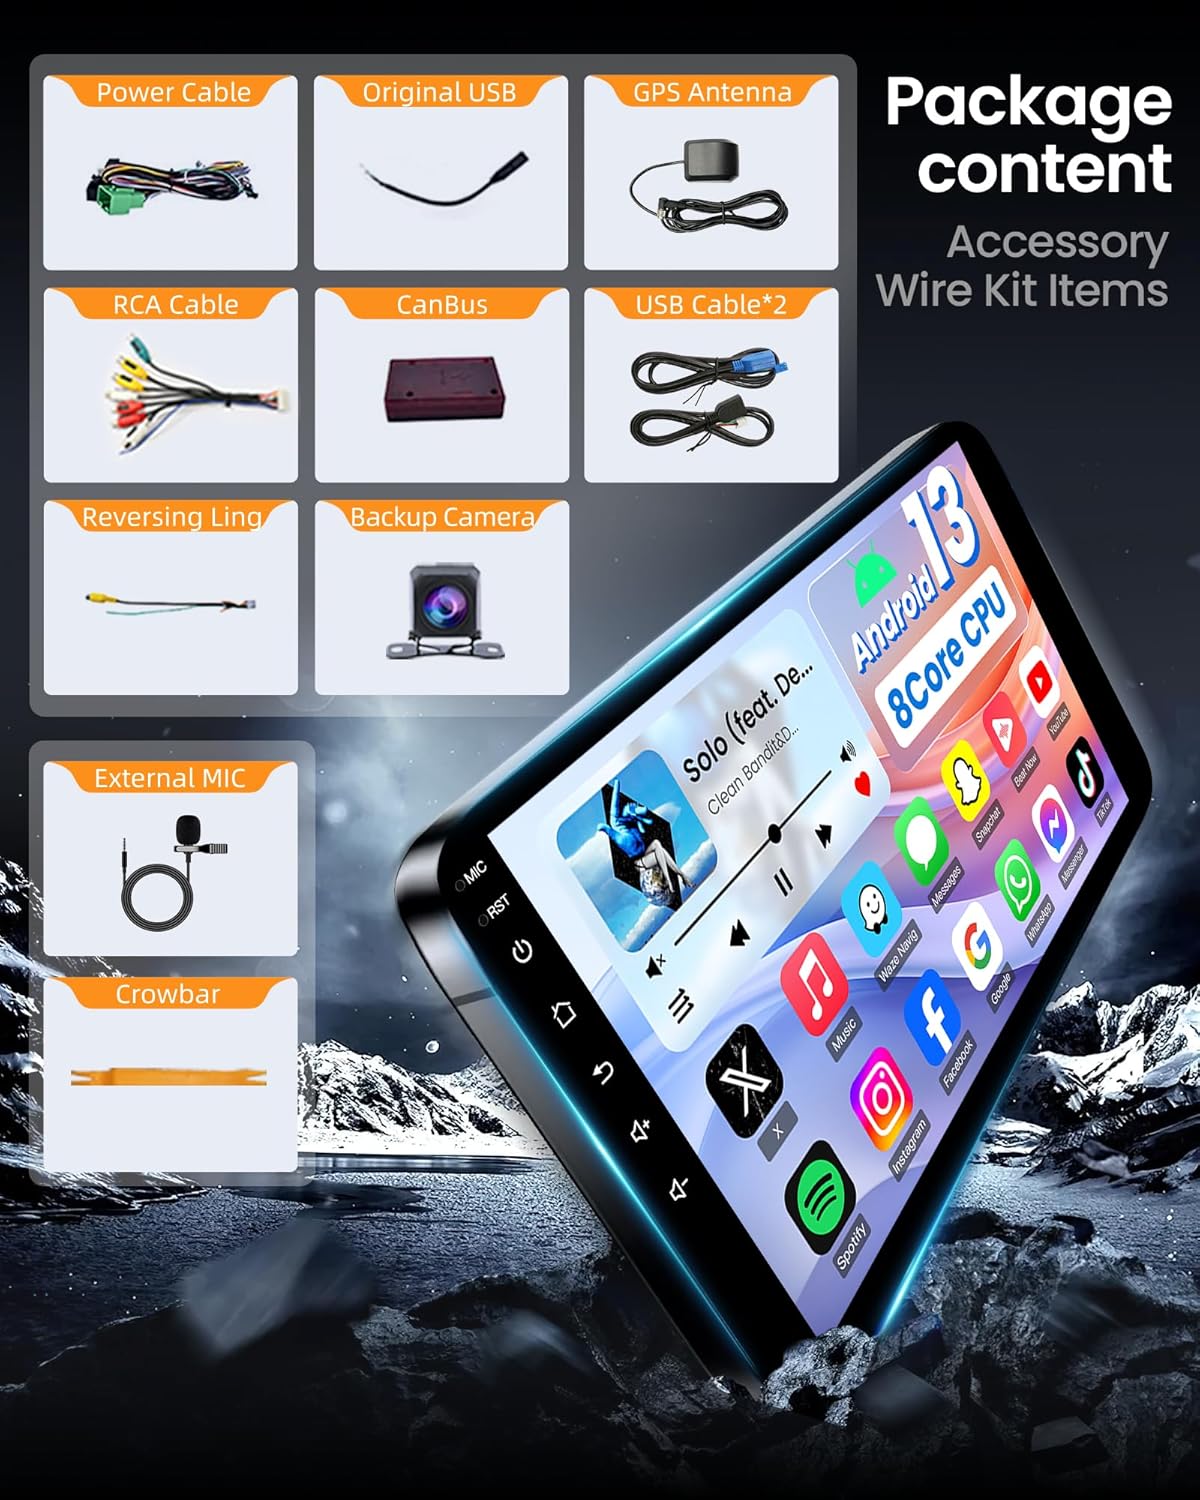
Image 2.1: Included accessories and wiring kit items.
- Main Head Unit (10-inch display)
- Power Cable (Plug and Play)
- Original USB Adapter
- GPS Antenna
- RCA Cable
- CanBus Decoder
- USB Cables (x2)
- Reversing Line
- Backup Camera
- External Microphone
- Crowbar (for trim removal)
3. Installation Guide
Important Safety Note: Always disconnect the vehicle's battery before beginning any installation to prevent system errors, fuse damage, or permanent malfunction.
3.1 Vehicle Compatibility Check
This car radio is compatible with Chevrolet Silverado and GMC Sierra models from 2014-2018. To ensure proper fitment and functionality, verify your vehicle's original dashboard configuration and RPO code.

Image 3.1: Vehicle compatibility check based on original dashboard and RPO code.
To determine your vehicle's RPO code:
- Open the passenger side glove box.
- Locate the label inside the glove box. The RPO code can be found on this label.
3.2 Wiring Connections
Follow these steps to connect the necessary cables to the head unit:
Video 3.1: Demonstration of car radio wiring connections.
- USB Cables: Connect the 6-pin and 4-pin USB cables to their respective ports on the back of the head unit.
- Rear Camera Signal Wire: Connect the 10-pin rear camera signal wire to the 10-pin reversing video input interface.
- 4G Antenna: Connect the 4G antenna to the designated port.
- GPS Antenna: Connect the GPS antenna to its port.
- Radio Antenna: Connect the factory radio antenna to the ANT port.
- Power Cable: Connect the main power cable (plug and play) to the 16-pin port on the head unit.
3.3 Power Cable Diagrams (XC-1255 & XC-1256)
Refer to the appropriate diagram based on your vehicle's RPO code for correct power cable connections.

Image 3.2: XC-1255 Power Cable Wiring Diagram (for IOB RPO code).

Image 3.3: XC-1256 Power Cable Wiring Diagram (for IO3/IO4/IO5/IO6 RPO codes).
Note: Only connect the labeled plugs on the original car radio. Remaining plugs may not need to be connected.
3.4 Steering Wheel Control Adapter Cable Installation
Install the steering wheel control adapter cable according to your vehicle type and locate the HMI module if applicable.

Image 3.4: Steering Wheel Control Adapter Cable Installation.
- Single-row adapter cable: For Silverado 1500 and most 2500 models. Connect to the SM2.54mm female connector labeled "Silverado" on the CANBUS box.
- Dual-row adapter cable: For 3500 models. Connect to the SM2.54mm female connector on the CANBUS box.
- Installation Location: Connect to the 10-pin connector under the steering wheel.
- HMI Module Location (for IO4/IO5/IO6): Remove the front passenger armrest box, remove six screws, and locate the HMI module behind the metal pipe.
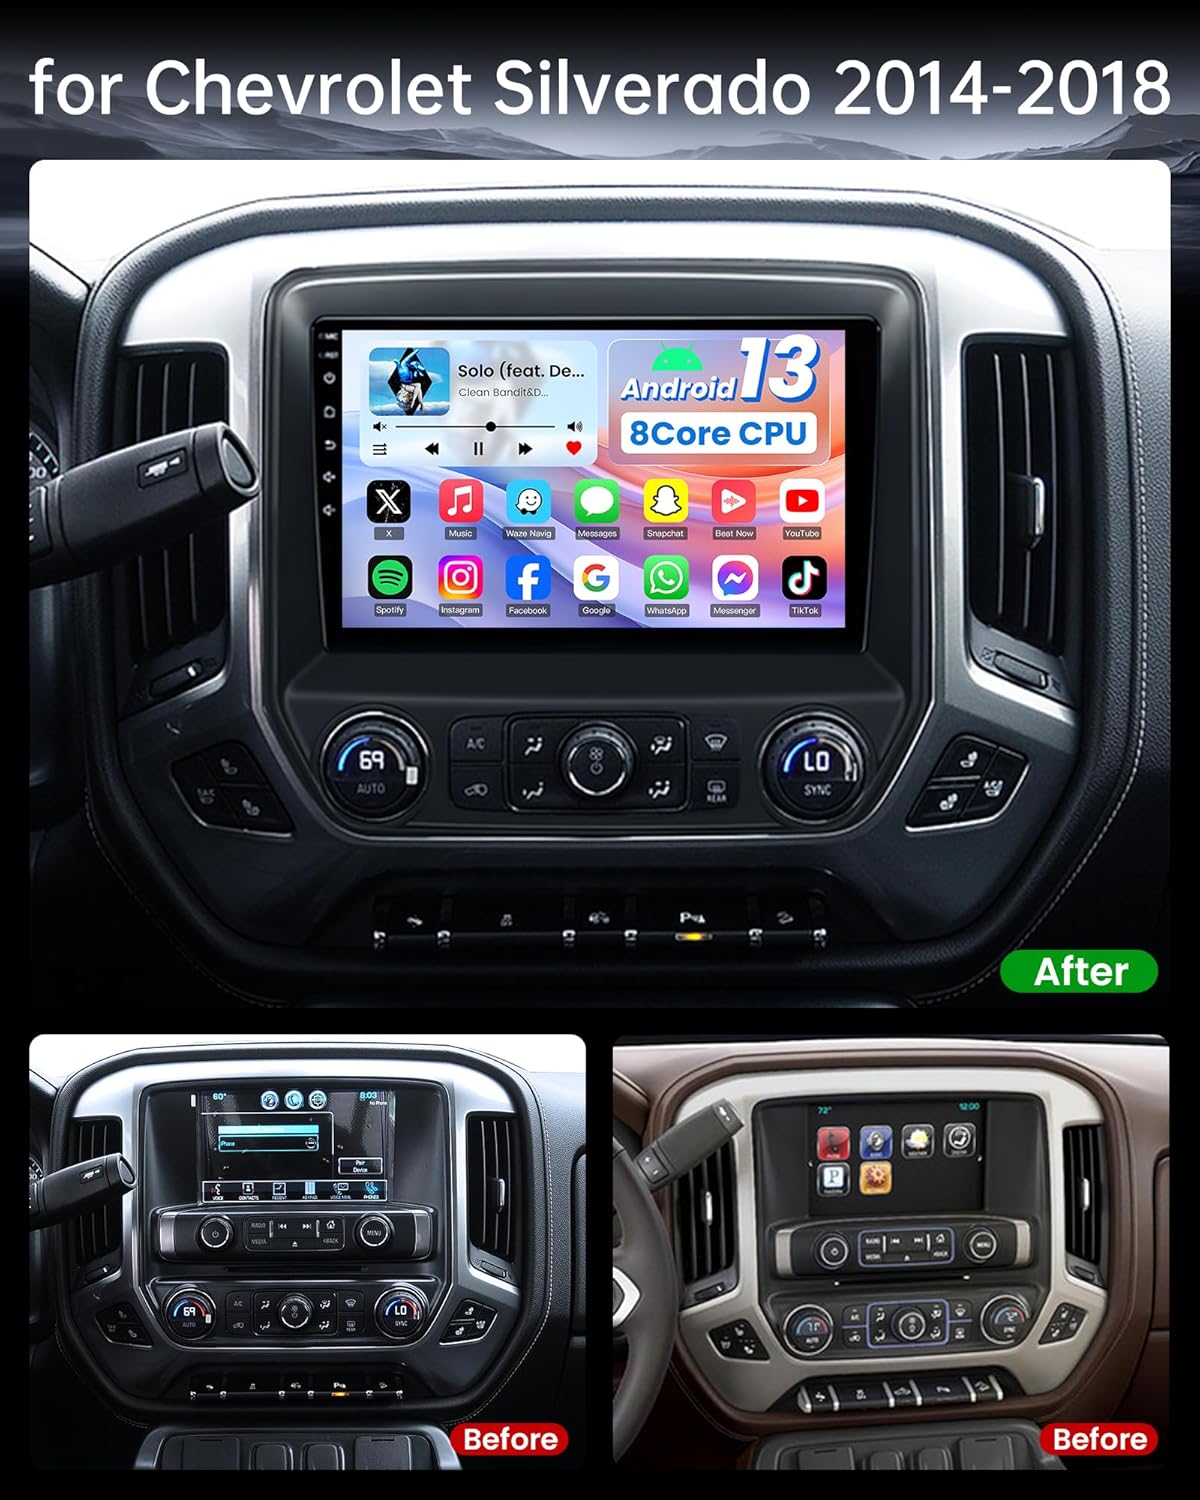
Image 3.5: Before and After installation example.
4. Operating Instructions
4.1 Wireless/Wired CarPlay & Android Auto
The car radio integrates with your smartphone for seamless access to navigation, music, calls, and messages. Use voice commands (Siri or Google Assistant) for hands-free operation.

Image 4.1: Wireless CarPlay and Android Auto interfaces.
4.2 GPS Navigation
The unit features a built-in GPS module and external GPS antenna for online and offline map navigation. Offline map data is preloaded for immediate use. Connect to 5G WiFi to download additional online navigation applications.
4.3 1080P Backup Camera
The included AHD backup camera provides a 170-degree ultra-wide-angle view. The system automatically switches to the rear view image when reversing, offering optimal parking assistance with 1080P resolution.

Image 4.2: 1080P Rear View Camera functionality.
4.4 Steering Wheel Control (SWC)
The unit supports the original vehicle's steering wheel controls. After correct wiring and learning the buttons in the settings, you can conveniently control functions without taking your hands off the wheel.

Image 4.3: Steering Wheel Control interface.
4.5 1280*800 IPS Touchscreen & Mirror Link
The 10.1-inch 1280*800 HD IPS touchscreen offers vibrant colors and sensitive touch response. IPS technology provides wide viewing angles. Mirror Link allows projecting smartphone applications onto the car's screen.

Image 4.4: 1280*800 IPS Touchscreen clarity comparison.
4.6 5G WiFi Connectivity
The unit supports 5G WiFi hotspot connection, enabling access to online navigation apps, social media, and other applications from the Play Store. This improves network performance and reduces latency.
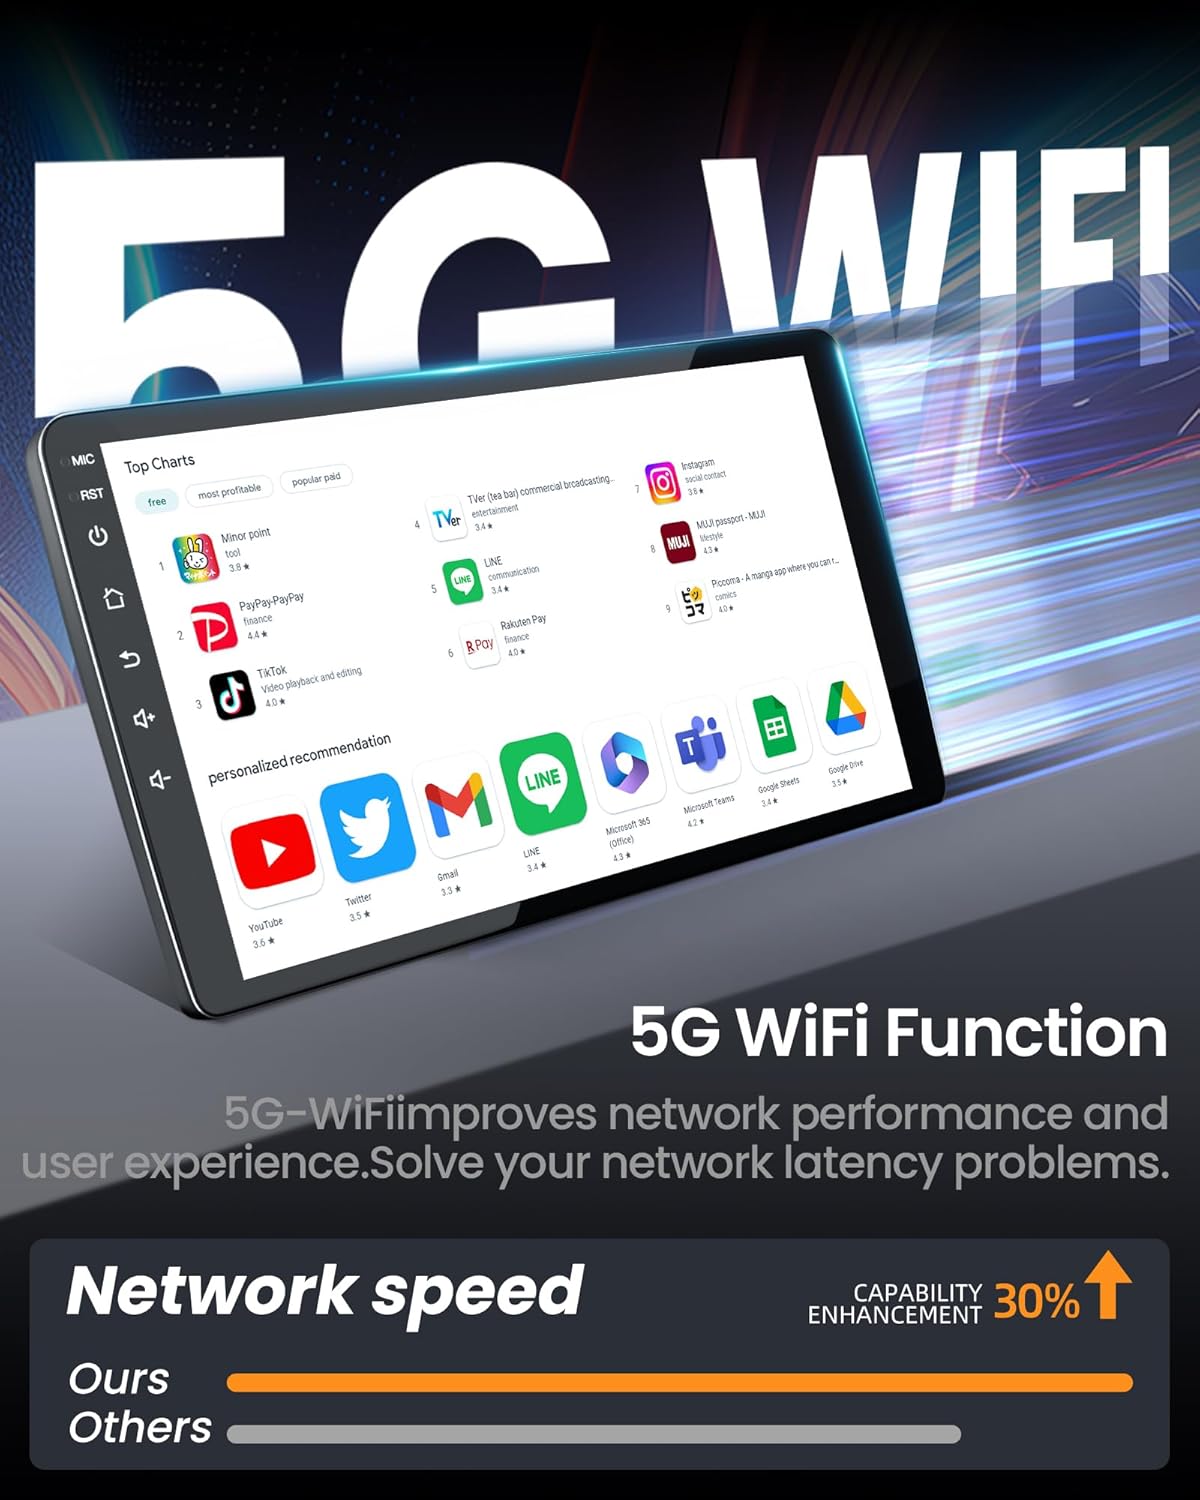
Image 4.5: 5G WiFi Functionality.
4.7 Bluetooth & DSP & FM/AM Radio
Enjoy premium DSP sound quality with 36 EQ settings (folk, rock, classic, jazz). The FM/AM radio includes 18 preset stations. Bluetooth 5.0 ensures stable connections for calls and media streaming.

Image 4.6: Professional DSP Sound settings.
4.8 Split Screen Function
The split-screen feature allows you to run two applications simultaneously, such as navigation and music playback, enhancing multitasking capabilities.

Image 4.7: Split Screen Functionality.
5. Troubleshooting
5.1 No Sound After Installation
If there is no audio output after installation, consider the following:

Image 5.1: Troubleshooting for no sound.
- BOSE System Compatibility: This unit is not compatible with BOSE systems directly. If your original vehicle has a BOSE system, an additional fiber optic interface is required. Connect the included MST cable to the adapter and the factory CD player to ensure proper audio output.
- Identifying BOSE System:
- Front door speakers may have a BOSE logo.
- The factory green connector typically has only two wires.
5.2 Steering Wheel Control Not Working
If the steering wheel control is not functioning after installation:
Image 5.2: Troubleshooting for steering wheel control.
- Check Connections: Ensure the correct steering wheel control adapter cable is securely connected to the 10-pin connector under the steering wheel.
- Power Cable Plug: Confirm the 8-pin plug on the power cable is correctly inserted into the 8-pin port on the back of the radio unit.
- Configuration: Configure the correct car model in the settings: Go to Settings -> Factory (enter password "3368") -> Car Model, then select XP[Simple] -> GM/Chevrolet -> ALL-XP[H].
6. Specifications
| Feature | Specification |
|---|---|
| Item Weight | 5.4 pounds |
| Package Dimensions | 14.53 x 13.66 x 4.88 inches |
| Display Size | 10.1 Inches |
| Voice Command | Touchscreen |
| Operating System | Android, iOS (via CarPlay/Android Auto) |
| Memory Storage Capacity | 32 GB |
| Connectivity Technology | Bluetooth, Wi-Fi (5G), USB, Wireless |
| Map Type | North America, South America (preloaded) |
| Audio Output Mode | Stereo |
| Mounting Type | Dashboard Mount |
| Special Feature | Touchscreen, Waterproof (referring to general durability, not submersible) |
| Processor | 8-Core CPU |
| RAM | 2GB |

Image 6.1: 8-Core CPU and Memory Configuration.
7. Warranty and Customer Support
Fortdows is committed to providing quality products and support.

Image 7.1: Warranty and Service Information.
- Warranty: 1-Year Warranty
- Return Policy: 7 Days Return Policy
- Defects: Returns accepted for defects.
Customer Support Contact:

Image 7.2: Customer Support Contact Information.
For assistance, please contact:
- Email: fortdows.cam@gmail.com
- Website: www.fancygod.com