1. Important Safety Instructions
Please read all instructions carefully before operating the appliance. Retain this manual for future reference.
- Ensure the ice maker is connected to a properly grounded electrical outlet.
- Do not operate the appliance with a damaged power cord or plug.
- Keep the ice maker away from heat sources and direct sunlight.
- Do not immerse the appliance, power cord, or plug in water or other liquids.
- Always unplug the ice maker before cleaning or performing any maintenance.
- This appliance is intended for commercial and household use as described in this manual.
- Ensure adequate ventilation around the unit. Maintain at least 6 inches of clearance from walls and other objects.
2. Product Overview
The Electactic Commercial Ice Maker Machine Z5845M is designed to produce high-quality moon-shaped ice efficiently. This freestanding or under-counter unit is suitable for various settings, including homes, bars, cafes, and offices.

The Electactic Commercial Ice Maker Machine, model Z5845M, shown with its moon-shaped ice production, control panel, and accompanying accessories including an ice scoop, water inlet hose, drain hose, and water filter.
Key Features:
- Efficient Ice Production: Produces up to 100 pounds of moon-shaped ice per 24 hours, with 64 cubes per cycle.
- Adjustable Ice Thickness: Customize ice cube thickness (thin, medium, thick) to suit various applications.
- Smart LCD Control Panel: Intuitive interface for easy operation, including timer and self-cleaning functions.
- Durable Construction: Crafted from stainless steel for longevity and a sleek appearance.
- Freestanding or Under-Counter Installation: Versatile design for flexible placement.

A detailed front view of the Electactic ice maker, illustrating its capacity to produce 100 lbs of ice per 24 hours, 64 pieces per cycle, and a 28 lbs ice storage bin.
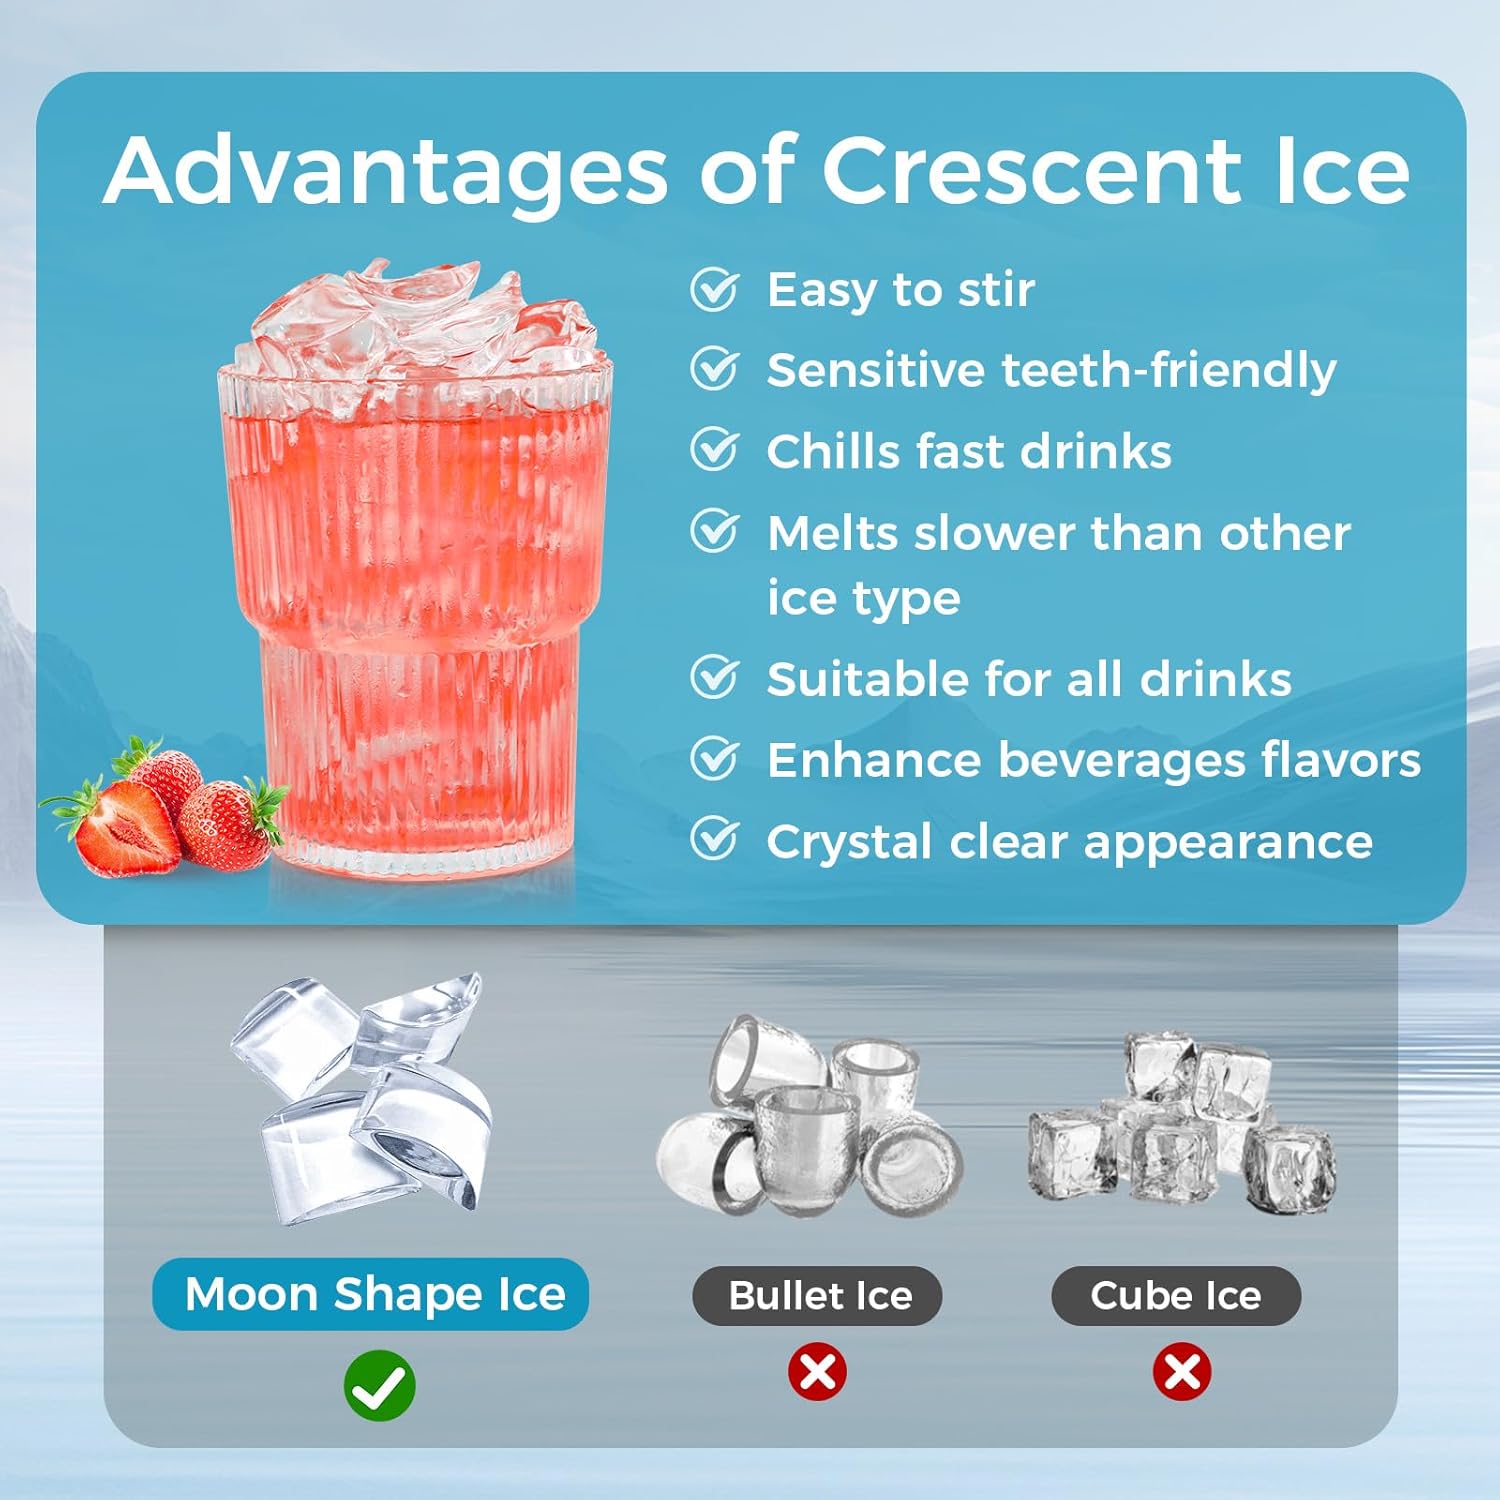
An infographic highlighting the benefits of crescent-shaped ice, such as ease of stirring, being sensitive teeth-friendly, chilling drinks fast, melting slower, suitability for all drinks, enhancing beverage flavors, and crystal clear appearance, compared to bullet and cube ice.
3. Package Contents
Verify that all items are present in the packaging:
- Electactic Commercial Ice Maker Machine
- Ice Scoop
- Water Inlet Hose
- Drain Hose
- Water Filter
- User Manual (this document)
4. Setup and Installation
4.1 Placement
Choose a stable, level surface capable of supporting the ice maker's weight. Ensure the location has access to a water supply and a drain. The unit can be installed freestanding or under a counter.
- Maintain at least 6 inches of clearance around the sides and back for proper ventilation.
- Avoid placing the unit near heat-generating appliances or in direct sunlight.
- Ensure the ambient temperature is between 50°F (10°C) and 90°F (32°C).

The Electactic ice maker installed under a counter in a kitchen setting, with dimensions labeled: 15.75 inches height, 31.42 inches depth, and 17.64 inches width.
4.2 Water Connection
Connect the provided water inlet hose to a potable water supply with a pressure between 15-80 PSI. Connect the drain hose to a suitable drain. Ensure all connections are secure to prevent leaks.

Rear view of the ice maker, illustrating the connections for the water inlet, drain hose, and power cable.
4.3 Power Connection
Plug the ice maker into a dedicated, grounded 110-120V AC electrical outlet. Do not use extension cords or adapters.
4.4 Initial Cleaning
Before first use, it is recommended to clean the interior of the ice maker. Refer to the 'Maintenance' section for detailed cleaning instructions.
5. Operating Instructions
5.1 Control Panel Overview

A close-up view of the ice maker's Smart LCD Control Panel, detailing indicators for ice making, self-cleaning, light symbol, water absence, ice full alarm, and buttons for Light, Timer, Clean, On/Off, and ice thickness adjustment (+/-).
- ON/OFF Button: Powers the unit on or off.
- LIGHT Button: Activates the interior light.
- TIMER Button: Sets a delayed start or stop time for ice production.
- CLEAN Button: Initiates the self-cleaning cycle (press and hold for 5 seconds).
- +/- Buttons: Adjust ice thickness or timer settings.
- Indicators: Ice Making, Self-Cleaning, Light Symbol, Water Absence, Ice Full Alarm.
5.2 Starting Ice Production
- Ensure the water supply is connected and turned on.
- Press the ON/OFF button to power on the unit.
- The ice making indicator will illuminate, and the machine will begin the ice production cycle.
5.3 Adjusting Ice Thickness
Use the + and - buttons on the control panel to select your desired ice thickness. The display will show the current setting.
- Thin Ice: Ideal for quick chilling and delicate beverages.
- Medium Ice: Standard size for most drinks.
- Thick Ice: Melts slower, suitable for prolonged chilling or specific applications like seafood displays.

An image demonstrating the adjustable ice thickness feature, showing examples of thin, medium, and thick ice, and their suggested uses for seafood, soft drinks, and whisky, respectively.
5.4 Using the Timer Function
The timer allows you to schedule when the ice maker turns on or off. Press the TIMER button and use the + and - buttons to set the desired delay in hours.
6. Maintenance
6.1 Self-Cleaning Function
The ice maker features an automatic self-cleaning cycle:
- Ensure the unit is powered on and the water supply is connected.
- Press and hold the CLEAN button for approximately 5 seconds until the self-cleaning indicator illuminates.
- The machine will perform a cleaning cycle, typically lasting about 30 minutes.
- Once complete, the unit will return to standby mode or resume ice production.
6.2 Regular Cleaning
For optimal performance and hygiene, regular manual cleaning is recommended:
- Exterior: Wipe the stainless steel exterior with a soft cloth and mild detergent. Avoid abrasive cleaners.
- Interior: Periodically clean the ice storage bin and water reservoir with a solution of water and white vinegar or a food-grade ice maker cleaner. Rinse thoroughly with clean water.
- Air Filter: Clean the air filter (located on the front or side grille) regularly to ensure efficient cooling. Remove and wash with warm, soapy water, then dry completely before reinserting.
6.3 Drainage
Ensure the drain hose is always clear and properly positioned to allow water to flow out freely. Blockages can lead to water accumulation and potential issues.
7. Troubleshooting
Refer to this section for common issues and their solutions.
| Problem | Possible Cause | Solution |
|---|---|---|
| Ice maker not producing ice | No water supply, power issue, ambient temperature too high. | Check water connection, ensure power is on, verify room temperature. |
| "Water Absence" indicator on | Water supply is off or disconnected. | Turn on water supply, check hose connections. |
| "Ice Full" alarm on | Ice storage bin is full. | Remove ice from the storage bin. |
| Ice cubes are too small or too large | Ice thickness setting is incorrect. | Adjust ice thickness using the +/- buttons on the control panel. |
| Unusual noise during operation | Unit not level, loose components, or normal compressor operation. | Ensure unit is level. If noise persists and is unusual, contact support. |
8. Specifications
| Feature | Detail |
|---|---|
| Brand | Electactic |
| Model Name | Z5845M |
| Product Dimensions (D x W x H) | 15.75" x 17.64" x 31.42" |
| Weight | 72.6 Pounds |
| Ice Production Capacity | 100 lbs / 24 hours |
| Ice Storage Capacity | Approximately 28 lbs |
| Wattage | 345 watts |
| ASIN | B0DMZZM7JM |
9. Warranty and Support
For warranty information or technical support, please refer to the warranty card included with your product or contact Electactic customer service. When contacting support, please have your model number (Z5845M) and ASIN (B0DMZZM7JM) available.


