1. Safety Instructions
Please read all safety warnings and instructions before using this product. Failure to follow the warnings and instructions may result in electric shock, fire, and/or serious injury.
- Keep the vacuum away from water or other liquids.
- Do not use the vacuum to pick up flammable or combustible liquids, such as gasoline, or use in areas where they may be present.
- Do not pick up anything that is burning or smoking, such as cigarettes, matches, or hot ashes.
- Ensure the filter is properly installed before use.
- Keep hair, loose clothing, fingers, and all parts of the body away from openings and moving parts.
- Use only as described in this manual. Use only manufacturer's recommended attachments.
- Do not use with a damaged cord or plug. If the appliance is not working as it should, has been dropped, damaged, left outdoors, or dropped into water, return it to a service center.
- Do not handle the charger or appliance with wet hands.
- Always turn off the appliance before connecting or disconnecting the battery.
- Store the appliance indoors in a cool, dry area.
2. Package Contents
Verify that all items listed below are included in your package:
- Organizer Box
- 4-in-1 Vacuum Unit
- User Manual
- Flexible Hose
- Long Blowing Nozzle
- Flat Suction Nozzle
- Multi-surface Nozzle
- Flat Brush
- Short Blowing Nozzle
- Stainless Washable Filter
- HEPA Washable Filter (1 pre-installed, 1 spare)
- Round Brush
- Air Suction Nozzle
- Type-C Charging Cable
- Removable Battery x 2
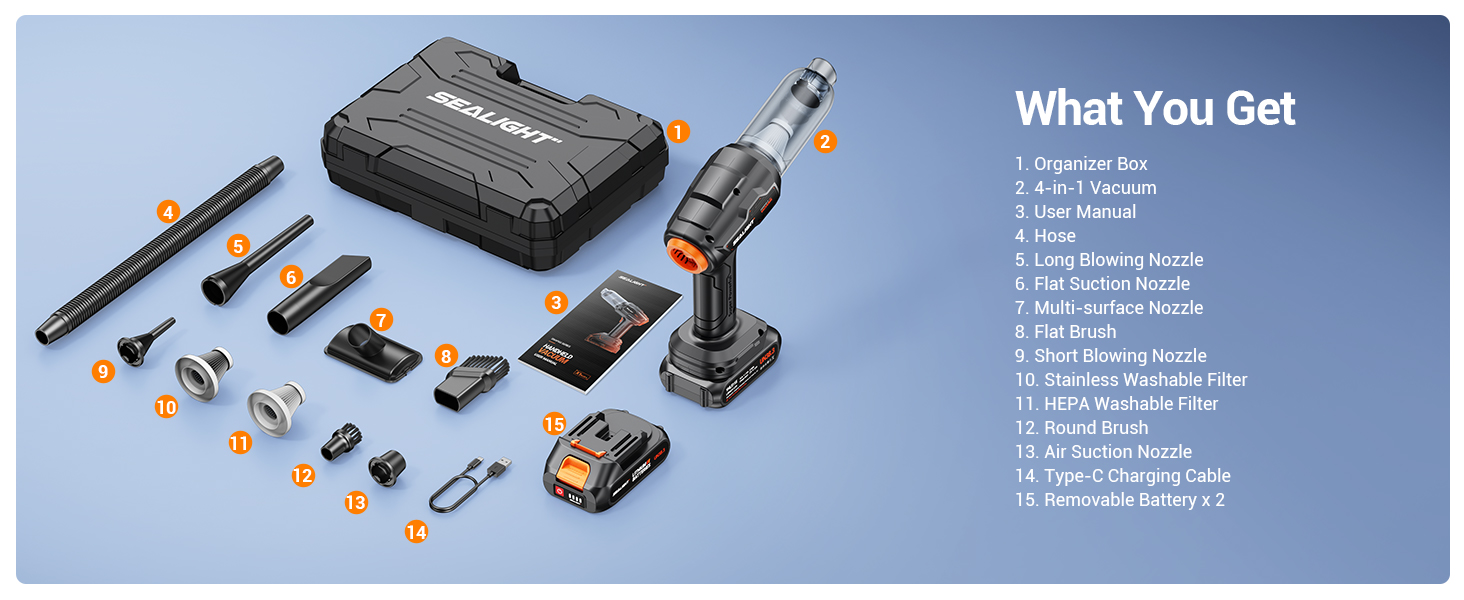
Image: All components of the SEALIGHT Car Vacuum including the main unit, various nozzles, filters, charging cable, and two batteries, neatly arranged in an organizer box.
3. Setup
3.1 Attaching/Detaching Battery
To attach the battery, align the battery pack with the base of the vacuum unit and slide it in until it clicks securely into place. To detach, press the release button on the battery pack and slide it off.
3.2 Attaching/Detaching Dust Cup and Filter
To attach the dust cup, align it with the main body and twist clockwise until secure. To detach, twist counter-clockwise and pull it off. The filter is located inside the dust cup and can be pulled out for cleaning.
3.3 Attaching Nozzles
The vacuum comes with various nozzles for different tasks. Simply push the desired nozzle onto the suction port (for vacuuming) or the blowing port (for air duster/inflator) until it fits snugly.
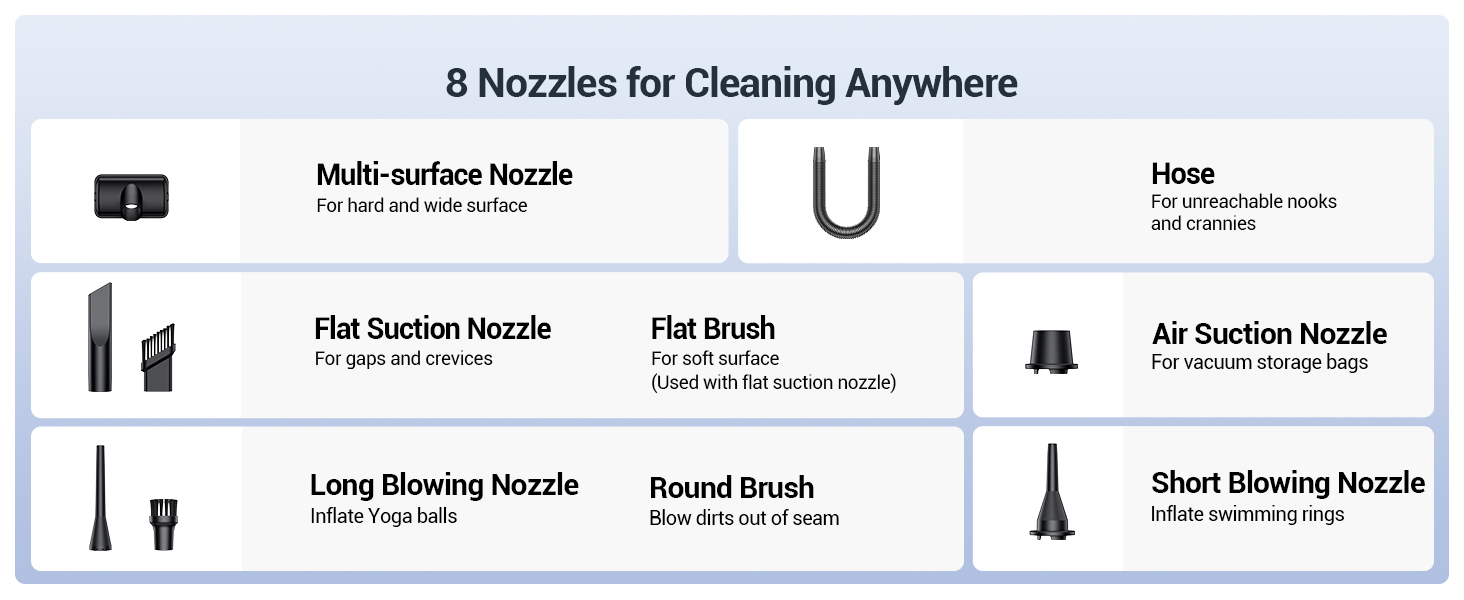
Image: Diagram showing various nozzles and their recommended uses for different cleaning and inflating tasks.
4. Operating Instructions
4.1 Power On/Off
Press the power button once to turn on the vacuum. Press again to cycle through different suction/blowing speeds (if applicable). Press and hold to turn off the device.
4.2 Vacuuming
Attach the appropriate nozzle to the suction end of the vacuum. Use the Flat Suction Nozzle for crevices and tight spaces, the Multi-surface Nozzle for general cleaning, and the Flat Brush for soft surfaces. The Flexible Hose can extend reach into difficult areas.
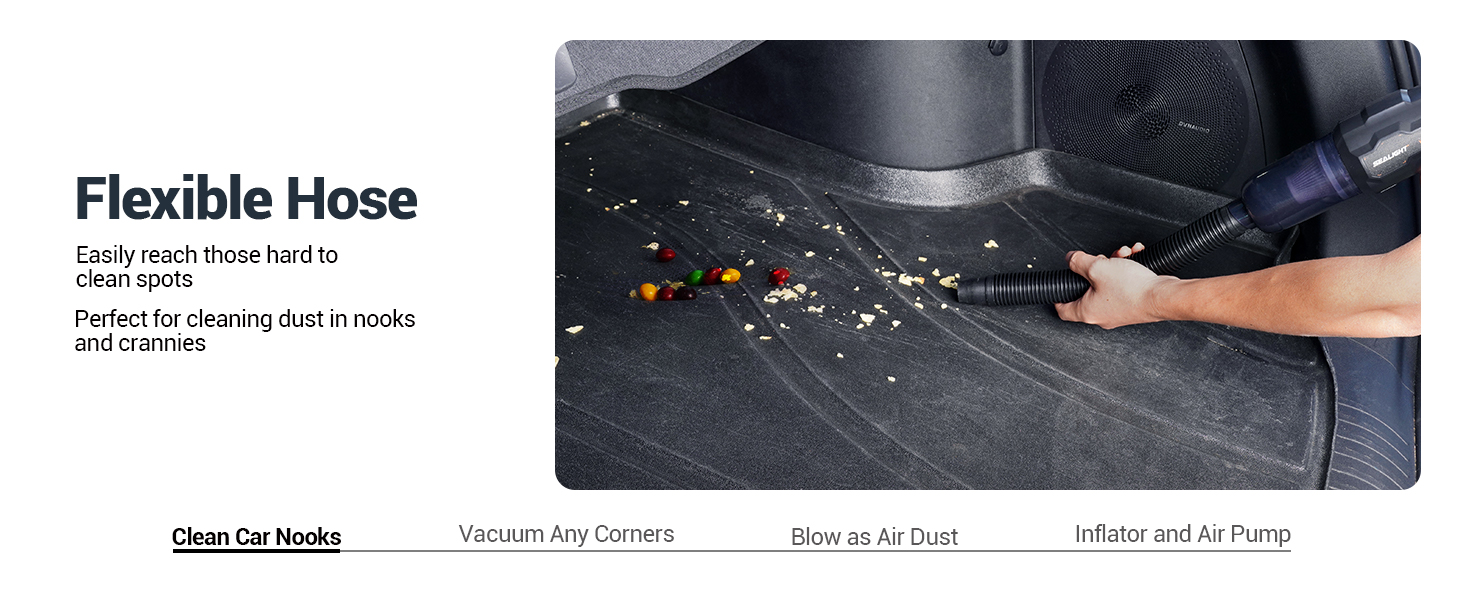
Image: Using the flexible hose for cleaning car nooks.
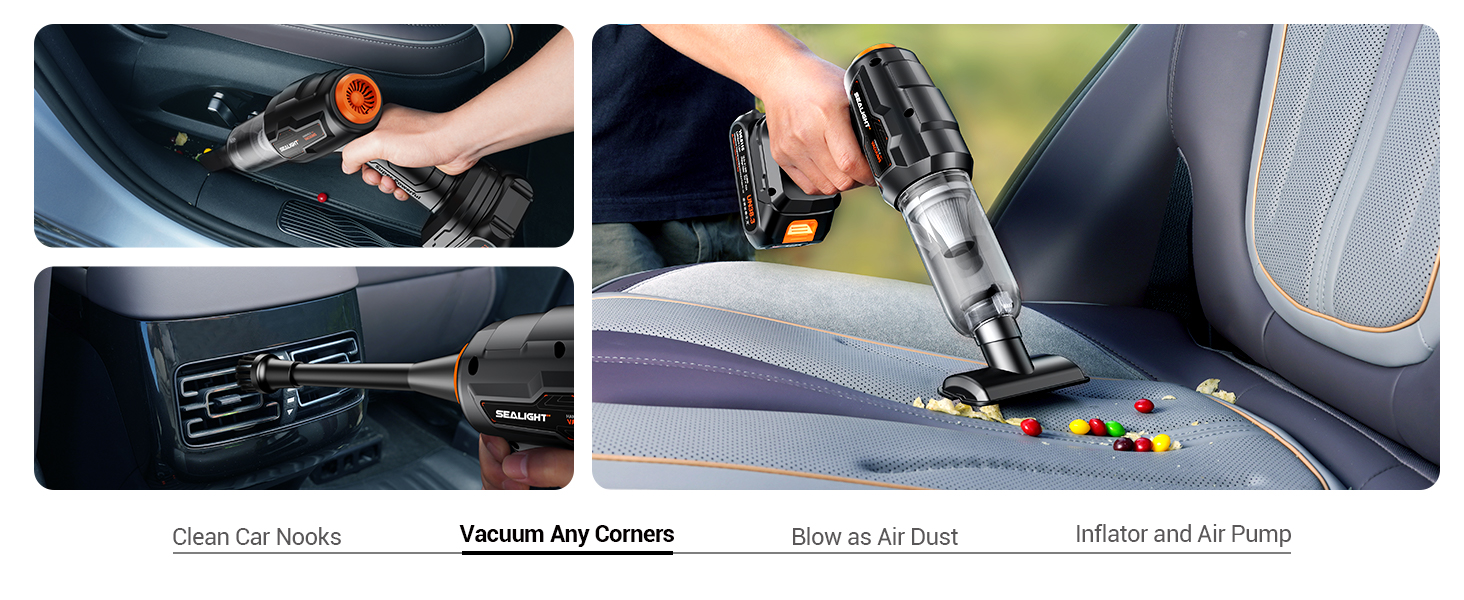
Image: Vacuuming various corners and surfaces in a car.
4.3 Air Duster Function
Attach a blowing nozzle to the exhaust end of the vacuum. Use this function to blow away dust from keyboards, car vents, or to clear light debris like leaves from surfaces.
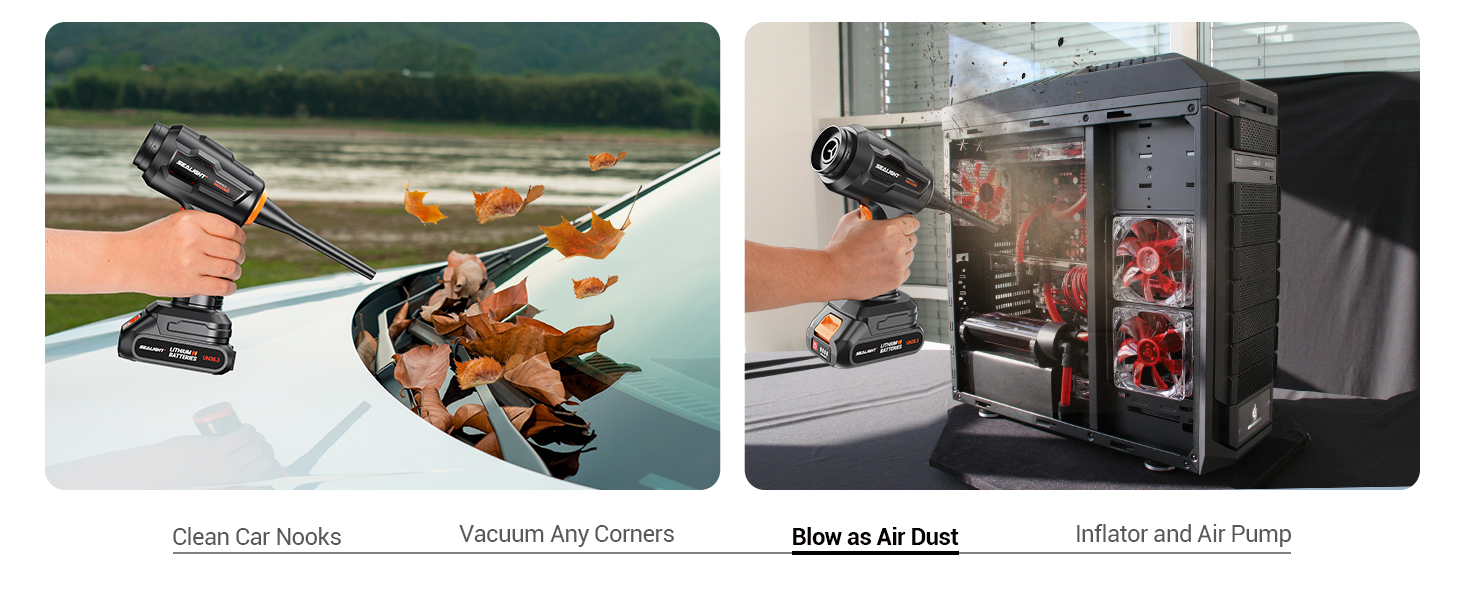
Image: Using the air duster to clear dust and leaves.
4.4 Inflator/Pumping Function
Utilize the specialized nozzles on the blowing port to inflate items such as yoga balls, inflatable pools, or to vacuum seal storage bags.
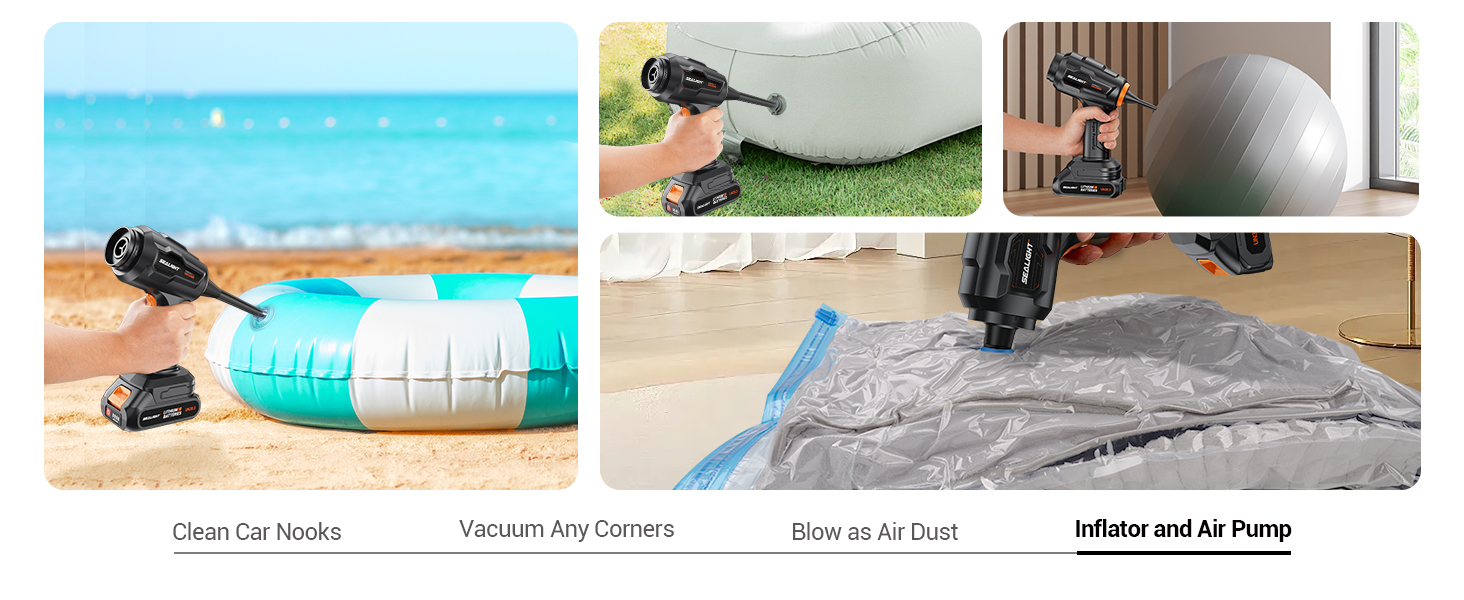
Image: Inflating and pumping with the specialized nozzles.
Video: An overview of the SEALIGHT Mini Vacuum's features and versatility.
Video: Demonstration of the SEALIGHT Portable Vacuum Cleaner's functions and accessories.
Video: The SEALIGHT Car Vacuum in action, showcasing its cleaning capabilities in a vehicle.
Video: A detailed look at the SEALIGHT Handheld Vacuum's design and functionality.
5. Maintenance
5.1 Emptying the Dust Cup
The dust cup has a capacity of 180ml. To empty, twist the dust cup counter-clockwise to detach it from the main unit. Dispose of collected debris into a trash bin. Reattach by twisting clockwise until secure.
5.2 Cleaning the Filter
The vacuum uses a washable HEPA filter. After detaching the dust cup, carefully remove the filter. Rinse the filter under running water until clean. Ensure the filter is completely dry before reinserting it into the dust cup and reattaching to the vacuum.
5.3 Charging the Battery
Connect the Type-C charging cable to the charging port on the battery pack. Use a 5V/2A adapter (not included) for optimal charging. The battery provides approximately 15 minutes of use per single battery, or 30 minutes with dual batteries. After the battery is exhausted, separate the vacuum cleaner and the bottom battery to avoid the vacuum cleaner completely consuming the battery pack when it is turned on, which reduces the battery life.

Image: Type-C Charging Port for convenient charging.
6. Troubleshooting
- No Power: Ensure the battery is fully charged and properly attached.
- Low Suction/Blowing Power: Check if the dust cup is full or if the filter is clogged. Clean the filter and empty the dust cup. Ensure no blockages in the nozzles or main unit.
- Overheating: If the unit overheats and shuts off, allow it to cool down for at least 15-20 minutes before resuming use. This can occur after prolonged continuous operation.
- Battery Drains Quickly: Ensure the vacuum is separated from the battery when not in use to prevent passive discharge.
7. Specifications
| Brand | SEALIGHT |
| Model Name | X1 Plus |
| Suction Power | 21000Pa |
| Wattage | 120 watts |
| Battery Life | 15 minutes (single battery), 30 minutes (dual batteries) |
| Dust Cup Capacity | 180 Milliliters |
| Noise Level | 70 Decibels |
| Product Dimensions | 8"L x 3"W x 10"H |
| Item Weight | 1 pounds |
| Filter Type | HEPA Filter (Washable) |
| Power Source | Battery Powered |
8. Warranty & Support
SEALIGHT is committed to providing high-quality products and customer satisfaction. For any product-related inquiries, technical support, or warranty claims, please refer to the contact information provided in your product packaging or visit the official SEALIGHT website.
We offer:
- 24/7 Quick Reply
- Free Replacement
- Product Quality Support


