1. Introduction
This manual provides detailed instructions for the installation, operation, and maintenance of your WININMETA Automatic Chicken Coop Door, Model HHUSCCD-C. This device is designed to automate the opening and closing of your chicken coop door, offering convenience through WiFi APP control, solar power, and integrated timer and light sensor functions. It features an anti-pinch design for poultry safety and is constructed from durable, weather-resistant aluminum.
1.1 Package Contents
- Automatic Chicken Coop Door Unit
- Solar Panel
- USB-DC Charging Cable
- Mounting Hardware (screws, anchors)
- User Manual (this document)
2. Safety Information
Please read all safety instructions before installation and operation to prevent injury or damage to the product.
- Anti-Pinch Feature: The door is equipped with an anti-pinch safety program. If an obstruction is detected during closing, the door will pause for 4 seconds before attempting to close again. This feature activates once per closing cycle.
- Power Source: Use only the provided solar panel or USB-DC charging cable for power. Ensure proper connection to avoid electrical hazards.
- Installation: Install the door securely according to the instructions. Loose installation can lead to malfunction or injury.
- Children and Animals: Keep children and pets away from the moving door to prevent accidents.
- Environmental Conditions: The door is designed for outdoor use and is weather-resistant. However, extreme weather conditions may affect performance.
3. Setup and Installation
3.1 Physical Installation
Ensure the chicken coop opening is suitable for the door dimensions (approximately 9.6 inches wide x 14 inches high for the door panel). The overall unit dimensions are 9.6 inches (width) x 3.1 inches (depth) x 14 inches (height).

Image Description: An image illustrating the dimensions of the automatic chicken coop door and its corresponding opening in a wooden coop. The door unit measures 24.5cm (9.6in) wide and 36cm (14in) high. The solar panel measures 12cm (4.7in) by 17cm (6.6in) and is connected by an 85cm (33in) cable. The coop opening is shown as 21cm (8in) wide and 25.5cm (10in) high, with a 1cm (0.4in) gap at the top and 8.5cm (3.3in) above the opening.
- Prepare the Opening: Ensure your chicken coop has an opening that accommodates the door panel.
- Mount the Door Unit: Position the main door unit over the coop opening. Use the provided screws and anchors to securely fasten the unit to the coop wall. Ensure it is level and the door panel can move freely.
- Mount the Solar Panel: Choose a location for the solar panel that receives maximum direct sunlight throughout the day. Mount it securely using the provided hardware.
3.2 Power Connection
The door is primarily solar-powered but can also be charged via USB-DC.
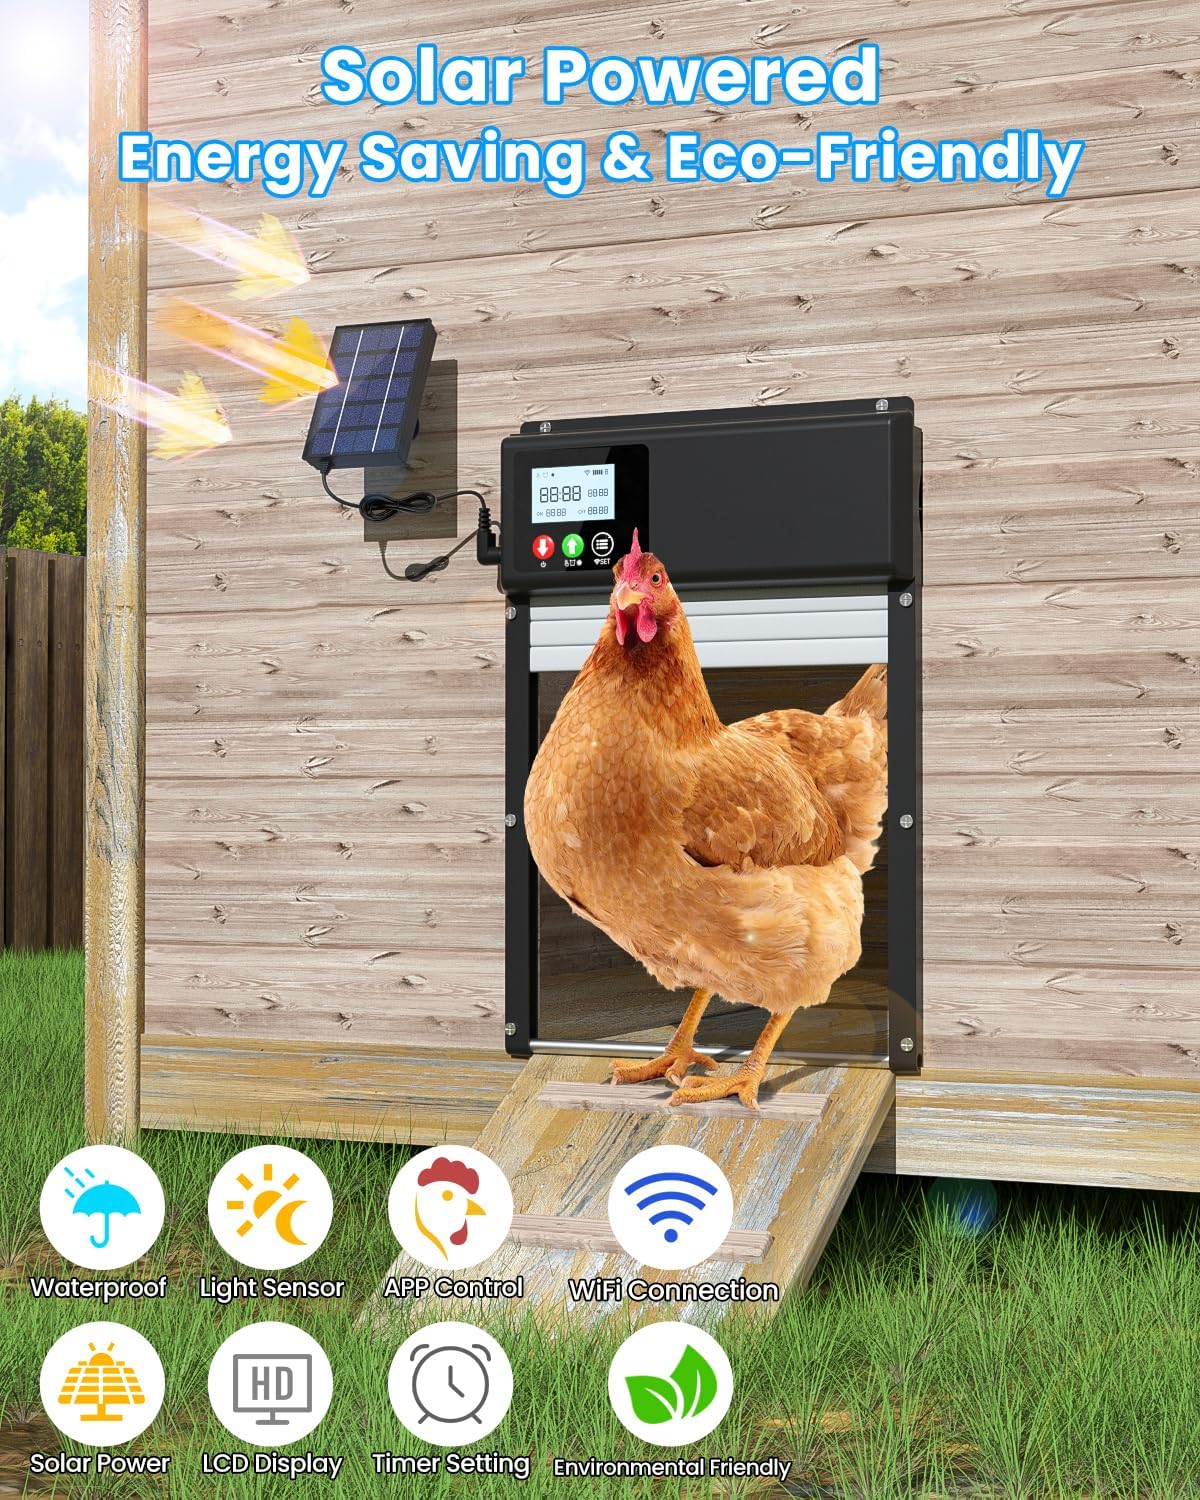
Image Description: A chicken coop door installed on a wooden coop, with a solar panel mounted above it. Sunlight is depicted shining on the solar panel, indicating its charging function. Icons below the image highlight features like waterproof, light sensor, APP control, WiFi connection, solar power, LCD display, timer setting, and environmental friendliness.
- Connect Solar Panel: Plug the solar panel cable into the designated charging port on the main door unit.
- USB-DC Charging (Optional): If solar charging is insufficient (e.g., during prolonged cloudy weather), connect the USB-DC charging cable to the unit and a suitable power adapter (not included).
3.3 WiFi and App Setup
The door supports remote control via a smartphone application. Ensure your WiFi network is 2.4GHz.

Image Description: A smartphone screen showing the 'Smart APP Remote Control via WiFi' interface for the chicken coop door. The app displays options for 'Timing Mode', 'Light Perception Mode', 'Manual Mode', and 'Other Settings'. A hand is interacting with the phone, and a laptop is visible in the background, suggesting remote management.
- Download App: Search for the designated control app (refer to packaging or included documentation for app name) on your smartphone's app store and install it.
- Register/Log In: Create an account or log in to the app.
- Add Device: Follow the in-app instructions to add your chicken coop door. This typically involves putting the device into pairing mode (often by pressing and holding a button on the unit) and connecting it to your 2.4GHz WiFi network.
- Configure Settings: Once connected, you can configure various settings through the app, including timing, light sensor sensitivity, and manual operation.
4. Operating Instructions
The WININMETA Automatic Chicken Coop Door offers multiple operating modes for flexible control.

Image Description: A detailed view of the chicken coop door's control panel, featuring a spacious LCD display and three control buttons. The LCD shows current time, door opening time, and door closing time. The buttons are labeled 'Select/Power Switch', 'Select/Mode Switch', and 'Set Up'. Indicators for WiFi and battery power are also visible.
4.1 Control Modes
- Timer Mode: Set specific times for the door to open and close daily. This can be configured via the LCD display or the smartphone app.
- Light Sensor Mode: The door automatically opens at dawn and closes at dusk based on ambient light levels. Sensitivity can be adjusted.
- Manual Mode: Open or close the door manually using the buttons on the unit or through the smartphone app.
- APP Control: Remotely control the door's opening and closing, switch modes, and adjust settings from anywhere using the connected smartphone app.

Image Description: A split image showing the automatic chicken coop door in two scenarios: left side depicts morning (7:00 AM) with the door open and chickens exiting, indicating automatic opening during the day. The right side depicts night (6:00 PM) with the door closed and predators (fox, wolf, skunk) illustrated, indicating automatic closing at night to protect poultry.
4.2 LCD Display
The integrated LCD screen provides real-time information about the door's status, including current time, mode, open/close conditions, and power level. Use the 'Select/Mode Switch' and 'Set Up' buttons to navigate and adjust settings directly on the unit.
4.3 Anti-Pinch Protection
The door is designed with an anti-pinch mechanism. If an obstruction (e.g., a chicken) is detected during the closing sequence, the door will stop, pause for 4 seconds, and then attempt to close again. This helps prevent injury to your poultry.

Image Description: An image demonstrating the anti-pinch protection. The top part shows the door open with a chicken inside. The bottom part shows the door closing, with a red warning triangle and the door paused slightly above the chicken, illustrating that it detects obstructions and stops to prevent injury.
5. Maintenance
Regular maintenance ensures optimal performance and longevity of your chicken coop door.
- Cleaning: Periodically clean the door panel and tracks to remove dirt, debris, or feathers that could impede smooth operation. Use a soft, damp cloth. Avoid harsh chemicals.
- Solar Panel: Keep the solar panel clean and free of dust, leaves, or snow to ensure efficient charging.
- Battery Check: Monitor the battery level via the LCD display or app. If the battery consistently runs low, ensure the solar panel is receiving adequate sunlight or use the USB-DC charging cable.
- Weather Resistance: The door is crafted from aluminum and AES for durability and weather resistance (from -15°F to 140°F). While waterproof, ensure connections are secure to prevent moisture ingress.

Image Description: The automatic chicken coop door installed on a wooden wall, with rain falling on it. Icons indicate 'Waterproof', 'Aluminum Alloy', and 'Cold Resistant', emphasizing its weather resistance and durable construction.
6. Troubleshooting
Refer to the table below for common issues and their solutions.
| Problem | Possible Cause | Solution |
|---|---|---|
| Door does not open/close automatically. | Incorrect timer settings, insufficient light for sensor, low battery, obstruction in path. | Check timer settings in app/LCD. Adjust light sensor sensitivity. Ensure solar panel is clean and receiving sunlight; charge via USB if needed. Clear any obstructions. |
| WiFi connection issues or app not responding. | Not connected to 2.4GHz WiFi, weak signal, app error, device not paired. | Ensure your router is broadcasting 2.4GHz WiFi. Check WiFi signal strength at the coop. Restart the app and the door unit. Re-pair the device with the app if necessary. |
| Battery not charging or draining quickly. | Solar panel obstructed or dirty, insufficient sunlight, faulty battery. | Clean the solar panel. Relocate the solar panel to an area with more direct sunlight. Use USB-DC charging. If issues persist, contact support. |
| Door requires manual reset after power loss. | Designed behavior for certain power interruptions. | After a power outage (e.g., solar battery completely drains), the unit may require a manual press of the power button to restart. Ensure consistent power supply to avoid this. |
| Door stops during closing (anti-pinch activated). | Obstruction detected in the door's path. | This is a safety feature. Ensure no poultry or objects are in the door's path. The door will attempt to close again after a brief pause. |
7. Specifications
| Feature | Detail |
|---|---|
| Model Number | HHUSCCD-C |
| Brand | WININMETA |
| Material | Aluminum, AES |
| Product Dimensions (LxWxH) | 9.6 x 3.1 x 14 inches (24.5 x 7.9 x 35.6 cm) |
| Item Weight | 4.18 pounds (1.9 kg) |
| Power Source | Solar Powered (1 Lithium Ion battery included), USB-DC Charging |
| Connectivity | 2.4G WiFi (APP Control) |
| Control Modes | Timer, Light Sensor, Manual, APP Remote Control |
| Display | LCD Screen |
| Operating Temperature | -15°F to 140°F (-26°C to 60°C) |
| Special Features | Anti-Pinch Design, Waterproof, Easy Assembly |
| Target Audience | Chicken, Duck, Goose |
8. Warranty and Support
8.1 Warranty Information
This WININMETA Automatic Chicken Coop Door comes with a 1-year warranty from the date of purchase. The warranty covers manufacturing defects and malfunctions under normal use. It does not cover damage caused by misuse, improper installation, accidents, or unauthorized modifications.
8.2 Customer Support
For technical assistance, troubleshooting, or warranty claims, please contact WININMETA customer support. Refer to the product packaging or the official WININMETA website for the most current contact information.


