
1. Introduction
The PWAYTEK 400Ft HDMI Extender Over IP is designed to transmit HDMI signals over long distances using standard CAT5e/6 Ethernet cables. This device supports 1080p HD video and stereo audio, making it suitable for various applications including home theaters, offices, and educational environments. It offers flexible connectivity options, including Power over Ethernet (PoE) compatibility and support for both 100M and 1000M Ethernet switches for one-to-many configurations.
This manual provides comprehensive instructions for the proper installation, operation, and maintenance of your HDMI extender to ensure reliable performance.
2. Package Contents
Please verify that all items listed below are included in your package. If any items are missing or damaged, please contact PWAYTEK customer support.
- 1x HDMI Transmitter (TX unit)
- 1x HDMI Receiver (RX unit)
- 2x Power Supply Adapters (DC 12V)
- 1x User Manual
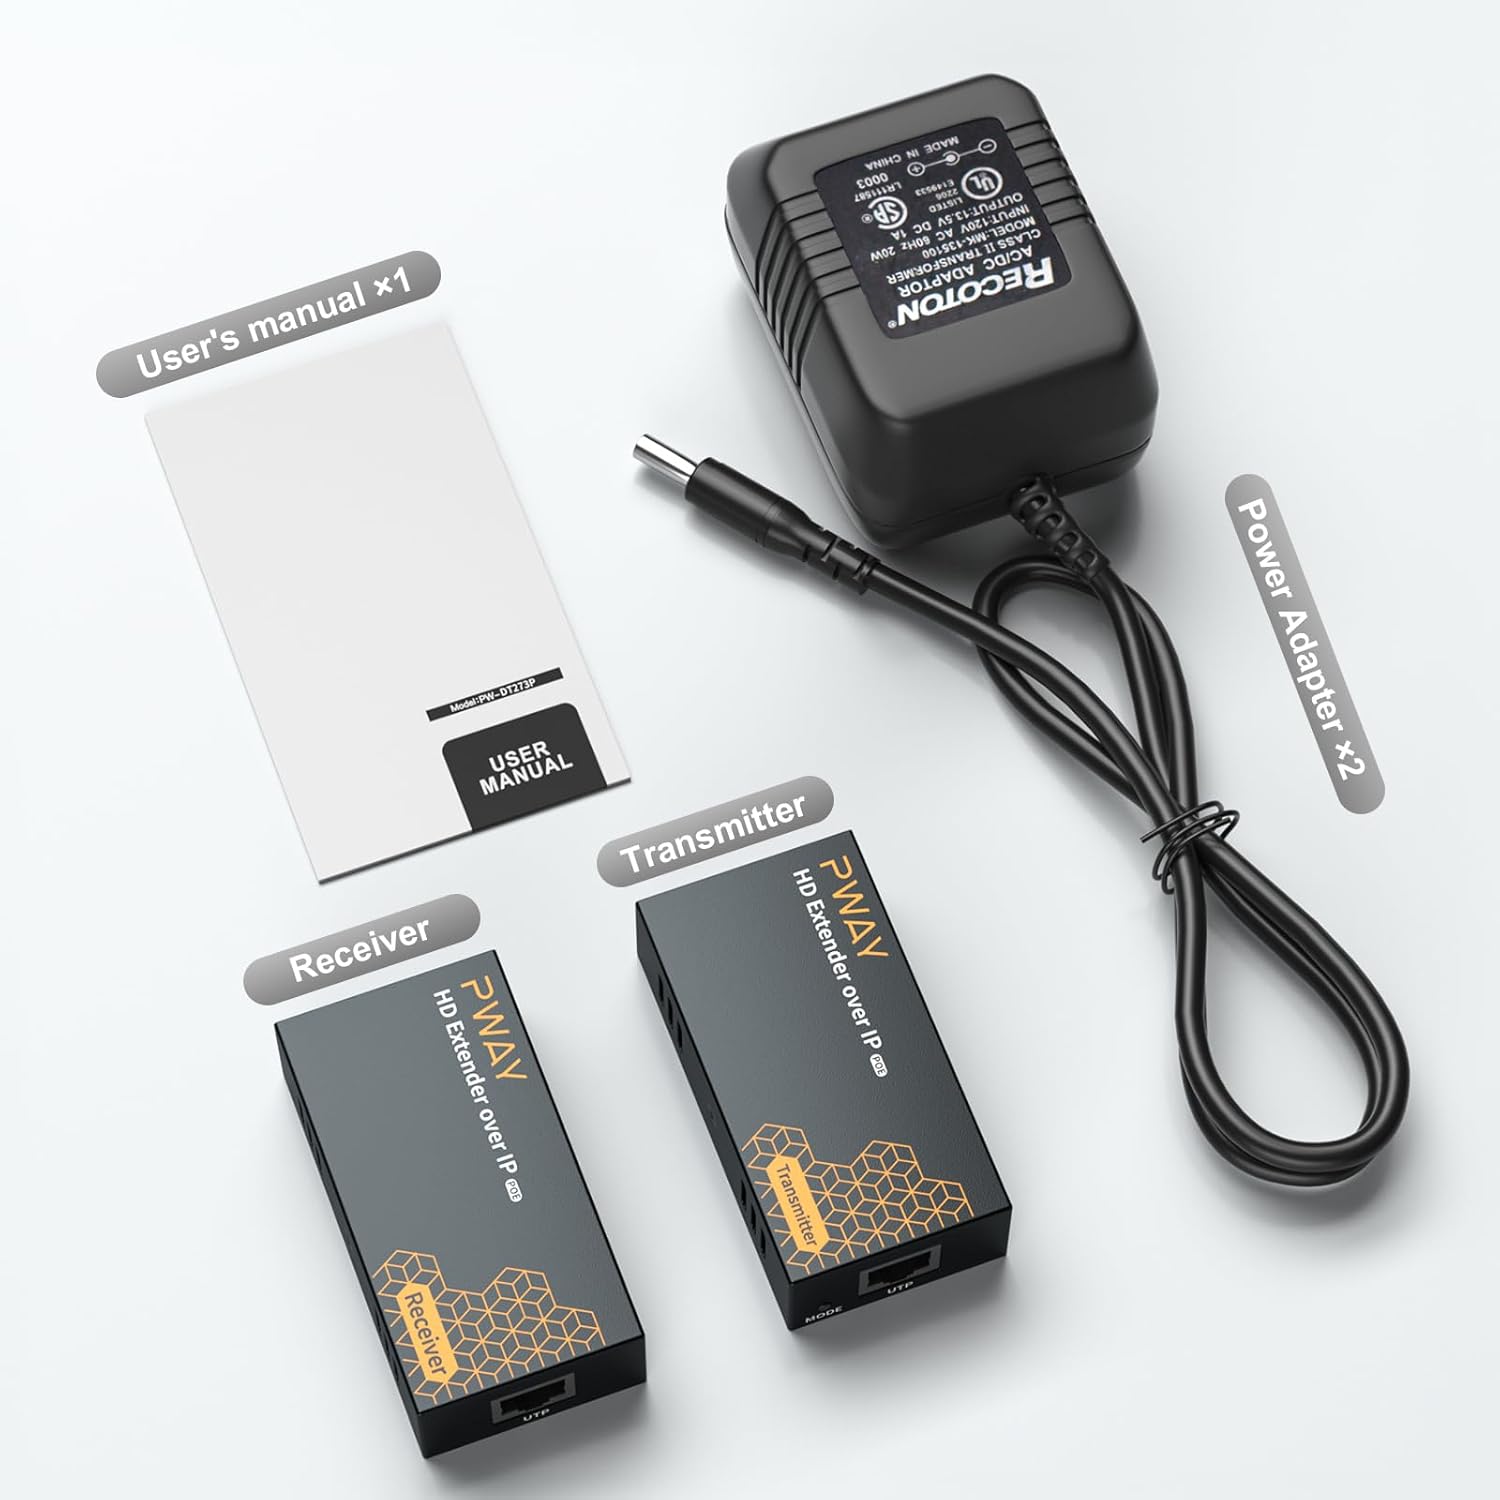
Figure 2.1: Included components of the PWAYTEK HDMI Extender package.
3. Features
- Extended Transmission: Supports HDMI signal transmission up to 400 feet (120 meters) over a single CAT5e/6 Ethernet cable.
- PoE Compatibility: Can be powered directly by a PoE switch, eliminating the need for separate power adapters for the units.
- Network Flexibility: Compatible with both Gigabit and 100M Ethernet switches, ensuring stable performance without excessive bandwidth consumption.
- High-Quality Output: Delivers crystal-clear 1080p resolution at 60Hz with synchronized stereo audio.
- Plug and Play: Designed for straightforward setup and operation.
4. Safety Information
- Ensure proper ventilation around the units to prevent overheating.
- Do not expose the devices to water, moisture, or extreme temperatures.
- Use only the provided power adapters.
- Avoid disassembling the units; this will void the warranty.
- Keep out of reach of children.
5. Setup
Before beginning installation, ensure all devices are powered off.
5.1. Component Overview

Figure 5.1: Port layout of the Transmitter and Receiver units.
5.2. One-to-One Connection
- Connect your HDMI source device (e.g., laptop, TV box) to the HD IN port of the Transmitter unit using an HDMI cable.
- Connect your display device (e.g., TV, monitor, projector) to the HD OUT port of the Receiver unit using an HDMI cable.
- Connect the UTP port of the Transmitter to the UTP port of the Receiver using a single CAT5e/6 Ethernet cable. Ensure the cable length does not exceed 400 feet (120 meters).
- Connect the provided 12V DC power adapters to the DC 12V ports on both the Transmitter and Receiver units.
- Power on all connected devices.

Figure 5.2: One-to-one connection diagram.
5.3. One-to-Many Connection (via Network Switch)
For distributing an HDMI signal to multiple displays, you can use a network switch. The extender supports both PoE and regular network switches.
5.3.1. Using a PoE Switch
- Connect your HDMI source device to the HD IN port of the Transmitter unit.
- Connect the UTP port of the Transmitter to a PoE-enabled port on your PoE network switch using an Ethernet cable.
- For each display, connect the UTP port of a Receiver unit to another PoE-enabled port on the same PoE network switch.
- Connect each Receiver's HD OUT port to its respective display device.
- The Transmitter and Receiver units will draw power directly from the PoE switch, eliminating the need for individual power adapters.
- Power on all connected devices.

Figure 5.3: One-to-many connection using a PoE switch.
5.3.2. Using a Regular Network Switch
- Connect your HDMI source device to the HD IN port of the Transmitter unit.
- Connect the UTP port of the Transmitter to a port on your regular network switch using an Ethernet cable.
- For each display, connect the UTP port of a Receiver unit to another port on the same network switch.
- Connect each Receiver's HD OUT port to its respective display device.
- Connect the provided 12V DC power adapters to the DC 12V ports on both the Transmitter and all Receiver units.
- Power on all connected devices.

Figure 5.4: One-to-many connection using a regular network switch.
6. Operating Instructions
Once the setup is complete and all devices are powered on, the HDMI extender should automatically establish a connection and transmit the signal.
- Signal Indicators: The units feature LED indicators (LINK, STA) to show connection status. A solid LINK light indicates a stable Ethernet connection. A solid STA light indicates active HDMI signal transmission.
- Resolution: The extender supports up to 1080p@60Hz resolution. Ensure your source and display devices are set to a compatible resolution for optimal performance.
- MODE Button (Transmitter): The 'MODE' button on the Transmitter unit is typically used for specific network configurations or pairing in complex setups. For standard one-to-one or one-to-many (via switch) applications, it usually does not require adjustment. Refer to advanced setup guides or contact support if specific mode changes are needed.

Figure 6.1: Example of 1080p HD video output.
7. Maintenance
To ensure the longevity and optimal performance of your PWAYTEK HDMI Extender, follow these maintenance guidelines:
- Cleaning: Use a soft, dry cloth to clean the exterior of the units. Do not use liquid or aerosol cleaners.
- Ventilation: Ensure the ventilation slots on the units are not blocked to prevent overheating.
- Cable Management: Keep cables neatly organized and avoid sharp bends or excessive tension on the connections.
- Storage: If storing the device for an extended period, disconnect it from power and store it in a cool, dry place.
8. Troubleshooting
If you encounter issues with your HDMI extender, please refer to the following common troubleshooting steps:
- No Signal or Intermittent Signal:
- Verify all HDMI and Ethernet cables are securely connected.
- Ensure both the Transmitter and Receiver units are receiving power (check LED indicators).
- Test the HDMI cables directly between the source and display to confirm they are functional.
- Ensure the Ethernet cable is CAT5e/6 and within the specified length (up to 400ft/120m).
- If using a network switch, try connecting the Transmitter and Receiver units directly with a short Ethernet cable to rule out network configuration issues. While the product is designed to work over IP networks, some specific network switch configurations or models may introduce compatibility challenges. If issues persist with a network switch, consider using a dedicated Ethernet cable for the extender or consult your network administrator.
- Try power cycling all devices (source, extender units, display).
- Poor Picture Quality (Flickering, Distorted Image):
- Check the resolution settings on your source device. Ensure it is set to a resolution supported by the extender (up to 1080p@60Hz).
- Ensure the Ethernet cable is of good quality and not damaged.
- Reduce the length of the Ethernet cable if it is close to the maximum limit.
- No Audio:
- Verify audio settings on your source device and display.
- Ensure the HDMI cables are fully inserted and functional.
If the problem persists after trying these steps, please contact PWAYTEK customer support for further assistance.
9. Specifications
| Feature | Specification |
|---|---|
| Model Number | 6bc69801-a8e4-49f7-a30d-3f5e2737373d |
| HDMI Version | Supports 1080p@60Hz |
| Transmission Distance | Up to 400ft (120m) over CAT5e/6 Ethernet cable |
| Power Supply | DC 12V (included) or PoE (Power over Ethernet) |
| Compatible Devices | Laptop, Monitor, Projector, Television, Gaming Consoles, Streaming Devices |
| Item Weight | 1.01 pounds (0.46 Kilograms) |
| Package Dimensions | 5.47 x 4.41 x 3.03 inches |
10. Warranty and Support
The PWAYTEK 400Ft HDMI Extender Over IP (TX+RX) comes with a 2-year manufacturer’s warranty from the date of purchase. This warranty covers defects in materials and workmanship under normal use.
For technical support, warranty claims, or any questions regarding your product, please contact PWAYTEK customer support through the retailer's platform or visit the official PWAYTEK website for contact information.
Please retain your proof of purchase for warranty purposes.