1. Introduction
Thank you for choosing the Wisoee Digital Shower Clock. This device is designed to provide time, temperature, and a countdown timer function in environments where water exposure is common, such as bathrooms and kitchens. Its clear LCD display and multiple mounting options offer convenience and versatility.
Please read this manual thoroughly before use to ensure proper operation and to maximize the lifespan of your product.
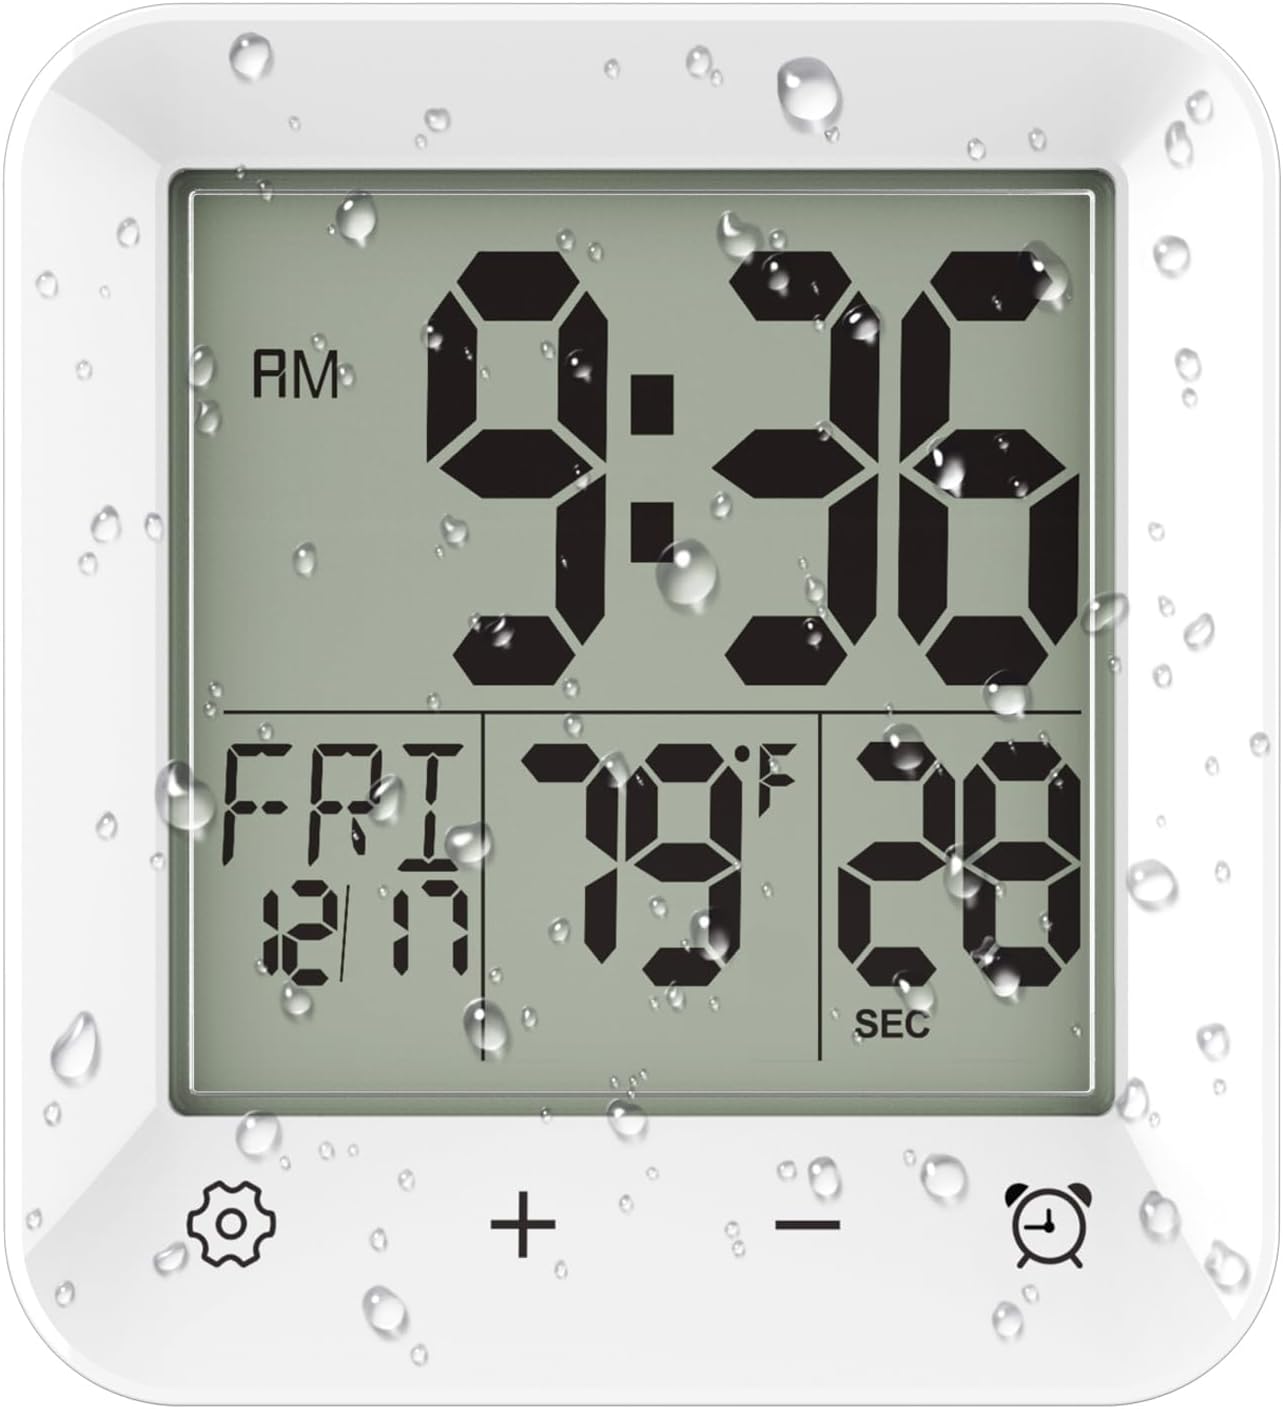
Figure 1: Front view of the Wisoee Digital Shower Clock.
2. Product Features
- LCD Screen Display: Features a 2.95-inch LCD screen with large numbers for easy readability.
- Time Modes: Supports both 12-hour and 24-hour time formats.
- Temperature Display: Shows indoor temperature, switchable between Celsius and Fahrenheit.
- Countdown Timer: Easy-to-set timer with four touch buttons, capable of counting down up to 99 minutes with an audible alert.
- Water Resistance: IP24 water resistant, suitable for water spray environments. Note: Do not immerse in water.
- Multiple Placement Options: Includes tabletop stand, suction cups, and a hanging mount for flexible installation.
- Versatile Use: Suitable for bathrooms, kitchens, studies, and offices.
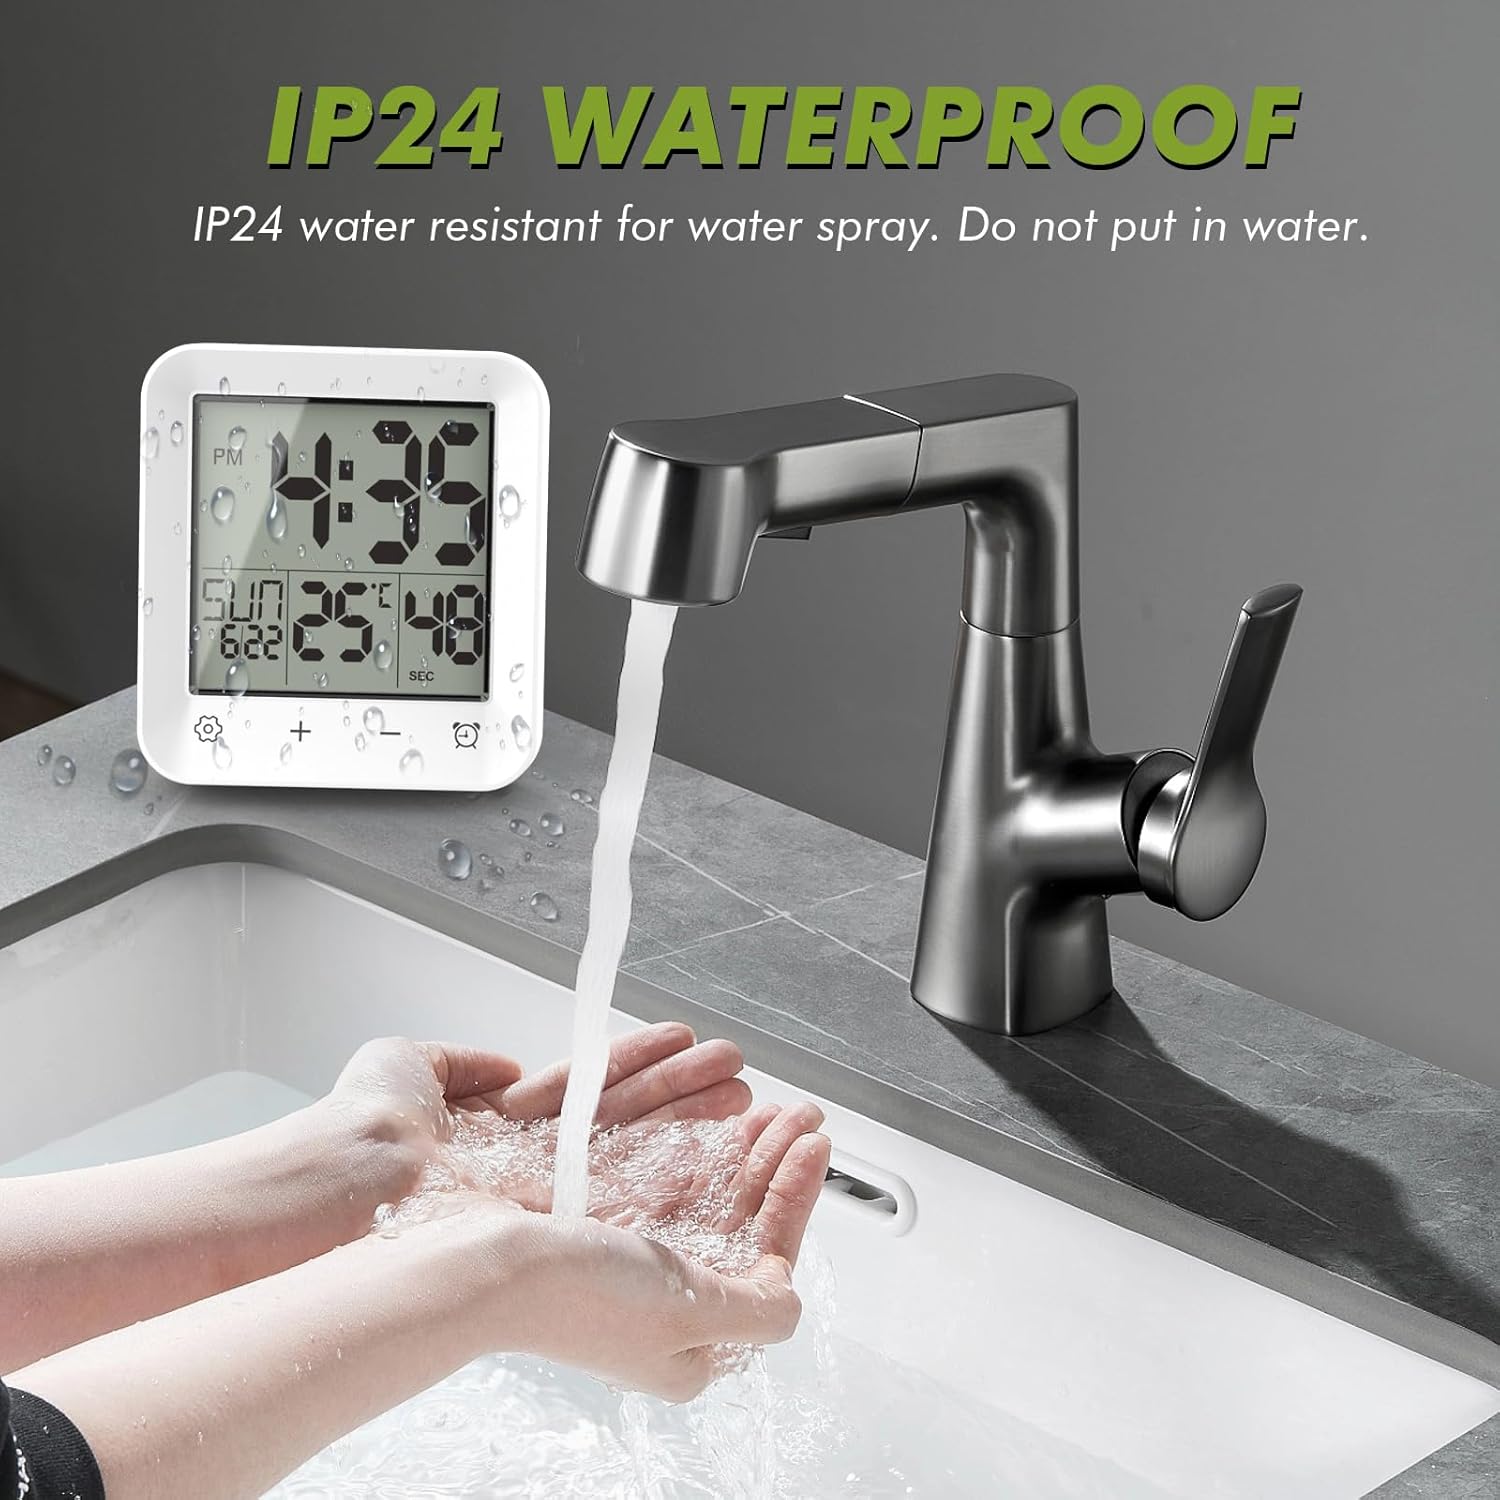
Figure 2: The clock demonstrating its IP24 water resistance near a sink.
3. Product Overview
Familiarize yourself with the components and controls of your Wisoee Digital Shower Clock.
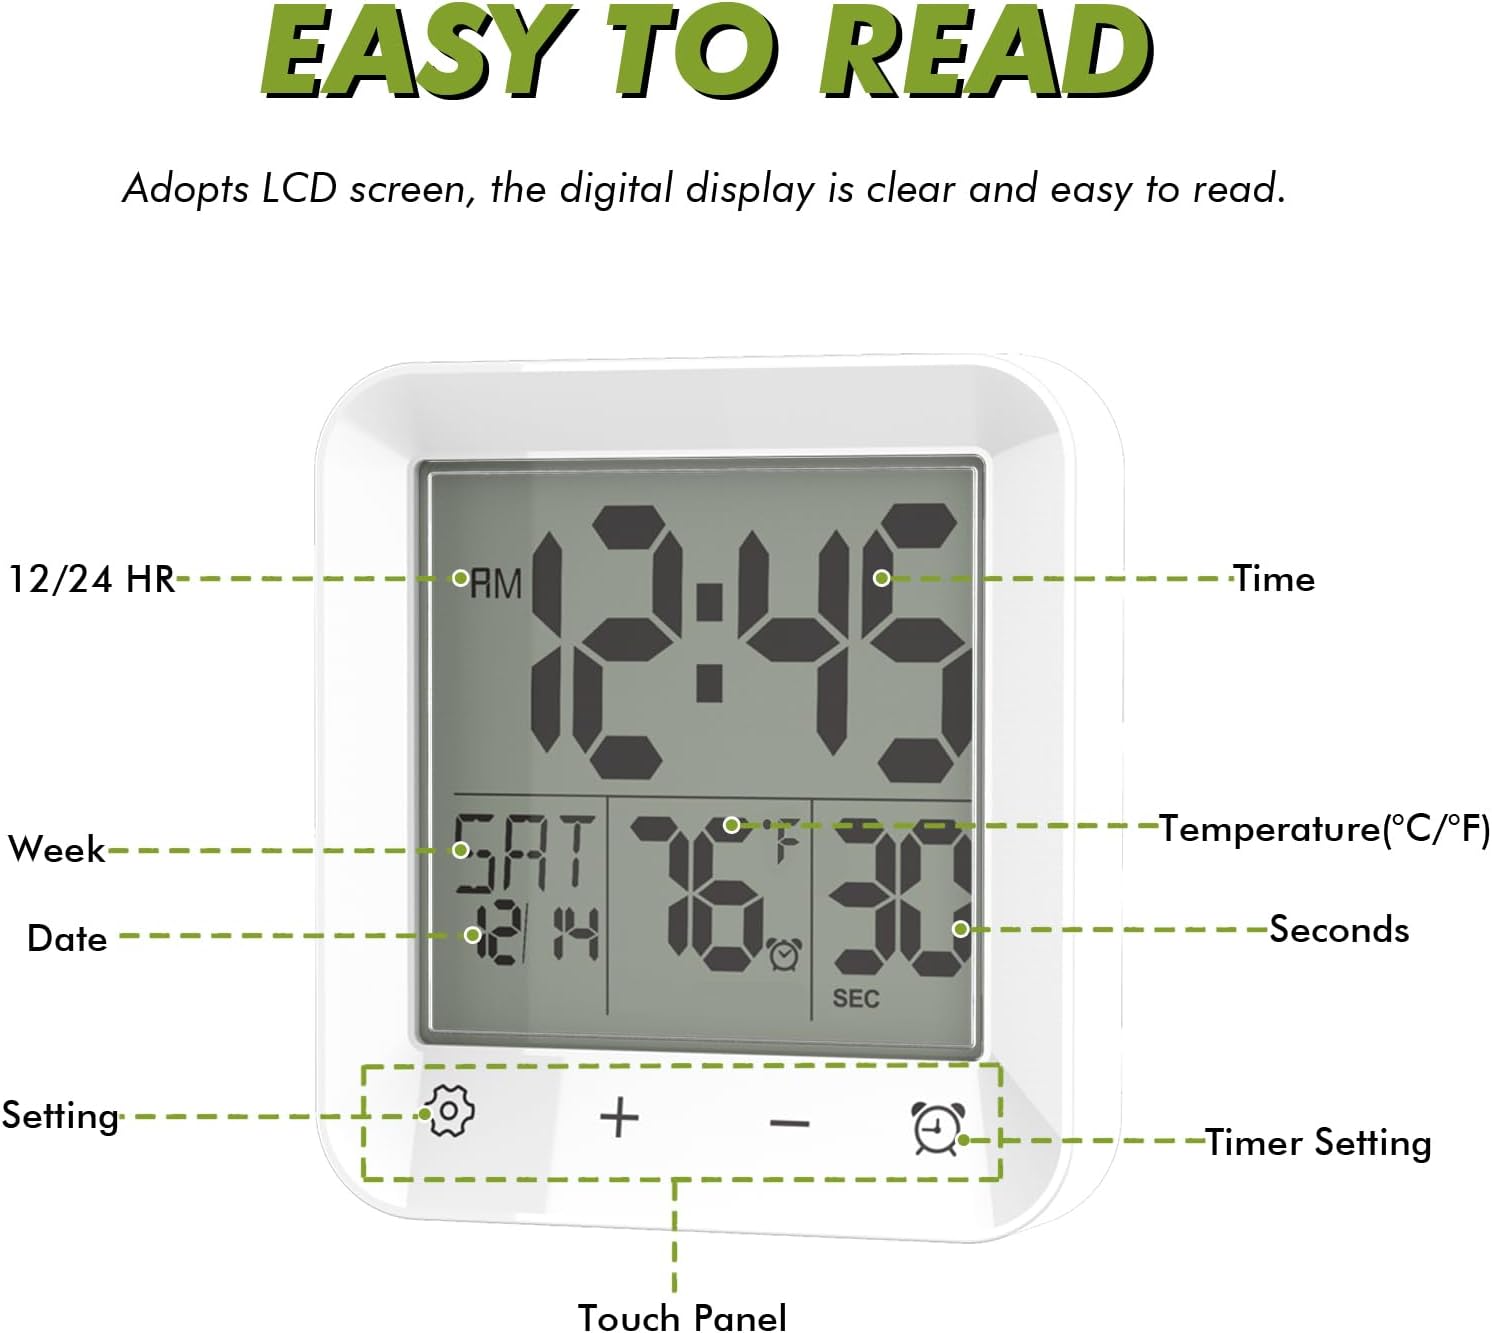
Figure 3: Labeled diagram of the clock's display and touch panel.
- Display Area: Shows time, date, day of the week, temperature, and countdown timer.
- Setting Button (⚙️): Used to enter time/date/temperature setting mode.
- Plus Button (+): Used to increase values during setting or timer adjustment.
- Minus Button (-): Used to decrease values during setting or timer adjustment.
- Timer Setting Button (⏰): Used to activate and adjust the countdown timer.
4. Setup
4.1 Battery Installation
- Locate the battery compartment on the back of the clock.
- Open the battery compartment cover.
- Insert two (2) AA 1.5V batteries, ensuring correct polarity (+/-). Batteries are not included.
- Close the battery compartment cover securely.
4.2 Initial Time and Date Setting
- Press and hold the ⚙️ (Setting) button for 3 seconds to enter time setting mode. The hour digits will flash.
- Use the + and - buttons to adjust the hour.
- Press ⚙️ again to move to minute setting. Adjust with + and -.
- Continue pressing ⚙️ to cycle through year, month, and day settings, adjusting each with + and -.
- After setting the day, press ⚙️ one more time to exit setting mode.
- To switch between 12-hour and 24-hour format, briefly press the + button while in normal time display mode.
- To switch between Celsius and Fahrenheit temperature display, briefly press the - button while in normal time display mode.
5. Operating Instructions
5.1 Time and Temperature Display
The clock continuously displays the current time, day of the week, date, and indoor temperature. The seconds count up in the bottom right corner.
5.2 Countdown Timer Function
The countdown timer can be set for up to 99 minutes, useful for managing shower times or other activities.
- Press and hold the ⏰ (Timer Setting) button for 3 seconds to enter countdown timer setting mode. The minute digits will flash.
- Use the + and - buttons to set the desired countdown minutes (0-99).
- Press ⏰ again to start the countdown. The display will show the remaining time.
- Once the countdown reaches zero, an audible beep will sound.
- To stop the timer before it finishes, press ⏰ once. To reset the timer, press and hold ⏰ for 3 seconds again.

Figure 4: The clock used as a countdown timer during study time.
6. Mounting Options
The Wisoee Digital Shower Clock offers three versatile mounting methods:
- Tabletop Stand: Use the integrated kickstand on the back for placement on flat surfaces.
- Suction Cup: Attach to smooth, non-porous surfaces like tiles or mirrors.
- Hanging Mount: Utilize the hanging hole for hooks or nails.

Figure 5: Rear view illustrating the mounting mechanisms.
6.1 Suction Cup Installation
For optimal adhesion, follow these steps:
- Clean the Surface: Ensure the target surface (tile, mirror) is clean, flat, and dry. Wipe away dust, grease, and moisture with a damp cloth, then dry thoroughly.
- Soften Suction Cup (Optional): For improved stickiness, soak the suction cup in warm water for a short period to soften it.
- Apply: Press the suction cup firmly onto the clean, dry surface, aligning its center. Apply pressure to expel any trapped air.
Warm Tip: It is recommended to repeat the cleaning and application steps monthly for optimal performance and to prevent the clock from falling.

Figure 6: Visual guide for suction cup installation.
7. Maintenance
- Cleaning: Wipe the clock with a soft, damp cloth. Do not use abrasive cleaners or solvents.
- Water Exposure: While water-resistant, avoid direct streams of water or prolonged immersion. Dry any excess water from the surface.
- Battery Replacement: Replace batteries when the display dims or becomes erratic. Always replace both batteries simultaneously with new ones.
- Storage: If storing for an extended period, remove the batteries to prevent leakage.
8. Troubleshooting
| Problem | Possible Cause | Solution |
|---|---|---|
| Display is dim or blank. | Low or dead batteries. | Replace with two new AA 1.5V batteries. |
| Clock not keeping accurate time. | Incorrect initial setting or battery issue. | Re-set the time and date as per Section 4.2. Ensure batteries are fresh. |
| Suction cup not holding. | Surface is dirty, wet, porous, or suction cup is old/hardened. | Clean and dry the surface thoroughly. Soak the suction cup in warm water to soften. Reapply firmly, expelling air. Consider using the stand or hanging option if the surface is unsuitable. |
| Countdown timer not working. | Timer not activated or set correctly. | Ensure you press and hold the ⏰ button for 3 seconds to enter setting mode, then set the time and press ⏰ again to start. |
| Temperature reading seems inaccurate. | Clock exposed to extreme temperatures or direct heat/cold sources. | Relocate the clock to a more stable environment. Ensure it's not near vents, windows, or direct sunlight. |
9. Specifications
- Brand: Wisoee
- Model Number: JS2737
- Display Type: Digital LCD
- Product Dimensions: 4.06" W x 4.45" H
- Item Weight: 6.7 ounces (0.19 Kilograms)
- Power Source: 2 x AA Batteries (1.5V, not included)
- Material: Acrylonitrile Butadiene Styrene (ABS) Plastic
- Water Resistance: IP24 (Water spray resistant)
- Special Features: Indoor thermometer, Countdown Timer, Calendar and Week Display, 12/24 HR Switch
- Temperature Range: 0°C to 37°C (32°F to 98°F)
- Mounting Type: Tabletop, Wall Mount (Suction Cup, Hanging Hole)
- UPC: 709084840174

Figure 7: Clock dimensions and display features.
10. Warranty and Support
Wisoee is committed to providing high-quality products and ensuring customer satisfaction. If you encounter any issues or believe your product is defective, please contact us directly.
Contact Support: For warranty claims or technical assistance, please reach out to Wisoee customer service via the Amazon platform. We aim to respond and arrange a replacement or refund within 24 hours for defective products.
Please retain your purchase receipt as proof of purchase for warranty purposes.