
MechMaxx B200
MechMaxx B200 Wood Chipper Shredder Mulcher Instruction Manual
Model: B200 | Brand: MechMaxx
1. Safety Information
Read and understand all safety warnings and instructions before operating the MechMaxx B200 Wood Chipper. Failure to follow these instructions may result in serious injury or death.
- Personal Protective Equipment (PPE): Always wear appropriate PPE, including safety glasses, hearing protection, gloves, and sturdy footwear. Avoid loose clothing that could get caught in moving parts.
- Work Area: Operate the chipper on a level, stable surface. Keep the work area clear of bystanders, children, and pets. Maintain a safe distance from the discharge chute.
- Material Feeding: Never feed foreign objects (e.g., metal, rocks) into the chipper. Only feed wood or organic material within the specified diameter (up to 8 inches). Do not overfeed the machine.
- Emergency Stop: The unit is equipped with an emergency stop button on the upper side of the feeding drum and an emergency stop press bar on the lower side. In case of emergency or malfunction, immediately activate the emergency stop to protect equipment and operator safety.
- Maintenance: Disconnect the spark plug wire or battery before performing any maintenance or clearing jams. Ensure all moving parts have come to a complete stop.
- Transportation: Utilize the towbar for safe transportation. Ensure tail lights are functional when towing on public roads.
2. Product Overview
The MechMaxx B200 is a powerful and efficient gas-powered wood chipper designed for processing wood and organic debris up to 8 inches in diameter. It features a robust engine, convenient mobility, and enhanced safety features.

Figure 2.1: Main view of the MechMaxx B200 Wood Chipper.
Key Features:
- Engine: 1000cc 35hp 4-stroke air-cooled OHV gas-powered engine with electric start (45Ah 12V lead-acid battery included).
- Chipping Capacity: Easily handles wood or branches up to 8 inches in diameter.
- Mobility: Equipped with a trailer bar, 2x front wheels (19'') and 2x rear wheels (13'') for stable and fast transportation.
- Discharge Chute: 360° rotary discharge chute with adjustable deflector for precise debris discharge.
- Cutting System: Features 2x double-edge blades and 1x anvil, made of A8 alloy steel for durability and efficiency.
- Belts: Kevlar material belts for high strength and wear resistance.
- Safety: Emergency stop button and press bar, and integrated tail lights.

Figure 2.2: Key features of the MechMaxx B200.
3. Setup
3.1 Unpacking and Assembly
Carefully unpack all components. Ensure all parts listed in the packing list are present. Follow the detailed assembly instructions provided in the separate assembly guide (usually found in the small storage box next to the feeding chute).
3.2 Pre-Operation Checks
- Engine Oil Level: Check the engine oil level using the dipstick. Add recommended oil if necessary.
- Fuel Level: Fill the fuel tank with fresh, unleaded gasoline. Do not overfill.
- Battery Connection: Ensure the 45Ah 12V lead-acid battery is securely connected for electric start.
- Blade Condition: Inspect the chipper blades for sharpness and damage. Replace or sharpen as needed.
- Belt Tension: Verify the tension of the Kevlar belts. Adjust if too loose or too tight.
- Fasteners: Check all nuts, bolts, and fasteners for tightness.
3.3 Towbar and Tail Lights
The chipper is equipped with a towbar for easy transport. Attach the towbar to a suitable towing vehicle using a 2-inch trailer ball. Connect the tail lights to your vehicle's electrical system for safe road travel.

Figure 3.1: MechMaxx B200 with towbar for transport.

Figure 3.2: Rear view showing integrated tail lights.
4. Operating Instructions
4.1 Starting the Engine
- Ensure the chipper is on a stable, level surface.
- Set the choke to the 'START' position (if applicable).
- Turn the ignition key to the 'START' position. Release once the engine starts.
- Once the engine is running, gradually move the choke to the 'RUN' position.
- Allow the engine to warm up for a few minutes before beginning operation.
4.2 Feeding Material
- Stand to the side of the feeding chute, never directly in front of it.
- Feed branches and wood into the hopper one at a time, ensuring they are within the 8-inch maximum diameter.
- Allow the chipper to pull the material in. Do not force material into the chute.
- For smaller, leafy material, feed in bundles to prevent clogging.
- If the chipper bogs down, reduce the feeding rate.
4.3 Adjusting Discharge Chute
The 360° rotary discharge chute allows you to direct chipped material. Loosen the locking mechanism, rotate the chute to the desired direction, and re-tighten. The deflector at the end of the chute can be adjusted to control the height and distance of the discharge.
4.4 Shutting Down
- Allow the chipper to run for a few minutes without feeding material to clear the chamber.
- Turn the ignition key to the 'OFF' position.
- Wait for all moving parts to come to a complete stop before approaching the machine.
Video 4.1: Demonstration of the MechMaxx Wood Chipper in operation, showing material feeding and discharge.
5. Maintenance
Regular maintenance ensures optimal performance and extends the lifespan of your MechMaxx B200 Wood Chipper. Always disconnect the spark plug wire or battery before performing any maintenance.
5.1 Blade Inspection and Replacement
The chipper uses 2x double-edge blades and 1x anvil made of A8 alloy steel. Inspect blades regularly for dullness, nicks, or damage. Sharp blades are crucial for efficient chipping.
- Inspection: After every 8-10 hours of operation, visually inspect the blades.
- Sharpening/Replacement: If blades are dull or damaged, they can be sharpened or replaced. Refer to the detailed instructions in the full service manual for blade removal and installation.

Figure 5.1: View of the chipping mechanism, showing blades and anvil.
5.2 Belt Inspection and Adjustment
The Kevlar material belts are designed for high strength and wear resistance. Check belt tension periodically.
- Inspection: Check for cracks, fraying, or excessive wear.
- Adjustment: If belts appear loose, consult the service manual for instructions on adjusting tension. Proper tension prevents slippage and premature wear.
5.3 Engine Maintenance
- Oil Change: Change engine oil after the first 5 hours of operation, then every 25-50 hours or seasonally.
- Air Filter: Clean or replace the air filter regularly, especially when operating in dusty conditions.
- Spark Plug: Inspect and clean the spark plug annually or every 100 hours. Replace if worn.
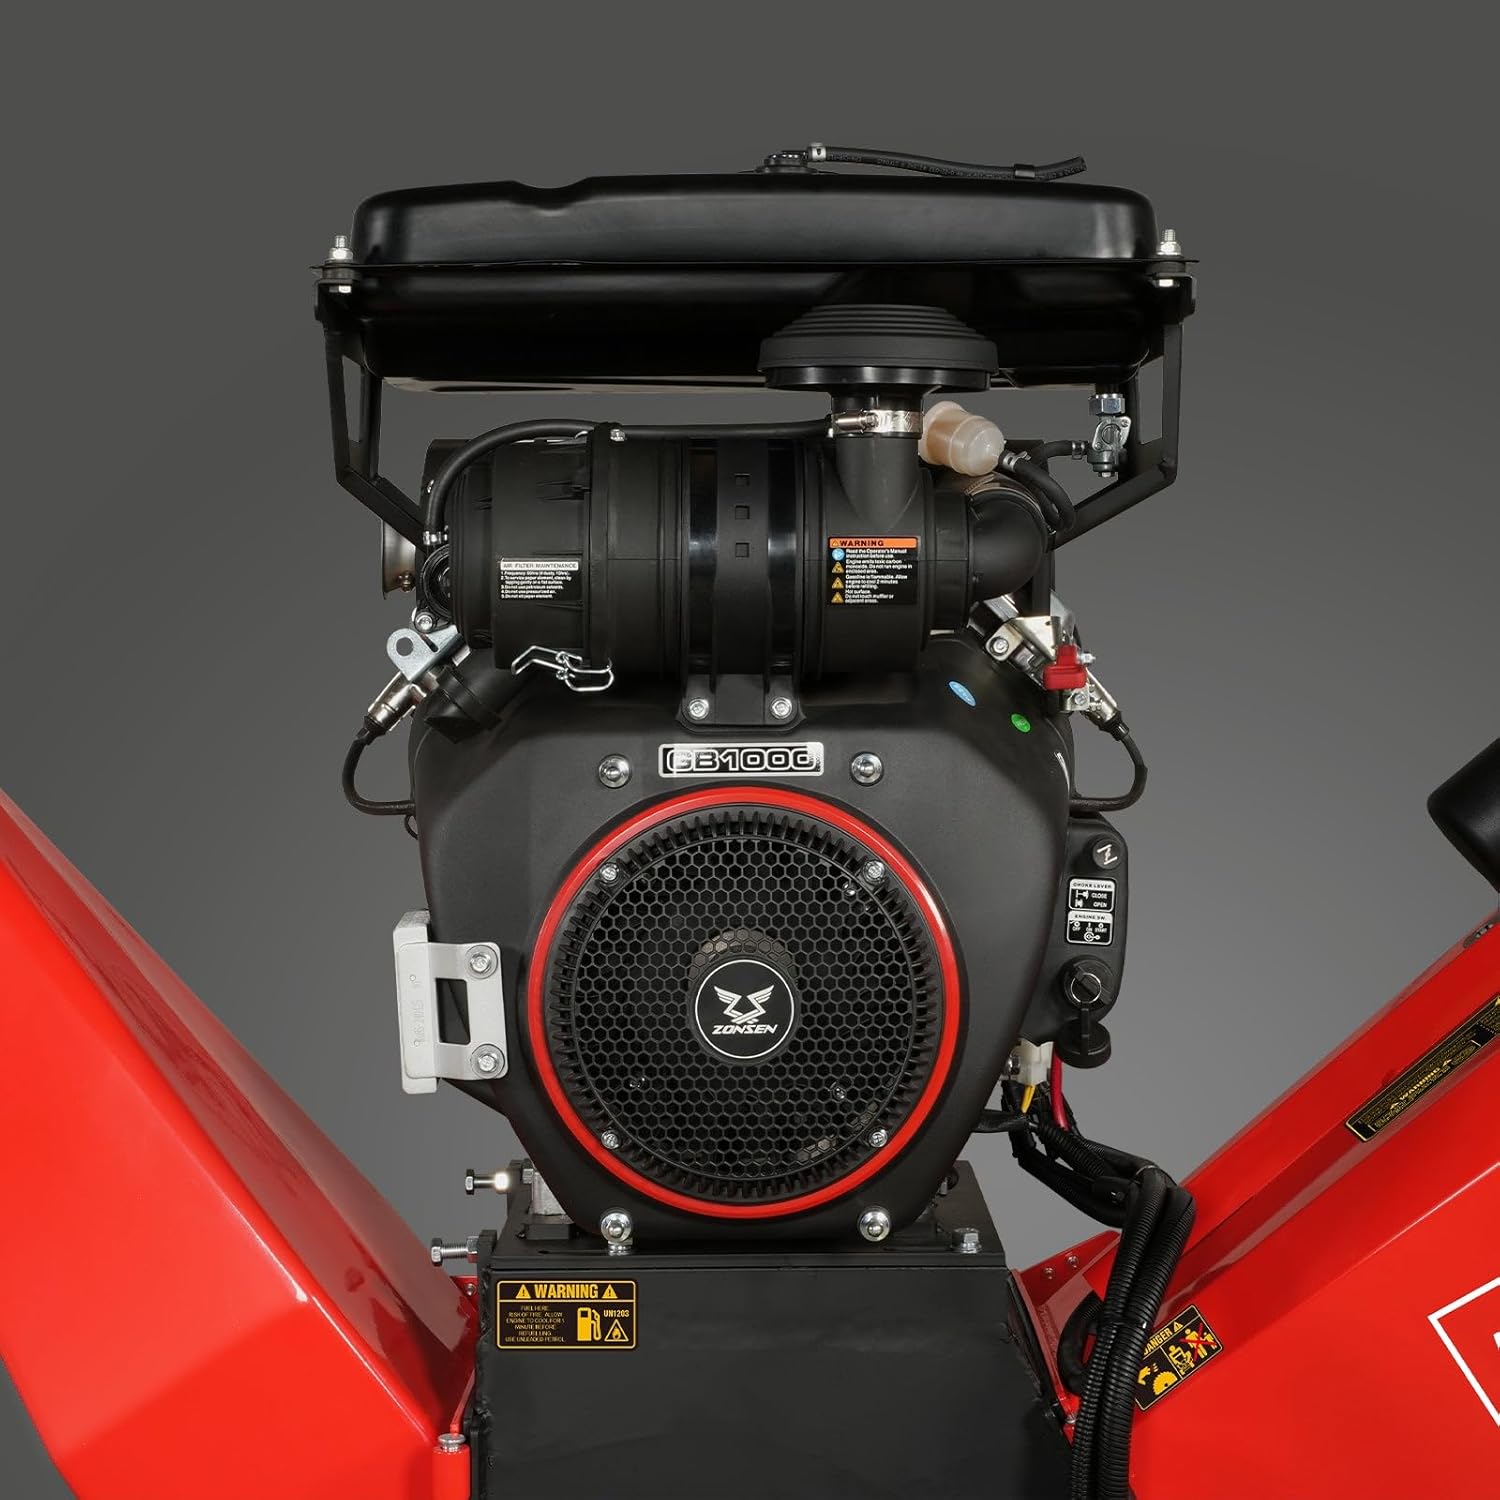
Figure 5.2: Detailed view of the 1000cc 35hp engine.
5.4 General Cleaning and Storage
After each use, clean the chipper to remove debris, especially from the hopper and discharge chute. Store the chipper in a dry, protected area when not in use.
6. Troubleshooting
| Problem | Possible Cause | Solution |
|---|---|---|
| Engine will not start | No fuel; Choke not set; Dead battery; Faulty spark plug | Add fuel; Adjust choke; Charge/replace battery; Inspect/replace spark plug |
| Poor chipping performance | Dull blades; Overfeeding; Incorrect material | Sharpen/replace blades; Reduce feeding rate; Only feed appropriate material |
| Machine bogs down/jams | Overfeeding; Wet material; Foreign object | Reduce feeding; Allow material to dry; Clear jam (engine off, disconnect spark plug) |
| Excessive vibration | Unbalanced blades; Loose fasteners | Inspect/balance blades; Tighten all fasteners |
For issues not listed here, or if troubleshooting steps do not resolve the problem, please contact MechMaxx customer support.
7. Specifications
| Attribute | Value |
|---|---|
| Model Number | B200 |
| Engine Type | 1000cc 35hp 4-stroke air-cooled OHV gas-powered |
| Starting System | Electric Start (45Ah 12V lead-acid battery) |
| Max. Chipping Diameter | 8 inches |
| Product Dimensions | 108.8 x 47.9 x 57.2 inches |
| Item Weight | 798 pounds |
| Manufacturer | MechMaxx |
| Country of Origin | China |

Figure 7.1: Hopper design for efficient feeding.

Figure 7.2: Detail of the wheel and tow hitch mechanism.
8. Warranty & Support
For warranty information, please refer to the warranty card included with your product or visit the official MechMaxx website. Keep your proof of purchase for warranty claims.
For technical support, parts, or service inquiries, please contact MechMaxx customer service through their official channels. Contact information can typically be found in the product packaging or on the manufacturer's website.
MechMaxx offers comprehensive pre-sales and after-sales services to ensure consumer satisfaction.
You can visit the MechMaxx store for more information: MechMaxx Store on Amazon
Related documentsB200


Ask a question about this manual
Ask about setup, troubleshooting, compatibility, parts, safety, or missing instructions. Manuals+ will review the question and use this page’s manual context to help answer it.