1. Product Overview
The VSDISPLAY 19-inch IPS Stretched Bar LCD Monitor (Model VS190ZJ-V823) is a versatile display designed for various applications, including advertising, extra display for gaming cabinets, and digital signage. It features a 19-inch IPS panel with a resolution of 1920x360, offering a wide 178° viewing angle and vibrant colors. The monitor supports USB video input with autoplay functionality for videos and pictures, and allows for 180° display rotation. It is designed for easy setup and installation, with multiple mounting options.
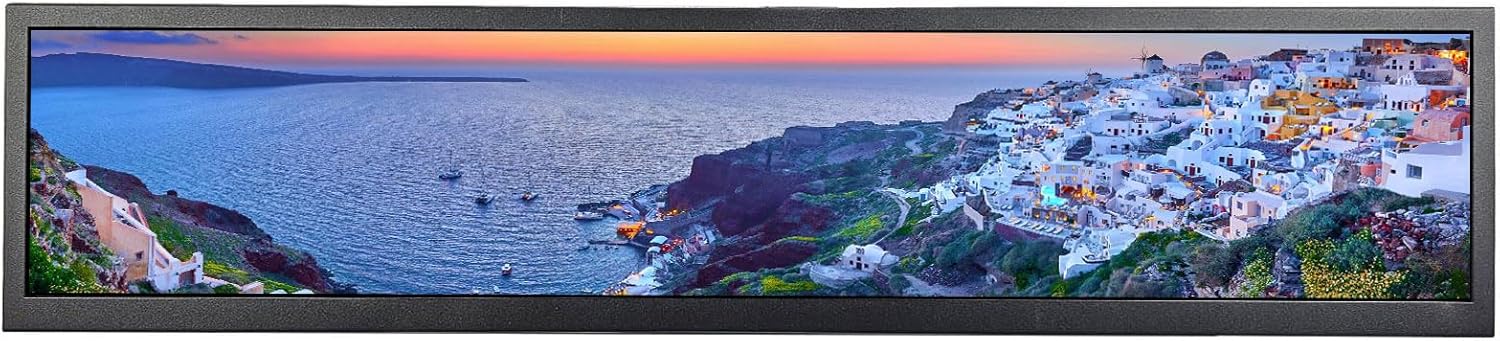
Figure 1: VSDISPLAY 19-inch IPS Stretched Bar LCD Monitor in operation.
2. Package Contents
Please verify that all items listed below are included in your package. If any items are missing or damaged, please contact customer support.
- 1 x VSDISPLAY 19-inch 1920x360 IPS LCD Monitor (Model VS190ZJ-V823)
- 1 x 12V 2A Power Adapter
- 1 x HDMI Cable
- 1 x USB-A to USB-C Cable
- 1 x USB-C to USB-C Cable
- 2 x Mounting Brackets
- 1 x User Manual

Figure 2: Contents of the VSDISPLAY monitor package.
Video 1: Unboxing and initial overview of the VSDISPLAY 19-inch monitor, including package contents and basic connections.
3. Key Features
- 19-inch IPS Stretched Bar LCD: 1920x360 resolution with IPS 178° full viewing angle for a superior visual experience.
- USB Ports: Supports USB signal input with autoplay functionality for videos and pictures (Dolby sound effects not supported).
- Plug and Play: Easy setup; simply connect signal and power for immediate display.
- 180° Display Rotation: Supports picture or video 180° display rotation for flexible orientation.
- Multiple Mounting Options: Includes brackets for installation and features 75x75MM/100x100MM VESA mounting holes for desk or wall mounts.
- Wide Application: Ideal for PC case internal screens, gaming marquee monitors, supermarket shelf advertising, outdoor kiosks, and digital signage.

Figure 3: Visual representation of key features including IPS viewing angle and resolution.
4. Setup and Connections
4.1. Monitor Ports and Controls
Familiarize yourself with the monitor's ports and control buttons for optimal use.

Figure 4: Monitor control buttons and input/output ports.
- ON/OFF Button: Powers the monitor on or off.
- MENU Button: Accesses the On-Screen Display (OSD) menu.
- RIGHT/LEFT Buttons: Navigates menu options or adjusts settings.
- RETURN Button: Exits menu or confirms selection.
- Power Supply Port: Connects to the 12V 2A power adapter.
- HD Port (HDMI): Connects to devices via HDMI for video input.
- USB Port: Connects to devices for USB video input and autoplay features.
4.2. Connecting to a PC/Laptop
The monitor supports both HDMI and USB-C connections for video input from your computer.
4.2.1. Using HDMI Connection
Connect the provided HDMI cable from your PC/laptop's HDMI output to the monitor's HD port. Ensure the monitor is powered on using the 12V adapter.
Video 2: Demonstrates connecting the monitor to a PC/laptop via USB-C and HDMI, showcasing touchscreen functionality and various display modes.
4.2.2. Using USB-C Connection
For devices with a full-featured USB-C port (supporting video, power, and touch), use the provided USB-C to USB-C cable. Connect one end to your device and the other to the monitor's USB-C port. If your device's USB-C port does not provide sufficient power, you may need to connect the 12V power adapter to the monitor.
Video 3: Illustrates connecting the monitor to a PC/laptop and a smartphone using USB-C, demonstrating touchscreen and OSD menu access.
4.3. Connecting to a Smartphone
For smartphones with a full-featured USB-C port, connect directly using the USB-C to USB-C cable. This enables touchscreen functionality, signal transmission, and power supply. If the power supply is insufficient, an additional power adapter may be required.
Video 4: Shows connecting the monitor to a smartphone via USB-C, demonstrating desktop and mirror modes, and touchscreen interaction.
5. Operating Instructions
5.1. Power On/Off and Basic Navigation
Use the ON/OFF button to power the monitor. The MENU, RIGHT, LEFT, and RETURN buttons allow for navigation and selection within the OSD menu.
5.2. Display Modes
The monitor supports various display modes when connected to a PC/laptop:
- Extended Mode: Extends your desktop across both screens, providing more workspace.
- Second Screen Mode: Duplicates your primary display, showing the same content on both screens.
- Portrait Mode: Allows the monitor to be used in a vertical orientation, ideal for long documents or social media feeds.
Video 5: Demonstrates switching between extended, second screen, and portrait modes, highlighting the versatility of the monitor.
5.3. Touchscreen Functionality
When connected to a compatible device via USB-C, the monitor offers full touchscreen capabilities, allowing for intuitive interaction with your content.
Video 6: Shows direct touchscreen interaction with the monitor, demonstrating navigation and application control.
5.4. On-Screen Display (OSD) Menu
The OSD menu allows you to adjust various display settings such as brightness, contrast, color temperature, and input source. Access the menu using the dedicated MENU button and navigate with the directional buttons.
Video 7: Demonstrates accessing and navigating the OSD menu to adjust monitor settings.
5.5. PC Monitoring Secondary Screen
The monitor can be used as a secondary display for PC monitoring, showing system information like CPU/GPU usage, temperatures, and network activity.
Video 8: Example of using the monitor as a PC monitoring secondary screen.
6. Installation
6.1. Using Included Brackets
The monitor comes with two brackets for easy desktop placement or integration into custom setups. Secure the brackets to the monitor using the provided screws.
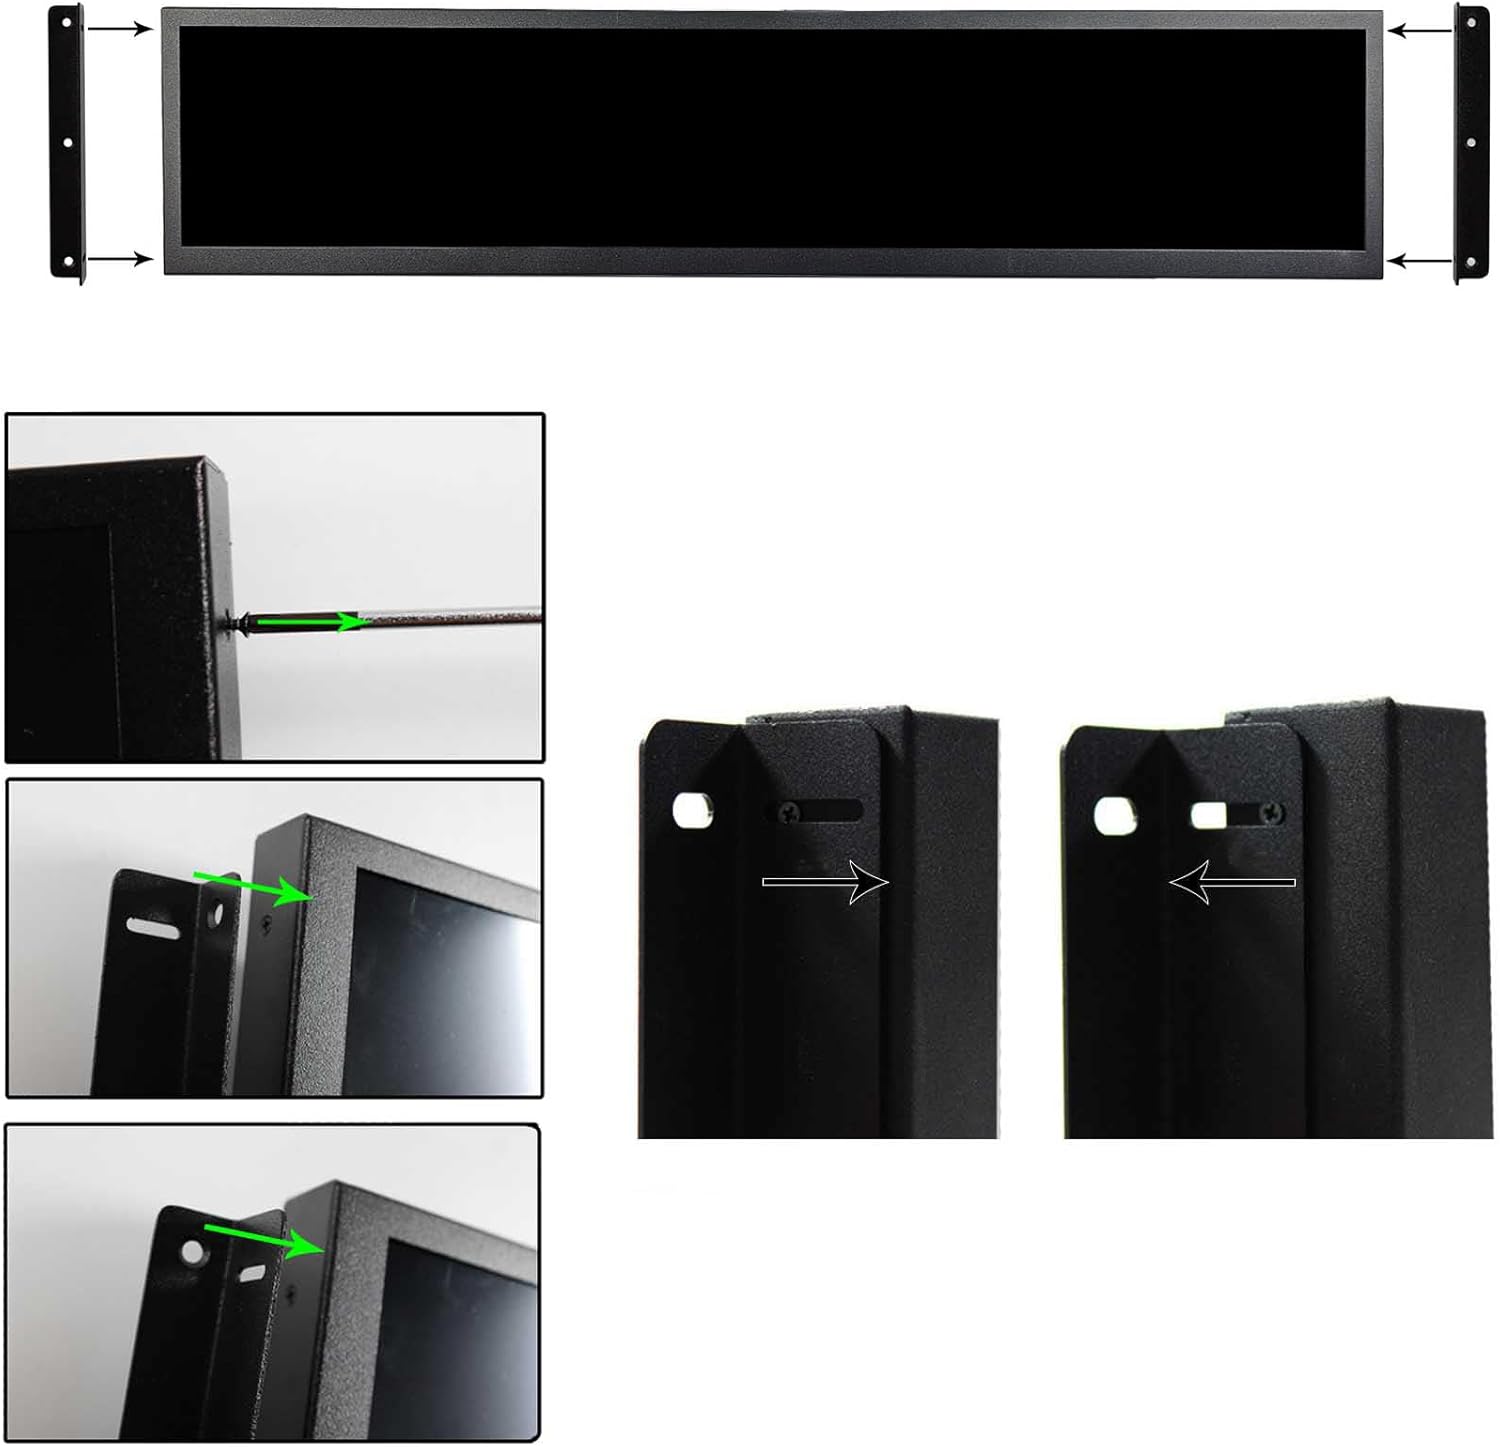
Figure 5: Steps for attaching the mounting brackets.
6.2. PC Case Internal Screen Installation
The monitor can be installed as an internal screen within a PC case, such as the 9000D. This requires removing the side panel of the PC case and securing the monitor using its mounting points or custom solutions.
Video 9: Shows the process of installing the 19-inch stretched bar LCD as an internal screen in a PC case.
7. Troubleshooting
- Issue: Monitor does not auto-display normally when connected via USB.
Solution: Check USB settings on your device. Ensure the correct display output is selected and drivers are up to date. Refer to this video for detailed USB setting adjustments.Video 10: Guide on adjusting USB settings if the monitor does not auto-display correctly.
- Issue: Display is not full screen or has incorrect aspect ratio.
Solution: Adjust the refresh rate. For optimal full-screen display, try setting the refresh rate to 56.89Hz instead of 60Hz in your device's display settings. Refer to this video for instructions.Video 11: Instructions for resolving non-full screen display by adjusting the refresh rate.
- Issue: Monitor does not turn off when the computer shuts down.
Solution: This behavior may depend on your computer's power management settings and the monitor's default power state. Check your computer's BIOS/UEFI settings for USB power delivery options when shut down. Manually power off the monitor using its ON/OFF button if automatic shutdown is not desired. - Issue: Touchscreen not responding.
Solution: Ensure the USB-C cable is properly connected and supports touch functionality. Some USB-C cables only support power or video. Verify your device's operating system supports external touchscreens and that necessary drivers are installed.
8. Technical Specifications

Figure 6: Product dimensions.
| Feature | Detail |
|---|---|
| Model Number | VS190ZJ-V823 |
| Screen Size | 19 Inches |
| Resolution | 1920x360 Pixels |
| Aspect Ratio | 16:9 (Stretched) |
| Panel Type | IPS |
| Viewing Angle | 178° Full Viewing Angle |
| Image Brightness | 300 cd/m2 |
| Screen Surface | Matte |
| Input Ports | HDMI, USB |
| Product Dimensions | 1.18 x 19.57 x 4.57 inches |
| Item Weight | 5 pounds |
9. Warranty and Support
9.1. Product Warranty
This VSDISPLAY monitor is covered by a manufacturer's warranty. Please refer to the warranty card included in your package or visit the official VSDISPLAY website for detailed warranty terms and conditions.
9.2. Customer Support
For technical assistance, troubleshooting, or any product-related inquiries, please contact VSDISPLAY customer support. You can find contact information on the official VSDISPLAY website or through their Amazon store page.
