Introduction
The ANENG SZ26 Automotive Multimeter is a versatile digital instrument designed for comprehensive automotive diagnostics and general electrical testing. It offers a wide range of functions including tachometer readings, dwell angle measurement, DC current, AC/DC voltage, resistance, and duty cycle. Its user-friendly interface and durable design make it an essential tool for mechanics, engineers, and DIY enthusiasts seeking precise and reliable measurements.
Safety Information
Always observe basic safety precautions when using this multimeter to avoid electric shock or damage to the meter or the equipment under test. Read all instructions carefully before use.
- Do not apply more than the rated voltage, as marked on the meter, between terminals or between any terminal and earth ground.
- Use extreme caution when working with voltages above 30V AC RMS, 42V peak, or 60V DC. Such voltages pose a shock hazard.
- Always disconnect the test leads from the circuit before changing functions or ranges.
- Ensure the meter is in good working condition. Do not use the meter if it appears damaged or if the insulation on the test leads is compromised.
- Always use the correct terminals, function, and range for your measurements.
- Keep hands and fingers behind the probe barriers on the test leads.
- Replace the battery immediately when the low battery indicator appears to ensure accurate readings.
Package Contents
The ANENG SZ26 Multimeter package includes the following items:
- ANENG SZ26 Automotive Multimeter Unit
- 9V Battery (included)
- Multimeter Test Leads (red and black)
- Combination Leads (4*connection socket, 2*PVC cable, 2*copper needle, 2*U-shaped insert, 2*meter pen, 6*alligator clips, 2*puncture needle)
- Instruction Manual
- Storage Bag

Image: The ANENG SZ26 Multimeter shown with its comprehensive accessory kit, including test leads, various connectors, a 9V battery, and a storage case.
Product Overview
The ANENG SZ26 Multimeter features a large LCD display and a rotary dial for selecting various measurement functions. Key components include:
- LCD Display: Large, clear screen for easy readability of measurements.
- Function Dial: Rotary switch to select measurement modes (RPM, Dwell, Voltage, Current, Resistance, Diode, Continuity).
- Input Jacks: Ports for connecting test leads (COM, VΩmA, 10A).
- HOLD Button: Freezes the current reading on the display.
- POWER Button: Turns the device on/off.
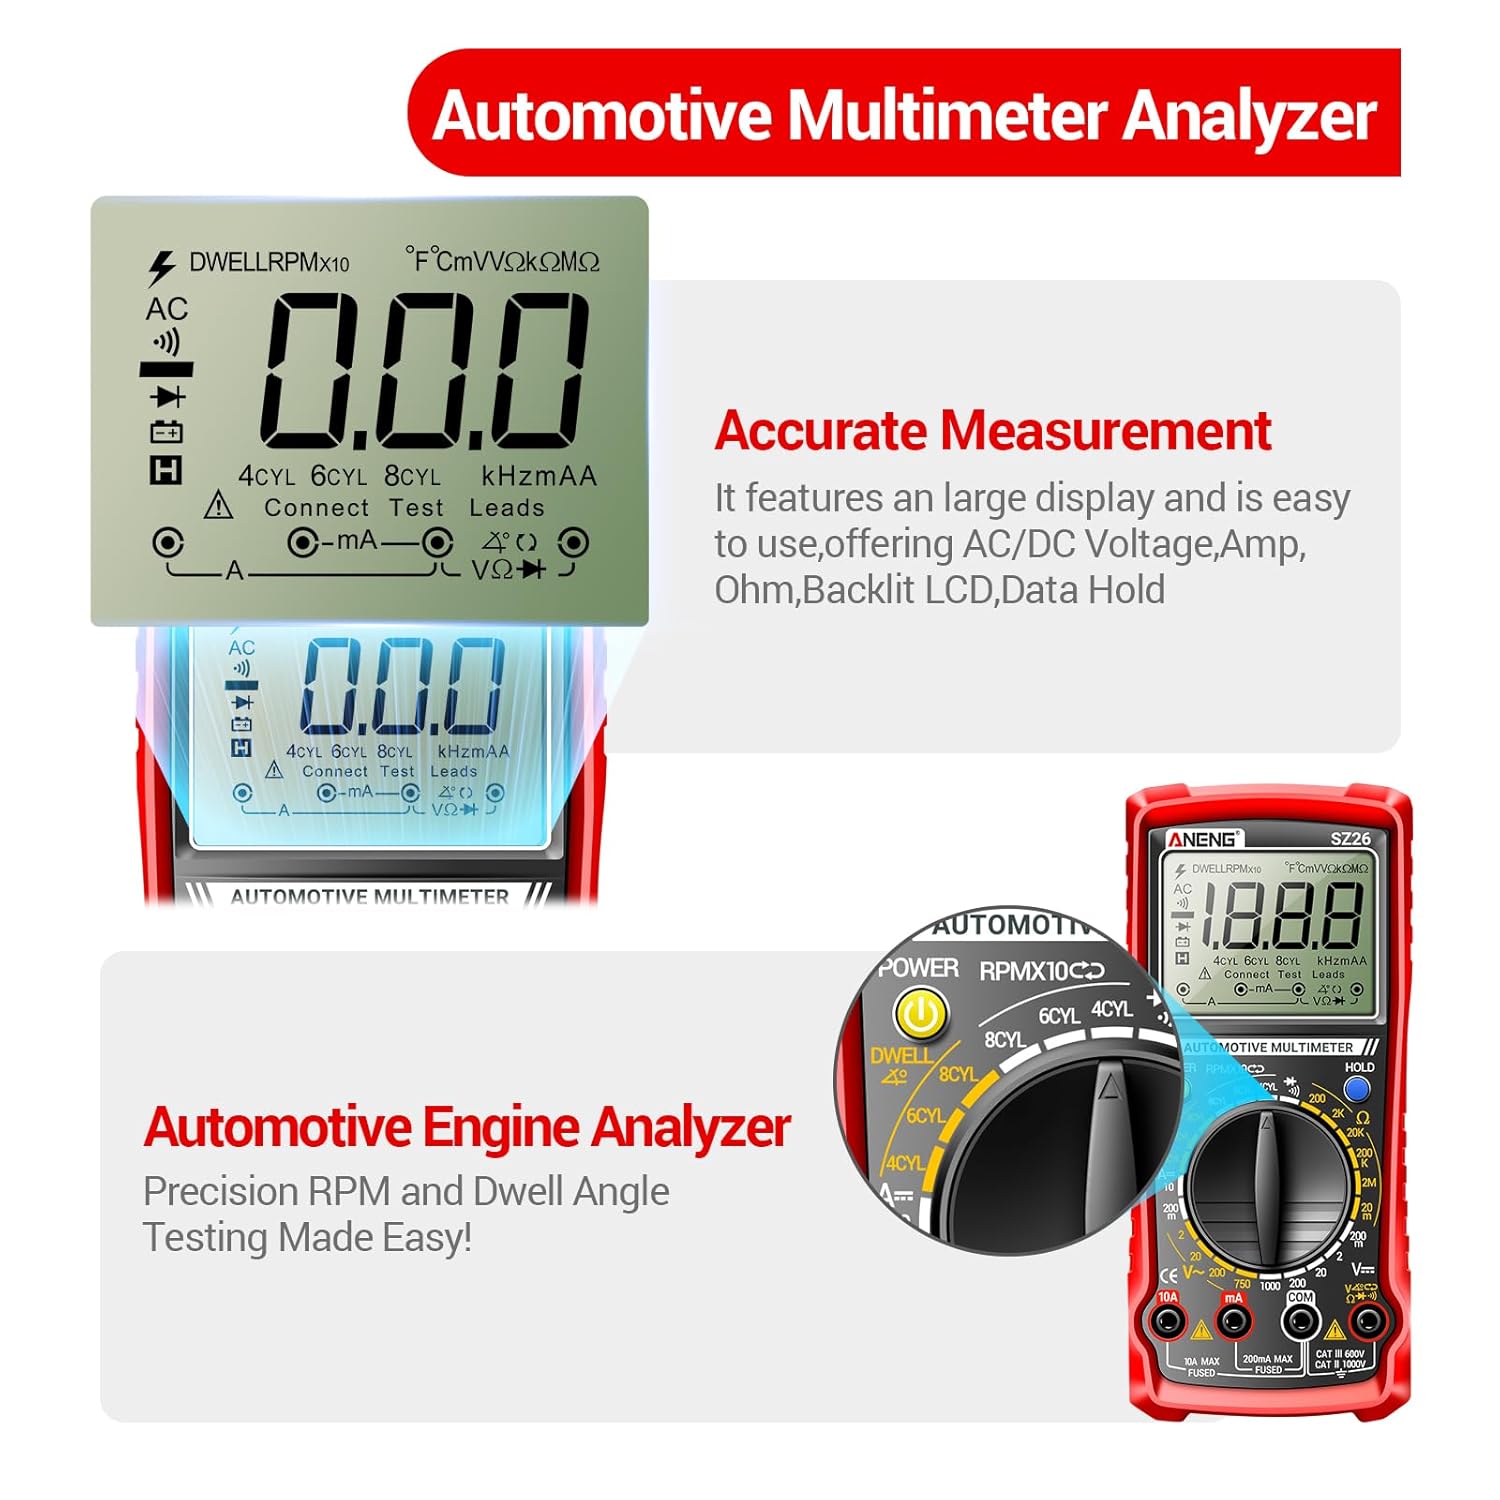
Image: A detailed view of the ANENG SZ26 Multimeter's large LCD display and the central rotary dial, highlighting its various measurement functions and input ports.
Setup
Battery Installation
The ANENG SZ26 Multimeter requires one 9V battery for operation. Follow these steps to install the battery:
- Locate the battery compartment on the back of the multimeter.
- Use a Phillips head screwdriver to loosen the screw securing the battery cover.
- Remove the battery cover.
- Connect the 9V battery to the battery clips, ensuring correct polarity (positive to positive, negative to negative).
- Place the battery inside the compartment.
- Replace the battery cover and tighten the screw.
Video: This video demonstrates the unboxing process and battery installation for the ANENG SZ26 Multimeter, showing how to access the battery compartment and correctly insert the 9V battery.
Operating Instructions
General Measurement Principles
Before taking any measurement, ensure the test leads are correctly inserted into the appropriate input jacks for the desired function. The black lead always connects to the 'COM' (common) jack. The red lead connects to the 'VΩmA' jack for voltage, resistance, and small current measurements, or to the '10A' jack for high current measurements.
Voltage Measurement (AC/DC)
To measure voltage:
- Insert the black test lead into the 'COM' jack.
- Insert the red test lead into the 'VΩmA' jack.
- Set the function dial to the desired AC Voltage (V~) or DC Voltage (V=) range. Select a range higher than the expected voltage.
- Connect the test probes in parallel across the component or circuit to be measured.
- Read the voltage value on the LCD display.

Image: The multimeter is shown measuring both AC and DC voltages, illustrating the correct connection of test leads for each type of measurement.
Current Measurement (DC)
To measure DC current:
- Insert the black test lead into the 'COM' jack.
- For currents up to 200mA, insert the red test lead into the 'VΩmA' jack. For currents up to 10A, insert the red test lead into the '10A' jack.
- Set the function dial to the appropriate DC Current (A=) range.
- Disconnect power to the circuit. Open the circuit where the current is to be measured and connect the multimeter in series with the load.
- Apply power to the circuit and read the current value on the LCD display.
Resistance Measurement
To measure resistance:
- Insert the black test lead into the 'COM' jack.
- Insert the red test lead into the 'VΩmA' jack.
- Set the function dial to the Resistance (Ω) range.
- Ensure the circuit is de-energized before measuring resistance. Connect the test probes across the component to be measured.
- Read the resistance value on the LCD display.
Dwell Angle Measurement
The dwell angle function is used to measure the contact breaker point closure time in degrees for conventional ignition systems.
- Insert the black test lead into the 'COM' jack and connect it to the engine block (ground) or the negative battery terminal.
- Insert the red test lead into the 'VΩmA' jack and connect it to the distributor low voltage terminal or the ignition coil '-' (negative) terminal.
- Set the function dial to the 'DWELL' setting, selecting the appropriate cylinder setting (4CYL, 6CYL, 8CYL).
- Start the engine and allow it to idle.
- Read the dwell angle on the LCD display.

Image: The multimeter is shown connected to an automotive engine, demonstrating the setup for measuring the engine's dwell angle. The display shows a reading of 90.0 degrees.
RPM Measurement (Tachometer)
The RPM function measures engine speed in revolutions per minute.
- Insert the black test lead into the 'COM' jack and connect it to the engine block (ground) or the negative battery terminal.
- Insert the red test lead into the 'VΩmA' jack and connect it to the ignition coil '-' (negative) terminal or the tachometer test point.
- Set the function dial to the 'RPMx10' setting, selecting the appropriate cylinder setting (4CYL, 6CYL, 8CYL).
- Start the engine and allow it to idle.
- Read the RPM value on the LCD display. Note that the reading is multiplied by 10 (e.g., a display of 500 means 5000 RPM).
Duty Cycle Measurement
The duty cycle function measures the percentage of time a signal is active within a period.
- Insert the black test lead into the 'COM' jack.
- Insert the red test lead into the 'VΩmA' jack.
- Set the function dial to the 'Duty Cycle' setting.
- Connect the test probes across the signal source.
- Read the duty cycle percentage on the LCD display.
Diode and Continuity Test
To test diodes or circuit continuity:
- Insert the black test lead into the 'COM' jack.
- Insert the red test lead into the 'VΩmA' jack.
- Set the function dial to the Diode/Buzzer setting.
- For diode test, connect the red probe to the anode and the black probe to the cathode. The display will show the forward voltage drop. Reverse the probes to check for open circuit.
- For continuity test, connect the probes across the circuit. A continuous beep indicates a closed circuit (low resistance).

Image: This image illustrates the multimeter's capability to perform various functional measurements including AC voltage, DC voltage, diode test, resistance, on-off beep (continuity), and DC current.
Maintenance
Cleaning
To clean the multimeter, wipe the case with a damp cloth and mild detergent. Do not use abrasives or solvents. Ensure the meter is completely dry before use.
Storage
When not in use, store the multimeter in its provided storage bag in a cool, dry place away from direct sunlight and extreme temperatures. Remove the battery if the meter is not going to be used for an extended period to prevent battery leakage.
Battery Replacement
When the low battery indicator appears on the display, replace the 9V battery by following the battery installation steps outlined in the Setup section.
Troubleshooting
If you encounter issues with your ANENG SZ26 Multimeter, consider the following common problems and solutions:
| Problem | Possible Cause | Solution |
|---|---|---|
| Meter does not power on. | Dead or incorrectly installed battery. | Check battery installation; replace battery if necessary. |
| No reading or "OL" (Overload) displayed. | Incorrect range selected; open circuit; value exceeds meter's range. | Select a higher range; check for proper circuit connection; ensure circuit is complete. |
| Inaccurate readings. | Low battery; poor test lead connection; external interference. | Replace battery; ensure firm connection of test leads; move away from strong electromagnetic fields. |
| RPM/Dwell readings are erratic or incorrect. | Incorrect cylinder setting; poor connection to ignition system. | Verify the correct cylinder setting on the dial; ensure secure connections to the ignition coil or test point. |
Specifications
Below are the general specifications for the ANENG SZ26 Automotive Multimeter:
- Model: SZ26 Automotive Multimeter
- Display: Large LCD, 1999 Counts
- Power Source: 1 x 9V Battery (included)
- Dimensions: Approximately 9.45 x 5.94 x 2.17 inches
- Weight: Approximately 1.37 Pounds
- Safety Rating: Overload Protection, Insulated Probes
- Functions:
- DC Voltage: Yes
- AC Voltage: Yes
- DC Current: Yes
- Resistance: Yes
- RPM (Tachometer): 500-10000RPM (for 4, 6, 8 cylinder engines)
- Dwell Angle: Yes (for 4, 6, 8 cylinder engines)
- Duty Cycle: Yes
- Diode Test: Yes
- Continuity Test (Buzzer): Yes
- Data Hold: Yes

Image: The ANENG SZ26 Multimeter is displayed with its physical dimensions and the protective case, emphasizing its robust design and portability.
Warranty and Support
ANENG products are designed for reliability and performance. For warranty information, technical support, or service inquiries, please refer to the contact details provided on the product packaging or visit the official ANENG website. Keep your purchase receipt as proof of purchase for warranty claims.


