Introduction
This manual provides detailed instructions for the installation, operation, and maintenance of your DEWENWILS Wireless Switches for Lights. Please read this manual thoroughly before installation and use to ensure proper function and safety. Keep this manual for future reference.
Product Overview
The DEWENWILS Wireless Light Switch and Receiver Kit offers a convenient and flexible solution for controlling your lighting fixtures without the need for traditional in-wall wiring. It consists of a wireless switch and a compact receiver unit.
Key Features:
- Simple Installation: No complex wiring required, simplifying setup.
- Versatile Application: Easily add wall light switches or replace pull strings.
- 3-Way Switch Creation: Effortlessly create 3-Way switching without additional wiring.
- Remote Control: Strong RF signal with up to 100FT range for flexible control.
- Programmable & Expandable: Supports multiple switches controlling one lamp, or one switch controlling multiple lamps.
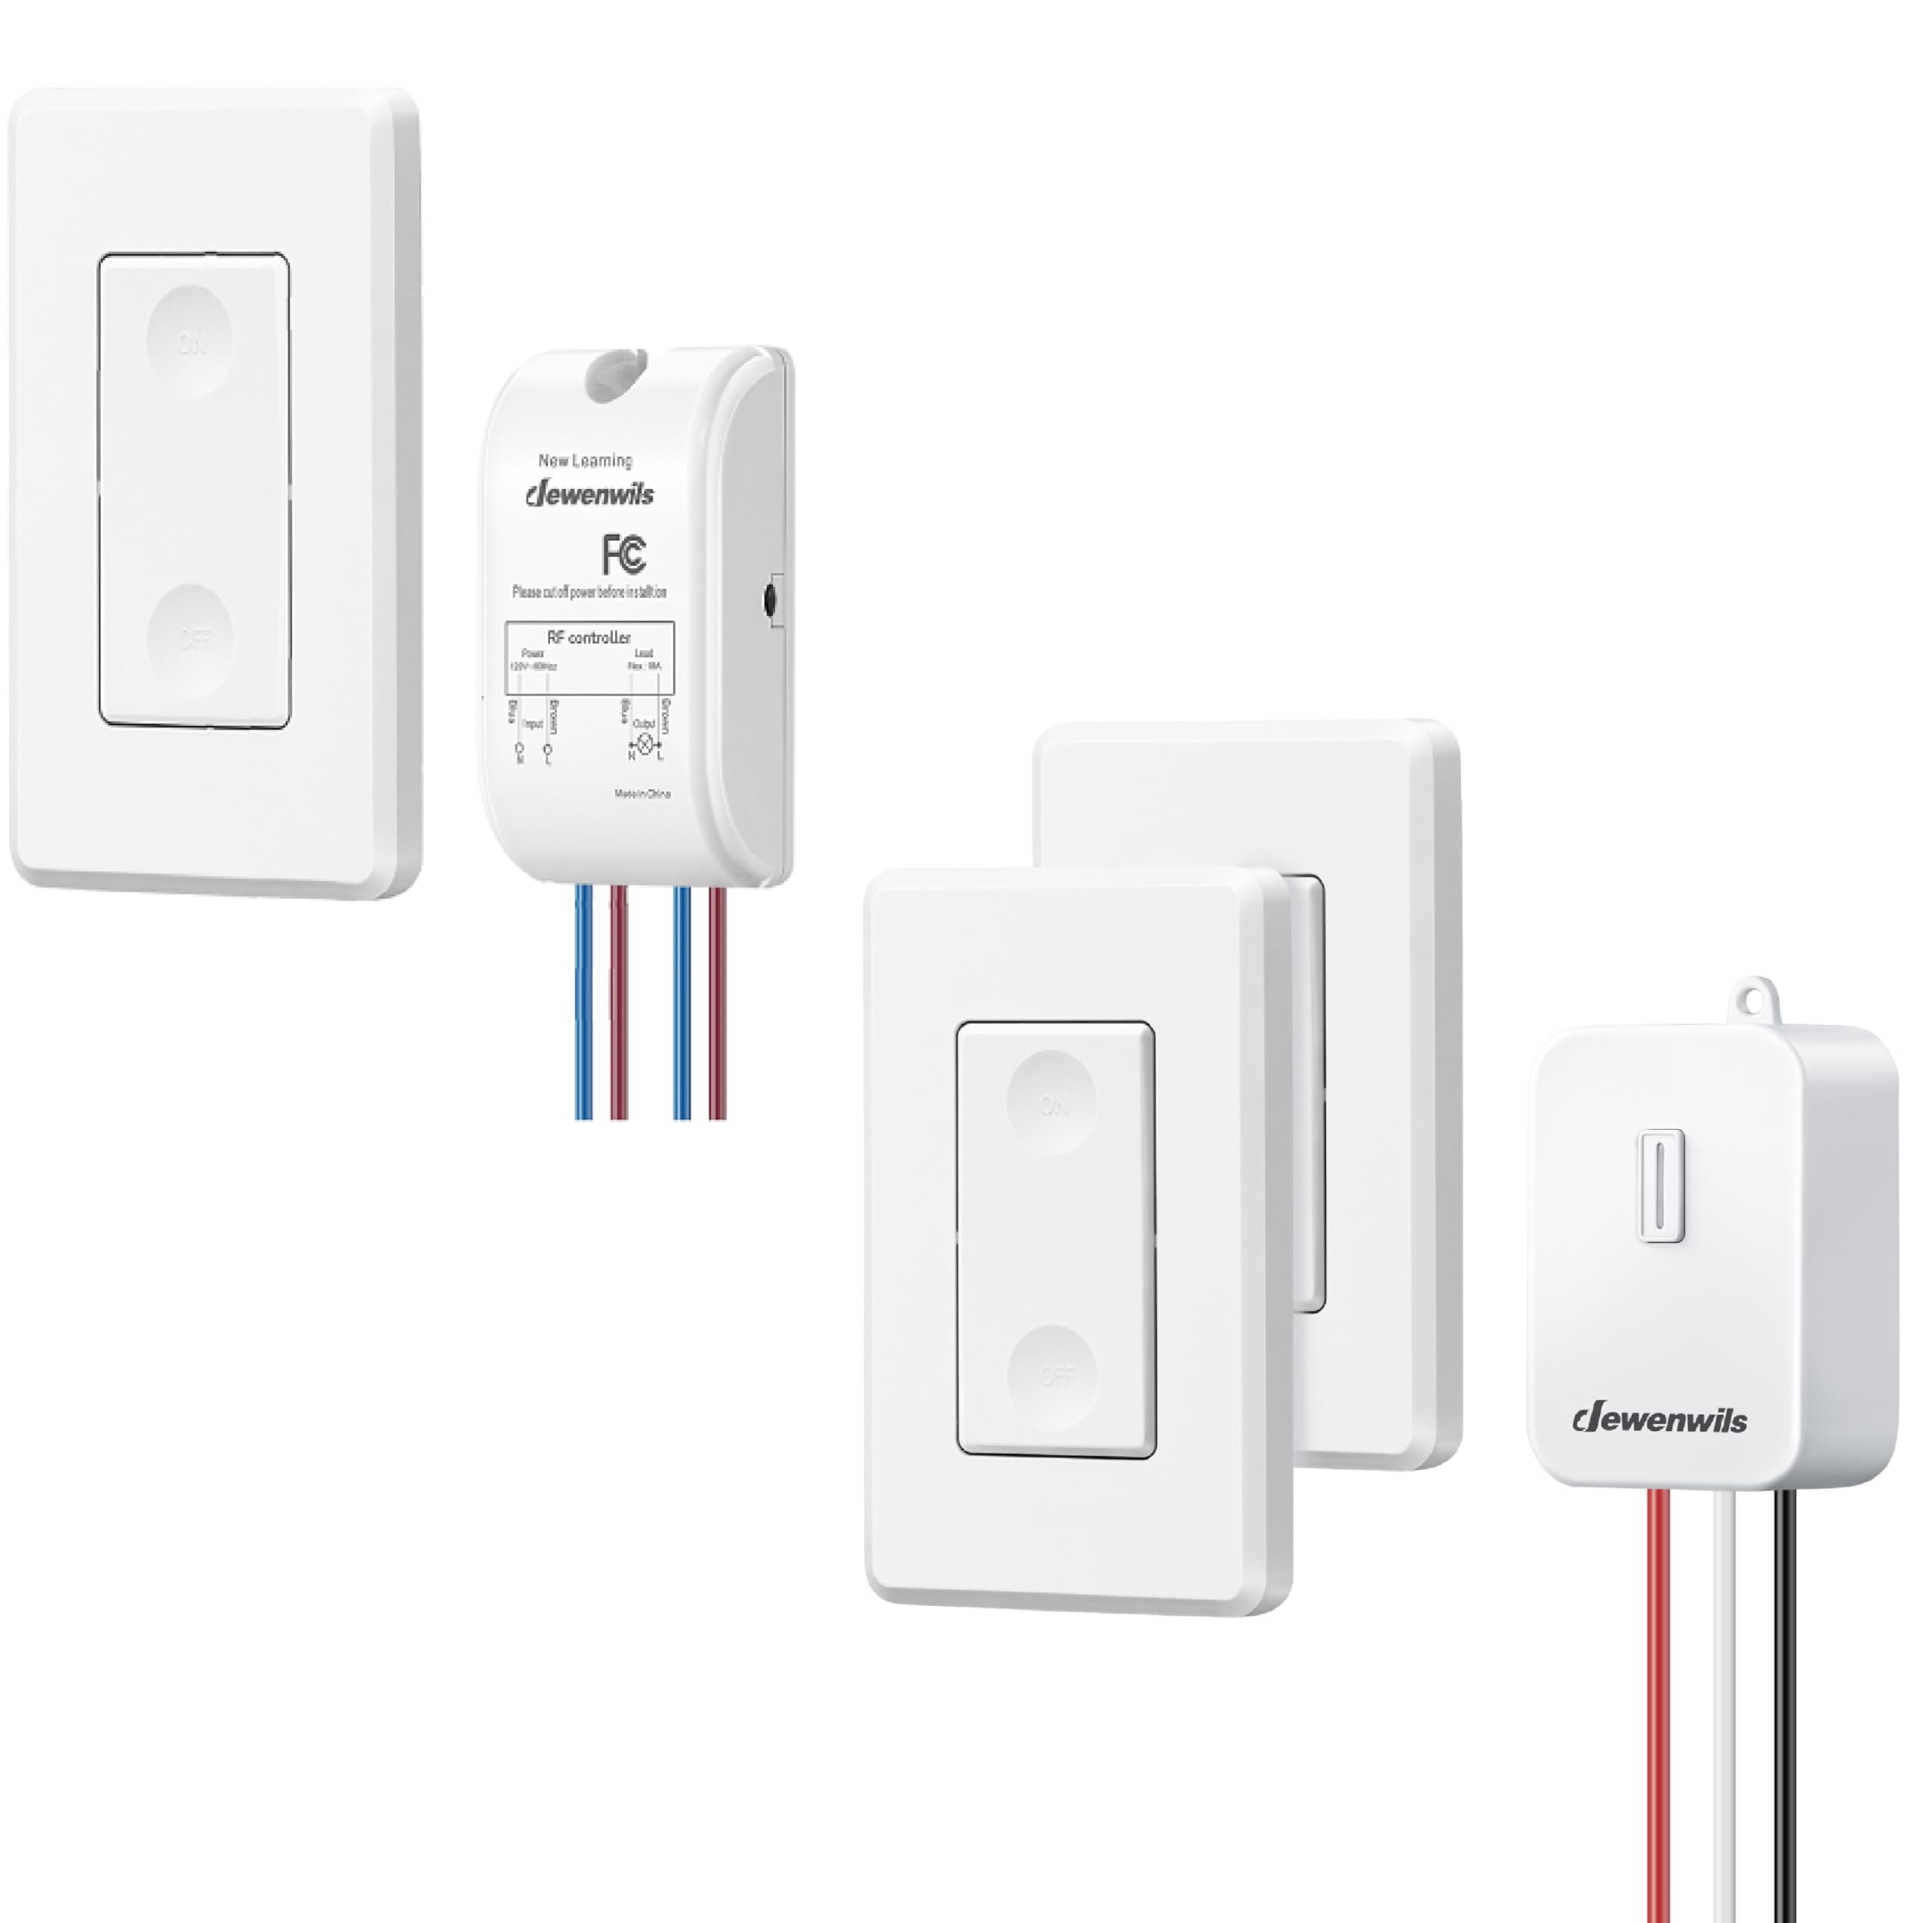
Image: The DEWENWILS Wireless Light Switch and Receiver Kit, showing the wireless switch and the receiver unit.
Setup and Installation
Follow these steps to install your DEWENWILS Wireless Switch system.
1. Wiring the Receiver
- Safety First: Before beginning any wiring, ensure the power supply to the circuit is turned OFF at the circuit breaker.
- Identify the input and output wires on the receiver. The receiver typically has input wires (for power supply) and output wires (to the light fixture).
- Connect the input wires of the receiver to your main power supply (Live and Neutral).
- Connect the output wires of the receiver to your light fixture (Load and Neutral).
- Ensure all connections are secure and properly insulated.

Image: Detailed wiring diagram for the DEWENWILS RF controller (receiver), showing input and output connections for power and load.
Note: The receiver is designed for 120V~60Hz power and can handle a maximum load of 10A. Consult a qualified electrician if you are unsure about wiring procedures.
2. Pairing the Wireless Switch with the Receiver
- After wiring the receiver and restoring power, the receiver will be in pairing mode for a short period (refer to specific product instructions for exact timing, usually indicated by a blinking LED).
- Press the "ON" or "OFF" button on the wireless switch. The receiver should respond (e.g., the light turns on/off, or an LED on the receiver confirms pairing).
- If pairing is unsuccessful, repeat the process. Some receivers may require a long press on a learning button to enter pairing mode.
3. Mounting the Wireless Switch
The wireless switch does not require in-wall wiring and can be mounted virtually anywhere.
- Use the included adhesive tape or screws to attach the switch to a wall, cabinet, or any desired surface.
- Ensure the mounting location is within the 100FT RF range of the receiver for optimal performance.

Image: Illustration demonstrating the difference between traditional in-wall wiring and the no-wiring installation of the DEWENWILS wireless switch system.
Operation
Basic On/Off Control
Once paired, simply press the "ON" button on the wireless switch to turn the connected light fixture on, and press the "OFF" button to turn it off.
Remote Control Range
The wireless switch operates using a strong RF signal, providing a remote control range of up to 100 feet (approximately 30 meters) in open areas. This allows for flexible placement of the switch and control of lights from various locations within your home.
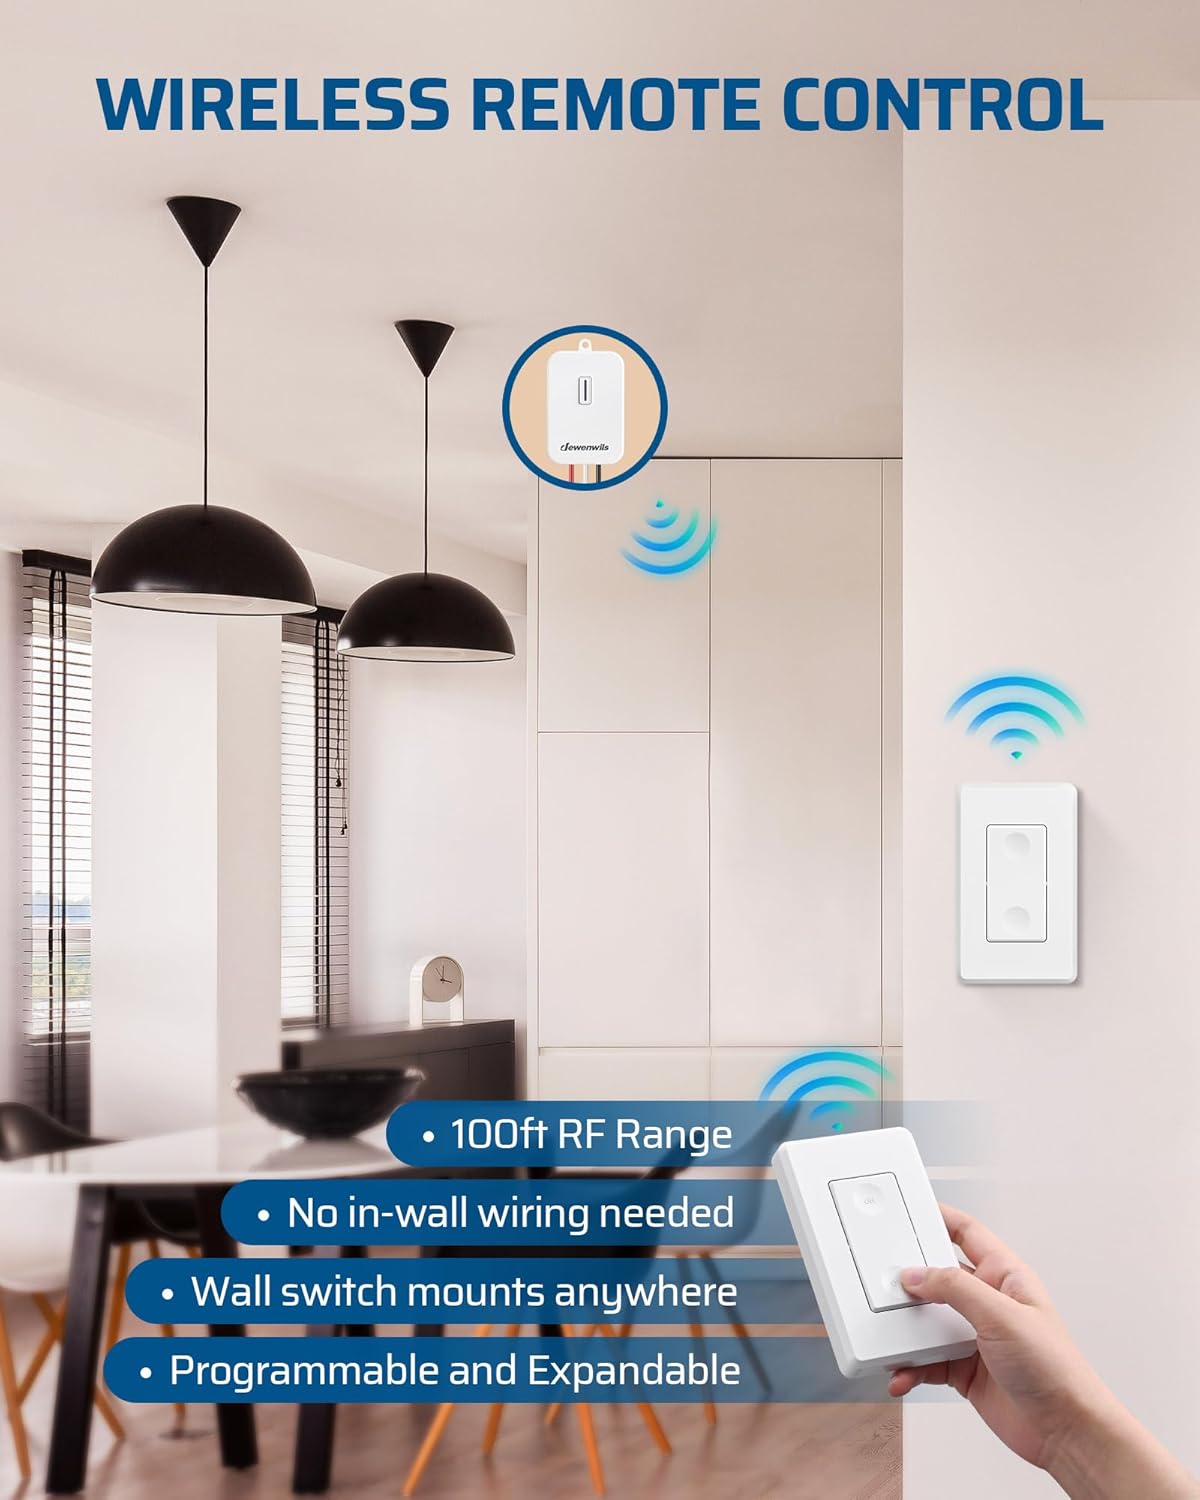
Image: Depiction of the wireless remote control capability of the DEWENWILS switch, highlighting its 100ft RF range and flexible mounting options.
Programmable and Expandable System
The DEWENWILS system is designed to be flexible and expandable, allowing for various control configurations:
- Multi-Switch Control: Multiple wireless switches can be paired to control a single light fixture (e.g., creating a 3-way or multi-way switch setup).
- Multi-Lamp Control: A single wireless switch can be paired to control multiple receiver units, thereby controlling multiple light fixtures simultaneously.
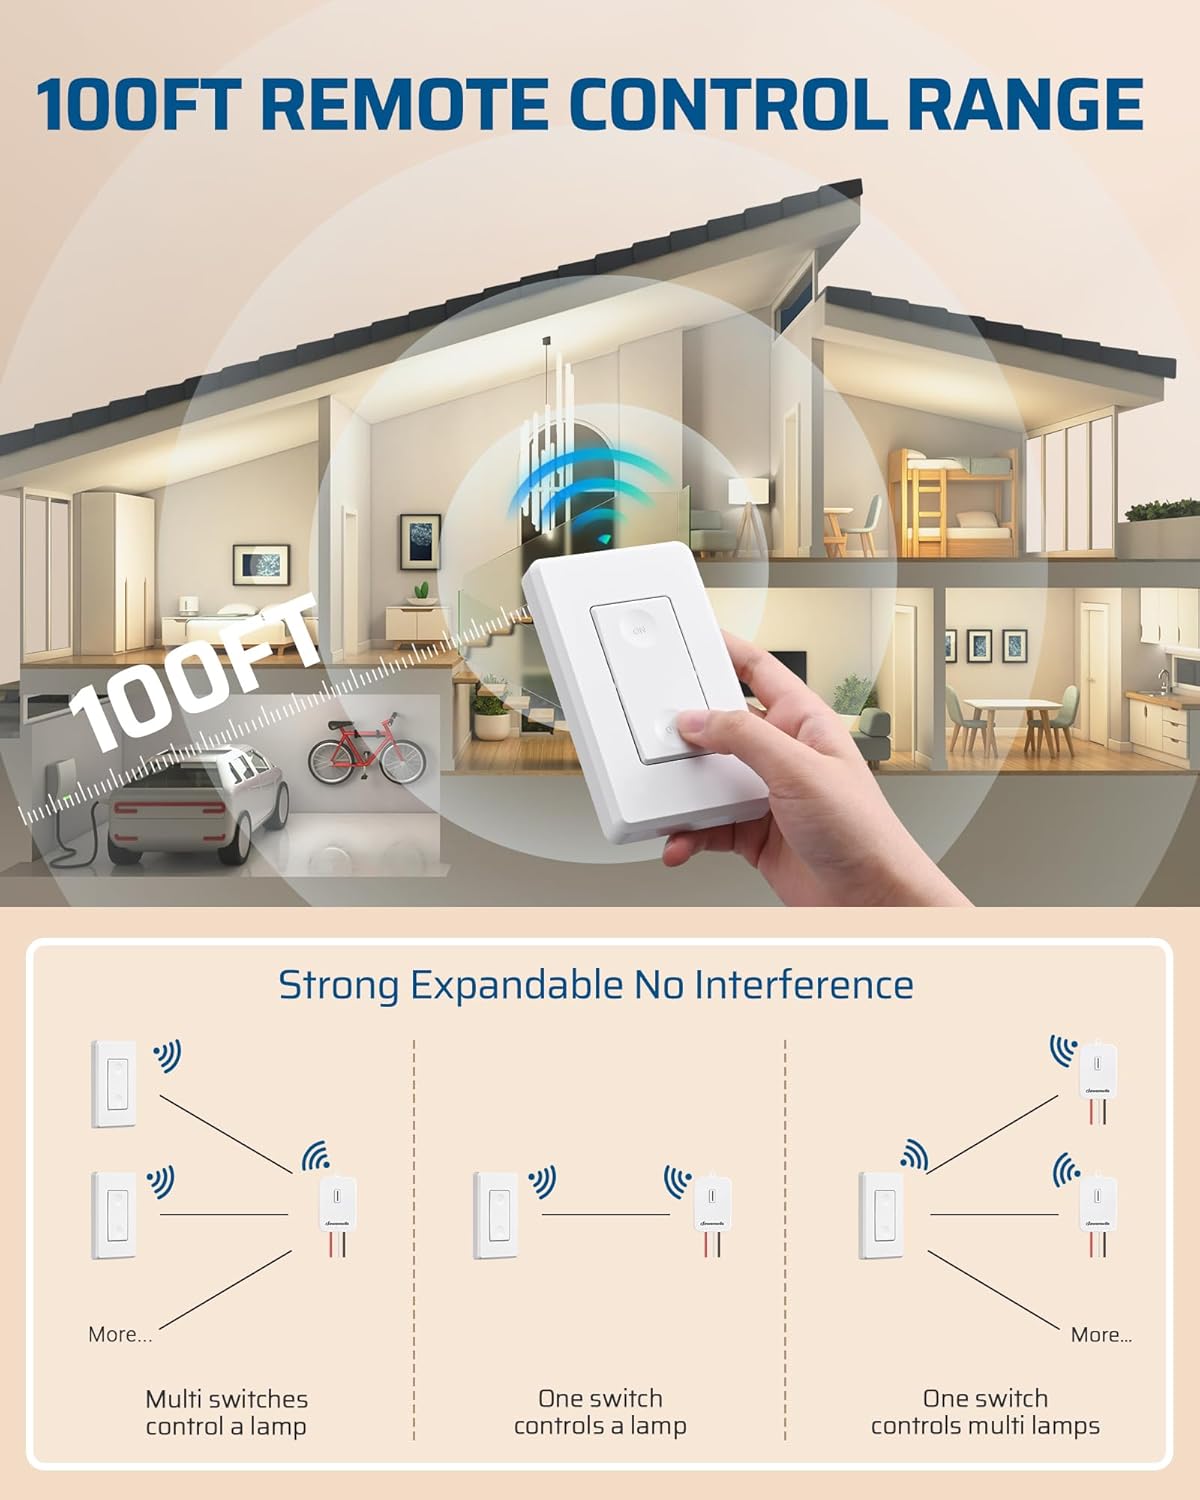
Image: Diagram illustrating the 100ft remote control range and expandable configurations, including multiple switches controlling one lamp, and one switch controlling multiple lamps.

Image: Examples of DEWENWILS wireless switch applications, such as adding a wireless switch, controlling ceiling fans, creating multi-way switches, and replacing hard-to-reach switches.
Maintenance
- Cleaning: Wipe the switch and receiver surfaces with a soft, dry cloth. Do not use abrasive cleaners or solvents.
- Power Source: The wireless switch is typically kinetic or uses a long-life battery (not user-replaceable in kinetic models). If your switch requires a battery, refer to specific product details for replacement instructions.
- Environmental Conditions: Ensure the receiver and switch are not exposed to excessive moisture, extreme temperatures, or direct sunlight, which can affect performance and lifespan.
Troubleshooting
| Problem | Possible Cause | Solution |
|---|---|---|
| Light does not turn ON/OFF. |
|
|
| Intermittent control. |
|
|
| Switch button feels unresponsive. |
|
|
Specifications
| Model Number: | B0DMJZK48L |
| Brand: | DEWENWILS |
| Input Voltage: | 120V~60Hz |
| Max Load: | 10A |
| Wireless Range: | Up to 100 feet (30 meters) in open areas |
Warranty and Support
For warranty information, technical support, or any questions regarding your DEWENWILS Wireless Switches for Lights, please refer to the product packaging or visit the official DEWENWILS website. You can also contact DEWENWILS customer service directly for assistance.
Website: DEWENWILS Store on Amazon


