
Introduction
Thank you for choosing the DEWENWILS Wireless Light Switch and Receiver Kit. This manual provides detailed instructions for the installation, operation, and maintenance of your new wireless light switch system. Please read this manual thoroughly before installation and retain it for future reference.
This kit allows you to add a light switch without running new wires, create 3-way switches, or control lights remotely. It features a strong RF signal with a 100ft range and is programmable and expandable.
Product Overview

Image: The DEWENWILS Wireless Light Switch and Receiver Kit, showing the wireless switch and the compact receiver module with wiring. This image provides a general view of the product components.

Image: A closer view of the wireless light switch and the receiver module. The switch has distinct ON and OFF buttons, and the receiver is shown with its wiring leads.
The DEWENWILS Wireless Light Switch and Receiver Kit consists of two main components: a wireless wall switch and a compact receiver module. The wireless switch operates on a 12V (23A) alkaline battery and communicates with the receiver via RF signals. The receiver module is designed to be wired into your existing lighting circuit.
Specifications
| Feature | Detail |
|---|---|
| Model | B0DMJYNL42 |
| Power (Receiver) | 120V~60Hz |
| Max Load (Receiver) | 15A (Resistive), 10A (Incandescent), 5A (LED/CFL) |
| Wireless Range | Up to 100ft (30m) indoors, 600ft (180m) outdoors (line of sight) |
| Switch Battery | 12V (23A) Alkaline Battery (included) |
| Operating Frequency | 433.92 MHz |
Setup and Installation
Important Safety Information: Always cut off power at the circuit breaker before performing any electrical work. If you are unsure about electrical wiring, consult a qualified electrician.
Receiver Wiring Diagram

Image: Detailed wiring diagram for the DEWENWILS RF controller receiver. It shows connections for input (Brown for Live, Blue for Neutral) and output (Brown for Load, Blue for Neutral), along with power specifications.
The receiver module has input and output wires. Connect the input wires to your power source and the output wires to your light fixture or appliance. Ensure correct polarity (Live and Neutral).
- Input: Connect the brown wire to the Live (L) wire from your power source. Connect the blue wire to the Neutral (N) wire from your power source.
- Output: Connect the brown wire to the Live (L) wire of your light fixture/load. Connect the blue wire to the Neutral (N) wire of your light fixture/load.
After wiring, the receiver can be placed inside a junction box, canopy, or behind the fixture.
Wireless Switch Installation

Image: A four-step visual guide demonstrating the installation of the wireless switch. It shows detaching the backplate, mounting it with screws, attaching the switch, and finally securing the faceplate.
The wireless switch can be mounted on any flat surface using the included screws or adhesive tape. It does not require any wiring.
- Prepare the Switch: The switch comes with a pre-installed 12V (23A) battery. Remove the battery insulation strip if present.
- Mount the Backplate: Detach the backplate from the switch. Use the included screws to mount the backplate to your desired wall location.
- Attach the Switch: Snap the wireless switch onto the mounted backplate.
- Secure: Ensure the switch is firmly attached.
Operating Instructions
Pairing the Switch and Receiver
The switch and receiver are pre-paired from the factory. If re-pairing is needed or if you are adding additional switches/receivers, follow these steps:
- Enter Pairing Mode: Press and hold the learning button on the receiver for approximately 3 seconds until the indicator light starts flashing.
- Activate Switch: Within 10 seconds, press the ON or OFF button on the wireless switch. The receiver's indicator light will stop flashing, indicating successful pairing.
To clear all paired switches from the receiver, press and hold the learning button on the receiver for approximately 10 seconds until the indicator light flashes rapidly and then turns off. This will reset the receiver.
Basic Operation
- Press the ON button on the wireless switch to turn the connected light/appliance ON.
- Press the OFF button on the wireless switch to turn the connected light/appliance OFF.
Expanding Your System
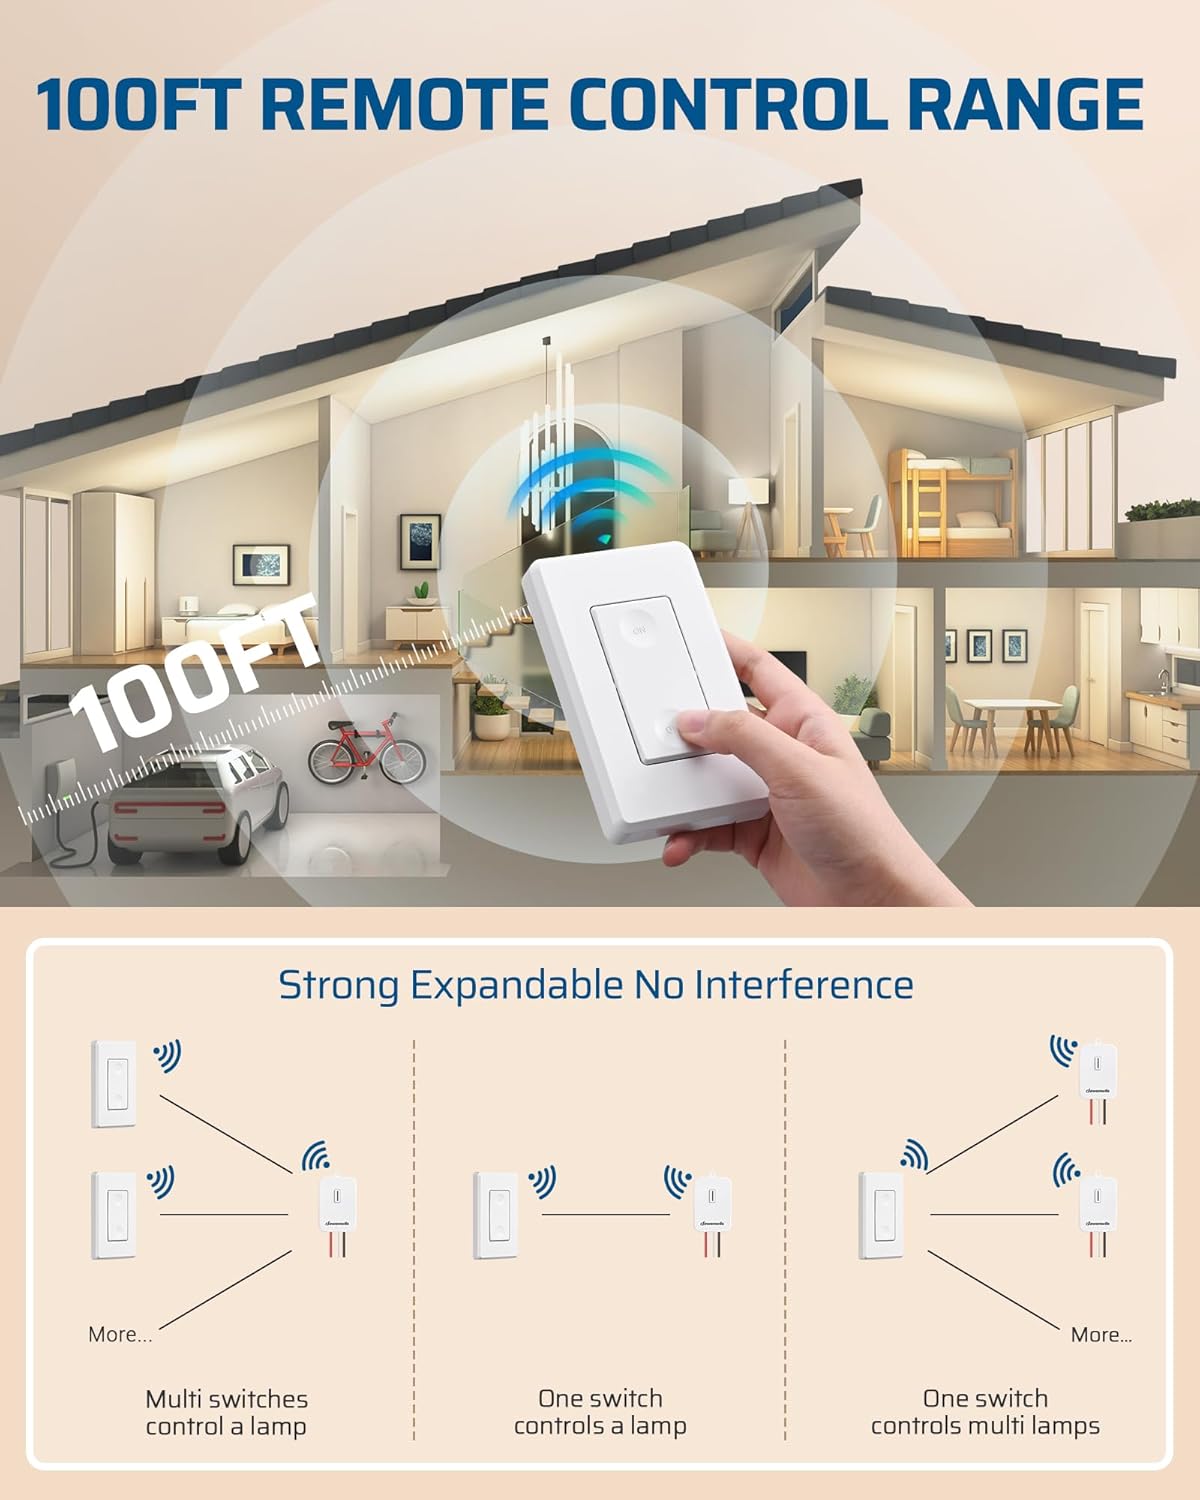
Image: An illustration demonstrating the 100ft remote control range and various system expansion possibilities, including multiple switches controlling one lamp, one switch controlling one lamp, and one switch controlling multiple lamps.
The DEWENWILS Wireless Light Switch system is highly expandable:
- Multiple Switches, One Receiver: You can pair multiple wireless switches to a single receiver, allowing control from different locations (e.g., creating a 3-way or multi-way switch setup).
- One Switch, Multiple Receivers: A single wireless switch can be paired with multiple receivers, allowing it to control several lights or appliances simultaneously.
Follow the pairing instructions above for each additional switch or receiver you wish to integrate into your system.
Maintenance
Battery Replacement
The wireless switch is powered by a 12V (23A) alkaline battery. When the switch's performance degrades or it stops responding, it's time to replace the battery.
- Carefully pry open the switch casing to access the battery compartment.
- Remove the old 12V (23A) battery.
- Insert a new 12V (23A) alkaline battery, ensuring correct polarity.
- Close the switch casing securely.
No maintenance is required for the receiver module other than ensuring proper wiring connections.
Troubleshooting
| Problem | Possible Cause | Solution |
|---|---|---|
| Light does not turn ON/OFF | No power to receiver; Receiver not paired; Switch battery low/dead; Receiver overloaded. | Check power supply to receiver. Re-pair switch and receiver. Replace switch battery. Ensure load does not exceed receiver's maximum rating. |
| Reduced wireless range | Obstructions (thick walls, metal objects); Interference from other RF devices; Low switch battery. | Relocate receiver or switch to minimize obstructions. Check for sources of interference. Replace switch battery. |
| Receiver indicator light not flashing during pairing | Not holding button long enough; Receiver not powered. | Hold the learning button for 3 seconds. Ensure receiver is powered. |
Warranty and Support
DEWENWILS products are designed for reliability and performance. For warranty information or technical support, please contact DEWENWILS customer service. Details can typically be found on the product packaging or the official DEWENWILS website.
Please retain your purchase receipt as proof of purchase for warranty claims.
For further assistance, visit the DEWENWILS Store on Amazon.