1. Introduction
Thank you for choosing the DEWENWILS Outdoor Digital Timer. This device is designed to provide automated control over your outdoor electrical appliances, enhancing convenience and energy efficiency. Please read this manual thoroughly before installation and operation to ensure proper use and safety.
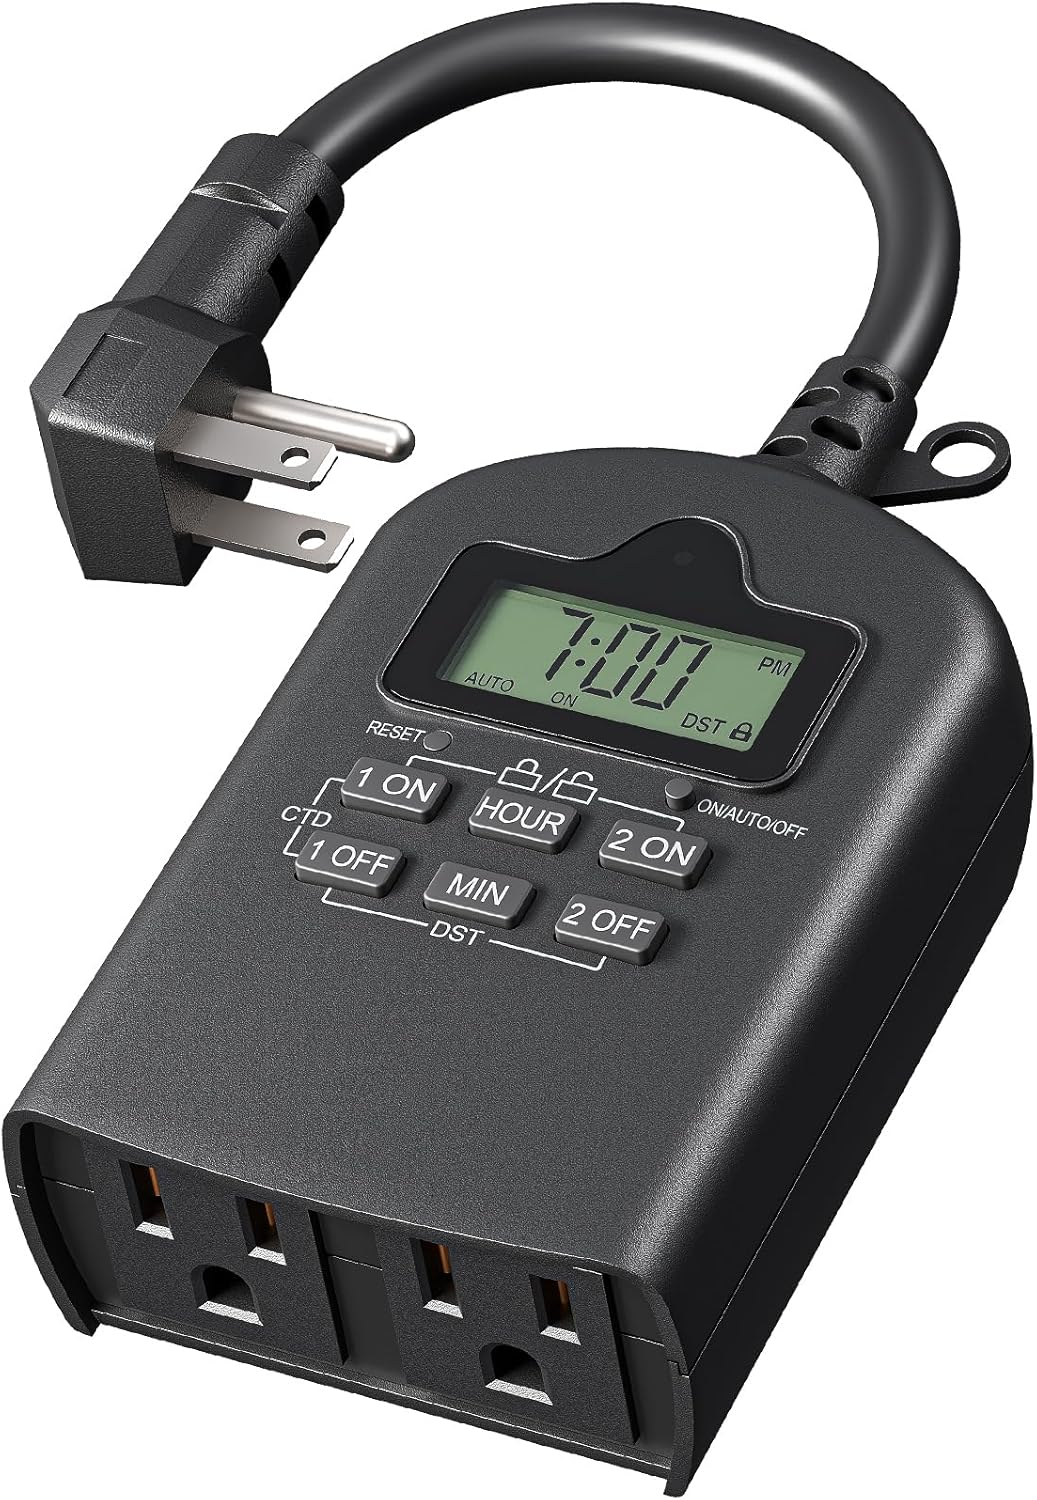
Image 1.1: The DEWENWILS Outdoor Digital Timer, showcasing its two grounded outlets, digital display, and control buttons.
2. Product Overview
2.1 Key Features
- Three Timing Modes: Offers Always On, Always Off, and Timer modes with daily repeat options.
- Programmable Schedules: Supports two independent timing schedules with a minimum interval of 1 minute.
- Daylight Saving Time (DST): Quick switch function for easy adjustment.
- Built-in Rechargeable Battery: Preserves settings during power outages for up to 3 months.
- Countdown Function: Automatically powers off connected equipment after a user-defined period.
- Random Mode: Simulates presence by randomly controlling lights, enhancing home security.
- Lock Screen: Prevents accidental changes to programmed settings.
- Weatherproof Design: PPE+PC fire-resistant housing suitable for outdoor use in rain or snow.
- Dual Grounded Outlets: Controls two devices simultaneously.
- Heavy-Duty Construction: ETL certified with 6-inch SJTW 14/3C grounded cord.
- Max Load: 15A resistive, 1250W/10A tungsten, 1/2 HP.
2.2 Package Contents
- DEWENWILS Outdoor Digital Timer (1 unit)
- User Manual (1 copy)
3. Important Safety Instructions
To reduce the risk of electric shock, fire, or injury, always follow basic safety precautions when using electrical products. Read all instructions before using this timer.
- Do not immerse the timer in water or expose it to direct water jets.
- For outdoor use, install the timer vertically and at least 2 feet (0.6 meters) above the ground to prevent water entry into the outlets.
- Ensure the timer is securely mounted or placed in a stable position.
- Do not exceed the maximum load ratings: 15A resistive, 1250W/10A tungsten, 1/2 HP.
- Always plug the timer into a grounded outlet.
- Do not use with extension cords that are not rated for outdoor use.
- Keep children away from the timer and connected devices.
- Unplug the timer from the power source before cleaning or when not in use for extended periods.
- Do not disassemble or attempt to repair the timer. Contact customer support for assistance.

Image 3.1: The timer demonstrating its waterproof design, with a crucial note to mount it at least 2 feet off the ground vertically for outdoor use.
4. Setup
4.1 Initial Charging and Reset
- Plug the timer into a standard 125VAC grounded outlet. The internal battery will begin charging. Allow at least 30 minutes for the battery to charge sufficiently for initial programming.
- Locate the RESET button (usually a small recessed button). Use a pen or a pointed object to press and hold the RESET button for 3 seconds. This will clear all previous settings and reset the timer to its default state.
- The display will show "0:00" and "AUTO ON".
4.2 Setting the Current Time
- Press the HOUR button to set the current hour. The display will cycle through 1-12 AM/PM.
- Press the MIN button to set the current minute.
- Ensure the AM/PM indicator is correct for the current time.

Image 4.1: The timer's control panel, illustrating the simplicity of setup and the various programming modes available.
5. Operating Instructions
5.1 Understanding the Modes
The timer offers three primary operating modes, selectable by pressing the ON/AUTO/OFF button:
- AUTO ON: The timer will follow the programmed ON/OFF schedules.
- ALWAYS ON: The connected devices will remain continuously powered ON, overriding any programmed schedules.
- ALWAYS OFF: The connected devices will remain continuously powered OFF, overriding any programmed schedules.
5.2 Programming ON/OFF Schedules
The timer supports two independent ON/OFF programs (Program 1 and Program 2).
- Press the 1 ON button to set the first ON time. The display will show "1 ON".
- Use the HOUR and MIN buttons to set the desired ON time.
- Press the 1 OFF button to set the first OFF time. The display will show "1 OFF".
- Use the HOUR and MIN buttons to set the desired OFF time.
- Repeat steps 1-4 for Program 2 using the 2 ON and 2 OFF buttons.
- After setting all desired programs, press the ON/AUTO/OFF button until "AUTO ON" is displayed to activate the schedules.

Image 5.1: Visual representation of automating devices with two distinct programs, such as outdoor string lights and a garden fountain.
5.3 Countdown Function
The countdown function allows you to turn off connected devices after a specified duration.
- Press the CTD button. The display will show "CTD" and a countdown time.
- Use the HOUR and MIN buttons to set the desired countdown duration.
- Press CTD again to start the countdown. The connected devices will turn off once the countdown reaches zero.
5.4 Random Mode
Random mode turns lights on and off at irregular intervals to simulate occupancy, enhancing security.
- Press and hold the ON/AUTO/OFF button for 3 seconds. The display will show "RANDOM".
- The timer will now randomly turn connected devices ON and OFF within a set time window (e.g., dusk to dawn).
- To exit Random mode, press and hold the ON/AUTO/OFF button again for 3 seconds.

Image 5.2: The random function in action, providing an illusion of occupancy to deter potential intruders.
5.5 Daylight Saving Time (DST)
To adjust for Daylight Saving Time:
- Press the DST button once to advance the time by one hour (for Spring forward).
- Press the DST button again to revert the time by one hour (for Fall back).
5.6 Lock Screen Function
To prevent accidental changes to your programmed settings:
- Press and hold the 1 ON and 2 ON buttons simultaneously for 3 seconds. A lock icon will appear on the display.
- To unlock, press and hold the 1 ON and 2 ON buttons simultaneously again for 3 seconds. The lock icon will disappear.

Image 5.3: A visual summary of advanced features including countdown, random operation, DST adjustment, and the lock screen function.
6. Maintenance
- Cleaning: Disconnect the timer from the power source before cleaning. Wipe the exterior with a soft, damp cloth. Do not use harsh chemicals or abrasive cleaners.
- Storage: When not in use for extended periods, store the timer in a cool, dry place away from direct sunlight.
- Battery: The internal rechargeable battery is designed for long-term use. If the timer is unplugged for several months, the battery may discharge. Reconnect it to power for a few hours to recharge.

Image 6.1: The timer's blackout memory feature, which uses a built-in rechargeable battery to retain programmed settings during power interruptions.
7. Troubleshooting
| Problem | Possible Cause | Solution |
|---|---|---|
| Timer display is blank. | No power to the timer or internal battery is depleted. | Ensure the timer is securely plugged into a live outlet. Allow 30 minutes for the internal battery to charge. If still blank, perform a reset. |
| Devices do not turn ON/OFF as programmed. | Timer is not in "AUTO ON" mode, incorrect program settings, or lock screen is active. | Press ON/AUTO/OFF until "AUTO ON" is displayed. Verify program times are correct. Check if the lock screen is active and unlock if necessary. |
| Timer is not responding to button presses. | Lock screen is active. | Press and hold 1 ON and 2 ON simultaneously for 3 seconds to unlock. |
| Time is incorrect after a power outage. | Internal battery is depleted or faulty. | Allow the timer to charge for several hours. If the issue persists, the internal battery may need service (contact support). |
8. Specifications
- Model: Outdoor Digital Timer
- Voltage: 125VAC, 60Hz
- Max Load: 15A Resistive, 1250W/10A Tungsten, 1/2 HP
- Outlets: 2 Grounded Outlets
- Cord Type: SJTW 14/3C
- Material: PPE+PC (Fire-resistant)
- Color: Black
- Dimensions: Approximately 1"D x 3"W x 5"H
- Item Weight: Approximately 8.96 - 9 ounces
- Certifications: ETL Listed
- Battery: 1 AAAA battery required (included, internal rechargeable)

Image 8.1: Detailed view of the timer highlighting its electrical specifications and construction materials.
9. Warranty and Customer Support
DEWENWILS products are designed for reliability and performance. For warranty information, technical support, or any questions regarding your product, please contact DEWENWILS customer service through the retailer's platform or the official DEWENWILS website.
Please have your model number (Outdoor Digital Timer) and purchase information ready when contacting support.


