1. Introduction
This manual provides detailed instructions for the safe and efficient operation of your SEVERIN MW 7982 4-in-1 Microwave Oven. This appliance combines microwave, grill, hot air fryer, and oven functions, offering versatile cooking options. Please read this manual thoroughly before first use and keep it for future reference.
The SEVERIN MW 7982 is designed for domestic use and features a 25-liter capacity, 10 power levels, and 10 automatic cooking programs. Its stainless steel design ensures durability and easy cleaning.
2. Safety Instructions
Always follow basic safety precautions when using electrical appliances to reduce the risk of fire, electric shock, injury to persons, or exposure to excessive microwave energy.
- Read all instructions before using the appliance.
- Ensure the appliance is properly grounded.
- Do not operate the oven if the door or door seals are damaged. Contact qualified service personnel.
- Do not heat liquids or other foods in sealed containers as they are liable to explode.
- Only use utensils suitable for microwave ovens.
- Do not use corrosive chemicals or vapors in this appliance.
- Close supervision is necessary when the appliance is used by or near children.
- Do not use this appliance for commercial purposes.
- Always ensure proper ventilation around the appliance.
3. Product Components and Overview
Familiarize yourself with the main parts and accessories of your SEVERIN MW 7982 microwave oven.

Figure 3.1: Front view of the SEVERIN MW 7982 microwave oven, showcasing its stainless steel finish and control panel on the right side.

Figure 3.2: The accessories included with the microwave oven: a round cooking rack, a non-stick coated air fryer tray, and a non-stick coated pizza plate.
Included Accessories:
- Removable Turntable (Ø27 cm)
- Cooking Rack
- Non-stick Coated Pizza Plate (Ø28 cm)
- Non-stick Coated Air Fryer Tray
4. Setup
4.1 Unpacking
Carefully remove the microwave oven and all packing materials from the carton. Check for any damage. Do not operate the appliance if it appears damaged.
4.2 Placement
- Place the oven on a stable, level surface that can support its weight.
- Ensure adequate ventilation: leave a minimum of 20 cm clearance above the oven, 10 cm at the rear, and 5 cm on each side. Do not block any ventilation openings.
- Keep the oven away from heat sources, strong magnetic fields, and areas with high humidity.
4.3 Initial Cleaning
Before first use, wipe the interior and exterior surfaces of the oven with a damp cloth. Wash the turntable, cooking rack, pizza plate, and air fryer tray in warm, soapy water. Dry all parts thoroughly.
4.4 Power Connection
Plug the power cord into a grounded electrical outlet. Ensure the voltage matches the rating label on the appliance.
5. Operating Instructions
5.1 Control Panel Overview
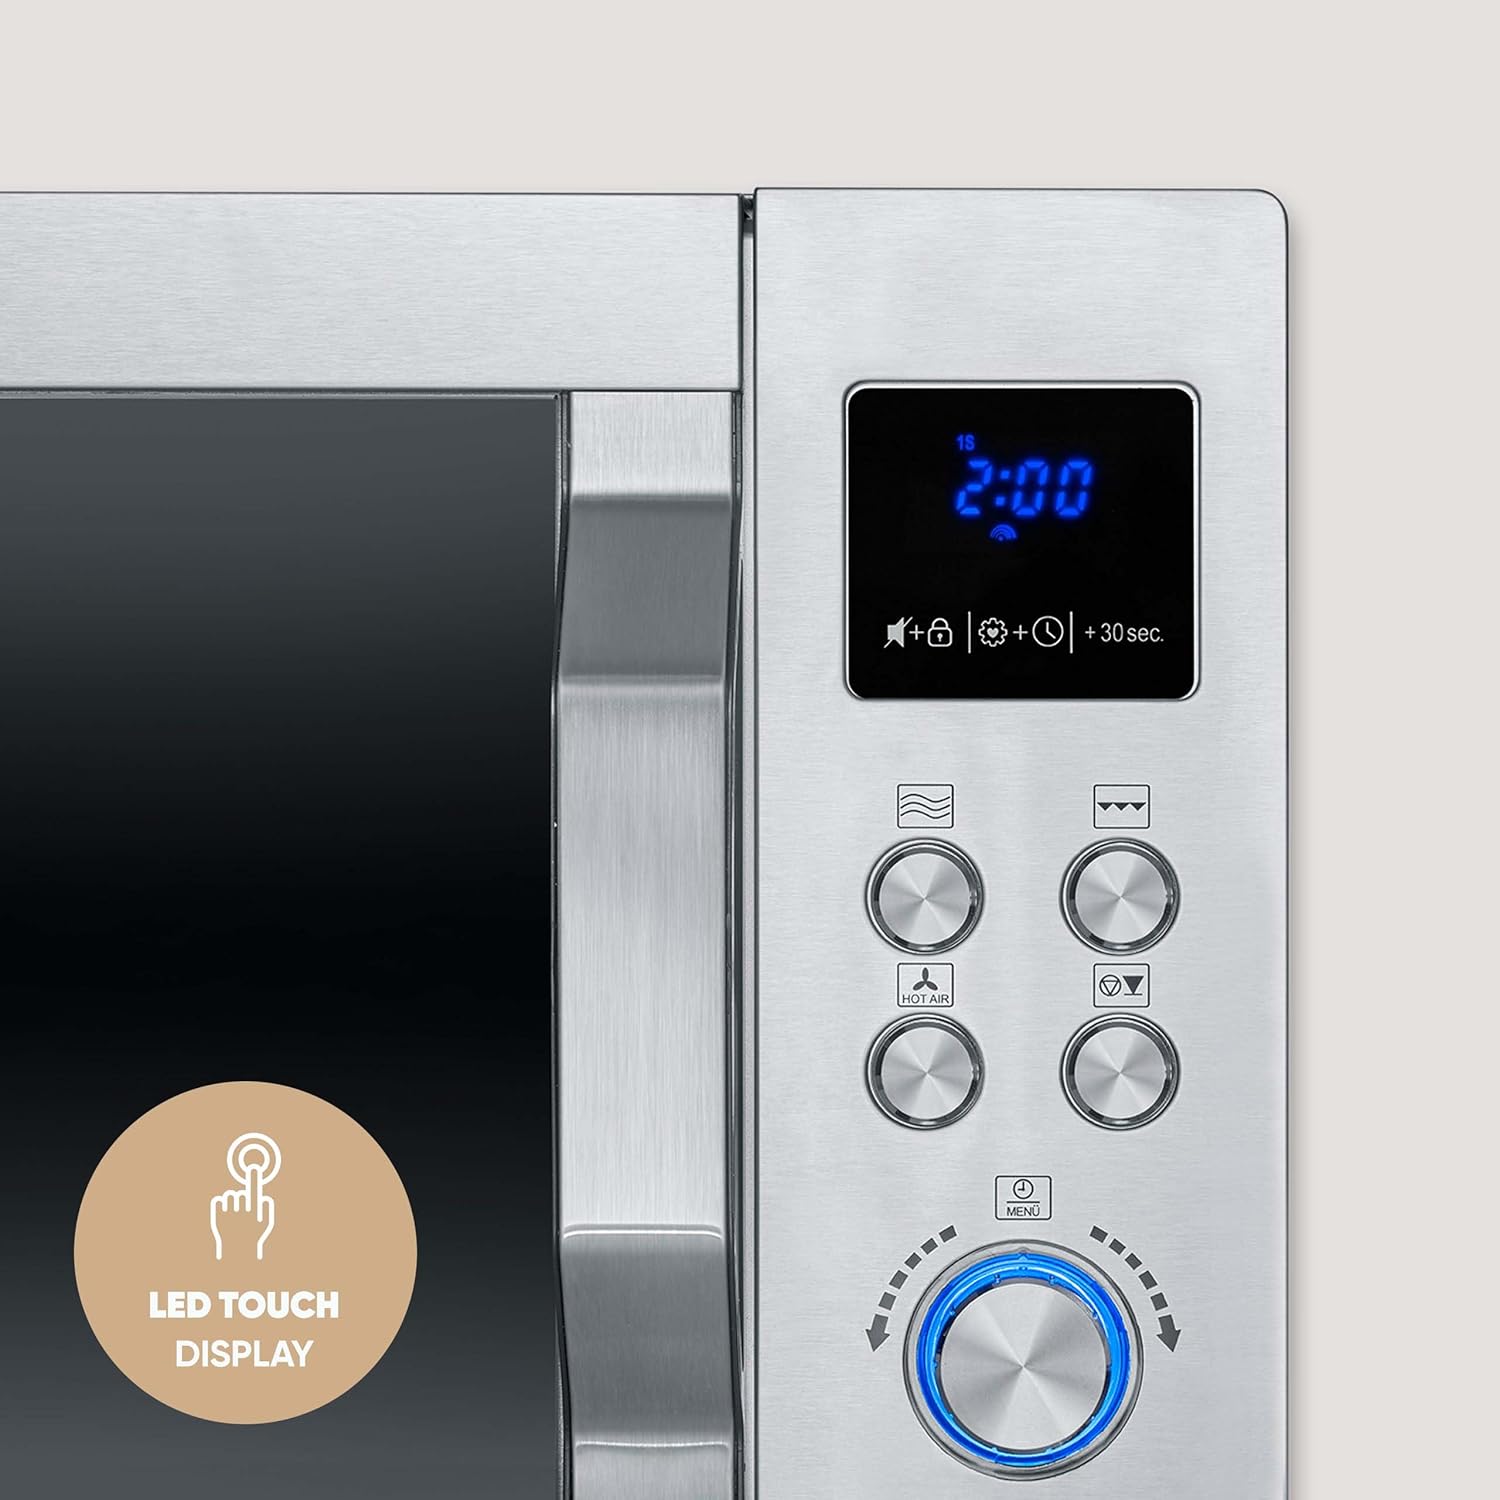
Figure 5.1: A detailed view of the LED touch display and the various control buttons and rotary knob on the right side of the microwave oven.
The appliance features an LED touch display, a 360° rotary knob, and four program buttons for easy operation.
5.2 Setting the Clock
Upon initial power-up or after a power outage, the display will show '0:00'. Follow the instructions in your full manual to set the current time using the rotary knob and confirmation button.
5.3 Microwave Cooking
The microwave function offers 10 power levels. Place food in a microwave-safe container on the turntable.
- Press the Microwave button.
- Use the rotary knob to select the desired power level (e.g., P100 for full power, P50 for medium).
- Use the rotary knob to set the cooking time.
- Press the Start button to begin cooking.
5.4 Grill Function
The grill function is ideal for browning and crisping food. Use the cooking rack for best results.
- Press the Grill button.
- Use the rotary knob to set the grilling time.
- Press the Start button.
5.5 Hot Air Fryer Function
This function allows for crispy results with little to no oil. Use the dedicated air fryer tray.
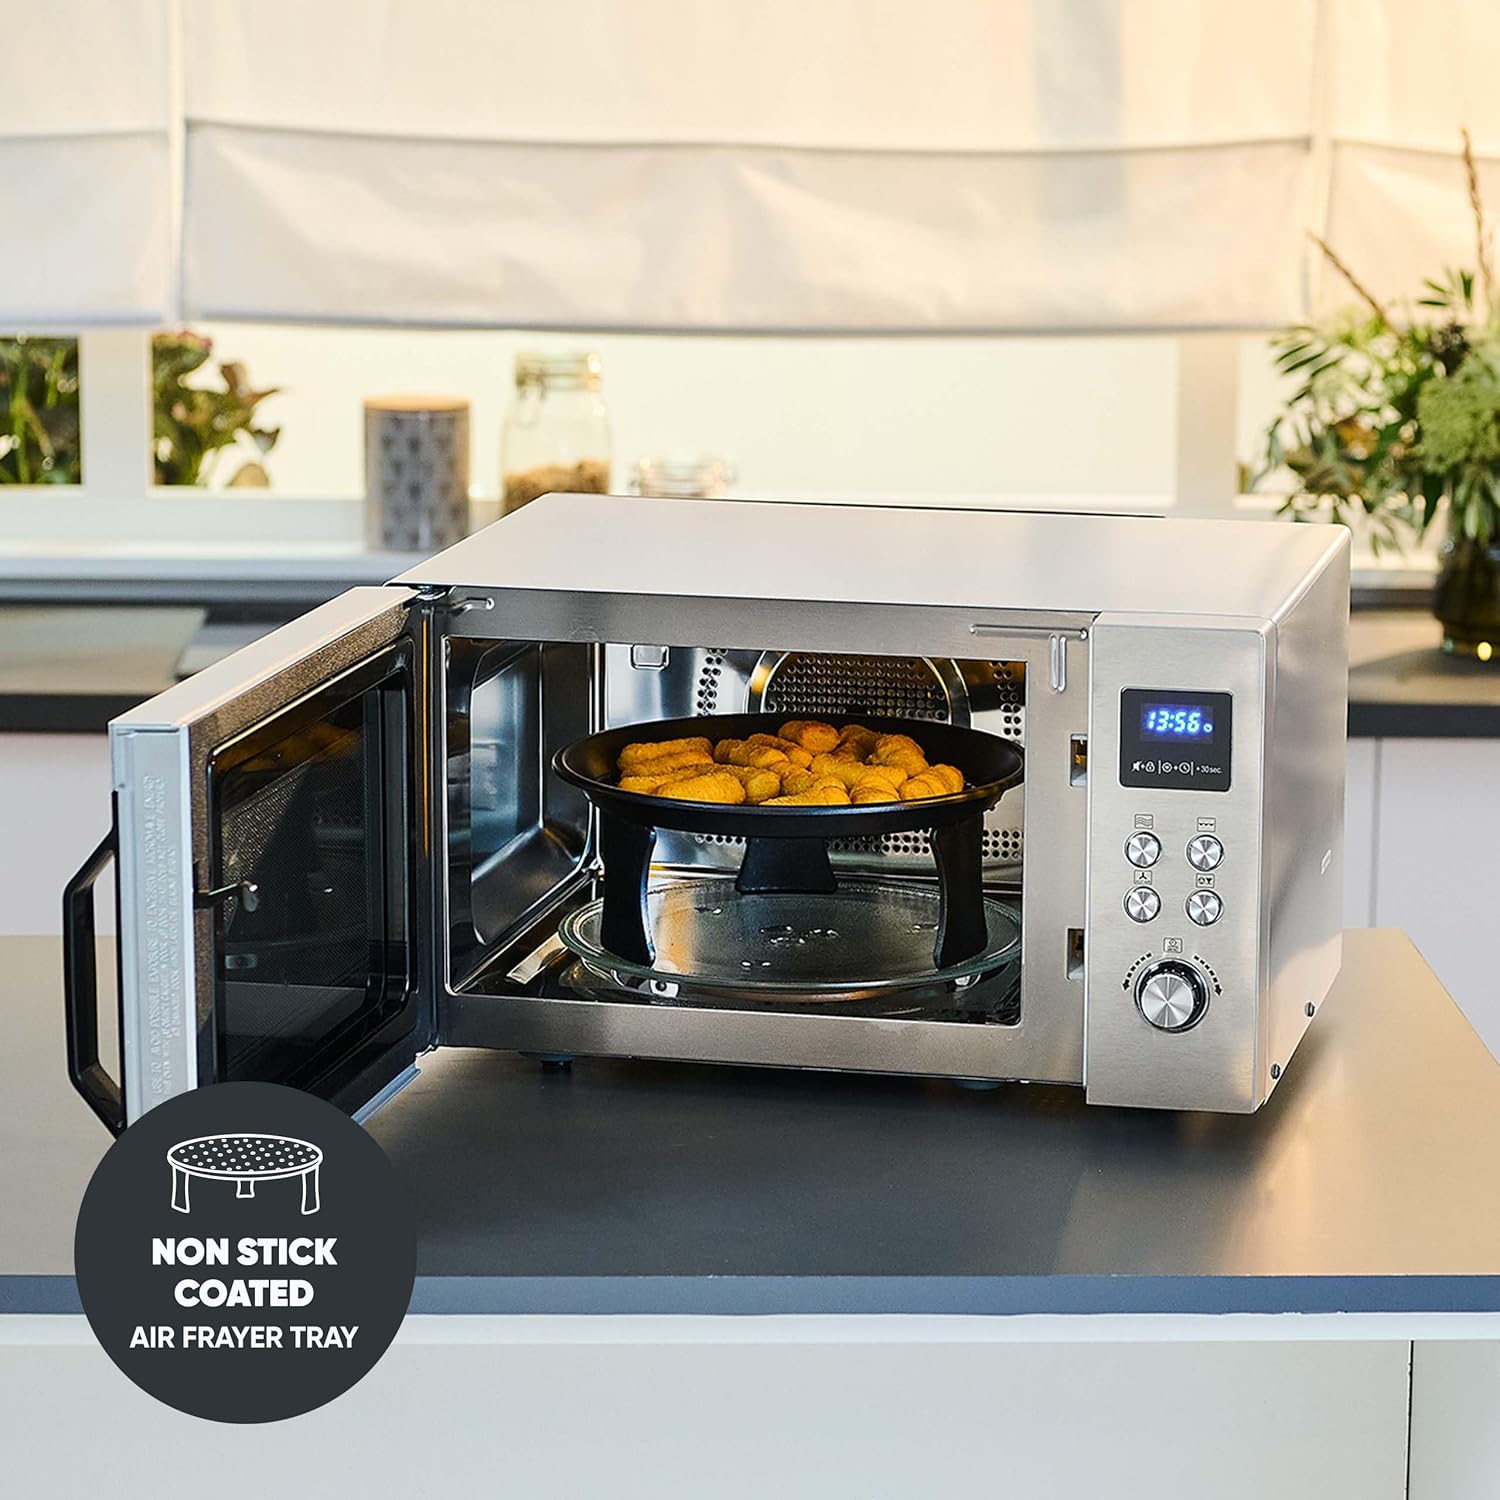
Figure 5.2: The air fryer tray with food, positioned inside the microwave oven, demonstrating the hot air circulation feature.

Figure 5.3: An internal view of the microwave oven highlighting the 360° hot air circulation for even cooking and crisping.
- Press the Hot Air Fryer button.
- Use the rotary knob to select the desired temperature (up to 230°C).
- Set the cooking time using the rotary knob.
- Press the Start button.
5.6 Combination Modes
The microwave, grill, and hot air functions can be programmed together or separately. Refer to the full manual for specific combination settings.
5.7 Automatic Programs
The oven includes 10 automatic programs for various food types. Select the desired program and the oven will automatically set the cooking time and power level.
5.8 Memory Function (Favourite Dish)
The 'Favourite Dish' function allows you to save up to 3 preferred cooking settings (power and duration) for quick recall.
- Set your desired power level and cooking time.
- Press and hold the Memory button until the display confirms saving.
- To recall, press the Memory button to cycle through saved programs and then Start.
5.9 Child Safety Lock
To activate the child safety lock, press and hold the designated button (refer to control panel diagram in full manual) until a lock icon appears on the display. This prevents accidental operation. Repeat the process to deactivate.
5.10 'Be-Silent' Function
This function allows you to deactivate the audible signal (beeps) for silent operation. Refer to the full manual for activation/deactivation steps.
6. Cleaning and Maintenance
Regular cleaning and maintenance will ensure the longevity and optimal performance of your microwave oven.
6.1 Exterior Cleaning
Wipe the exterior with a damp cloth and mild detergent. Avoid abrasive cleaners or scouring pads that could scratch the stainless steel finish.
6.2 Interior Cleaning
Clean the interior cavity after each use. For stubborn food splatters, place a bowl of water with lemon juice inside and microwave for a few minutes to loosen residue. Then wipe with a damp cloth.
6.3 Turntable and Accessories
The removable turntable, cooking rack, pizza plate, and air fryer tray can be washed by hand in warm, soapy water or in a dishwasher. Ensure they are completely dry before placing them back in the oven.
7. Troubleshooting
If you encounter issues with your microwave oven, consult the following table before contacting customer service.
| Problem | Possible Cause | Solution |
|---|---|---|
| Oven does not start | Power cord not plugged in; Door not closed properly; Fuse blown or circuit breaker tripped. | Ensure plug is firmly in outlet; Close door securely; Check household fuse/circuit breaker. |
| Food not cooking evenly | Food not stirred or turned; Incorrect power level or cooking time. | Stir or turn food during cooking; Adjust power level and cooking time as needed. |
| Excessive steam inside door | High moisture content in food. | This is normal for foods with high moisture. Wipe the interior after use. |
| Child lock activated | Oven controls are locked. | Deactivate child lock by pressing and holding the lock button. |
8. Technical Specifications
Detailed specifications for the SEVERIN MW 7982 microwave oven.
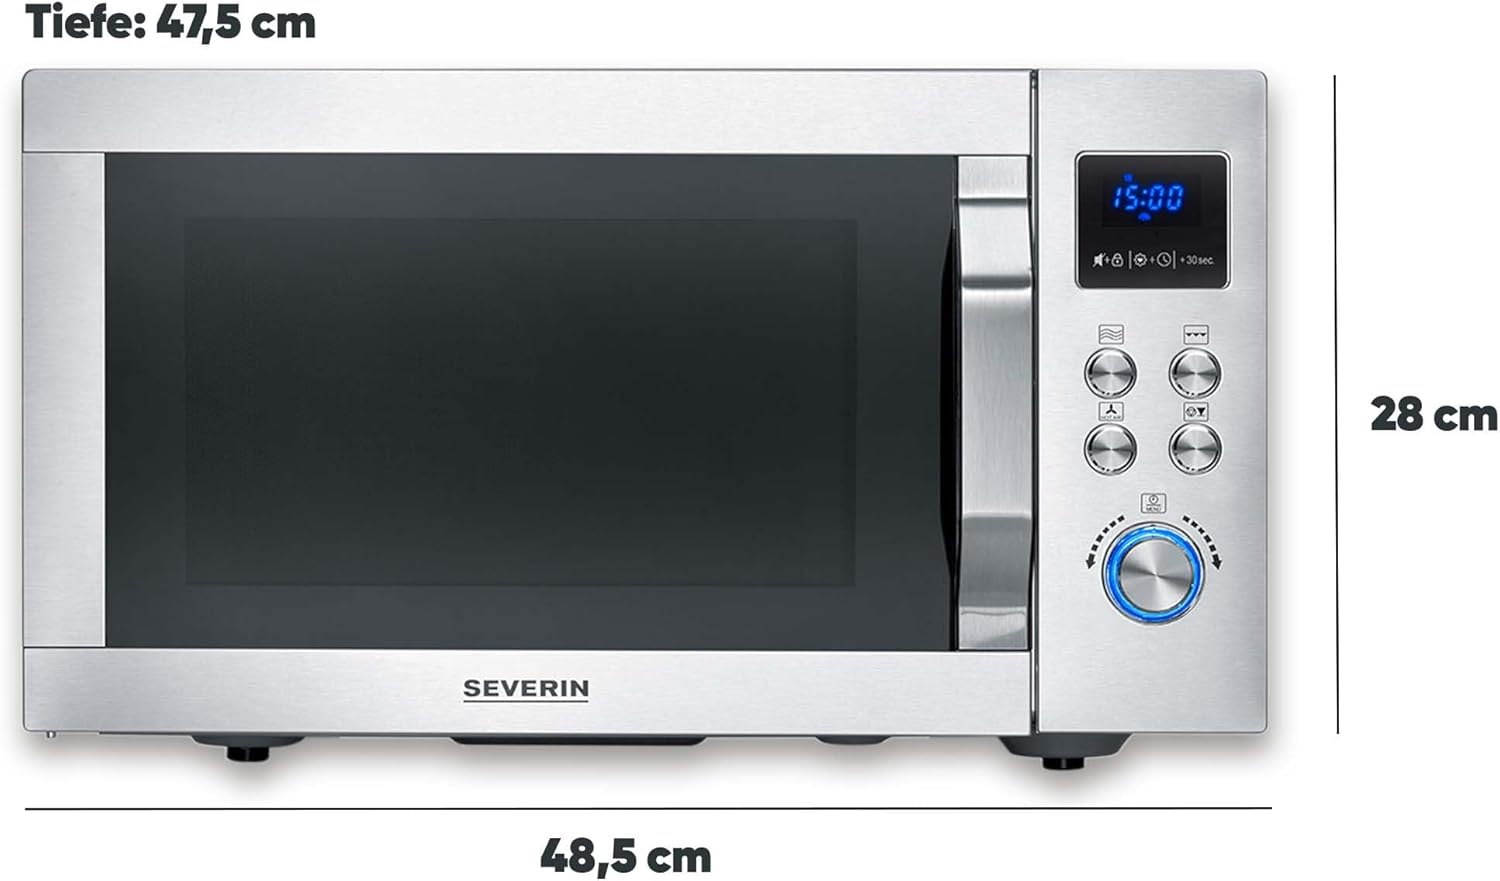
Figure 8.1: The overall dimensions of the SEVERIN MW 7982 microwave oven, showing a width of 48.5 cm, depth of 47.5 cm, and height of 28 cm.
| Feature | Specification |
|---|---|
| Model Number | MW 7982 |
| Brand | Severin |
| Capacity | 25 Liters |
| Microwave Power | 900 Watts |
| Total Power (Max) | 2150 Watts |
| Voltage | 220 Volts |
| Dimensions (L x W x H) | 48.5 x 47.5 x 28 cm |
| Weight | 16.3 Kilograms |
| Material | Stainless Steel |
| Installation Type | Freestanding |
| Special Features | Digital Control, 10 Power Levels, 10 Automatic Programs, Memory Function, Child Safety Lock, 'Be-Silent' Function |
| Cooking Modes | Microwave, Grill, Hot Air Fryer |
9. Warranty and Support
Your SEVERIN MW 7982 microwave oven comes with a 2-year warranty, reflecting the brand's commitment to quality and durability. This warranty covers manufacturing defects and ensures performance under normal domestic use.
For technical support, spare parts, or warranty claims, please refer to the contact information provided with your purchase documentation or visit the official Severin website.


