
1. Introduction
This manual provides essential information for the installation, operation, and maintenance of the SupHomie Dryer Heating Element Kit. This kit is designed as a replacement part for various Whirlpool and Maytag dryer models, restoring proper heating function to your appliance.
1.1 Kit Contents
The SupHomie Dryer Heating Element Kit includes the following components:
- 1 x Dryer Heating Element
- 1 x 279973 Dryer Thermostat Fuse Kit
- 1 x 3392519 Thermal Fuse
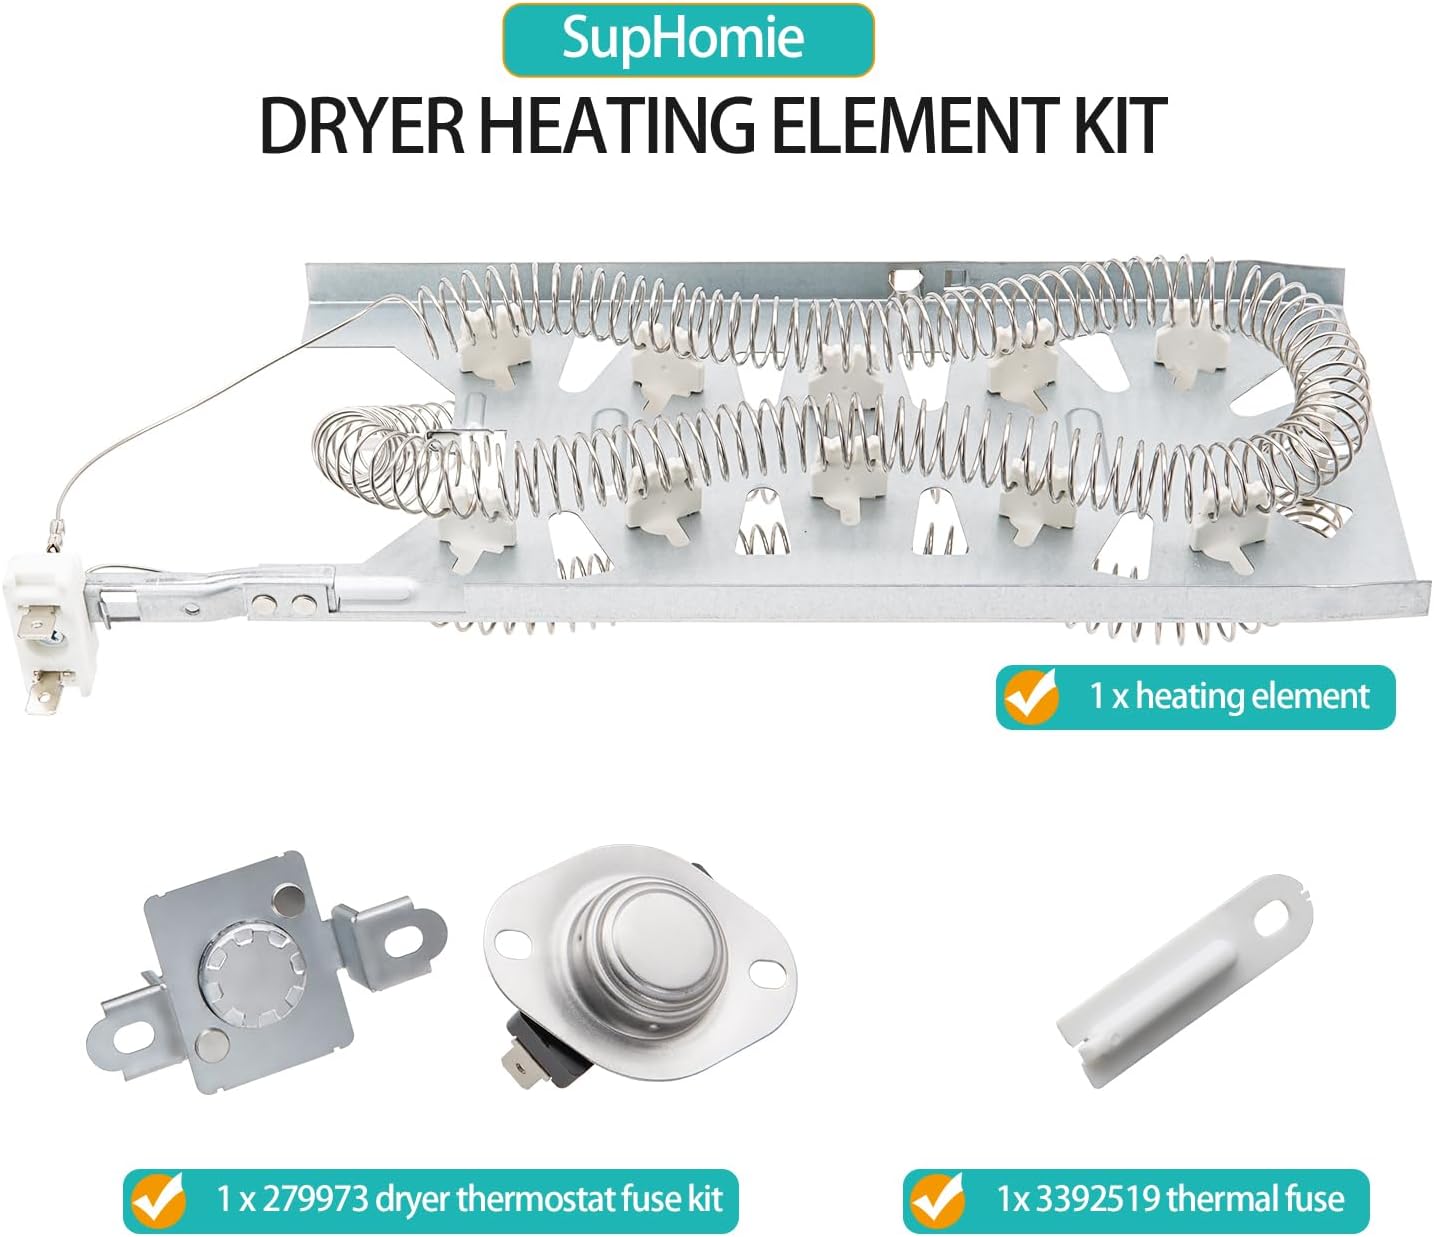
Image 1.1: The complete SupHomie Dryer Heating Element Kit, showing the heating element, 279973 dryer thermostat fuse kit, and 3392519 thermal fuse.
1.2 Compatible Models
This kit is compatible with a wide range of Whirlpool and Maytag dryer models. Please verify your dryer's model number against the list below to ensure compatibility. This kit replaces parts for models including, but not limited to:
- Whirlpool: WED5100HC0, WED5100HC1, WED5100HC2, WED5100HC3, WED5100HW0, WED5100HW1, WED5100HW2, WED5100HW3, WED5500BW0, WED5500XL0, WED5500XW0, WED5500XW1, WED5550XW0, WED5600XW0, WED5600XW1, WED5605MC0, WED5605MW0, WED560LHW0, WED560LHW1, WED560LHW2, WED5610XW0, WED5610XW1, WED5620HW0, WED5620HW1, WED5620HW2, WED5700AC0, WED5700AC1, WED5700XL0, WED5700XW0, WED5800BC0, WED5800BW0, WED5810BW0, WED6120HC0, WED6120HC1, WED6120HC2, WED6120HC3, WED6120HW0, WED6120HW1, WED6120HW2, WED6120HW3, WED6605MC0, WED6605MW0, WED6620HC0, WED6620HC1, WED6620HC2, WED6620HW0, WED6620HW1, WED6620HW2, WED7120HC0, WED7120HC1, WED7120HC2, WED7120HC3, WED7120HW0, WED7120HW1, WED7120HW2, WED7120HW3, WED7500GW0, WED7500GC0, WED7540FW1, WED7590FW1, WED75HEFW1, WED8120HC0, WED8120HW0, WED8127LC0, WED8127LC1, WED8127LW0, WED8127LW1, WED8300SB2, WED8300SE2, WED8300SW2, WED8410SW2, WED8540FW1, WED8540FW2, WED85HEFC1, WED85HEFW2, WED8500DC4, WED8500DR4, WED8500DW4, WED85HEFW1, WED85HEFC2, WED8620HC0, WED8620HC1, WED8620HC2, WED8620HW0, WED8620HW1, WED8620HW2, WED9050XW0, WED90HEFC1, WED90HEFC2, WED90HEFW1, WED90HEFW2, WED9150WW0, WED9250WL0, WED9250WR0, WED9250WW0, WED9270XL0, WED9270XR0, WED9270XW0, WED92HEFBD1, WED92HEFBD2, WED92HEFC1, WED92HEFC2, WED92HEFU1, WED92HEFU2, WED92HEFW1, WED92HEFW2, WED9620HBK0, WED9620HBK1, WED9620HBK2, WED9620HC0, WED9620HC1, WED9620HC2, WED9620HW0, WED9620HW1, WED9620HW2
- Maytag: MED3500FW1, MED5500FC1, MED5500FC2, MED5500FW1, MED5500FW2, MED5630HC0, MED5630HC1, MED5630HC2, MED5630HW0, MED5630HW1, MED5630HW2, MED5630MBK0, MED5801TW0, MED6230HC0, MED6230HC1, MED6230HC2, MED6230HC3, MED6230HW0, MED6230HW1, MED6230HW2, MED6230HW3, MED6230RHW0, MED6230RHW1, MED6230RHW2, MED6230RHW3, MED6630HC0, MED6630HC1, MED6630HC2, MED6630HW0, MED6630HW1, MED6630HW2, MED6630MBK0, MED7230HC0, MED7230HC1, MED7230HC2, MED7230HC3, MED7230HW0, MED7230HW1, MED7230HW2, MED7230HW3, MED8200FC1, MED8200FC2, MED8200FW1, MED8200FW2, MED8230HC0, MED8630HC0, MED8630HC1, MED8630HC2, MED8630HW0, MED8630HW1, MED8630HW2, MED9600SQ0, MED9700SB0, MED9700SQ0, MED9800TK0, MED9800TQ0, MEDC700VJ0, MEDC700VW0, MEDE200XW0, MEDE250XL0, MEDP576KW0, MEDP576KW1, MEDP575GW0, MEDP585GW0, MEDP586KW0, MEDX500XL0, MEDX500XW0, MEDX500XW1, MEDX550XW0, MEDX5SPAW0, MEDX5SPAW1, MEDX600XW0, MEDX600XW1, MEDX700AG0, MEDX700AG1, MEDX700XL0, MEDX700XL1, MEDX700XW0, MEDX700XW1, MEDZ400TQ2, MEDZ600TB2, MEDZ600TE2, MEDZ600TK2, MEDZ600TW2, MEDZ600WR0, MEDP475EW0, MEDB765FW0, MEDB765FC0, MEDB835DW4, MEDB855DC4, MEDB855DW4, MEDB835DC4
2. Safety Information
WARNING: Before attempting any repair or installation, always disconnect the dryer from its power source. Failure to do so can result in electric shock, injury, or death. If you are unsure about any step, consult a qualified technician.
- Always wear appropriate personal protective equipment, such as gloves and safety glasses.
- Ensure the work area is well-lit and clear of obstructions.
- Keep children and pets away from the work area.
- Handle components carefully to avoid damage or injury.
- Properly dispose of old parts according to local regulations.
3. Installation Guide
This section provides a general guide for replacing the dryer heating element kit. Specific disassembly and reassembly steps may vary by dryer model. It is highly recommended to consult your dryer's specific service manual or a reputable online repair video for your exact model before proceeding.
3.1 Tools Required
- Screwdrivers (Phillips and Flathead)
- Nut drivers or socket set
- Pliers
- Multimeter (for testing components, optional but recommended)
3.2 Step-by-Step Installation
- Disconnect Power: Unplug the dryer from the electrical outlet or turn off the circuit breaker supplying power to the dryer.
- Access the Heating Element: Depending on your dryer model, you may need to remove the back panel, front panel, or top panel to access the heating element housing. This often involves removing several screws.
- Locate and Disconnect Old Components: Identify the existing heating element, thermostat, and thermal fuse. Carefully disconnect all wires attached to these components. Take photos if necessary to remember wire placement.
- Remove Old Heating Element Assembly: Unscrew or unclip the old heating element assembly from its housing. Gently pull it out.
- Install New Heating Element: Insert the new SupHomie heating element into the housing, ensuring it seats correctly. Secure it with screws or clips.
- Install New Thermostat and Thermal Fuse: Replace the old thermostat and thermal fuse with the new ones from the kit. These are typically mounted on the heating element housing or nearby.
- Reconnect Wiring: Reattach all wires to the new components, referring to your photos or the dryer's wiring diagram. Ensure all connections are secure.
- Reassemble Dryer: Carefully reassemble the dryer panels, ensuring all screws are tightened and no wires are pinched.
- Restore Power and Test: Plug the dryer back into the electrical outlet or turn on the circuit breaker. Run a short cycle with no load to confirm the dryer heats properly.

Image 3.1: Close-up of the 279973 Dryer Thermostat Fuse Kit and 3392519 Thermal Fuse, critical components for temperature regulation and safety.
4. Operating Instructions
After successful installation of the heating element kit, your dryer should resume normal operation, providing heat for drying clothes. Refer to your dryer's original user manual for specific operating instructions, cycle selections, and care recommendations.
Ensure the dryer vent is clear and unobstructed for efficient and safe operation.
5. Maintenance
Regular maintenance helps ensure the longevity and efficiency of your dryer and its components.
- Clean Lint Filter: Clean the lint filter before or after every load to maintain airflow and prevent lint buildup, which can be a fire hazard and reduce drying efficiency.
- Inspect Venting System: Periodically inspect and clean the dryer's exhaust vent system (from the dryer to the outside) to remove lint accumulation. A clogged vent can cause the dryer to overheat and reduce the lifespan of the heating element and other components.
- Check for Airflow: Ensure there is adequate space around the dryer for proper airflow.
6. Troubleshooting
This section addresses common issues that may indicate a problem with the heating system, which this kit is designed to resolve.
| Problem | Possible Cause | Solution |
|---|---|---|
| Dryer does not heat | Faulty heating element, blown thermal fuse, or tripped thermostat. | The SupHomie kit provides replacements for these components. Follow installation steps to replace. |
| Dryer will not start | Blown thermal fuse (can prevent dryer from starting if it's part of the control circuit). | Replace the thermal fuse from the kit. Also check door switch and power supply. |
| Dryer shuts off too soon / Overheating | Faulty operating thermostat, restricted airflow (clogged vent), or blown thermal fuse. | Replace the thermostat and thermal fuse. Clean the lint filter and dryer vent thoroughly. |
| Dryer runs but does not tumble | This issue is typically not related to the heating element kit. | Check the drive belt, motor, or idler pulley. |

Image 6.1: The heating element is designed to address common dryer issues such as not starting, not shutting off, not tumbling, or shutting off too soon, often caused by heating system failures.
7. Specifications
| Feature | Detail |
|---|---|
| Manufacturer | SupHomie |
| Part Number | WED7500GC0, WED7500GW0, WED75HEFW1 (representative models) |
| Item Weight | 1.2 pounds |
| Product Dimensions | 13 x 6 x 2 inches |
| Heating Element Rating | 5400 Watts, 240 Volts |
| Heating Element Material | Nickel-Chromium (80% content) |
| Included Components | 1 x Dryer Heating Element, 1 x 279973 Thermal Fuse & Thermostat, 1 x 3392519 Dryer Thermal Fuse |

Image 7.1: Detailed view of the heating element, highlighting its 5400 Watts, 240 Volts rating, and 80% Nickel-Chromium content.

Image 7.2: Diagram illustrating the dimensions of the heating element, approximately 13.2 inches in length and 5.2 inches in width.
8. Warranty and Support
8.1 Warranty Information
This product comes with a 1-year warranty. For any questions or issues regarding the product, please contact the manufacturer or seller directly.
8.2 Customer Support
For further assistance, please contact SupHomie customer support. We are committed to resolving any problems you may encounter with our product.