1. Product Overview
This user manual provides instructions for the Aroepurt protective case and tempered glass screen protector designed for the Easyphone Value XL 6" mobile phone. The case offers robust protection with a combination of hard PC and soft silicone, featuring a unique reflective light design and an integrated ring support. The included tempered glass screen protector ensures comprehensive screen defense.

Figure 1: Aroepurt Easyphone Value XL 6" Phone Case and Tempered Glass Screen Protector.
2. Features
- Dual-Layer Protection: Constructed with a hard PC back panel and a soft silicone frame for comprehensive impact absorption.
- Shock Airbags: Four-corner shock airbags provide enhanced drop protection.
- Screen and Camera Protection: Case design is elevated above the camera and screen to prevent direct contact with flat surfaces.
- Integrated Ring Support: Adhesive metal finger ring support for secure grip, one-hand operation, and use as a kickstand.
- Magnetic Car Mount Compatibility: The ring support is compatible with magnetic car mounts (mount not included).
- Colorful Reflect Light Design: Frosted surface with an ultra-high definition pattern layer and special process layer that reflects light differently from various angles.
- Tempered Glass Screen Protector: 9H high hardness, shatterproof, 99.9% super transparency, perfect adhesion, case friendly, and anti-fingerprint properties.
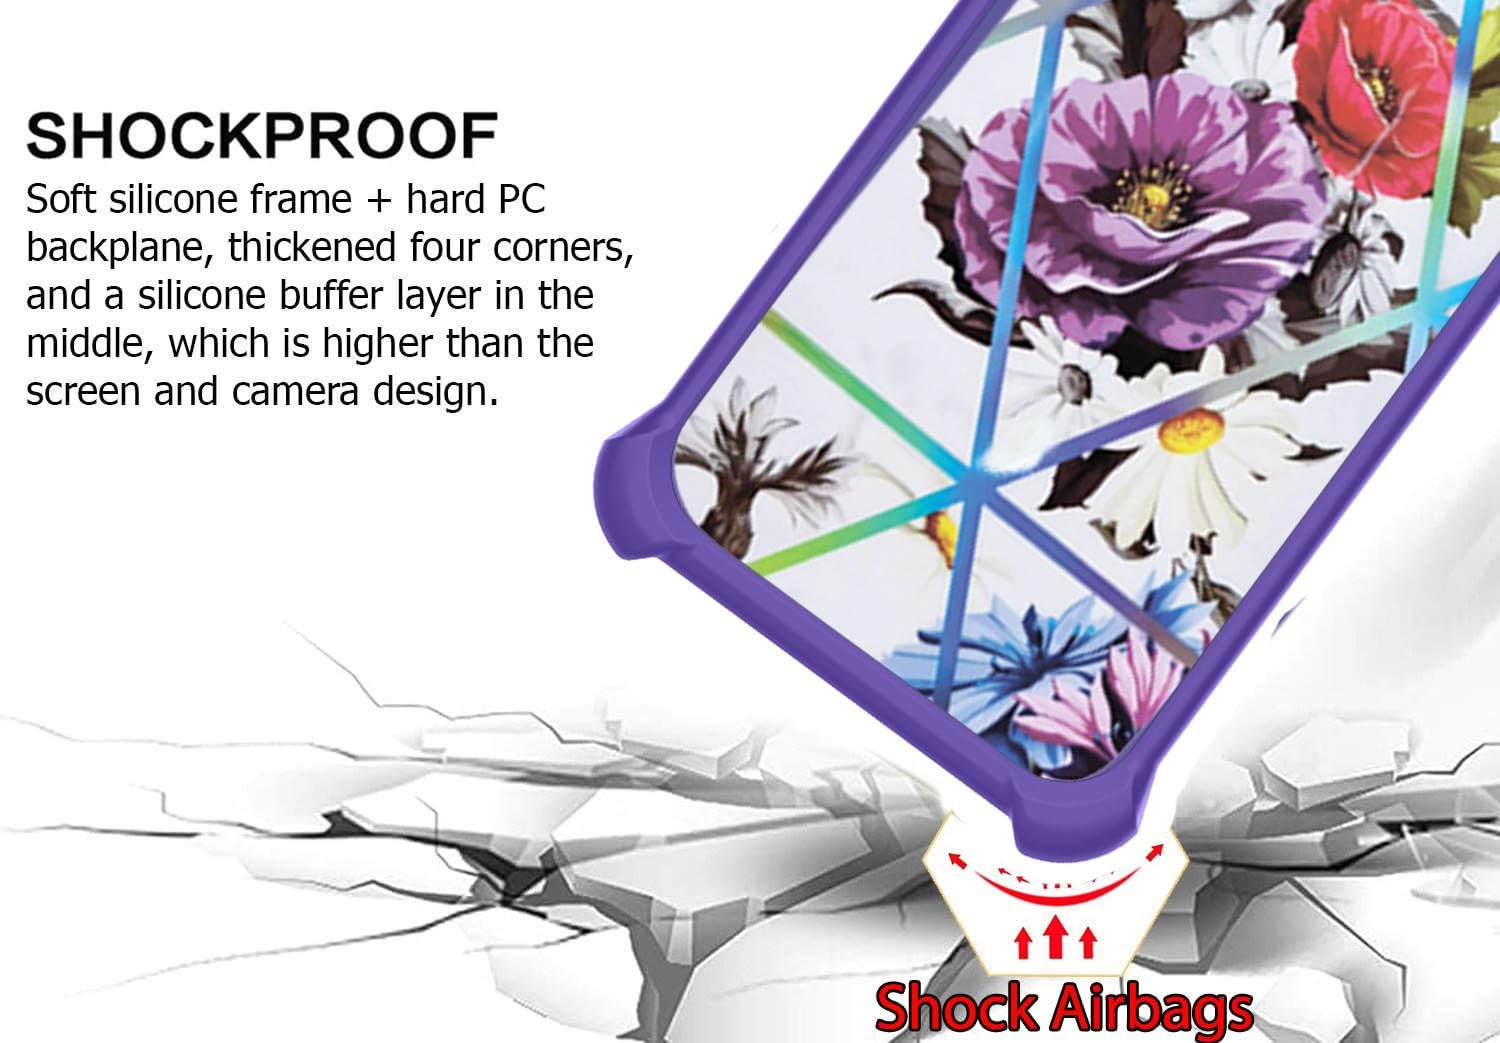
Figure 2: Illustration of Shock Airbags for enhanced protection.

Figure 3: Exploded view of the IMD laser style back panel layers.

Figure 4: Key features of the included Tempered Glass Screen Protector.
3. What's in the Box
- 1 x Aroepurt Phone Case (IMDZ-HUA2)
- 1 x Tempered Glass Screen Protector
4. Setup and Installation
4.1 Installing the Phone Case
- Ensure your Easyphone Value XL 6" is clean and free of dust or debris.
- Align the phone with the case, starting with the top or bottom edge.
- Gently press the phone into the case, ensuring all corners and edges are securely fitted.
- Verify that all ports, buttons, and camera cutouts align correctly with the phone.
4.2 Installing the Tempered Glass Screen Protector
For optimal adhesion and clarity, perform installation in a dust-free environment.
- Clean the Screen: Use an alcohol wipe (not included) to thoroughly clean your phone's screen. Follow with a microfiber cloth to remove any smudges or lint.
- Remove Dust: Use a dust-absorber sticker (not included) to pick up any remaining dust particles from the screen.
- Align the Protector: Carefully peel off the protective film from the adhesive side of the tempered glass. Align the screen protector with your phone's screen, paying attention to the speaker, camera, and home button cutouts.
- Apply: Once aligned, gently lower the screen protector onto the screen. The adhesive will begin to spread automatically.
- Remove Bubbles: If any bubbles appear, gently push them towards the edges of the screen using a clean, soft cloth or a squeegee (not included). Small bubbles may disappear within 24-48 hours.

Figure 5: Tempered glass screen protector demonstrating scratch resistance.
4.3 Attaching the Ring Support
The adhesive metal finger ring support can be attached to the case or used separately.
- Clean the desired attachment area on the back of the phone case.
- Peel off the protective film from the adhesive side of the ring support.
- Firmly press the ring support onto the case for at least 30 seconds. Allow 24 hours for the adhesive to fully cure before heavy use.
5. Operating Instructions
5.1 Using the Ring Support
- Secure Grip: Slide your finger through the ring for a more secure hold, reducing the risk of accidental drops.
- Kickstand Function: Rotate the ring 180 degrees to use it as a kickstand for hands-free viewing in landscape or portrait mode.
- 360-Degree Rotation: The ring can rotate 360 degrees, allowing for comfortable viewing angles and grip positions.
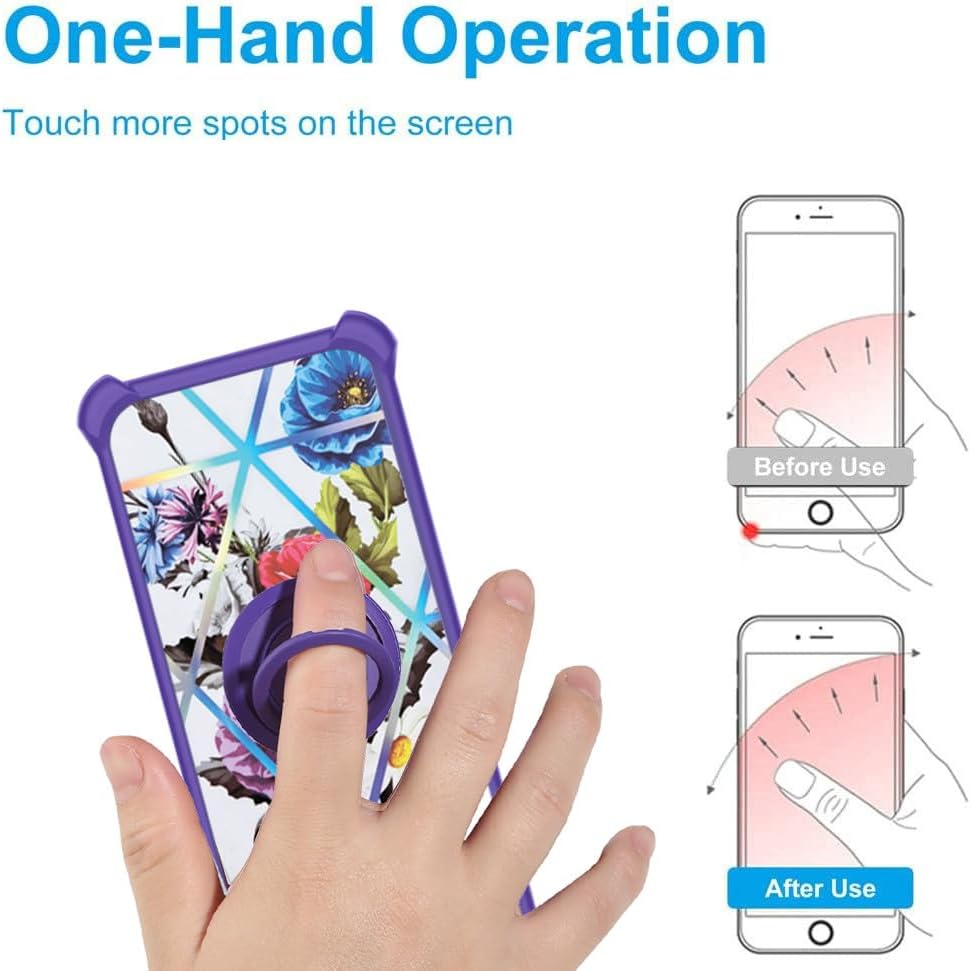
Figure 6: One-Hand Operation facilitated by the ring support.
5.2 Magnetic Car Mount Use
The metal plate within the ring support allows for easy attachment to magnetic car mounts. Simply place the back of the case onto a compatible magnetic car mount for secure navigation or hands-free calls.
Note: Magnetic car mount is not included. Wireless charging may be affected by the metal ring; removal of the case may be necessary for wireless charging.

Figure 7: Ring support compatibility with magnetic car mounts.
6. Maintenance
- Case Cleaning: Wipe the phone case regularly with a soft, damp cloth to remove dust and smudges. For tougher stains, use a mild soap solution and rinse thoroughly. Avoid harsh chemicals or abrasive cleaners.
- Screen Protector Cleaning: Clean the screen protector with a microfiber cloth. For fingerprints or smudges, a screen cleaner spray designed for electronics can be used.
- Avoid Extreme Temperatures: Do not expose the case or screen protector to extreme heat or cold, as this may affect their material integrity and performance.
- Inspect Regularly: Periodically inspect the case and screen protector for any signs of wear or damage. Replace if significant damage is observed to ensure continued protection.
7. Troubleshooting
- Screen Protector Bubbles: If bubbles persist after installation, try gently lifting the nearest edge of the protector and re-applying, pushing the bubble out with a soft cloth. Ensure the screen is completely dust-free before re-application.
- Ring Support Loosening: If the adhesive on the ring support begins to loosen, ensure the surface is clean and dry. Re-apply pressure for an extended period, or consider using a stronger adhesive if necessary (not recommended for direct phone application).
- Case Fit Issues: Ensure your phone model is specifically the Easyphone Value XL 6". A mismatch in model size can lead to an improper fit.
8. Specifications
| Feature | Detail |
|---|---|
| Compatible Phone Models | Easyphone Value XL 6" Easy To Use Mobile |
| Material | PC hard back panel + soft silicone frame + metal support finger ring |
| Color | IMDZ-HUA2 |
| Special Features | 360 Rotating Ring, Car Magnetic Fixing, Finger ring + support + car bracket magnetic suction |
| Item Weight | 2.46 ounces |
| Product Dimensions | 0.39 x 0.39 x 0.39 inches |
| Included Components | 1*Phone Case, 1*Tempered Glass Screen Protector |
9. Warranty and Support
For information regarding warranty coverage or technical support, please refer to the product packaging or contact Aroepurt customer service directly through the retailer where the product was purchased. Keep your purchase receipt as proof of purchase.


