1. Important Safety Instructions
Please read all instructions carefully before using this appliance. Failure to follow these instructions may result in electric shock, fire, or serious injury.
- Always plug the heater directly into a wall outlet. Never use with an extension cord or relocatable power tap.
- Do not use the heater in bathrooms, laundry areas, or similar indoor locations where it may come into contact with water.
- Keep combustible materials, such as furniture, pillows, bedding, papers, clothes, and curtains at least 1 meter (3 feet) from the front of the heater and keep them away from the sides and rear.
- This heater is hot when in use. To avoid burns, do not let bare skin touch hot surfaces.
- Extreme caution is necessary when any heater is used by or near children or invalids and whenever the heater is left operating and unattended.
- Always unplug the heater when not in use.
- Do not operate any heater with a damaged cord or plug or after the heater malfunctions, has been dropped or damaged in any manner.
- Do not insert or allow foreign objects to enter any ventilation or exhaust opening as this may cause an electric shock or fire, or damage the heater.
- To prevent a possible fire, do not block air intakes or exhaust in any manner. Do not use on soft surfaces, like a bed, where openings may become blocked.
- This heater has an automatic tip-over switch and overheat protection. If the heater tips over or overheats, it will automatically shut off.
2. Product Overview
The alpina PTC-1903R is a bladeless ceramic heater and fan designed for efficient heating and cooling of indoor spaces. It features an LED display, touch controls, and a remote control for convenient operation.
2.1 Components
- Bladeless Air Outlet
- LED Display
- Control Panel (Touch Buttons)
- Power Cord
- Base with Tip-Over Switch
- Remote Control
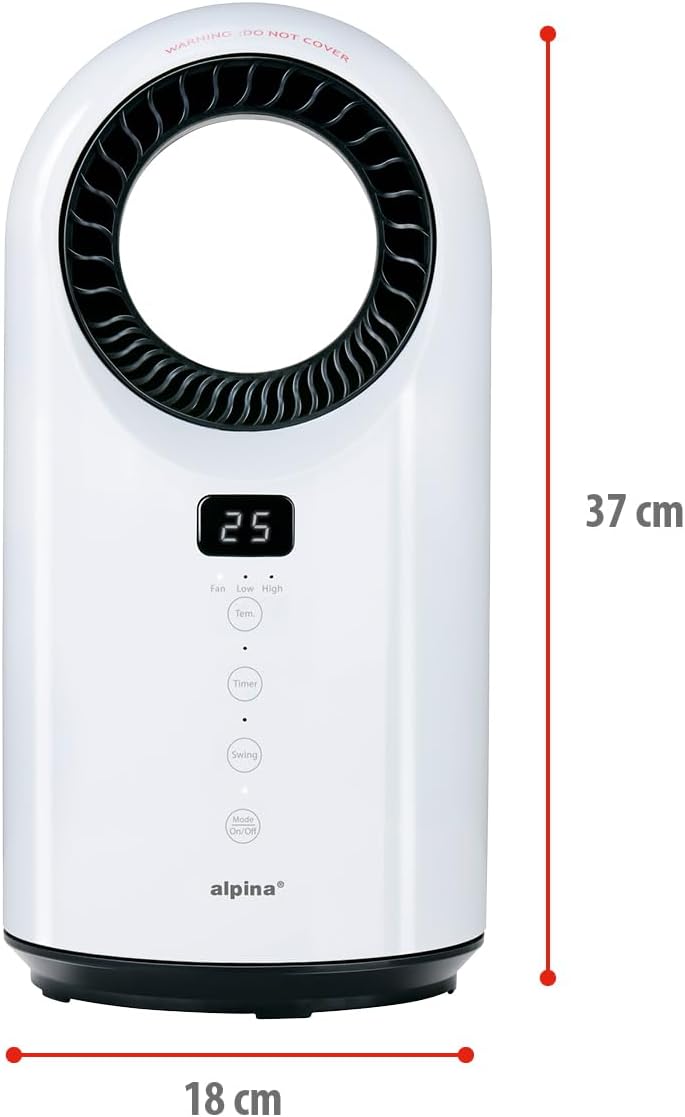
Figure 1: Front view of the alpina bladeless heater with LED display and control panel.

Figure 2: Overview of key features including indoor use, safety tip-over switch, two heating modes, 12-hour timer, oscillating function, and overheat protection.
2.2 Control Panel and Remote Control
The heater can be operated using the touch-sensitive control panel on the unit or the included remote control. The LED display shows the current temperature or timer setting.
- Mode/On/Off Button: Powers the unit on/off and cycles through fan/heating modes.
- Timer Button: Activates and adjusts the 12-hour timer.
- Swing Button: Toggles the oscillation function.
- Temp. Button: Adjusts the desired temperature.
- Fan Speed (Low/High): Adjusts fan speed in fan mode or heating intensity in heating mode.

Figure 3: Detailed view of the control panel with LED display and touch buttons for various functions.
3. Setup
- Unpacking: Carefully remove the heater from its packaging. Retain packaging for future storage or transport.
- Placement: Place the heater on a firm, level surface. Ensure there is at least 1 meter (3 feet) of clear space around the heater to allow for proper airflow and to prevent fire hazards. Do not place it on carpets with long piles.
- Power Connection: Plug the power cord into a standard 230V AC electrical outlet. Ensure the outlet is in good condition and not overloaded.
4. Operating Instructions
4.1 Power On/Off
Press the Mode/On/Off button on the control panel or remote control to turn the unit on. Press it again to turn the unit off.
4.2 Selecting Operating Mode (Heating/Fan)
After turning on the unit, press the Mode/On/Off button repeatedly to cycle through the available modes:
- Fan Mode: Provides cool air circulation.
- Low Heat Mode (1000W): Provides gentle heating.
- High Heat Mode (1500W): Provides maximum heating.

Figure 4: The heater offers both heating and ventilating functions with power output ranging from 1000W to 1500W.
4.3 Adjusting Temperature
In heating mode, press the Temp. button on the control panel or remote control to adjust the desired temperature. The LED display will show the set temperature.
4.4 Using the Timer Function
Press the Timer button to activate the 12-hour timer. Each press will increase the timer setting by one hour. The unit will automatically turn off after the set time has elapsed. The LED display will show the remaining time.
4.5 Activating Oscillation
Press the Swing button to activate the oscillation function. The heater will rotate from side to side, distributing air evenly across the room. Press the button again to stop oscillation.
5. Maintenance
Regular cleaning helps maintain the efficiency and lifespan of your heater.
- Before Cleaning: Always unplug the heater from the power outlet and allow it to cool down completely before cleaning.
- Exterior Cleaning: Wipe the exterior surfaces of the heater with a soft, damp cloth. Do not use abrasive cleaners or solvents, as these may damage the surface.
- Air Inlet/Outlet: Use a vacuum cleaner with a brush attachment to gently remove dust and debris from the air inlet and outlet grilles. Ensure these areas remain clear for optimal performance.
- Storage: When not in use, store the heater in a cool, dry place, preferably in its original packaging.
6. Troubleshooting
| Problem | Possible Cause | Solution |
|---|---|---|
| Heater does not turn on. |
|
|
| Heater produces no heat. |
|
|
| Oscillation not working. |
|
|
7. Specifications
| Feature | Detail |
|---|---|
| Model Number | PTC-1903R |
| Brand | alpina |
| Power Output | 1000W - 1500W |
| Type | Ceramic Fan Heater |
| Functions | Heating, Ventilation (Cooling) |
| Display | LED Screen / Touch Control |
| Safety Features | Automatic Shut-off (Tip-over), Overheat Protection |
| Dimensions (L x W x H) | 18 x 18 x 37 cm |
| Weight | 2.83 Kilograms |
| Voltage | 230 Volts (AC) |
| Special Features | Oscillating, 12-hour Timer, Remote Control |
| Intended Use | Indoor (Office, Home) |
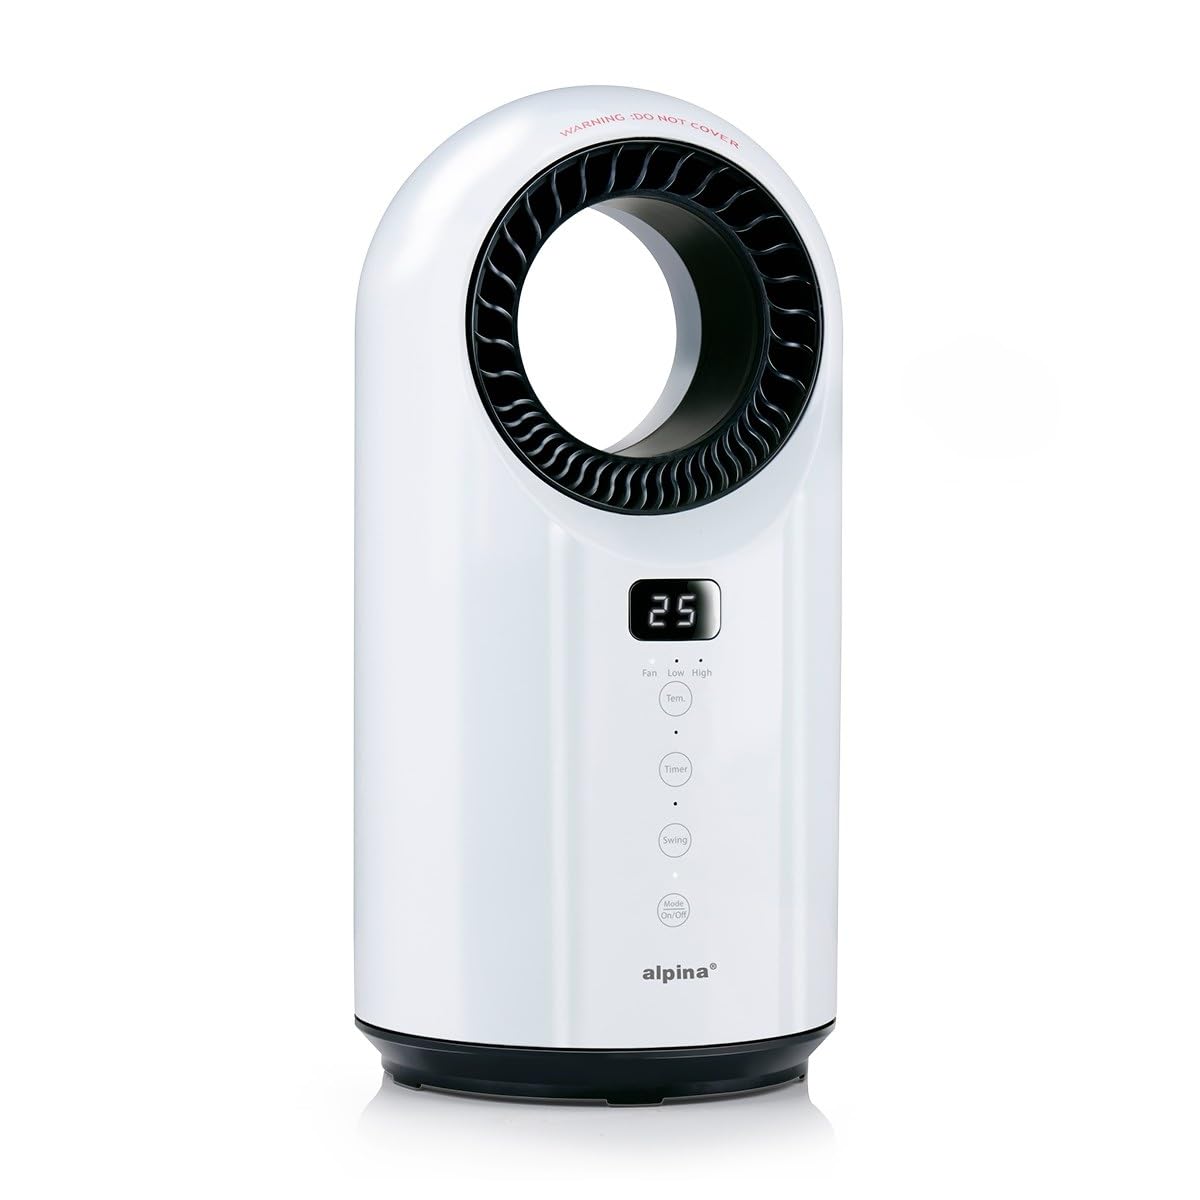
Figure 5: Product dimensions: 18 cm width and 37 cm height.

Figure 6: Bottom view illustrating the safety tip-over mechanism.
8. Warranty and Support
Specific warranty information is not provided in the product details. Please refer to the retailer's return policy or contact alpina customer support for warranty details and technical assistance.
For further support, please visit the official alpina website or contact your point of purchase.


