1. Introduction
This manual provides essential information for setting up, operating, and maintaining your Acer CB242Y G monitor. Please read this manual thoroughly before using the product to ensure proper functionality and safety.
The Acer CB242Y G is a 23.8-inch Full HD (1920 x 1080) IPS monitor designed for a clear and vibrant viewing experience. It features a frameless design, a high refresh rate of up to 120Hz via HDMI/DisplayPort, and 75Hz via VGA, with a rapid 1ms Visual Response Boost (VRB) or 4ms Gray-to-Gray (GTG) response time. The monitor also includes Adaptive Sync technology for smooth visuals and an adjustable stand for ergonomic comfort.
2. Safety Information
Observe the following safety precautions to prevent damage to the monitor and ensure personal safety:
- Place the monitor on a stable, level surface.
- Do not block ventilation openings.
- Use only the power adapter and cables provided by Acer.
- Keep the monitor away from water, moisture, and extreme temperatures.
- Do not attempt to service the monitor yourself. Refer all servicing to qualified personnel.
- Disconnect the power cable from the outlet before cleaning.
3. Package Contents
Verify that all items are present in your package:
- Acer CB242Y G Monitor
- Monitor Stand (Base and Neck)
- Power Cable
- HDMI Cable
- User Manual (this document)
4. Setup
4.1 Assembling the Monitor Stand
- Carefully remove the monitor and stand components from the packaging.
- Attach the stand neck to the monitor panel. Ensure it clicks securely into place or is fastened with screws if applicable (refer to specific model instructions for screw details).
- Attach the stand base to the stand neck. Tighten the thumb screw or screws at the bottom of the base to secure it.
- Place the assembled monitor on a stable, flat surface.
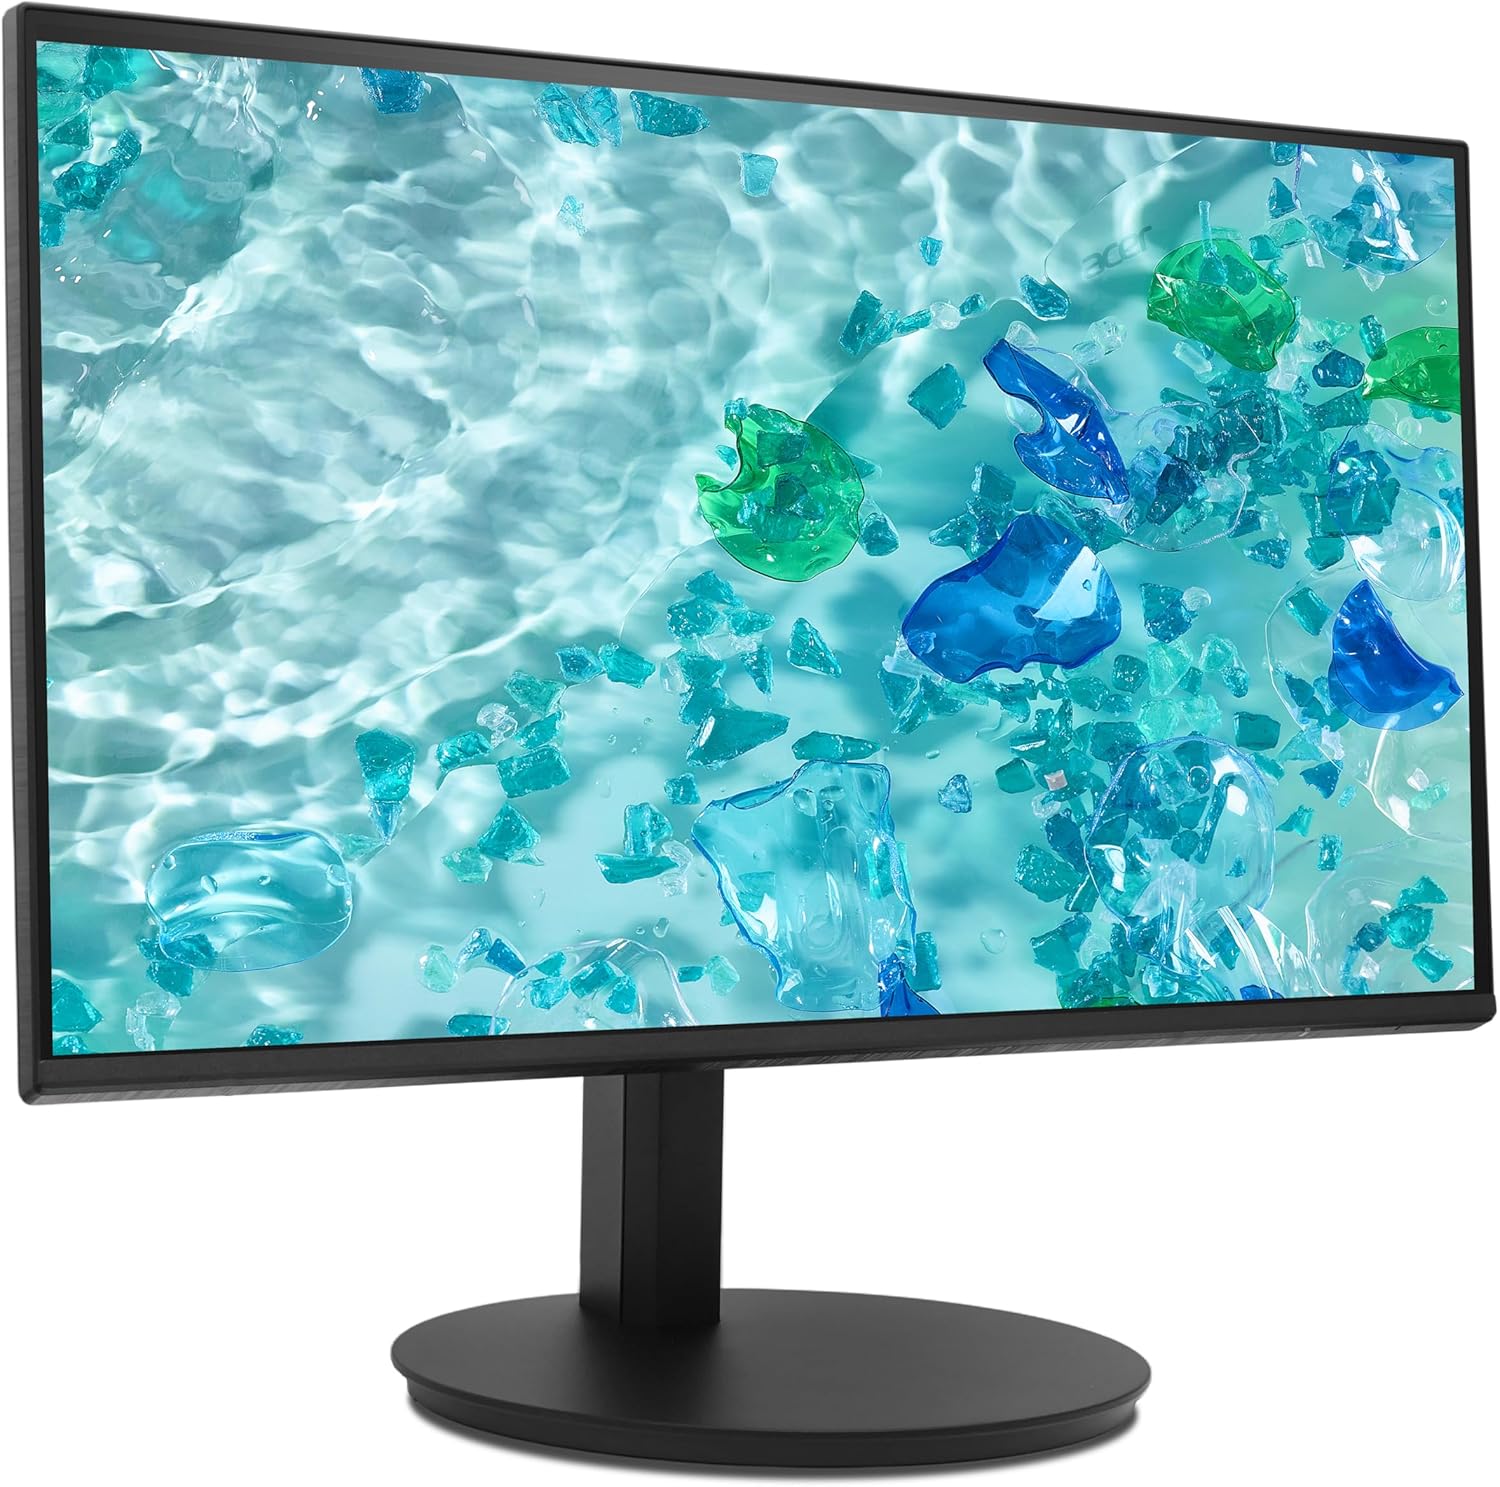
Figure 1: Assembled Acer CB242Y G Monitor. This image shows the monitor from an angled front perspective, highlighting its frameless design and the sturdy stand.
4.2 Connecting Cables
Connect the necessary cables to the monitor and your computer:
- Power Cable: Connect one end of the power cable to the monitor's power input and the other end to a power outlet.
- Video Cable:
- HDMI: Connect the provided HDMI cable from your computer's HDMI output to the monitor's HDMI input.
- VGA: If using VGA, connect a VGA cable from your computer's VGA output to the monitor's VGA input.
- DisplayPort (DP): If using DisplayPort, connect a DisplayPort cable from your computer's DP output to the monitor's DP input. (Note: DP cable not included, but supported by monitor).

Figure 2: Rear view of the monitor. This image displays the back of the monitor, clearly showing the various input ports including HDMI and VGA, and the power input.
4.3 VESA Wall Mounting
The monitor supports VESA 100 x 100 mm mounting. To mount the monitor on a wall or an alternative stand:
- Remove the stand neck from the monitor panel.
- Attach the VESA-compatible wall mount or arm to the four screw holes on the back of the monitor.
- Ensure the mounting screws are of appropriate length and type to avoid damaging internal components.
5. Operating Instructions
5.1 Powering On/Off
Press the power button located on the monitor to turn it on or off. The power indicator light will illuminate when the monitor is on.
5.2 On-Screen Display (OSD) Menu
The OSD menu allows you to adjust various monitor settings. Use the control buttons (usually located on the back or bottom right of the monitor) to navigate the menu.
- Press a control button to activate the OSD menu.
- Use the navigation buttons (up/down/left/right) to move through menu options.
- Press the select button to enter a sub-menu or confirm a selection.
- Press the exit button to go back or close the OSD menu.
5.3 Adjusting Display Settings
Key settings you can adjust via the OSD menu include:
- Brightness/Contrast: Adjust the overall luminance and difference between light and dark areas.
- Color Settings: Modify color temperature, gamma, and individual RGB levels.
- Input Source: Manually select between HDMI, VGA, or DisplayPort inputs.
- Refresh Rate: The monitor automatically detects the optimal refresh rate. Ensure your graphics card settings are configured correctly to utilize the maximum 120Hz (HDMI/DP) or 75Hz (VGA).
- Adaptive Sync: Enable or disable Adaptive Sync to synchronize the monitor's refresh rate with your graphics card's frame rate, reducing screen tearing and stuttering. This feature is a VESA open standard.
- Blue Light Filter: Activate this feature to reduce blue light emissions, which can help reduce eye strain during prolonged use.
5.4 Ergonomic Adjustments
The monitor stand allows for various ergonomic adjustments:
- Height Adjustment: Raise or lower the monitor to achieve an optimal viewing height.
- Tilt: Adjust the screen's vertical angle (forward/backward) for comfortable viewing.
- Swivel: Rotate the monitor horizontally on its base.
- Pivot: Rotate the screen 90 degrees to switch between landscape and portrait orientation.

Figure 3: Side view of the monitor. This image illustrates the monitor's profile, demonstrating its slim design and the range of motion for height and tilt adjustments.
6. Maintenance
To ensure the longevity and optimal performance of your monitor, follow these maintenance guidelines:
- Cleaning the Screen: Gently wipe the screen with a soft, lint-free cloth. For stubborn marks, dampen the cloth slightly with water or a non-abrasive screen cleaner. Do not spray cleaner directly onto the screen.
- Cleaning the Casing: Use a soft, dry cloth to wipe the monitor casing. Avoid using strong detergents or abrasive cleaners.
- Ventilation: Ensure the ventilation openings on the monitor are not obstructed to prevent overheating.
- Power Off: Always turn off the monitor and unplug it from the power outlet before cleaning or if it will be unused for an extended period.
7. Troubleshooting
If you encounter issues with your monitor, refer to the following common problems and solutions:
| Problem | Possible Solution |
|---|---|
| No image on screen |
|
| Image is blurry or distorted |
|
| Screen tearing or stuttering |
|
| Monitor not detected by computer |
|
8. Specifications
| Model Name | CB242Y G |
| Screen Size | 23.8 inches (60 cm) |
| Panel Type | IPS with LED backlight |
| Resolution | 1920 x 1080 (Full HD) |
| Aspect Ratio | 16:9 |
| Refresh Rate | 120 Hz (HDMI/DP), 75 Hz (VGA) |
| Response Time | 1 ms (VRB), 4 ms (GTG) |
| Contrast Ratio | 2000:1 |
| Surface Treatment | Matte |
| Connectivity | HDMI 1.4, VGA, DisplayPort |
| Special Features | Adaptive Sync, Blue Light Filter, Height Adjustment, Pivot, Swivel, Tilt |
| VESA Mount Compatibility | 100 x 100 mm |
| Power Consumption (SDR) | 9.0 W |
| Energy Efficiency Class (SDR) | B |

Figure 4: Energy label for the Acer CB242Y G monitor, showing its energy efficiency class B and power consumption of 9 kWh/1000h.
For detailed product information, refer to the EPREL product database.
9. Warranty and Support
Acer provides comprehensive support for its products. For the Acer CB242Y G monitor, the following support terms apply:
- Minimum Guaranteed Product Support: 7 years
- Minimum Availability of Spare Parts: 7 years
- Software and Firmware Updates: Minimum 8 years
For technical assistance, warranty claims, or further inquiries, please visit the official Acer support website or contact your local Acer service center. Contact information can typically be found on the Acer website or in your product's packaging.