Introduction
Welcome to the user manual for your Truper PRO ROTI-20A3 Cordless 1/2" 20V Brushless Hammer Drill. This manual provides essential information for the safe and efficient operation, maintenance, and troubleshooting of your tool. Please read it thoroughly before first use and keep it for future reference.
Important Safety Instructions
Always follow basic safety precautions to reduce the risk of fire, electric shock, and personal injury.
- Read all instructions carefully before operating the tool.
- Wear appropriate personal protective equipment (PPE) such as safety glasses, hearing protection, and gloves.
- Keep the work area clean and well-lit to prevent accidents.
- Do not operate power tools in explosive atmospheres, such as in the presence of flammable liquids, gases, or dust.
- Ensure the battery is fully charged before use for optimal performance.
- Disconnect the battery pack from the tool before making any adjustments, changing accessories, or storing the tool.
- Use only Truper recommended accessories and attachments.
- Do not expose power tools to rain or wet conditions.
- Store idle tools out of reach of children and untrained persons.
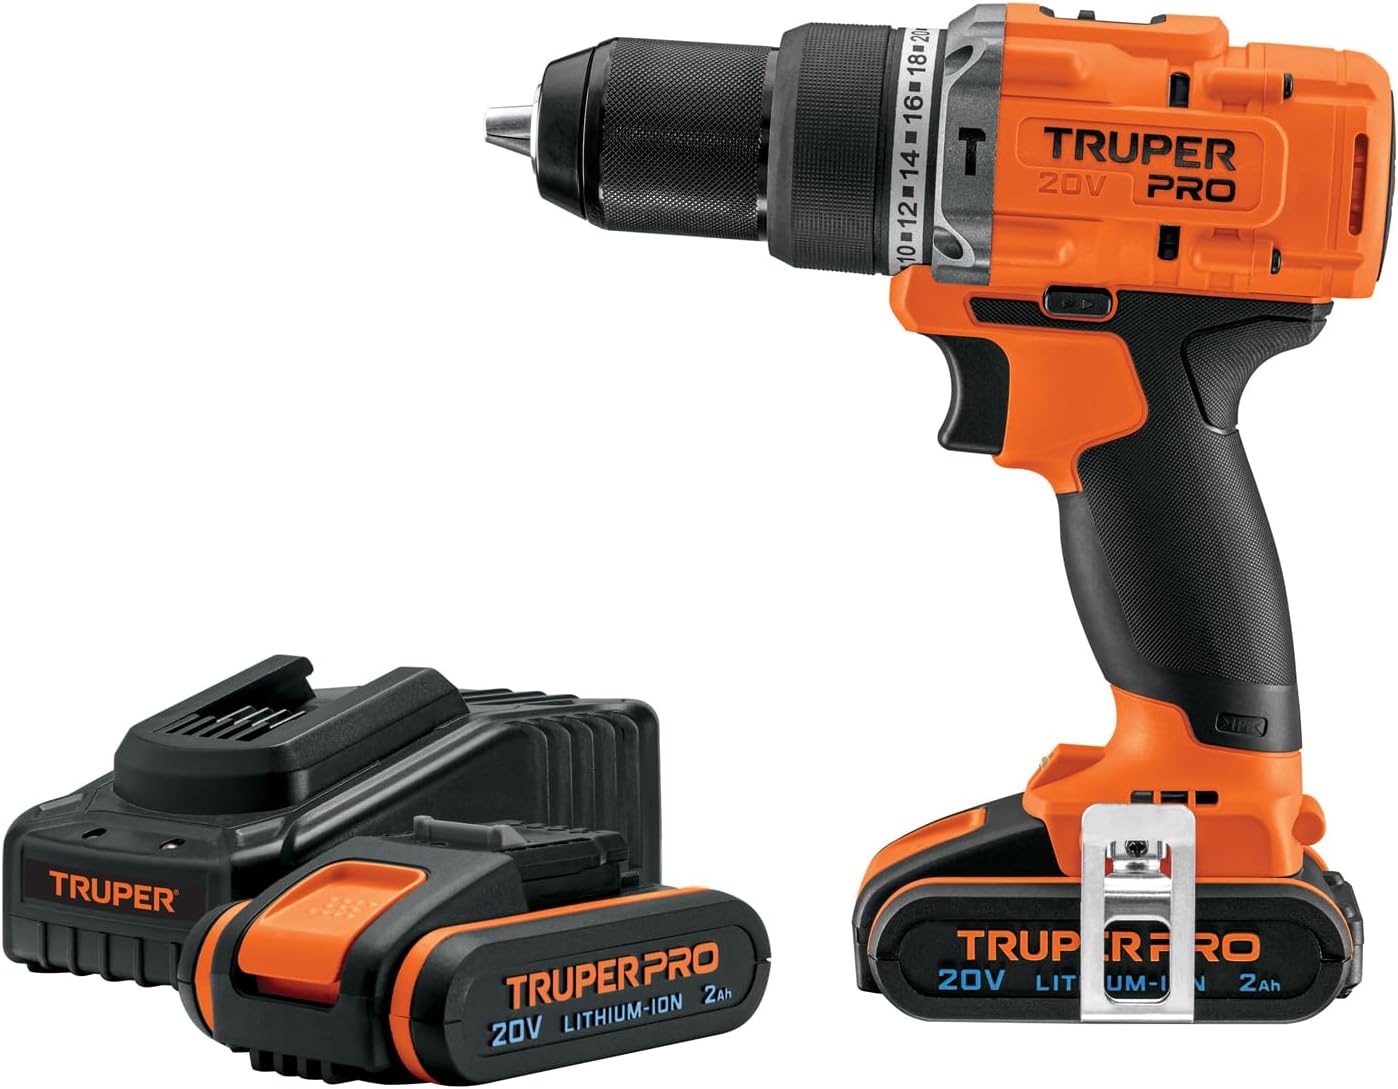
Components and Features
Familiarize yourself with the parts of your Truper PRO ROTI-20A3 hammer drill.

- 1/2" Metal Chuck: Keyless chuck for quick and secure bit changes.
- Torque and Function Selector: Adjusts torque settings (1-22) and switches between drilling, hammer drilling, and screwdriving modes.
- Anti-slip Grip: Ergonomically designed handle for comfortable and secure handling during operation.
- LED Light: Illuminates the work area for improved visibility in dimly lit conditions.
- Trigger Switch: Controls the tool's speed and power; variable speed for precise control.
- Direction Button: Changes the rotation direction (forward/reverse) and serves as a trigger lock when centered.
- Belt Clip: For convenient carrying and quick access to the tool.
- Battery Level Indicator: Displays the remaining battery charge, allowing you to monitor power levels.
- Brushless Motor: Provides increased efficiency, longer runtime, and extended tool life without the need for carbon brush maintenance.
Setup
1. Battery Charging
The Truper PRO ROTI-20A3 comes with two 2Ah Lithium-Ion batteries and a charger.
- Connect the charger to a standard power outlet.
- Slide the battery pack onto the charger until it clicks into place.
- The charger indicator light will show the charging status. Refer to the charger's specific instructions for light indications.
- Once fully charged, remove the battery from the charger.
2. Battery Installation
- Align the battery pack with the base of the tool.
- Slide the battery into the tool until it locks securely.
- To remove, press the battery release button and slide the battery out.
3. Bit Installation
- Ensure the tool is off and the battery is removed for safety.
- Twist the chuck counter-clockwise to open the jaws.
- Insert the drill bit or screwdriver bit into the chuck.
- Twist the chuck clockwise to tighten the jaws securely around the bit.
- Pull on the bit to ensure it is firmly seated before operation.
Operation
1. Selecting Mode and Torque
Rotate the torque and function selector ring to choose the desired mode:
- Screwdriving Mode: Use the numbered torque settings (1-22) for driving screws. Lower numbers are for smaller screws or softer materials; higher numbers are for larger screws or harder materials.
- Drilling Mode: Select the drill icon for general drilling in wood or metal.
- Hammer Drilling Mode: Select the hammer icon for drilling into masonry or concrete.
2. Speed Selection
The tool features a double gear system with two mechanical speeds:
- Speed 1 (Low): Provides high torque for applications like driving screws or drilling large holes.
- Speed 2 (High): Offers faster drilling speeds for softer materials.
Use the speed selector switch located on top of the tool to change between speeds.
3. Starting and Stopping
- Press the trigger switch to start the tool. The LED light will illuminate the work area.
- The speed is variable; apply more pressure to the trigger for higher speeds.
- Release the trigger switch to stop the tool.
4. Direction of Rotation
Use the forward/reverse button near the trigger to select the rotation direction.
- Forward: For drilling and driving screws.
- Reverse: For removing screws or backing out drill bits.
Center the button to lock the trigger and prevent accidental starting.
Maintenance
- Cleaning: Regularly clean the ventilation openings of the tool to prevent overheating. Use a soft, damp cloth. Do not use solvents or abrasive cleaners.
- Chuck Maintenance: Keep the chuck jaws clean and free of debris for optimal bit gripping.
- Battery Care: Store batteries in a cool, dry place. Do not store fully discharged batteries for extended periods to prolong their lifespan.
- Storage: Store the tool and accessories in a dry, secure location, out of reach of children.
- Brushless Motor: The brushless motor design eliminates the need for carbon brush replacement, significantly reducing maintenance requirements.
Troubleshooting
| Problem | Possible Cause | Solution |
|---|---|---|
| Tool does not start | Battery not charged or not properly installed. Trigger lock engaged. | Charge battery. Ensure battery is fully seated. Disengage trigger lock. |
| Reduced power or speed | Low battery charge. Incorrect speed setting. | Recharge battery. Select appropriate speed (Speed 2 for higher speed). |
| Bit slips in chuck | Chuck not tightened sufficiently. Dirty chuck jaws. | Retighten chuck firmly. Clean chuck jaws to remove debris. |
| Overheating | Prolonged heavy use. Blocked ventilation openings. | Allow tool to cool down. Clear any obstructions from ventilation openings. |
Technical Specifications
| Feature | Specification |
|---|---|
| Model | ROTI-20A3 (103246) |
| Brand | TRUPER |
| Voltage | 20 V |
| Chuck Size | 1/2" (13 mm) |
| Motor Type | Brushless |
| Torque | 18 Newton-Meter |
| Battery Type | Lithium-Ion |
| Battery Capacity | 2 Ah |
| Included Components | 2 x 2Ah Li-ion batteries, Charger, Belt clip, Double-ended bit (flat and Phillips) |
| Dimensions | 21.6 x 20.4 x 12.5 cm |
| Weight | 2.56 kg |
Warranty and Support
For warranty information and customer support, please refer to the documentation included with your product or visit the official Truper website.
This product is covered by a manufacturer's warranty. Keep your proof of purchase for any warranty claims.
For technical assistance or spare parts, contact Truper customer service.
Product Overview