Introduction
This manual provides comprehensive instructions for the setup, operation, and maintenance of your Irfora Trail Camera. Please read this manual thoroughly before using the camera to ensure optimal performance and longevity. This camera is designed for capturing wildlife images and videos with features like night vision, motion detection, and waterproof construction.
Product Features
- High Resolution: 24MP images and 2.7K video for detailed captures.
- Advanced Night Vision: 36 IR LEDs provide clear visibility up to 20 meters (65 feet) in low light or darkness.
- Ample Storage: Supports SD cards up to 256GB (not included) for extended recording periods.
- Long Battery Life: Designed for extended operation with 8xAA batteries.
- Durable Design: IP66 waterproof rating ensures reliable performance in various weather conditions.
- Fast Trigger Speed: Captures motion quickly with a 0.3-second trigger speed.
- Wide Detection Angle: PIR motion sensor with a 120° detection angle.
Package Contents
Upon opening the package, please verify that all items are present and in good condition:
- 1x Irfora Trail Camera
- 1x Instruction Manual
- (Additional accessories such as mounting strap, USB cable, etc., may be included depending on the specific package variant.)
Product Overview
Familiarize yourself with the main components of your trail camera:
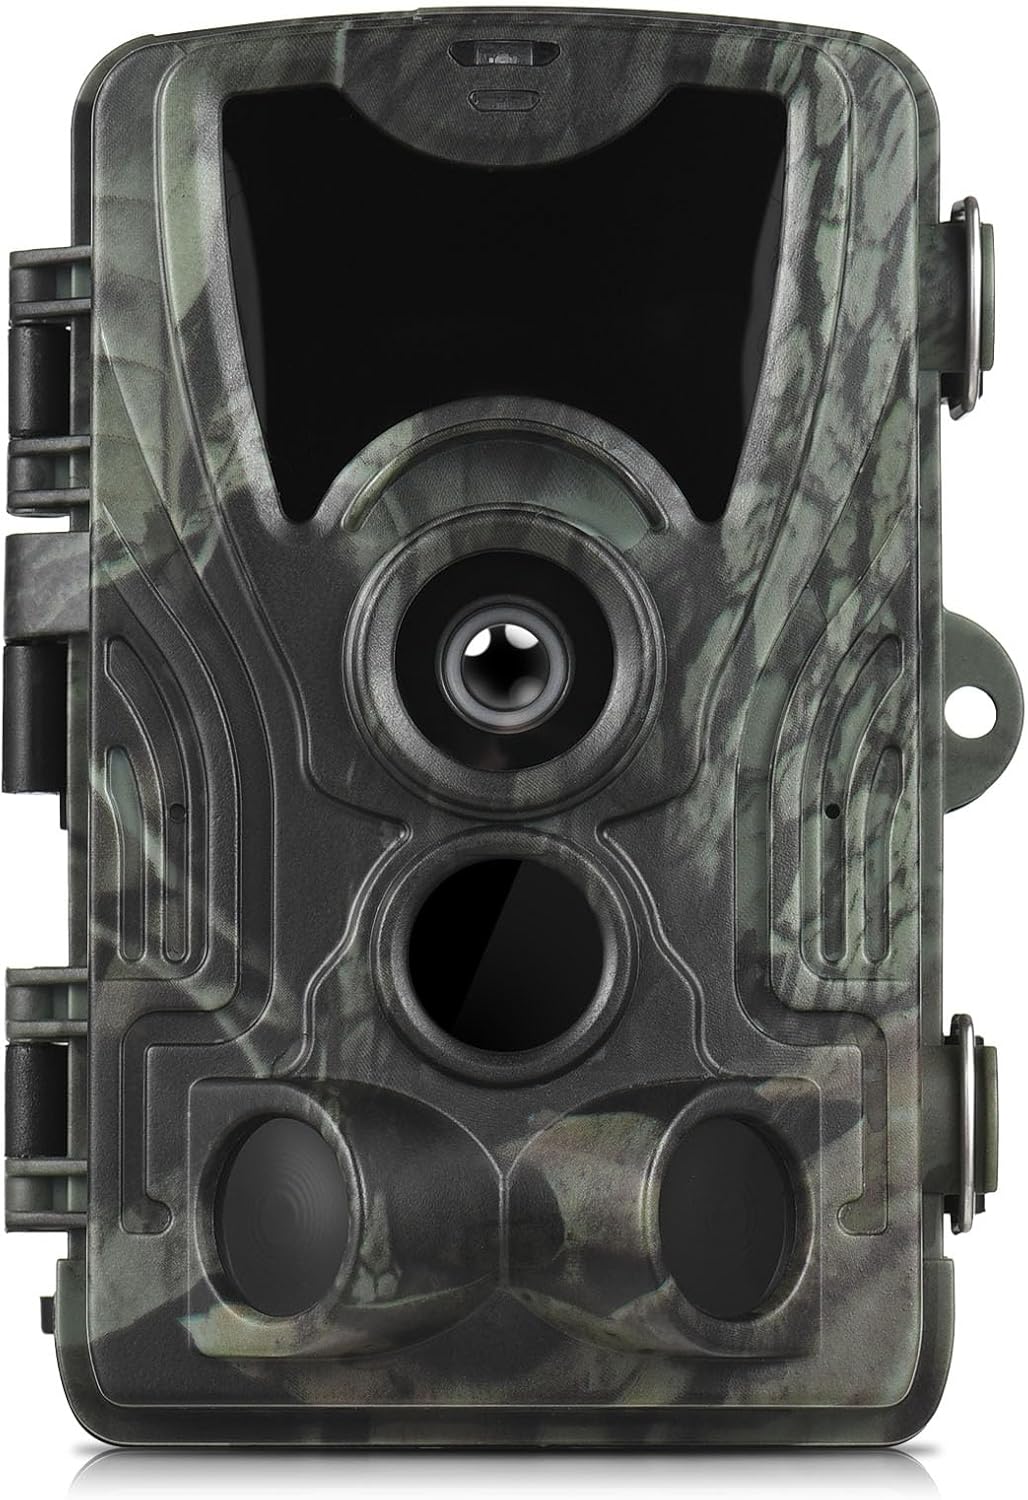
Image: Front view of the Irfora Trail Camera, showing the main lens, PIR sensor, and IR LEDs. The camera features a camouflage pattern.
- Main Lens: Captures images and videos.
- PIR Motion Sensor: Detects movement within its field of view.
- Infrared (IR) LEDs: Provide illumination for night vision without visible light.
- Display Screen: (Located inside when opened) For menu navigation and viewing captures.
- Battery Compartment: (Located inside) Holds AA batteries.
- SD Card Slot: (Located inside) For memory card insertion.
- Mounting Points: For securing the camera to a tree or post.
Setup
1. Battery Installation
The camera operates on 8xAA batteries. A 5000mAh lithium battery pack may also be used (if purchased separately).
- Open the camera's latch and swing open the front cover.
- Locate the battery compartment.
- Insert 8xAA batteries, ensuring correct polarity (+/-) as indicated inside the compartment.
- If using a lithium battery pack, connect it to the designated port.
- Close the battery compartment cover securely.
2. SD Card Installation
A Class 10 or higher SD card (up to 256GB) is required for storing photos and videos. The SD card is not included.
- With the camera open, locate the SD card slot.
- Insert the SD card with the metal contacts facing down until it clicks into place.
- To remove, push the card in again until it springs out.
3. Mounting the Camera
Choose a suitable location for your trail camera, such as a tree or post, ensuring a clear view of the area you wish to monitor.
- Use the provided mounting strap to secure the camera. Thread the strap through the slots on the back of the camera.
- Alternatively, use a tripod or other mounting accessories with the threaded insert at the bottom of the camera.
- Position the camera at an appropriate height (typically 3-6 feet off the ground) and angle to capture the desired area.
Operating Instructions
1. Powering On/Off and Mode Selection
The camera typically has a 3-position switch: OFF, SETUP, and ON.
- OFF: Powers the camera down.
- SETUP: Allows access to the menu for configuring settings and viewing captured files. The display screen will activate.
- ON: Activates the camera for automatic recording based on motion detection. The display screen will turn off after a few seconds, and the camera will enter monitoring mode.
2. Menu Settings (SETUP Mode)
In SETUP mode, use the navigation buttons (usually UP, DOWN, LEFT, RIGHT, OK/MENU) to adjust camera parameters.
Key settings include:
- Mode: Select Photo, Video, or Photo+Video.
- Photo Resolution: Set image quality (e.g., 24MP, 20MP, 16MP).
- Video Resolution: Set video quality (e.g., 2.7K, 1080P, 720P).
- PIR Sensitivity: Adjust motion sensor sensitivity (Low, Medium, High) to prevent false triggers.
- IR Flash: Control infrared LED behavior (e.g., Auto, On, Off).
- Trigger Interval: Set the delay between consecutive captures after a trigger event.
- Time Lapse: Configure the camera to take photos at set intervals regardless of motion.
- Date & Time: Set the current date and time for accurate timestamps on captures.
- Format SD Card: Erase all data on the SD card. Caution: This will delete all files.
3. Viewing Files
In SETUP mode, navigate to the playback option to view captured photos and videos directly on the camera's display. You can also remove the SD card and insert it into a computer or card reader to view files.
Maintenance
- Cleaning: Use a soft, dry cloth to clean the camera lens and PIR sensor. Avoid abrasive materials or harsh chemicals.
- Battery Replacement: Replace all batteries simultaneously when the low battery indicator appears. Do not mix old and new batteries or different battery types.
- SD Card Management: Regularly check the SD card for available space. Format the SD card periodically to maintain optimal performance.
- Storage: When not in use for extended periods, remove batteries and the SD card, and store the camera in a cool, dry place.
Troubleshooting
| Problem | Possible Cause / Solution |
|---|---|
| Camera does not power on. | Check battery polarity. Ensure batteries are fully charged or replaced. Verify battery compartment is closed securely. |
| No photos/videos captured. | Ensure SD card is inserted correctly and not full. Check camera mode (ON). Adjust PIR sensitivity. Verify date/time settings. |
| Poor image/video quality. | Clean the camera lens. Check resolution settings. Ensure sufficient light for daytime captures or proper IR function at night. |
| False triggers or too many blank captures. | Reduce PIR sensitivity. Avoid placing the camera near heat sources or moving branches. |
| Night vision not working. | Ensure IR LEDs are not obstructed. Check IR Flash setting in menu. |
Specifications
| Feature | Detail |
|---|---|
| Image Sensor | 5MP Color CMOS |
| Photo Resolution | Up to 24MP |
| Video Resolution | Up to 2.7K |
| Lens | F=3.1, FOV=90° |
| Memory | SD Card up to 256GB (not included) |
| PIR Detection Angle | 120° |
| PIR Detection Distance | 20m / 65ft |
| Night Vision Distance | 20m / 65ft (36 IR LEDs) |
| Trigger Speed | 0.3s |
| Waterproof Rating | IP66 |
| Battery Type | 8xAA or 4xAA, Lithium Battery 5000mAh (optional) |
| Dimensions | 13.5 x 9 x 7.6cm / 5.3 x 3.5 x 3in |
| Weight | 300g / 0.66lb |
| Model Number | LAKUSY292493-5LI |
| Manufacturer | Irfora |
Warranty and Support
This product comes with a standard manufacturer's warranty. For specific warranty details, please refer to the documentation included with your purchase or contact Irfora customer support. If you encounter any issues or have questions not covered in this manual, please reach out to the retailer or manufacturer for assistance.