Introduction
The ScopeAround Digital Otoscope with IPS Screen (Model SASA160) is designed for clear, real-time visual inspection of the ear canal. This device allows users to perform ear checks instantly without the need for external connections like phones or apps. It is equipped with a high-resolution camera and integrated lighting to provide detailed views, making it suitable for personal and family ear care, including monitoring ear wax and general ear health.

Image: The ScopeAround Digital Otoscope, showing the main unit with its integrated screen, detachable lens with extension cable, various ear picks, specula, alcohol pads, Q-tips, and USB cable.
Key Features
- Built-In IPS Screen: Features a clear IPS display for instant viewing without requiring a phone or app connection. Simply power on and view real-time images.
- High-Resolution Camera: The 720p HD camera and integrated IPS screen provide sharp, true-to-life images, allowing clear visualization of fine details within the ear canal without glare or distortion.
- Slim 3.9mm Lens with LED Lights: Designed for comfort and safety, the slim lens is gentle for all ages. Six LED lights with three brightness levels ensure optimal illumination for clear viewing.
- Flexible Detachable Lens and Extension Cable: The lens can be detached and connected to an extended cable, offering flexibility for self-inspection or assisting others comfortably.
- Photo and Video Capture: Capture clear photos and videos of the ear canal. Files are saved on the included 8GB memory card, useful for tracking progress or sharing with healthcare professionals.
- User-Friendly Design: Ergonomic grip and intuitive controls make the device easy to handle for both professionals and home users.

Image: Diagram highlighting the integrated screen for easy and efficient ear examinations, providing a clear and detailed view of the ear canal.
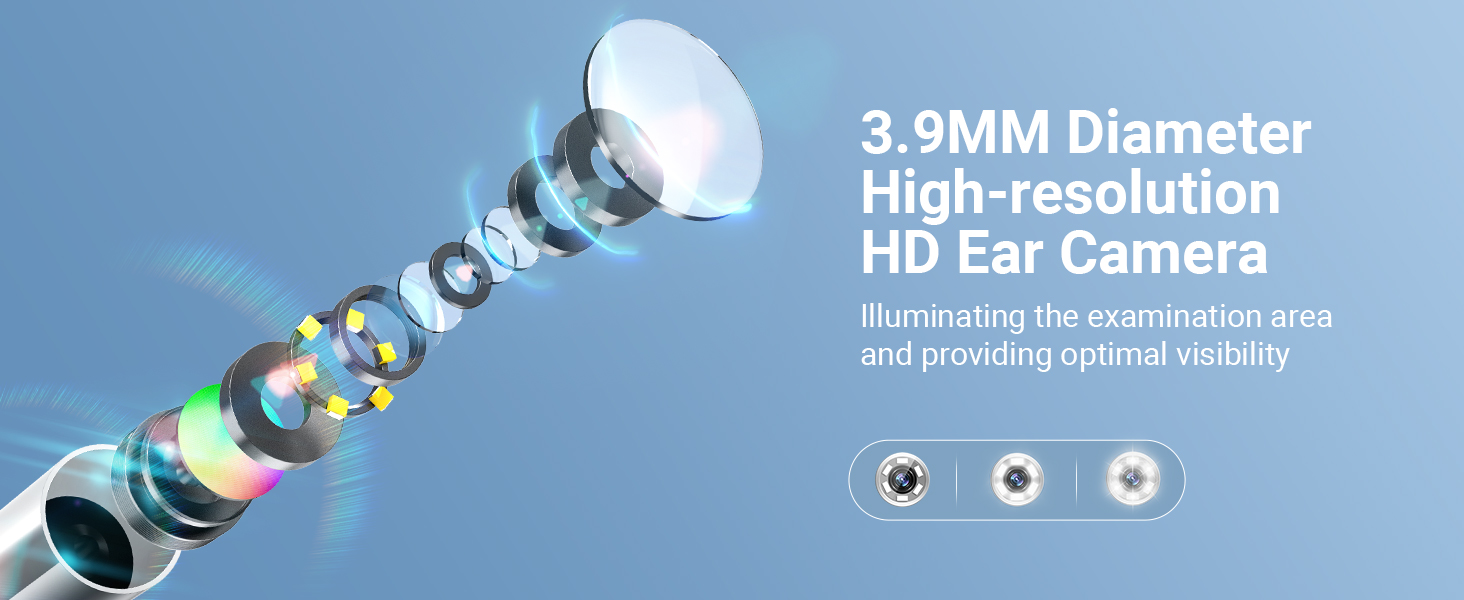
Image: Illustration of the 3.9mm diameter high-resolution HD ear camera, showing how it illuminates the examination area and provides optimal visibility.
What's in the Box
- SA160 Digital Otoscope (Main Unit)
- Ear Picks x 4
- Specula x 5
- Alcohol Pads x 4
- 1 Pack of Q-tips
- Extension Cable
- USB Charging Cable
- 8GB Memory Card (pre-installed or included separately)

Image: A visual representation of all items included in the product package, such as the otoscope, various ear picks, specula, alcohol pads, Q-tips, extension cable, USB cable, and user manual.
Setup
- Charge the Device: Before first use, fully charge the otoscope using the provided USB charging cable. The charging port is located on the device.
- Insert Memory Card: Ensure the 8GB memory card is properly inserted into the designated slot on the otoscope. This is necessary for saving photos and videos.
- Attach Lens/Extension Cable:
- For direct use, attach the lens probe directly to the main unit.
- For self-examination or extended reach, connect the lens probe to the extension USB cable, then connect the extension cable to the main unit. Ensure connections are secure.
- Attach Specula/Ear Picks: Select an appropriate speculum or ear pick and attach it to the tip of the lens probe. Ensure it is securely fitted to prevent accidental detachment during use.
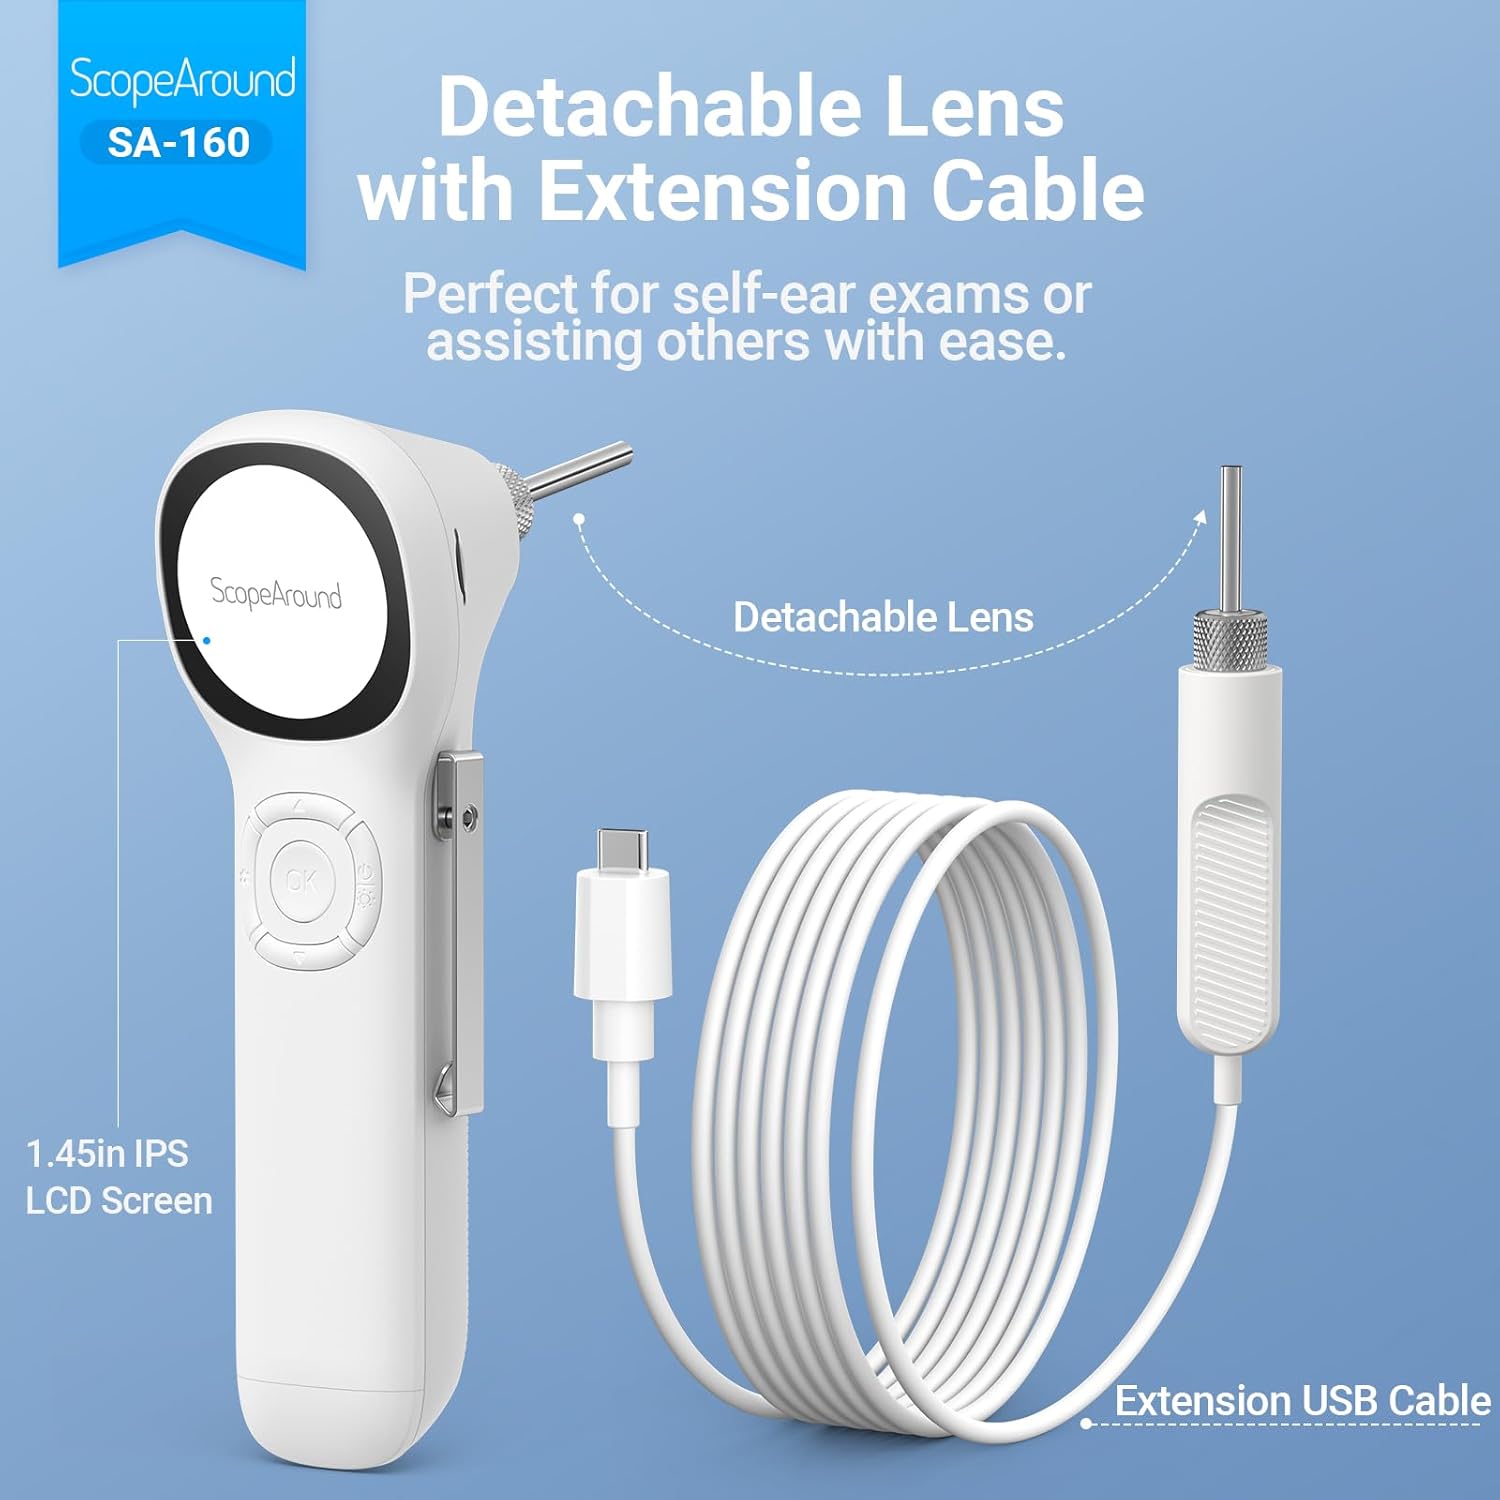
Image: The detachable lens and extension USB cable, illustrating how they connect to the main unit for flexible use, perfect for self-ear exams or assisting others.

Image: A detailed diagram labeling the various components and controls of the ScopeAround Smart Otoscope, including the 1.45-inch screen, settings button, OK button, Up/Down buttons, power button, lens module, capture button, reset, and Type-C port.
Operation
- Power On: Press and hold the Power Button to turn on the device. The IPS screen will activate, displaying the live view from the camera.
- Adjust Brightness: Use the dedicated button (often integrated with the power button or a separate control) to cycle through the three brightness levels of the LED lights for optimal visibility.
- Perform Examination: Gently insert the speculum-covered lens into the ear canal. Observe the live feed on the IPS screen. Move the otoscope slowly and carefully to get a comprehensive view.
- Capture Photos/Videos:
- Press the Capture Button to take a still photo.
- Press and hold the Capture Button to start recording a video. Press again to stop recording.
- Files are automatically saved to the 8GB memory card.
- Adjust Magnification/Rotation: If available, use the controls to adjust magnification (e.g., 1.0x, 1.3x, 1.5x) for more detailed views or rotate the image 180 degrees for flexible positioning.
- Review Media: Access saved photos and videos through the device's menu. You can transfer these files to a computer via the Type-C interface for larger screen viewing and health documentation.
- Power Off: Press and hold the Power Button to turn off the device after use.

Image: Demonstrates the two primary uses: self-ear checks using the extension cable and assisting others with direct use of the otoscope.

Image: Illustrates the adjustable magnification (1.0x, 1.3x, 1.5x) for detailed views and the 180-degree image rotation feature for flexible positioning during examinations.

Image: Shows a user transferring files from the otoscope to a laptop via the Type-C interface, emphasizing the ease of sharing ear health documentation with professionals.
Maintenance
- Cleaning the Lens and Specula:
- After each use, especially when used on different individuals, clean the lens and specula thoroughly.
- Use the provided alcohol pads or a soft cloth dampened with isopropyl alcohol to wipe the lens and the exterior of the specula.
- Ensure the lens is free of debris or earwax before storage.
- Cleaning the Main Unit: Wipe the main unit with a soft, dry cloth. Avoid using abrasive cleaners or submerging the device in water.
- Storage: Store the otoscope and its accessories in a clean, dry place, away from direct sunlight and extreme temperatures. Keep all small parts, especially ear picks and specula, organized in their case to prevent loss.
- Battery Care: To prolong battery life, avoid fully discharging the device frequently. Charge the device regularly, even if not in constant use.

Image: Illustrates safe and dangerous methods of ear cleaning, emphasizing the importance of proper technique to avoid ear canal injury and cross-infection.

Image: Close-up of the removable and soft silicone ear pick, highlighting its design for protection and convenience during ear wax removal.
Troubleshooting
| Problem | Possible Cause | Solution |
|---|---|---|
| Device does not power on. | Low battery; device malfunction. | Charge the device fully. If issue persists, contact customer support. |
| Image is blurry or unclear. | Dirty lens; incorrect focal distance; insufficient lighting. | Clean the lens with an alcohol pad. Adjust the distance from the ear canal. Increase LED brightness. |
| Cannot save photos/videos. | Memory card full or not inserted correctly; card error. | Check if the 8GB memory card is properly inserted. Delete old files to free up space or format the card (backup important data first). |
| Device freezes or is unresponsive. | Software glitch. | Perform a soft reset (refer to user manual for specific reset instructions, usually a small reset button). |
Specifications
- Model Name: Otoscope SA160
- Item Model Number: SASA160
- Brand: ScopeAround
- Color: White
- Material: Plastic
- Package Dimensions: 8.19 x 4.41 x 2.4 inches
- Item Weight: 9.6 ounces
- Light Source Type: LED
- Real Angle of View: 78 Degrees
- Magnification Maximum: 1.5 x
- Voltage: 3.7 Volts (DC)
- Batteries: 1 Lithium Polymer battery required (included)
- Compatible Devices: No device needed (standalone operation)
- First Available Date: November 4, 2024

Image: Detailed specifications of the SA-160 camera, including 3.9mm HD ear camera, 6 LED lights, 3 brightness adjustments, 0.39-1.18 inch focal distance, and 78-degree field of view.
Warranty and Support
For warranty information, technical support, or service inquiries, please refer to the official ScopeAround website or contact their customer service directly. Keep your purchase receipt as proof of purchase for any warranty claims.
ScopeAround is committed to providing high-quality products and customer satisfaction. For further assistance, please visit the ScopeAround Store on Amazon or contact their support team.