
TMY Mini Projector
TMY Mini Projector User Manual
Learning the Basics from Setup to Advanced Techniques and Troubleshooting
1. Introduction
Welcome to the comprehensive user manual for your TMY Mini Projector. This guide is designed to help you understand, set up, operate, and maintain your projector effectively. Whether you are a new user or looking to explore advanced features, this manual provides detailed instructions and helpful tips to ensure you get the most out of your device.
Please read this manual thoroughly before using your TMY Mini Projector to ensure safe and optimal performance.
2. Safety Information
To prevent fire, electric shock, or injury, always follow these basic safety precautions:
- Do not block ventilation openings.
- Do not expose the projector to rain or moisture.
- Do not open the projector casing; refer all servicing to qualified personnel.
- Use only attachments/accessories specified by the manufacturer.
- Unplug the projector during lightning storms or when unused for long periods.
- Avoid direct eye exposure to the projector lens when the lamp is on.
3. Product Overview
Familiarize yourself with the components of your TMY Mini Projector and its remote control.

Figure 3.1: Front view of the TMY Mini Projector with its remote control. The projector features a compact design with the lens prominently displayed on the front, and the remote control shows various function buttons.
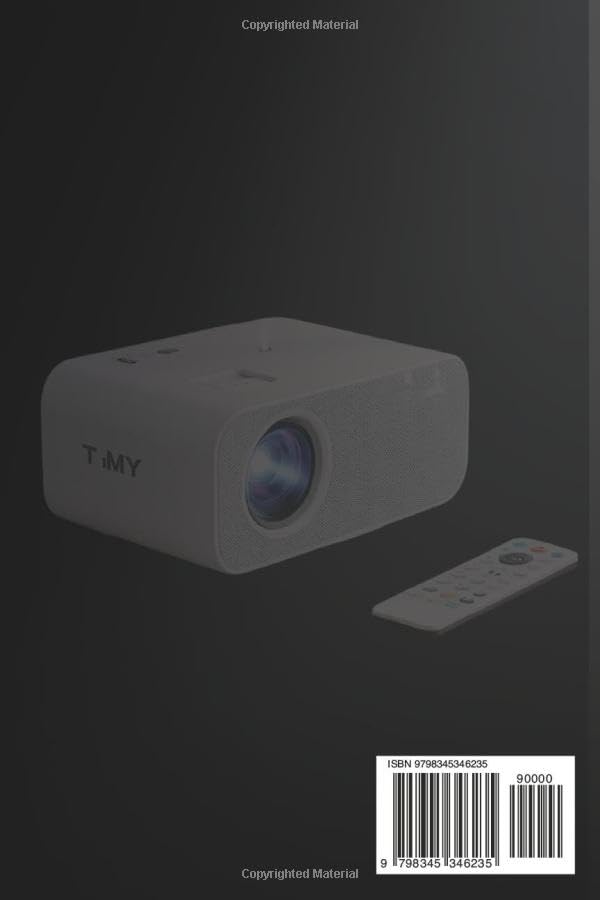
Figure 3.2: Side view of the TMY Mini Projector, highlighting its compact form factor and connectivity ports (not fully visible). The remote control is positioned alongside the projector.
Package Contents:
- TMY Mini Projector
- Remote Control
- Power Adapter
- HDMI Cable
- User Manual (this document)
4. Setup
This section guides you through the initial setup of your TMY Mini Projector for both indoor and outdoor environments.
4.1. Placement
Choose a flat, stable surface for the projector. Ensure there is adequate ventilation around the device. For optimal viewing, position the projector perpendicular to the projection surface (wall or screen).
4.2. Power Connection
- Connect the power adapter to the projector's power input port.
- Plug the other end of the power adapter into a wall outlet.
- The power indicator light on the projector will illuminate.
4.3. Initial Power On
Press the power button on the projector or the remote control to turn on the device. The TMY logo will appear on the screen, followed by the main interface.
5. Connectivity
Your TMY Mini Projector offers various connectivity options for different devices.
5.1. HDMI Connection
Connect devices like laptops, gaming consoles, or Blu-ray players using an HDMI cable.
- Plug one end of the HDMI cable into the HDMI port on your source device.
- Plug the other end into the HDMI port on the TMY Mini Projector.
- Select the HDMI input source from the projector's menu.
5.2. USB Connection
Play media files directly from a USB flash drive.
- Insert your USB flash drive into the USB port on the projector.
- Navigate to the "Media" or "USB" input option in the projector's menu.
- Browse and select your desired files (videos, photos, music).
5.3. Wireless Connectivity (Screen Mirroring/Bluetooth)
The TMY Mini Projector supports wireless screen mirroring for smartphones and tablets, and Bluetooth for audio devices.
Screen Mirroring:
- Ensure your projector and mobile device are connected to the same Wi-Fi network.
- Select the "Screen Mirroring" or "Wireless Display" option on the projector.
- On your mobile device, enable screen mirroring (e.g., "Smart View" for Android, "Screen Mirroring" for iOS) and select the projector from the list of available devices.
Bluetooth Pairing:
- Go to the Bluetooth settings on your projector.
- Enable Bluetooth on your external audio device (e.g., Bluetooth speaker, headphones) and set it to pairing mode.
- Select your audio device from the list on the projector's screen to pair.
6. Operation
This section covers basic operation, menu navigation, and image adjustments for your TMY Mini Projector.
6.1. Menu Navigation
Use the arrow keys and OK button on the remote control or the projector's control panel to navigate through the on-screen menus. The main menu typically includes options for Input Source, Settings, Media, and Apps (if applicable).
6.2. Image Adjustments
Achieve optimal image clarity and quality by adjusting the following:
- Focus Ring: Rotate the focus ring near the lens until the image appears sharp.
- Keystone Correction: If the image appears trapezoidal, use the keystone correction setting in the menu to adjust it to a rectangular shape.
- Picture Mode: Select from preset picture modes (e.g., Standard, Vivid, User) or customize brightness, contrast, color, and sharpness settings.
- Aspect Ratio: Adjust the aspect ratio (e.g., 16:9, 4:3) to match your content.
6.3. Audio Settings
Adjust volume and select audio output options (internal speaker, external Bluetooth speaker, or 3.5mm audio out) from the audio settings menu.
7. Maintenance
Proper maintenance ensures the longevity and optimal performance of your TMY Mini Projector.
7.1. Cleaning the Lens
Use a soft, lint-free cloth specifically designed for optical lenses. Gently wipe the lens in a circular motion. Avoid using abrasive cleaners or excessive force.
7.2. Cleaning the Projector Body
Wipe the exterior of the projector with a soft, dry cloth. Do not use liquid cleaners directly on the device.
7.3. Ventilation
Ensure the ventilation vents are clear of dust and obstructions. Blocked vents can lead to overheating and reduced lamp life. Periodically use compressed air to gently clear dust from the vents.
7.4. Storage
When not in use, store the projector in a cool, dry place, away from direct sunlight and extreme temperatures. Use the original packaging or a protective case to prevent dust accumulation and physical damage.
8. Troubleshooting
This section provides solutions to common issues you might encounter with your TMY Mini Projector.
| Problem | Possible Cause | Solution |
|---|---|---|
| No Power | Power cable not connected; Power outlet faulty; Projector in standby mode. | Check power cable connection; Try a different outlet; Press power button on projector/remote. |
| No Image | Incorrect input source; Cable not connected properly; Source device not outputting signal. | Select correct input source; Reconnect cables securely; Check source device settings. |
| Blurry Image | Focus not adjusted; Keystone not adjusted; Projector too far/close to screen. | Adjust focus ring; Use keystone correction; Adjust projection distance. |
| No Sound | Volume too low; Muted; Incorrect audio output selected; External speaker not connected. | Increase volume; Unmute; Select correct audio output; Check external speaker connection. |
| Remote Control Not Working | Batteries dead/incorrectly inserted; Obstruction between remote and projector. | Replace batteries; Ensure clear line of sight; Point remote directly at IR receiver. |
8.1. Frequently Asked Questions (FAQs)
- Q: Can I connect my smartphone wirelessly?
A: Yes, the TMY Mini Projector supports screen mirroring for both Android and iOS devices. Refer to Section 5.3 for detailed instructions. - Q: How do I clean the projector lens?
A: Use a soft, lint-free cloth designed for optical lenses. Gently wipe in a circular motion. Avoid harsh chemicals. See Section 7.1. - Q: What is the optimal projection distance?
A: The optimal distance varies with desired screen size. Generally, a distance of 1.5 to 3 meters (5 to 10 feet) provides a good balance for most home environments. Adjust focus and keystone as needed.
9. Specifications
Below are typical specifications for a TMY Mini Projector. Exact values may vary by specific model.
| Feature | Detail |
|---|---|
| Display Technology | LCD |
| Native Resolution | High Definition (HD) or Full HD (FHD) |
| Supported Resolution | Up to 1080p |
| Brightness | Varies by model, typically several thousand lumens |
| Contrast Ratio | High dynamic contrast |
| Lamp Life | Long-lasting LED lamp |
| Aspect Ratio | 4:3 / 16:9 (switchable) |
| Projection Distance | Flexible, typically 1.5m to 5m |
| Connectivity | HDMI, USB, AV, Audio Out, Wi-Fi, Bluetooth |
| Power Supply | AC 100-240V, 50/60Hz |
| Dimensions | Compact and portable |
| Weight | Lightweight |
Note: For precise specifications of your specific TMY Mini Projector model, please refer to the product packaging or the official TMY website.
10. Warranty and Support
TMY products typically come with a manufacturer's warranty. Please refer to the warranty card included with your product or visit the official TMY website for detailed warranty terms and conditions.
Customer Support:
For technical assistance, troubleshooting beyond this manual, or warranty claims, please contact TMY customer support through their official website or the contact information provided in your product packaging. When contacting support, please have your product model number and purchase details ready.
Website: www.tmyprojector.com (Example link, verify actual TMY support site)
Email: support@tmyprojector.com (Example email, verify actual TMY support email)
Related documentsMini Projector

Ask a question about this manual
Ask about setup, troubleshooting, compatibility, parts, safety, or missing instructions. Manuals+ will review the question and use this page’s manual context to help answer it.