
ROCAM CR1028E
ROCAM Digital Alarm Clock User Manual
Model: CR1028E
Brand: ROCAM
Introduction
Thank you for purchasing the ROCAM Digital Alarm Clock. This clock features a large LED display, adjustable brightness and volume, dual alarms with weekend mode, and convenient USB/Type-C charging ports. This manual provides detailed instructions for setup, operation, and maintenance to ensure you get the most out of your new alarm clock.
Package Contents
- ROCAM Digital Alarm Clock
- Power Adapter (10W)
- Power Cable
- User Manual

Image: The ROCAM Digital Alarm Clock, its power adapter, and power cable, as typically found in the product packaging.
Product Overview
Familiarize yourself with the various parts and controls of your ROCAM Digital Alarm Clock.
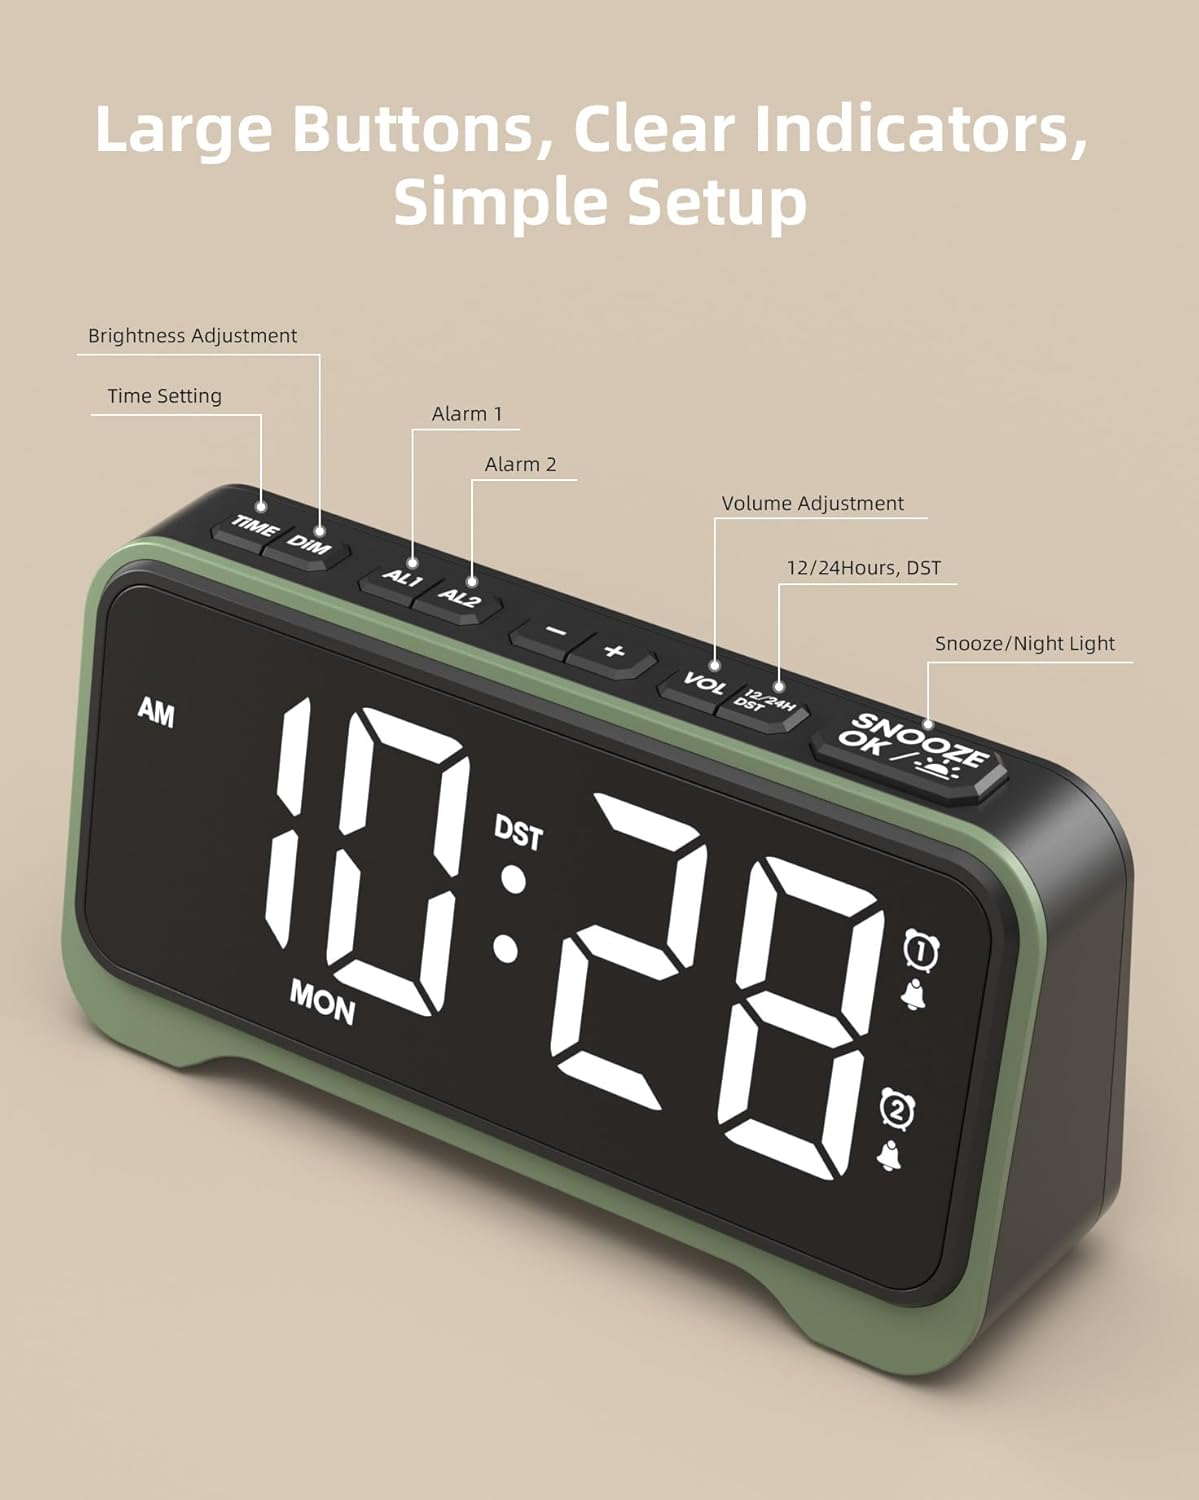
Image: Top view of the alarm clock highlighting the control buttons: TIME/DIM, AL1, AL2, -, +, VOL, 12/24H/DST, and SNOOZE/OK/Light.
Front Display:
- Large LED Digits: Displays time, AM/PM indicator, and day of the week.
- Alarm Indicators: Icons for Alarm 1 and Alarm 2.
- DST Indicator: Shows when Daylight Saving Time is active.

Image: A close-up view of the alarm clock's large 7.5-inch display, emphasizing its clear and bold digits for easy readability.
Top Buttons:
- TIME/DIM: Press to set time; long press to adjust display brightness.
- AL1 / AL2: Press to set Alarm 1 or Alarm 2; long press to enable/disable alarms.
- - / +: Adjust values during setting; adjust volume during normal operation.
- VOL: Press to cycle through volume levels.
- 12/24H / DST: Press to switch between 12-hour and 24-hour format; long press to activate/deactivate DST.
- SNOOZE / OK / Light: Press to snooze alarm; press to confirm settings; long press to activate/deactivate night light.
Rear Panel:
- DC IN Port: For connecting the power adapter.
- USB-A Output Port: For charging external devices.
- USB-C Output Port: For charging external devices.
- Battery Compartment: For 2 x AAA batteries (backup only).
- Alarm Mode Switches: Sliders for setting alarm frequency (MO-SO, MO-FRI, SA-SO).
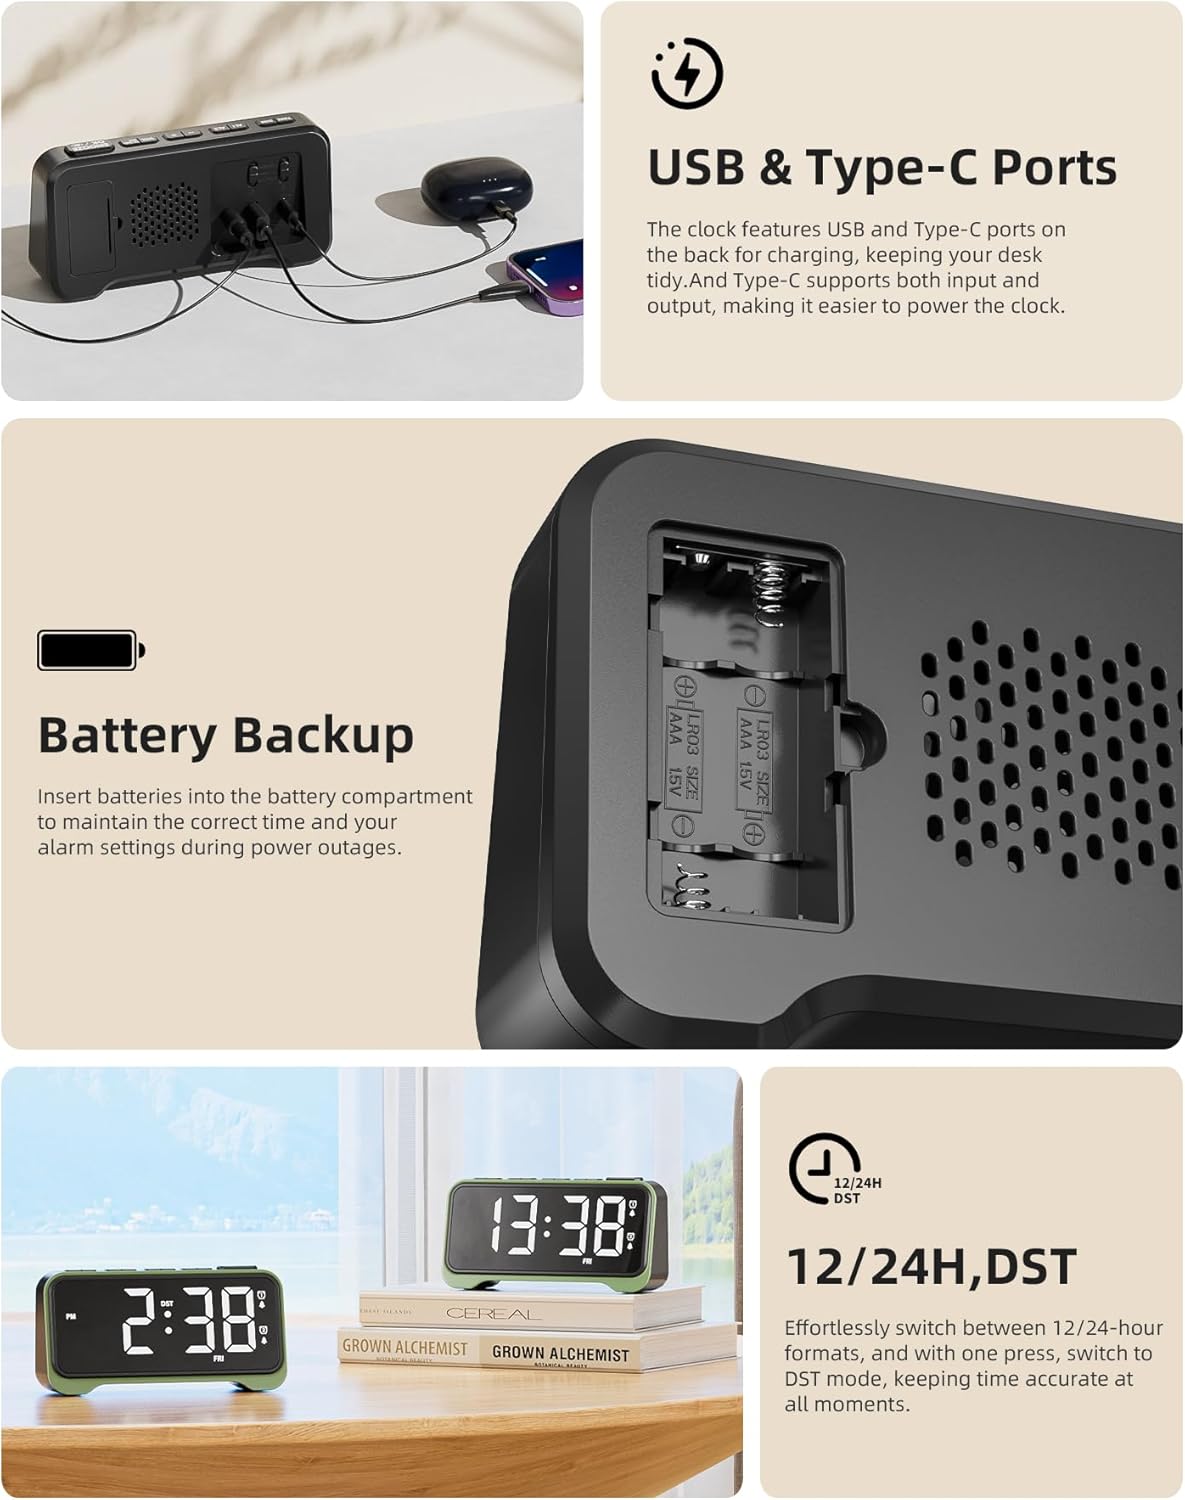
Image: A composite image showing the rear of the alarm clock with its USB and Type-C charging ports, the battery backup compartment, and a close-up of the alarm mode switches.
Setup
- Connect Power: Insert the DC plug of the power adapter into the DC IN port on the back of the alarm clock, then plug the adapter into a standard wall outlet. The display will light up.
- Install Battery Backup (Optional but Recommended): Open the battery compartment on the back and insert 2 x AAA batteries (not included), observing the correct polarity (+/-). These batteries will preserve time and alarm settings during a power outage, but will not power the display or alarm sound.
Operating Instructions
Setting the Time
- Press and hold the TIME/DIM button until the hour digits begin to flash.
- Use the + or - buttons to adjust the hour.
- Press the TIME/DIM button again to move to the minute setting. Use + or - to adjust the minutes.
- Press the TIME/DIM button again to move to the day of the week setting. Use + or - to adjust the day.
- Press the SNOOZE/OK/Light button to confirm and exit time setting mode.
Setting Alarms (Alarm 1 and Alarm 2)
The clock features two independent alarms. The process is identical for both.
- Press the AL1 or AL2 button. The alarm time will flash.
- Use the + or - buttons to adjust the alarm hour.
- Press the AL1 or AL2 button again to move to the alarm minute setting. Use + or - to adjust the minutes.
- Press the SNOOZE/OK/Light button to confirm the alarm time. The corresponding alarm icon will appear on the display, indicating it is active.
- To disable an alarm, press and hold the AL1 or AL2 button until the alarm icon disappears from the display.

Image: Visual representation of the dual alarm feature, showing two different alarm settings (e.g., 7:30 AM and 9:30 AM) and the physical switches on the back for setting alarm frequency (Mon-Sun, Mon-Fri, Sat-Sun).
Setting Alarm Frequency (Weekend Mode)
On the back of the alarm clock, there are physical switches for each alarm (AL1 and AL2) to select the alarm frequency:
- MO-SO (Monday-Sunday): Alarm sounds every day.
- MO-FRI (Monday-Friday): Alarm sounds only on weekdays.
- SA-SO (Saturday-Sunday): Alarm sounds only on weekends.
Adjusting Display Brightness
The clock has 7 brightness levels for the main display.
- Press and hold the TIME/DIM button during normal time display. The brightness will cycle through the levels. Release the button when your desired brightness is reached.
Adjusting Alarm Volume
The alarm volume can be set to 5 levels (76 dB, 83 dB, 90 dB, 100 dB, 110 dB).
- Press the VOL button repeatedly to cycle through the 5 volume levels. The current volume level will be briefly displayed.

Image: The alarm clock on a surface, illustrating its capability as a loud alarm clock suitable for heavy sleepers, with 5 volume levels up to 110 dB.
Snooze Function
- When the alarm sounds, press the large SNOOZE/OK/Light button to activate the snooze function. The alarm will pause for a few minutes (default snooze time is typically 9 minutes, refer to product specifics if different) and sound again.
- To turn off the alarm completely, press any other button (e.g., AL1, AL2, TIME/DIM) or let it ring for its full duration.
Night Light Function
The clock features an integrated night light at the bottom with 3 adjustable brightness levels.
- Press and hold the SNOOZE/OK/Light button to turn the night light ON.
- Continue to press and hold the SNOOZE/OK/Light button to cycle through the 3 brightness levels and OFF. Release the button at your desired setting.

Image: Two ROCAM Digital Alarm Clocks on a bedside table, one with its warm night light glowing, illustrating its use for gentle illumination.
Using USB/Type-C Charging Ports
The clock is equipped with a USB-A and a USB-C output port on the back for convenient charging of your mobile devices.
- Simply connect your device's charging cable to the appropriate USB-A or USB-C port on the back of the alarm clock.
- Ensure the alarm clock is powered via the main adapter for these ports to function.
12/24 Hour Format and Daylight Saving Time (DST)
- 12/24 Hour Format: Press the 12/24H/DST button to switch between 12-hour (with AM/PM indicator) and 24-hour formats.
- Daylight Saving Time (DST): Press and hold the 12/24H/DST button to activate or deactivate DST. When active, the DST indicator will appear on the display, and the time will adjust by one hour.
Maintenance
- Clean the clock with a soft, dry cloth. Do not use abrasive cleaners or solvents.
- Keep the clock away from direct sunlight, extreme temperatures, and high humidity.
- Ensure proper ventilation around the clock, especially if using the charging ports frequently.
- If not using the clock for an extended period, remove the AAA backup batteries to prevent leakage.
Troubleshooting
| Problem | Possible Cause / Solution |
|---|---|
| Clock display is blank. |
|
| Alarm does not sound. |
|
| Time is incorrect after power outage. |
|
| USB/Type-C charging ports not working. |
|
Specifications
| Brand | ROCAM |
| Model Number | CR1028E |
| Colour | Black |
| Product Dimensions | 16.9 x 3.81 x 8.6 cm |
| Item Weight | 200 g |
| Material | Plastic |
| Display Type | LED |
| Power Source | Mains power |
| Battery Backup | 2 x AAA batteries (not included) |
| Alarm Volume | Adjustable (76-110 dB) |
| Special Features | Loud Alarm, Snooze function, Large display, DST function, Dual Alarms, Weekend Mode, USB/Type-C Charging Ports, Night Light |
Warranty and Support
ROCAM products are designed for reliability and performance. For warranty information or technical support, please refer to the contact details provided with your purchase or visit the official ROCAM website. Please retain your proof of purchase for warranty claims.
For further assistance, you may contact ROCAM customer service through the details found on their Amazon store page: ROCAM Store.
Ask a question about this manual
Ask about setup, troubleshooting, compatibility, parts, safety, or missing instructions. Manuals+ will review the question and use this page’s manual context to help answer it.