1. Introduction
Thank you for choosing the Jacchozhi Fingerprint Smart Lock with HD Camera. This advanced keyless entry system offers multiple unlocking methods, integrated video doorbell functionality, and remote management via a mobile application. Designed for enhanced security and convenience, this manual provides detailed instructions for installation, setup, operation, and maintenance to ensure optimal performance and longevity of your smart lock.
2. Safety Information
Please read all safety instructions carefully before installation and use. Failure to follow these instructions may result in damage to the product, property, or personal injury.
- Do not expose the lock to extreme temperatures or direct sunlight for prolonged periods.
- Use only specified AA alkaline batteries. Do not mix old and new batteries or different types of batteries.
- Keep physical keys in a secure location outside the property.
- Avoid using abrasive cleaners or solvents on the lock's surface.
- Ensure all components are securely fastened during installation to prevent accidental dislodgement.
- In case of a low battery alert, replace batteries promptly.
3. Package Contents
Verify that all components are present before beginning installation:
- Front Panel Assembly (with camera and keypad)
- Rear Panel Assembly (with battery compartment and handle)
- Mortise Lock Body
- Strike Plate and Strike Box
- Mounting Screws and Hardware Kit
- Physical Keys (2)
- Fob Keycards (2)
- Installation Template
- User Manual (this document)

Image: Overview of Jacchozhi Smart Lock components, including the main unit, physical keys, and key fobs.
4. Product Overview
The Jacchozhi Smart Lock integrates multiple security and convenience features into a sleek design. Key features include:
- HD Camera: Provides clear video feed for monitoring visitors.
- Video Doorbell: Alerts your phone when a visitor presses the doorbell, allowing remote communication.
- Multiple Keyless Access: Fingerprint, password, Fob keycard, and APP unlocking.
- Built-in Wi-Fi: Enables remote management without an additional gateway.
- Two-Way Audio: Communicate with visitors via the app.
- Emergency Power: Micro-USB port for temporary power in case of battery depletion.
- Physical Key Backup: Traditional key access for emergencies.
- Auto-Lock: Automatically locks the door when closed.
- Anti-Peeping Keypad: Allows entry of virtual digits before or after the actual password to prevent onlookers from guessing your code.

Image: Key features of the Jacchozhi Smart Lock, including HD camera, two-way audio, fingerprint recognition, app control, built-in WiFi, and voice prompts.
5. Installation
Before installation, ensure your door meets the following requirements:
- Door thickness: 1.49 - 1.89 inches (38mm - 48mm)
- Backset: 2.36 or 2.75 inches (60mm or 70mm)
- Hole diameter: 2.13 inches (54mm)
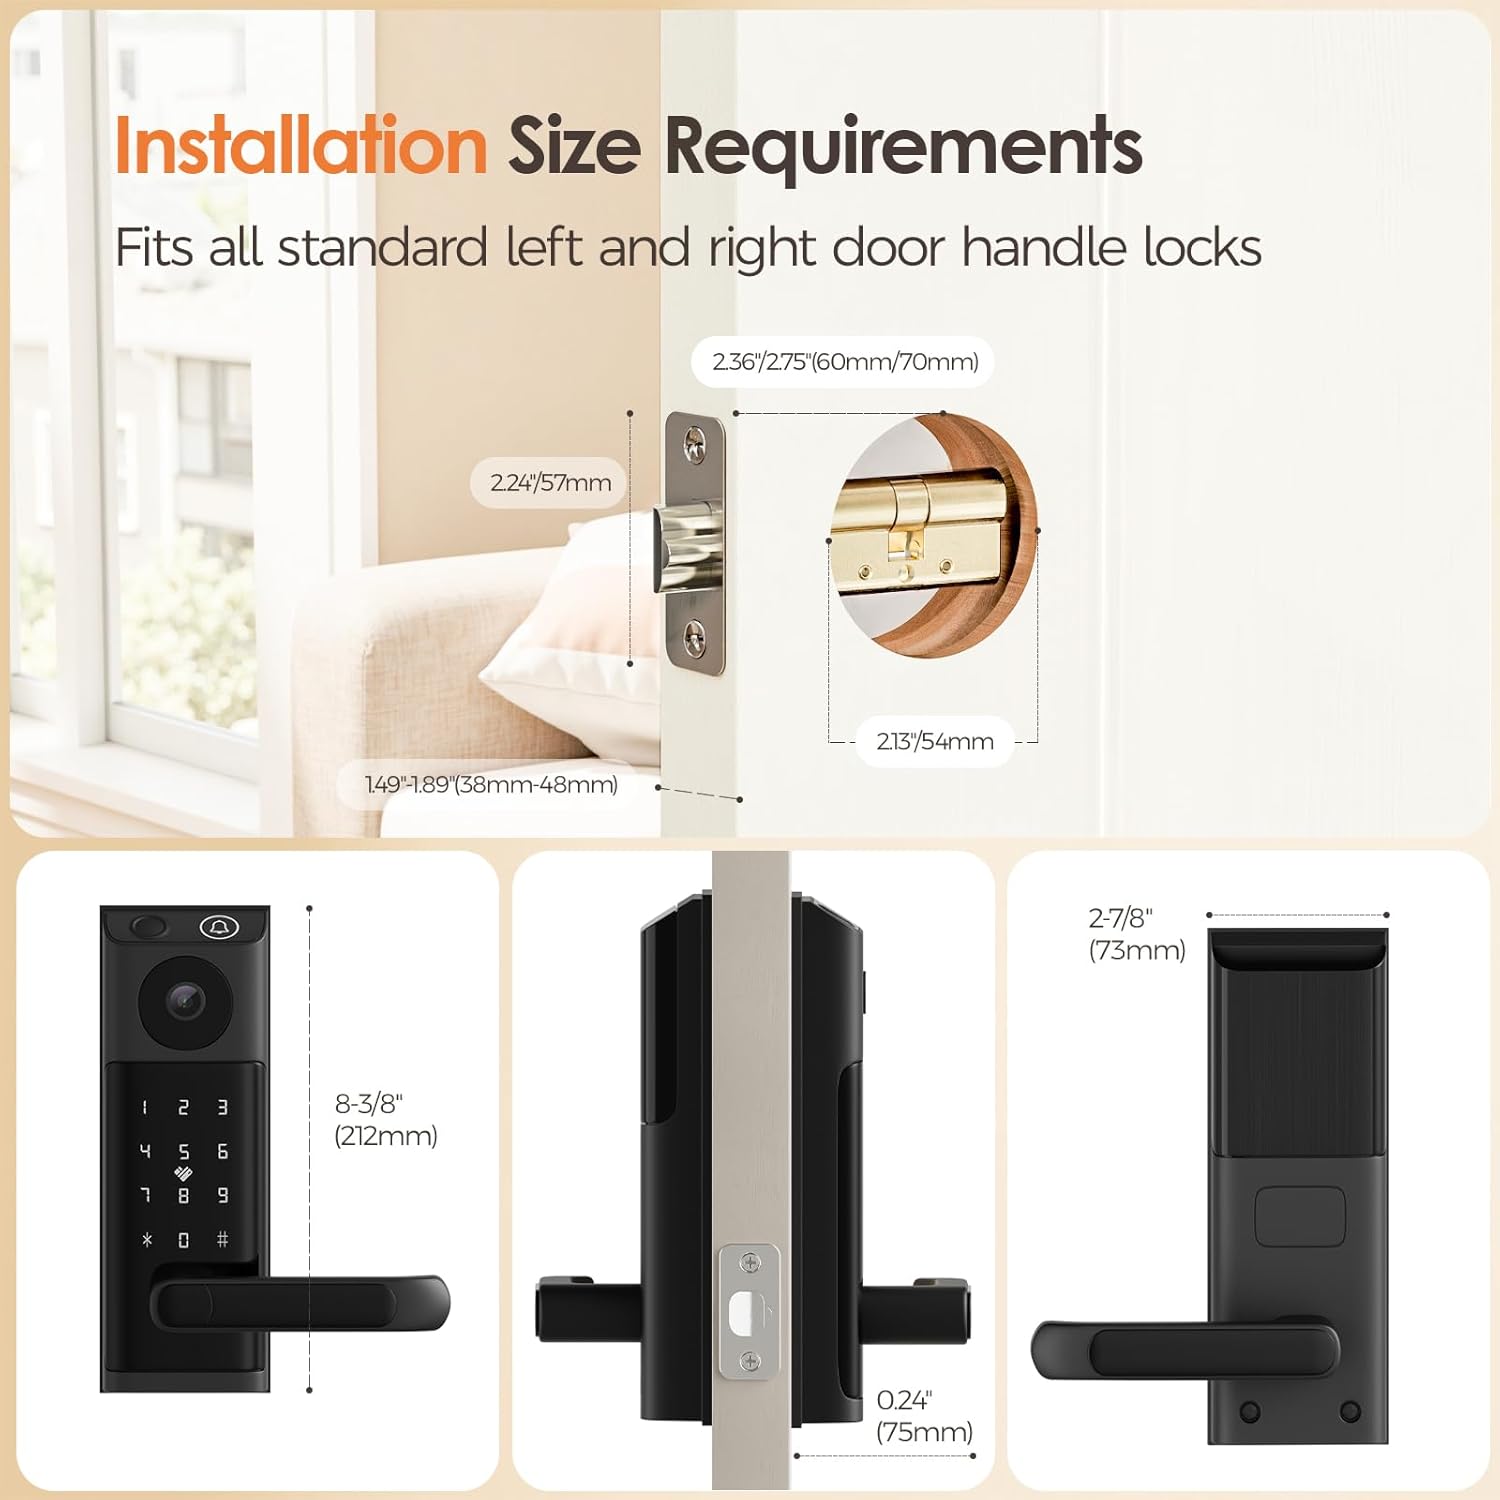
Image: Diagram illustrating the required door dimensions for smart lock installation.
5.1. Door Preparation
- Remove your existing lock and handle.
- Use the provided installation template to mark and drill any necessary holes on your door.
5.2. Installing the Mortise Lock Body
- Insert the mortise lock body into the edge of the door.
- Secure it with screws. Ensure the latch bolt is facing the correct direction for your door's swing.
5.3. Installing the Front and Rear Panels
- Connect the cable from the front panel to the rear panel.
- Align the spindle with the mortise lock body.
- Mount the front panel on the exterior side of the door.
- Mount the rear panel on the interior side, securing it with the provided screws.
- Ensure the handle operates smoothly and the lock engages properly.
6. Setup
6.1. Battery Installation
- Open the battery compartment on the rear panel.
- Insert 4 AA alkaline batteries, ensuring correct polarity.
- Close the battery compartment. The lock will power on and may provide a voice prompt.
6.2. App Download and Pairing (Tuya App)
- Download the Tuya Smart app from your smartphone's app store (iOS or Android).
- Register or log in to your Tuya Smart account.
- In the app, tap '+' to add a device. Select 'Security & Video Surveillance' then 'Smart Lock (Wi-Fi)'.
- Follow the on-screen instructions to put the lock into pairing mode (usually by pressing a button on the rear panel or keypad).
- Connect the lock to your home Wi-Fi network via the app.

Image: App control interface for the smart lock, showing remote unlocking and settings management.
6.3. Adding Users (Fingerprints, Passcodes, Key Fobs)
All user management is performed through the Tuya Smart app.
- Fingerprint: Navigate to 'User Management' in the app, select 'Add Fingerprint', and follow the prompts to register fingerprints on the lock's sensor.
- Passcode: Select 'Add Passcode' in the app. You can create permanent, temporary, or one-time passcodes.
- Key Fob: Choose 'Add Card' or 'Add Fob' in the app, then present the key fob to the designated area on the lock to register it.
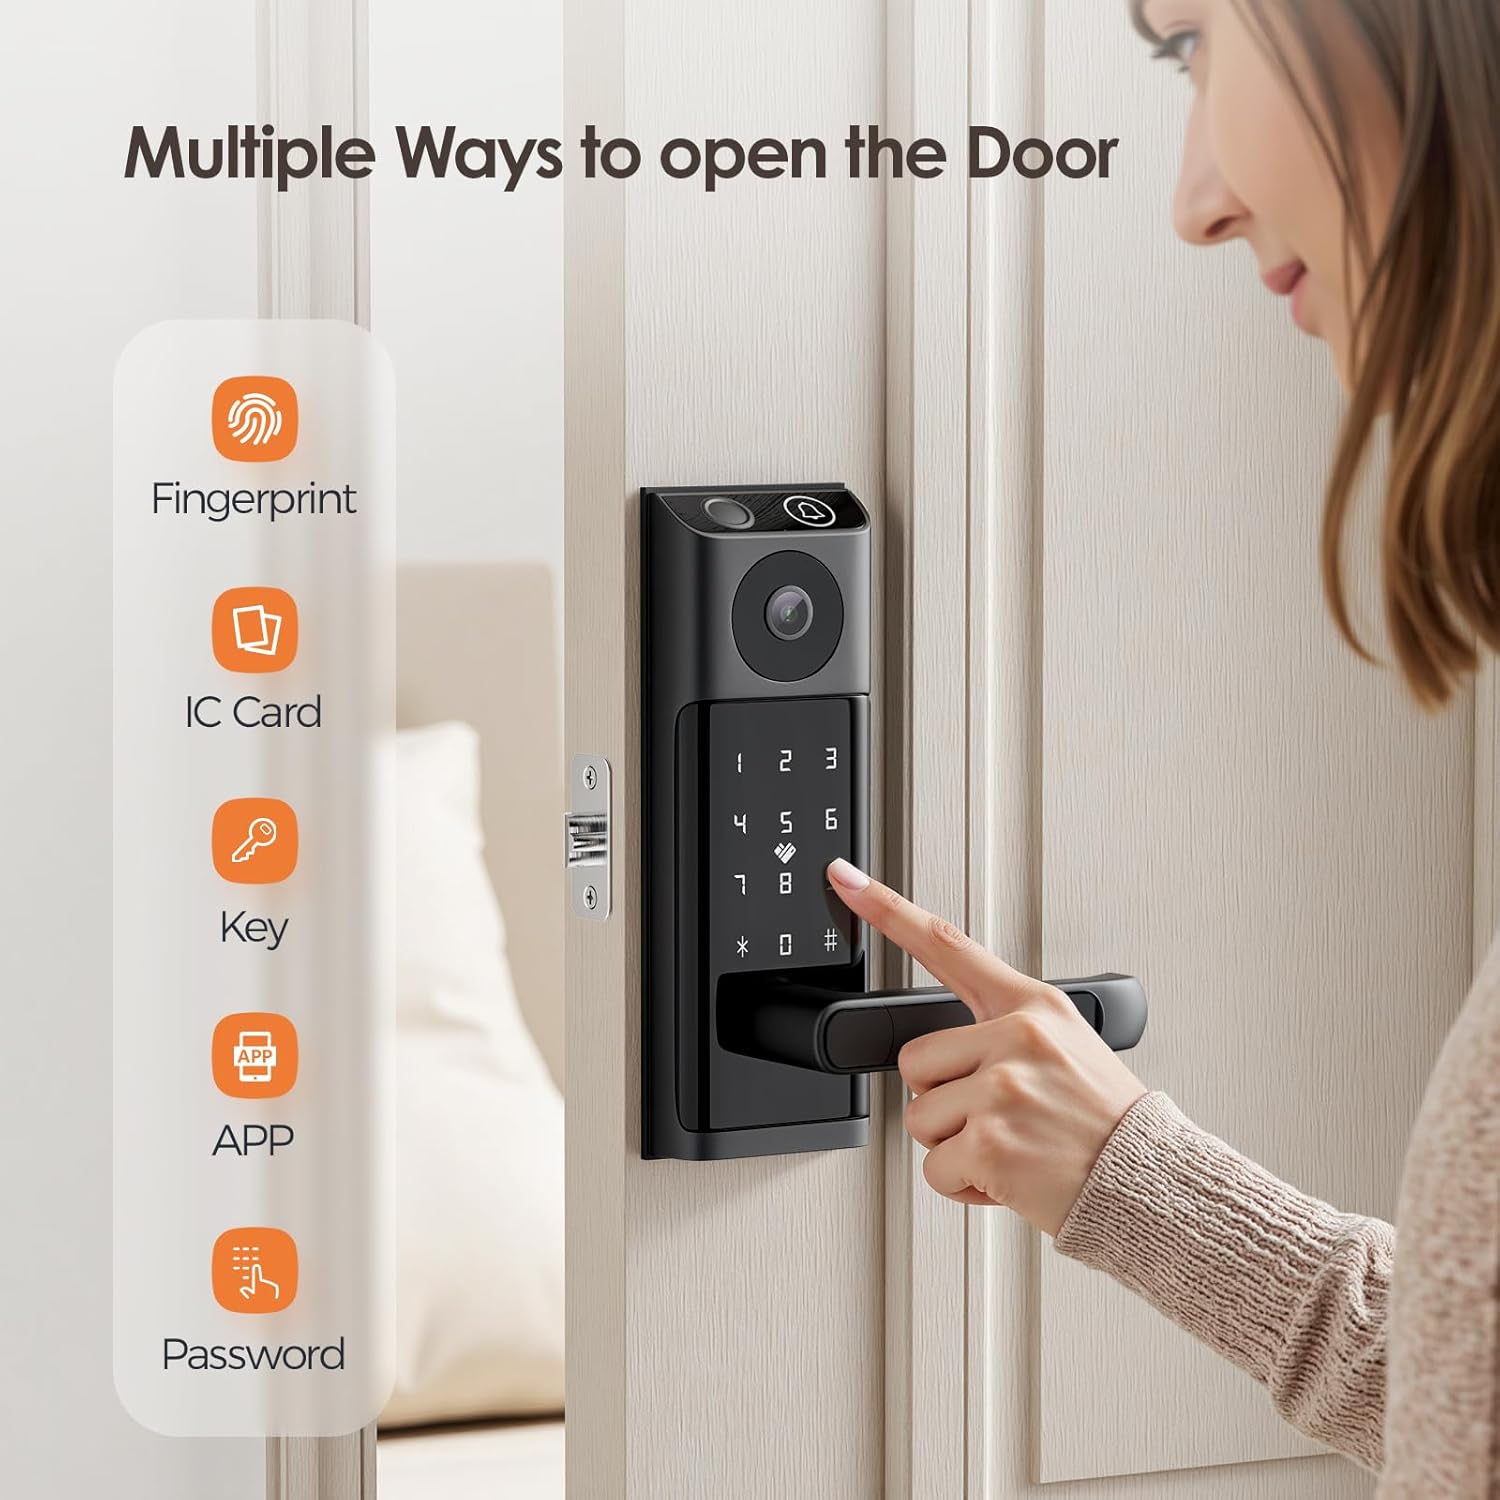
Image: Visual representation of the multiple unlocking methods available for the smart lock.
7. Operating Instructions
7.1. Unlocking Methods
- Fingerprint Unlocking: Place your registered finger on the fingerprint sensor. The lock will unlock in approximately 0.5 seconds.
- Passcode Unlocking: Enter your registered passcode on the touchscreen keypad, followed by '#'. For enhanced security, you can enter random digits before and after your actual passcode (anti-peeping function).
- Fob Keycard Unlocking: Present a registered key fob to the card reader area on the lock.
- APP Unlocking: Open the Tuya Smart app, select your lock, and tap the unlock icon.
- Physical Key Unlocking: Insert the physical key into the keyhole and turn to unlock. This method is primarily for emergency backup.

Image: Fingerprint unlocking in action, highlighting the speed and convenience.

Image: Password unlocking options, including permanent, temporary, and visitor codes.

Image: Physical key unlocking as a backup method for the smart lock.
7.2. Video Doorbell and Intercom
When a visitor presses the doorbell button on the smart lock:
- Your smartphone will receive a notification and a photo of the visitor.
- You can view the live video feed and engage in two-way audio communication with the visitor through the Tuya Smart app.
- You can remotely unlock the door for the visitor from the app.
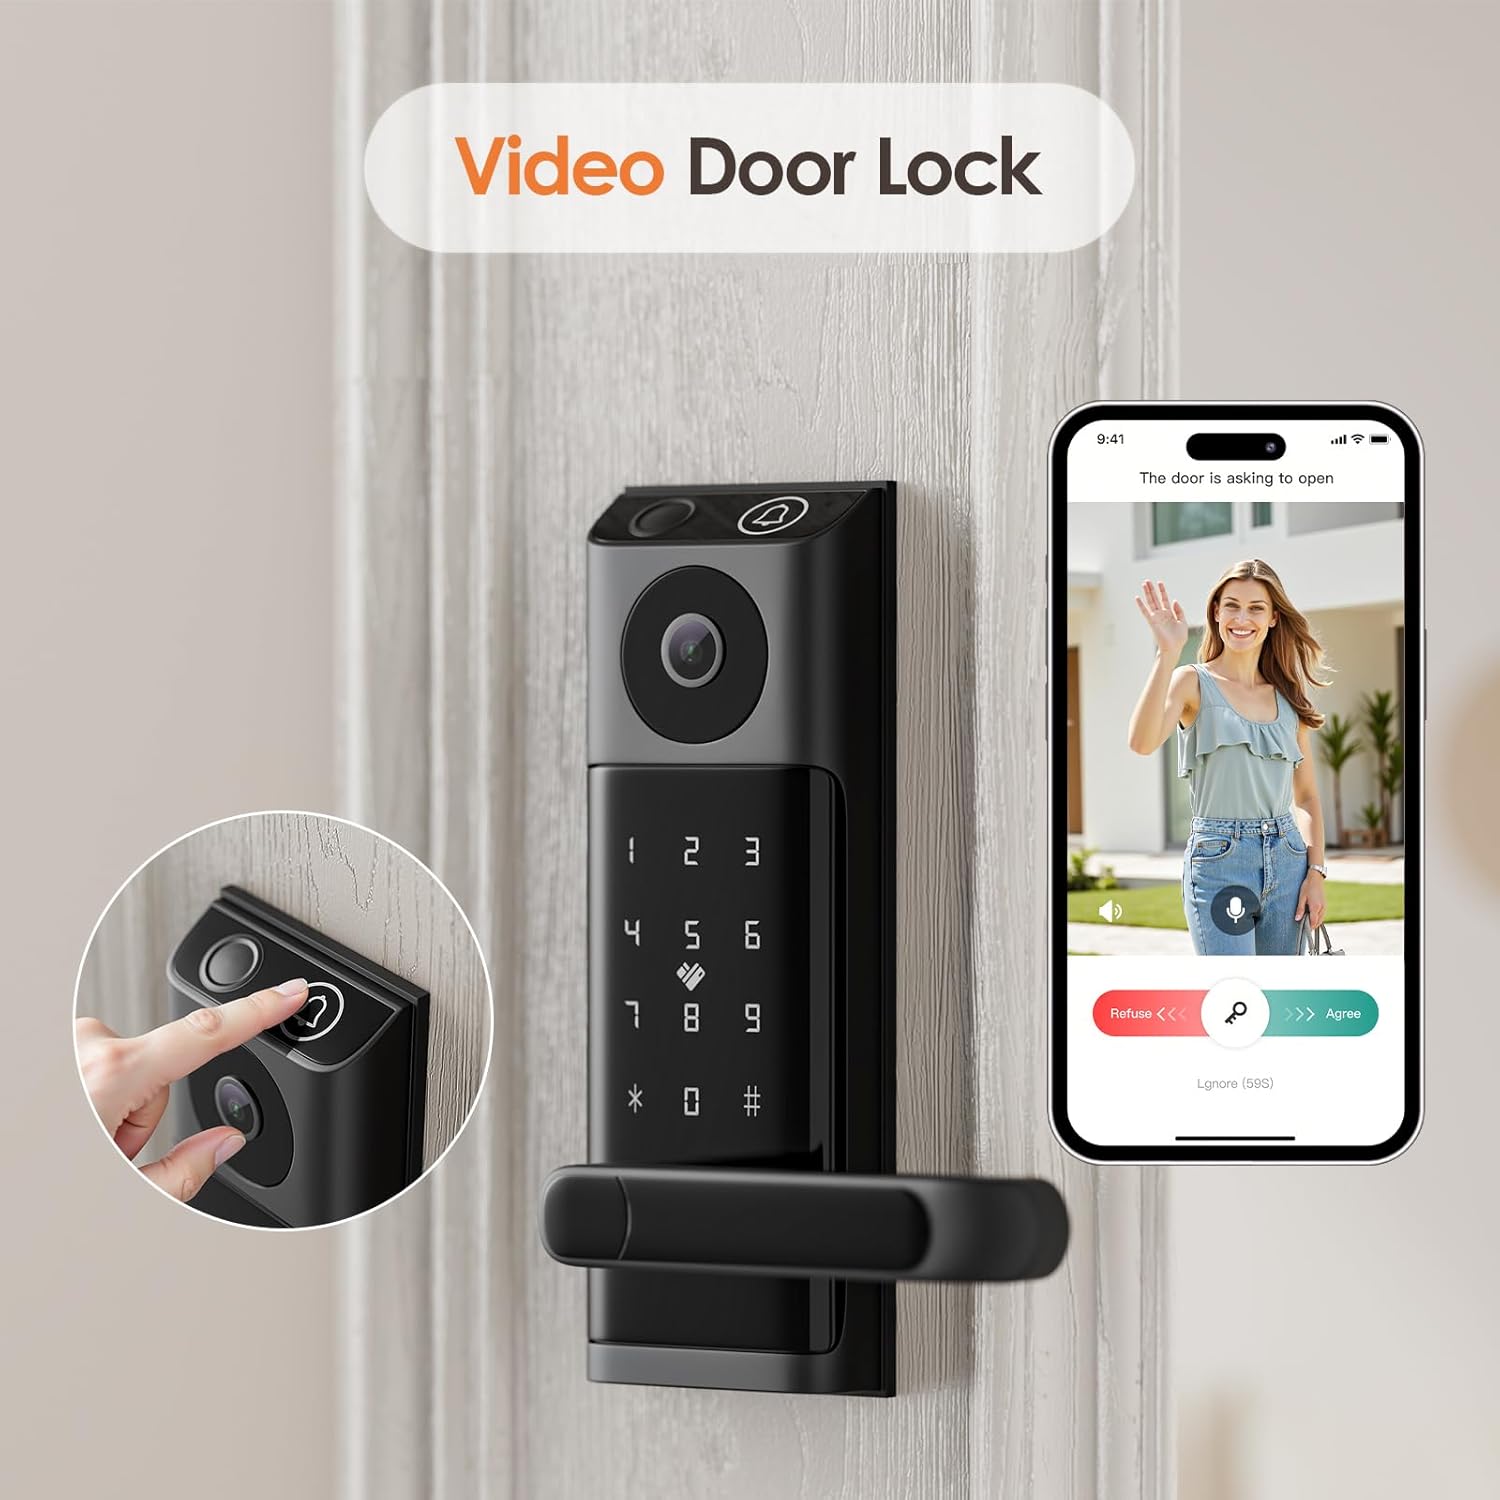
Image: The smart lock's video doorbell feature, showing a visitor on the screen.
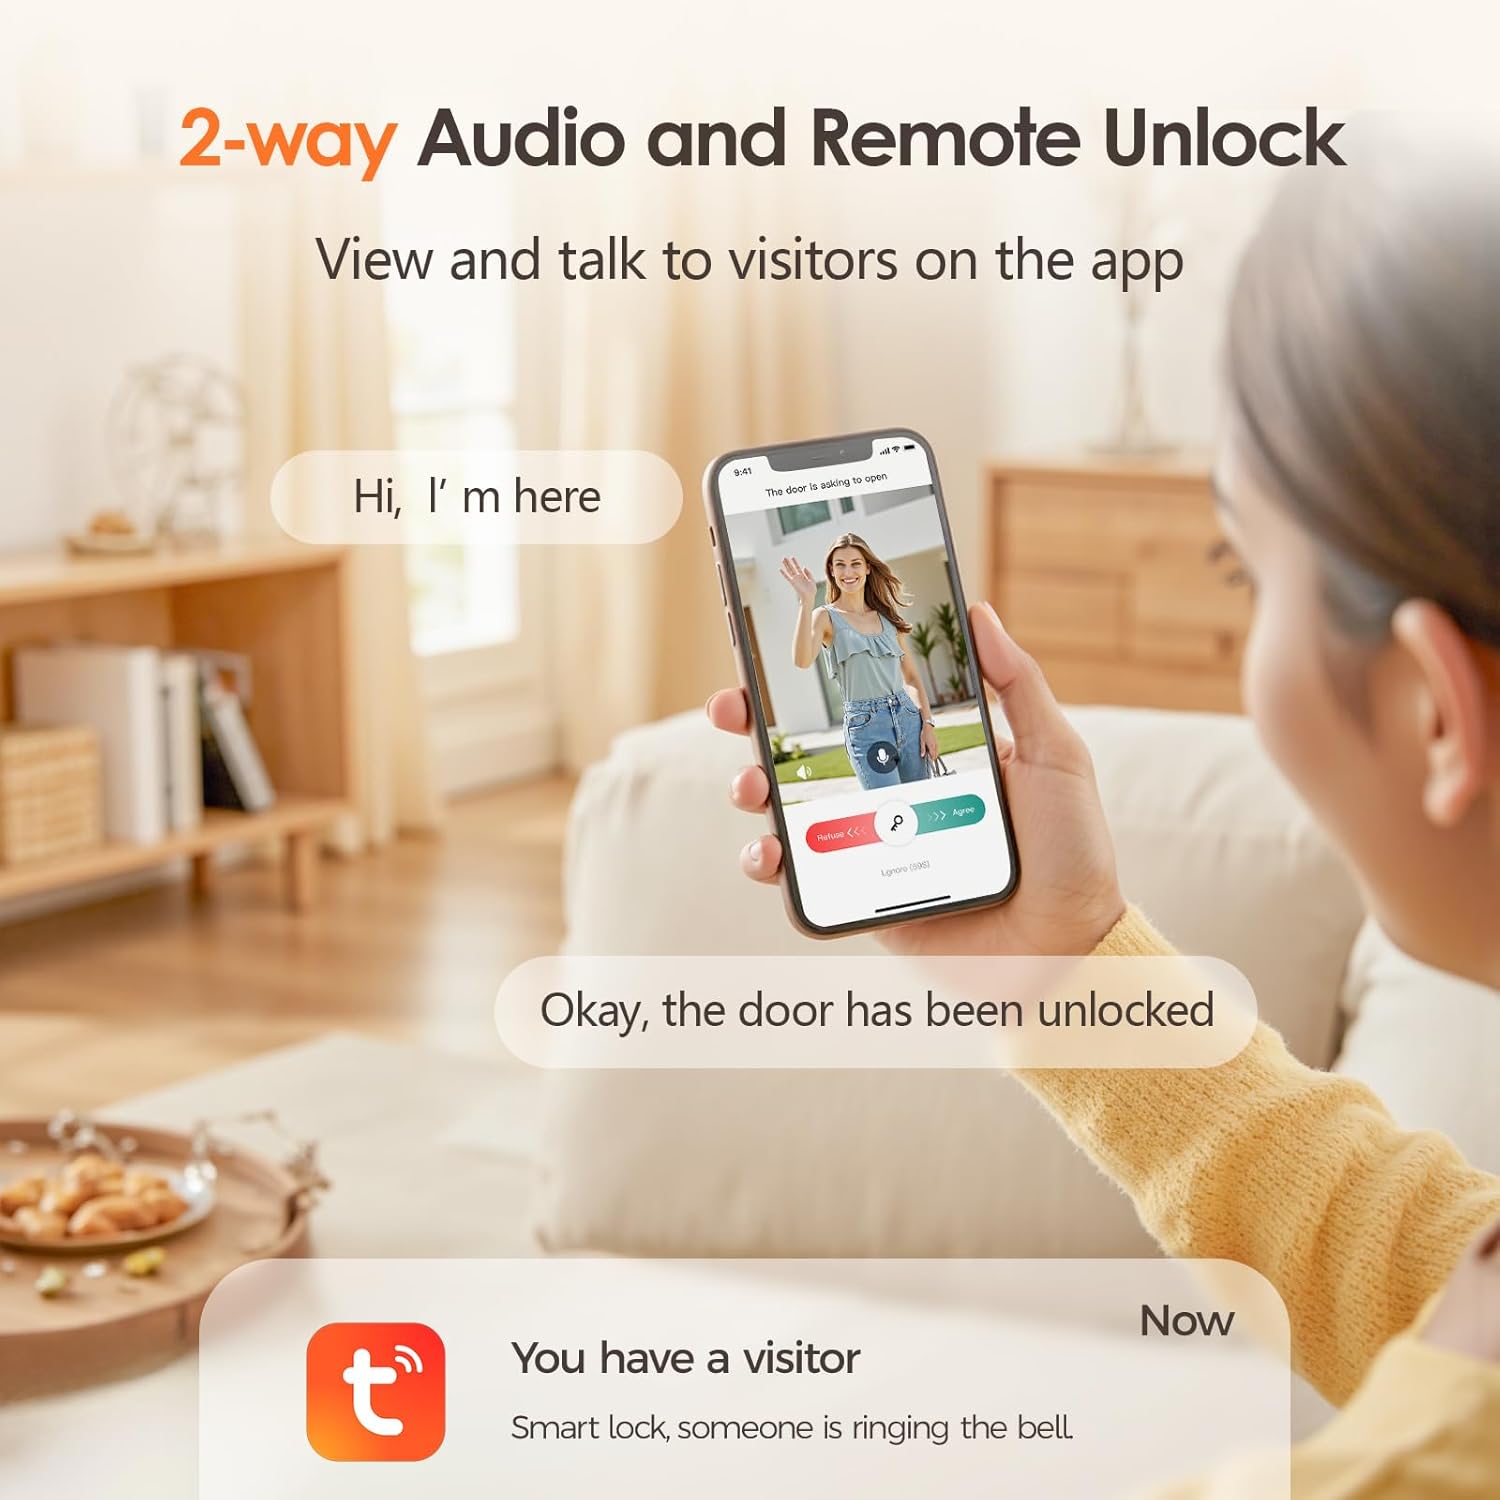
Image: Two-way audio and remote unlock functionality, allowing communication with visitors via the app.
7.3. Remote Management
With the built-in Wi-Fi module, you can manage your lock remotely via the Tuya Smart app:
- Unlock the door from anywhere.
- Add or delete users (fingerprints, passcodes, key fobs).
- Generate temporary passwords for guests or service personnel.
- View access logs to see who entered and when.
- Receive real-time alerts for password errors or forced entry attempts.
7.4. Auto-Lock Feature
The smart lock is designed to automatically lock itself after the door is closed, providing an added layer of security without manual intervention. This feature can typically be configured or disabled within the Tuya Smart app settings.
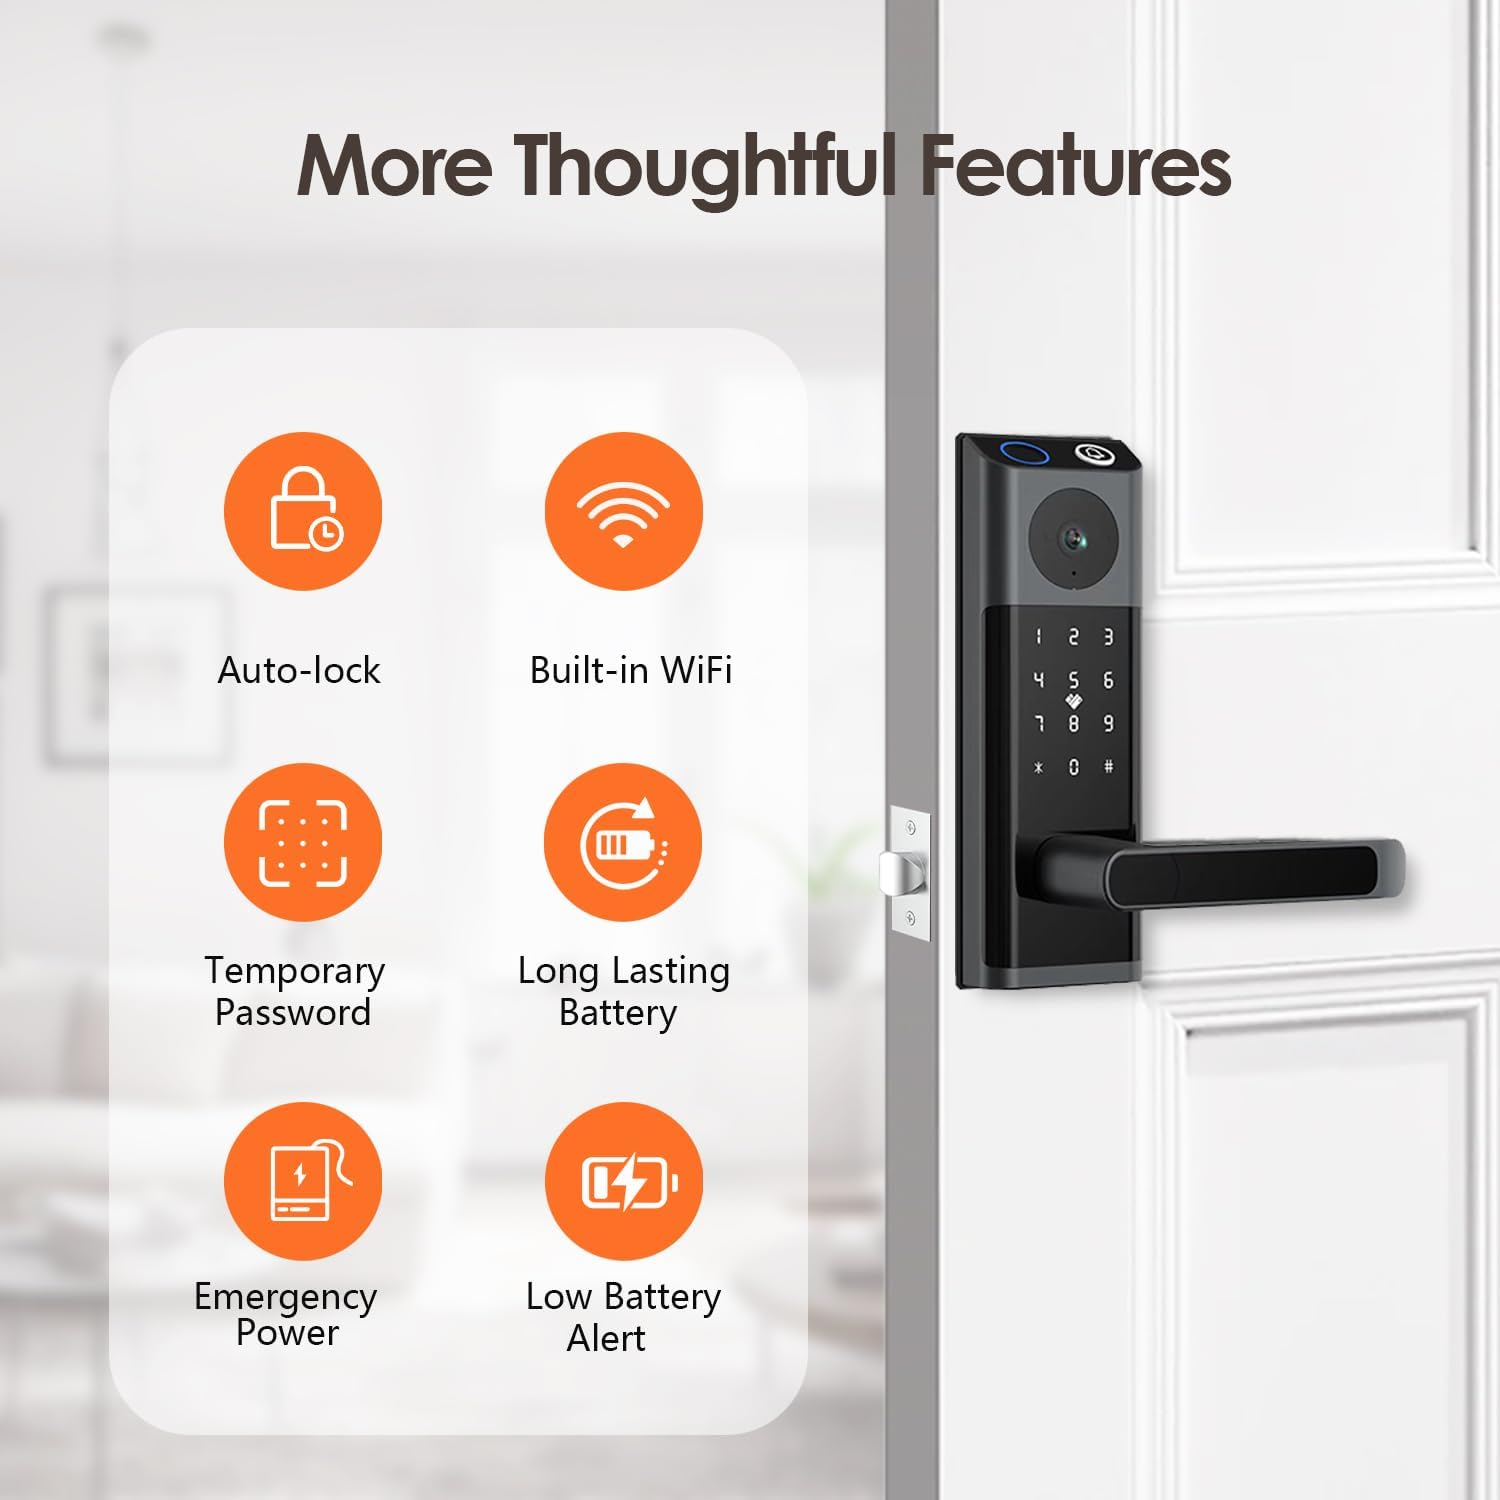
Image: Additional thoughtful features of the smart lock, including auto-lock and built-in WiFi.
8. Maintenance
8.1. Battery Replacement
The lock operates on 4 AA batteries and can last up to 6 months. The lock will provide a low battery alert when replacement is needed. To replace batteries:
- Open the battery compartment cover on the interior panel.
- Remove the old batteries.
- Insert 4 new AA alkaline batteries, ensuring correct polarity.
- Close the battery compartment cover.
In case of complete battery depletion, use the emergency power port (Micro-USB) on the exterior panel with a power bank to temporarily power the lock and gain access.
8.2. Cleaning
Clean the lock's surface with a soft, dry cloth. Do not use harsh chemicals, abrasive cleaners, or solvents, as these can damage the finish and electronic components. Regularly wipe the fingerprint sensor to ensure optimal performance.
9. Troubleshooting
| Problem | Possible Cause | Solution |
|---|---|---|
| Lock not responding | Dead batteries; loose cable connection. | Replace batteries; check cable connection between panels; use emergency power. |
| Fingerprint not recognized | Finger wet/dirty; unregistered fingerprint; sensor dirty. | Ensure finger is clean and dry; re-register fingerprint; clean sensor. |
| Passcode not working | Incorrect passcode; keypad malfunction. | Verify passcode; try re-entering; check for keypad damage. |
| Cannot connect to Wi-Fi/App | Incorrect Wi-Fi password; weak signal; router issues. | Verify Wi-Fi password; move router closer; restart router; re-pair lock with app. |
| Video doorbell not notifying | App notifications disabled; poor Wi-Fi connection. | Enable app notifications; check Wi-Fi signal strength. |
| Lock alarm triggers frequently | Forced entry attempt; sensitivity setting too high. | Check for tampering; adjust alarm sensitivity in app settings if available. |
10. Specifications
| Feature | Detail |
|---|---|
| Brand | Jacchozhi |
| Model Name | Smart lock with camera and handle (OS595) |
| Lock Type | Biometric, Keypad |
| Material | Aluminum |
| Color | Black |
| Item Dimensions (L x W x H) | 12 x 9 x 3.5 inches |
| Item Weight | 4.2 Pounds |
| Connectivity Protocol | Bluetooth, Wi-Fi |
| Control Method | App, Remote, Touch |
| Controller Type | Android, iOS (Tuya Smart App) |
| Power Source | 4 x AA Alkaline Batteries |
| Battery Life | Up to 6 months (approximate) |
| Special Features | Auto-Lock, Fingerprint, Fob Unlock, Touchscreen, HD Camera, Video Doorbell, 2-Way Audio |
| Recommended Uses | Home, Front Door |
| UPC | 730425956865 |
11. Warranty and Support
Jacchozhi provides a standard manufacturer's warranty for this product. Please refer to the warranty card included in your package or visit the official Jacchozhi website for detailed warranty terms and conditions.
For technical support, troubleshooting assistance, or any inquiries regarding your Jacchozhi Smart Lock, please contact Jacchozhi customer service through the contact information provided on their official website or within the Tuya Smart app's support section.
Note: Keep your purchase receipt as proof of purchase for warranty claims.