1. Introduction
Thank you for choosing the Cecotec Bolero Grandsommelier Origin 24 Hit Wine Cooler. This appliance is designed to store your wine at optimal temperatures, ensuring its quality and taste are preserved. Featuring a retro design, LED control, a temperature range of 5-20°C, NoFrost technology, and elegant wooden shelves, this wine cooler offers both functionality and style. Please read this manual carefully before use to ensure proper operation, maintenance, and safety.

Image 1.1: The Cecotec Bolero Grandsommelier Origin 24 Hit Wine Cooler in a contemporary setting.
2. Safety Instructions
To reduce the risk of fire, electric shock, or injury when using your wine cooler, follow these basic precautions:
- Read all instructions before using the appliance.
- Connect to a properly grounded outlet only.
- Do not operate if the power cord is damaged. Contact qualified service personnel.
- Do not place the appliance near heat sources or in direct sunlight.
- Ensure adequate ventilation around the unit. Maintain at least 10 cm (4 inches) of space from walls.
- Do not allow children to play with or inside the appliance.
- Unplug the appliance before cleaning or performing any maintenance.
- Do not use abrasive cleaners or sharp objects for cleaning.
- This appliance is intended for household use only.
3. Product Overview and Features
The Cecotec Bolero Grandsommelier Origin 24 Hit Wine Cooler combines a retro aesthetic with modern wine preservation technology.
Key Features:
- 24-Bottle Capacity: Offers ample storage in a compact design suitable for various room types.
- Electronic LED Display Control: Provides instant and simple temperature adjustments.
- Interior Light: Illuminates the interior for quick viewing of your wine collection.
- Wooden Shelves: Made from natural wood, these shelves provide a decorative touch and secure bottle storage.
- Adjustable Temperature (5°C to 20°C): Allows for precise temperature control to perfectly preserve all types of wine.
- NoFrost Technology: Automatic defrosting system prevents ice buildup, ensuring consistent cooling and minimal maintenance.
- Optimized Ventilation: Ensures uniform temperature distribution throughout the cooler.

Image 3.1: Front view of the wine cooler, showcasing its sleek black finish and glass door.

Image 3.2: Side view highlighting the compact and retro design of the appliance.
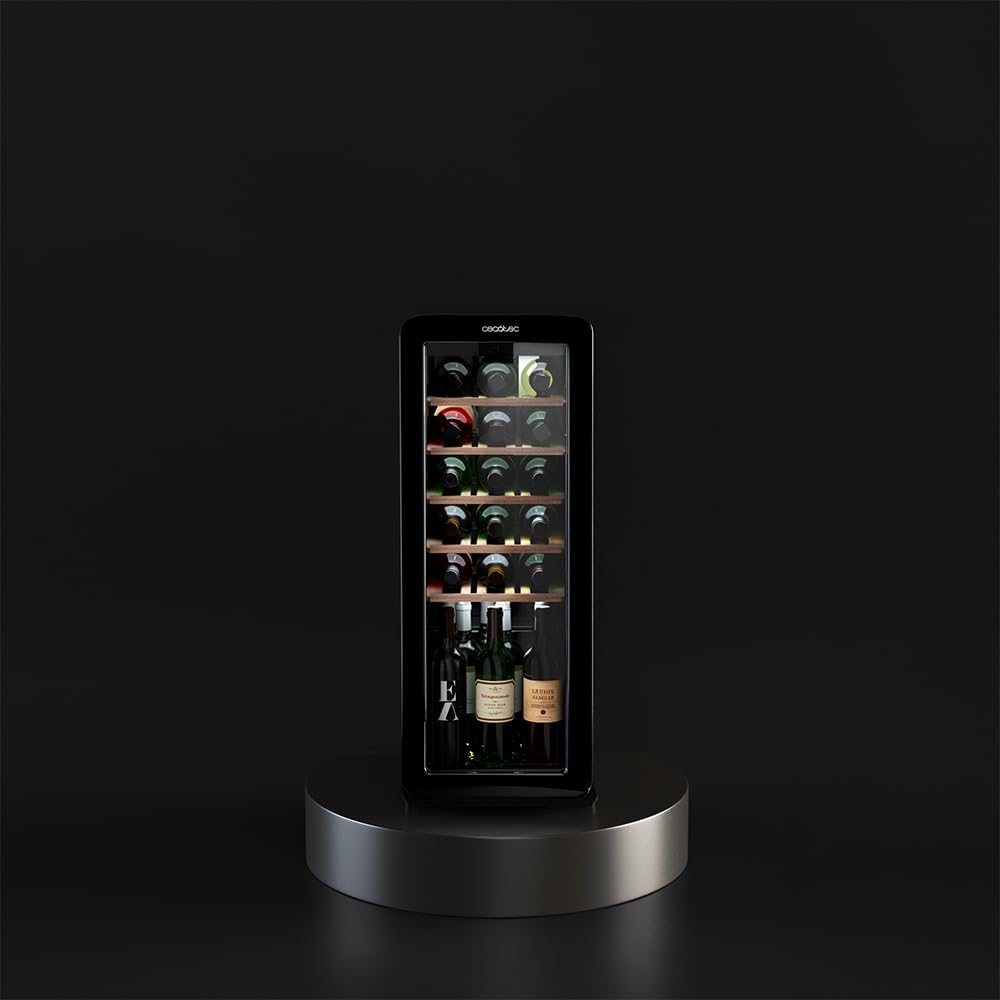
Image 3.3: Interior view showing bottles neatly arranged on the wooden shelves.

Image 3.4: Detailed view of the natural wooden shelves, designed for optimal bottle support.

Image 3.5: Visual representation of the NoFrost technology, preventing ice buildup.
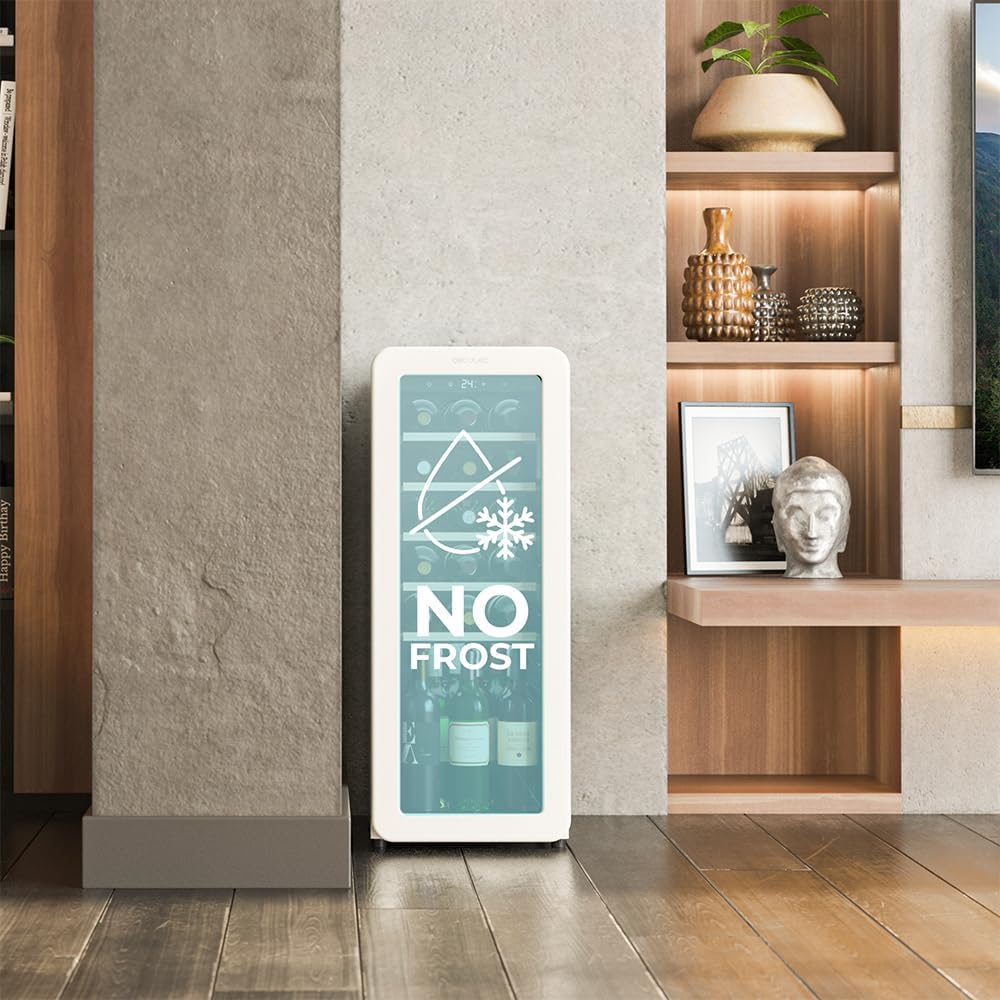
Image 3.6: Diagram showing the internal air circulation system for consistent temperature.
4. Setup
4.1 Unpacking
- Carefully remove all packaging materials. Keep packaging for future transport if needed.
- Inspect the appliance for any shipping damage. If damaged, do not plug it in and contact your retailer.
- Clean the interior and exterior of the wine cooler with a damp cloth before first use.
4.2 Placement
- Place the wine cooler on a firm, level surface to prevent vibrations and ensure proper operation.
- Ensure there is at least 10 cm (4 inches) of space around the back and sides for adequate ventilation.
- Avoid placing the unit in direct sunlight or near heat sources such as ovens, radiators, or heating vents.
- The appliance is designed for freestanding installation only. Do not embed it into cabinetry.
4.3 Initial Power-On
- After placing the unit, wait at least 2-4 hours before plugging it into a power outlet. This allows the refrigerant to settle.
- Plug the power cord into a dedicated, grounded electrical outlet.
- Allow the wine cooler to operate empty for 24 hours to reach its set temperature and stabilize before loading bottles.
5. Operating Instructions
5.1 Control Panel
The wine cooler features an intuitive LED control panel located on the top front of the unit.

Image 5.1: The LED control panel with temperature display and control buttons.
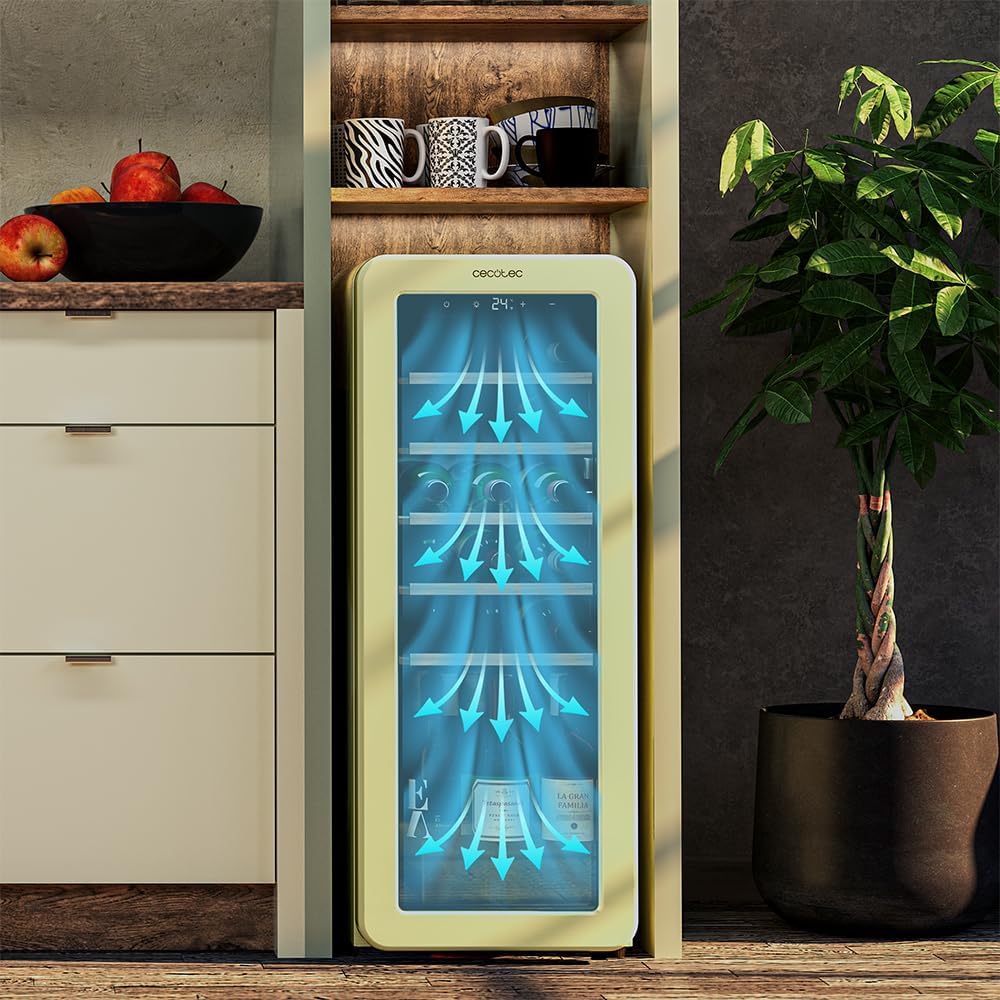
Image 5.2: Another detailed view of the control panel, showing power, light, and temperature adjustment buttons.
- Power Button (U): Press to turn the appliance on or off.
- Light Button (O): Press to turn the interior LED light on or off.
- Temperature Up Button (+): Press to increase the desired temperature.
- Temperature Down Button (-): Press to decrease the desired temperature.
5.2 Setting the Temperature
The wine cooler allows temperature settings between 5°C and 20°C (41°F and 68°F).

Image 5.3: The adjustable temperature range for optimal wine preservation.
- Press the Power button to turn on the wine cooler.
- Use the Temperature Up (+) or Temperature Down (-) buttons to select your desired temperature. The display will show the set temperature.
- The temperature will automatically adjust to your setting. Allow several hours for the temperature to stabilize, especially after initial setup or significant changes.
5.3 Using the Interior Light
The interior LED light can be toggled on or off independently of the cooling function.

Image 5.4: The interior light provides clear visibility of your wine collection.
- Press the Light button (O) on the control panel to turn the interior light on.
- Press the Light button again to turn the interior light off.
5.4 Loading Bottles
- Arrange bottles on the wooden shelves, ensuring they do not touch the back wall or obstruct the door from closing properly.
- Avoid overloading the shelves to allow for proper air circulation.
6. Maintenance
6.1 Cleaning the Exterior
- Unplug the wine cooler before cleaning.
- Wipe the exterior surfaces with a soft cloth dampened with mild detergent and water.
- Dry thoroughly with a clean, soft cloth.
- Do not use abrasive cleaners, solvents, or harsh chemicals.
6.2 Cleaning the Interior and Shelves
- Remove all bottles and shelves.
- Wash shelves with a mild detergent solution, rinse, and dry completely before returning them to the unit.
- Clean the interior surfaces with a solution of baking soda and water (2 tablespoons of baking soda to 1 liter of water).
- Rinse with clean water and dry thoroughly.
- Due to the NoFrost feature, manual defrosting is generally not required. If ice buildup occurs, unplug the unit and allow it to defrost naturally.
6.3 Long-Term Storage
- If the wine cooler will not be used for an extended period, unplug it from the power outlet.
- Clean the interior and leave the door slightly ajar to prevent odors and mold growth.
7. Troubleshooting
Before contacting customer service, please check the following common issues:
| Problem | Possible Cause | Solution |
|---|---|---|
| Wine cooler does not operate. | No power supply. | Check if the power cord is properly plugged in. Check the circuit breaker. |
| Temperature is not cold enough. | Door not closed properly; excessive door opening; high ambient temperature; unit overloaded. | Ensure door is sealed; reduce frequency of door opening; move unit to a cooler location; do not overload. |
| Excessive noise. | Unit not level; vibrating against a wall; normal compressor operation. | Adjust leveling feet; ensure clearance from walls; some noise is normal. |
| Condensation inside. | High humidity; frequent door opening. | Ensure door is sealed; reduce frequency of door opening. |
8. Specifications
| Feature | Specification |
|---|---|
| Brand | Cecotec |
| Model Number | A01_EU01_100508 |
| Product Dimensions (W x D x H) | 36.5 x 48 x 93 cm |
| Product Weight | 28.74 kg |
| Bottle Capacity | 24 Bottles |
| Volume Capacity | 60 Liters |
| Temperature Range | 5°C - 20°C |
| Color | Black |
| Installation Type | Freestanding |
| Number of Doors | 1 |
| Defrost System | Automatic (NoFrost) |
| Voltage | 240 Volts |
| Energy Efficiency Rating | 4 Star |
| Country of Origin | Spain |
| First Available | October 31, 2024 |
9. What's in the Box
The product package includes:
- 1 x Cecotec Bolero Grandsommelier Origin 24 Hit Wine Cooler
- Instruction Manual
10. Warranty and Support
This Cecotec appliance is covered by a manufacturer's warranty. Please refer to the warranty card included in your package for specific terms and conditions, including the warranty period and coverage details.
For technical support, service, or spare parts, please contact Cecotec customer service through their official website or the contact information provided in your warranty documentation. When contacting support, please have your model number (A01_EU01_100508) and purchase date ready.


