
Introduction
Welcome to the user manual for your new Pisichen 27-inch 2K 100Hz Touch Panel Monitor. This monitor is designed to provide a vibrant visual experience and intuitive interaction for both work and entertainment. It features a stunning QHD 2560x1440 resolution, a smooth 100Hz refresh rate, and responsive 10-point multi-touch functionality.
This manual provides detailed instructions on setting up, operating, maintaining, and troubleshooting your monitor to ensure optimal performance and longevity.

Image: Front view of the Pisichen 27-inch Touch Panel Monitor, showcasing its 100Hz 2K display, QHD resolution, IPS panel, USB-C connectivity, and built-in speakers.
Package Contents
Please verify that all the following items are included in your product package:
- Pisichen 27-inch Touch Panel Monitor
- HDMI Cable
- DC Power Adapter (12V 3A)
- USB-A to USB-C Cable
- USB-C to USB-C Cable
- Monitor Base
- User Manual (this document)
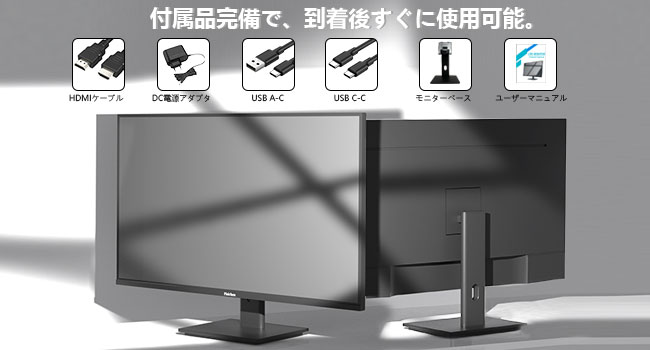
Image: A visual representation of the monitor and its included accessories: HDMI cable, DC power adapter, USB-A to USB-C cable, USB-C to USB-C cable, monitor base, and user manual.
Setup
1. Assembling the Monitor Base
- Carefully remove the monitor and base components from the packaging.
- Align the monitor stand with the mounting slot on the back of the monitor.
- Secure the stand to the monitor. For most models, this is a tool-free process, but some may require a screwdriver.
- Place the assembled monitor on a stable, flat surface.
2. Connecting to a Power Source
- Connect the DC power adapter to the monitor's DC input port.
- Plug the other end of the power adapter into a standard wall outlet.
3. Connecting to a Device
The monitor offers versatile connectivity options:
- HDMI Connection: Use the provided HDMI cable to connect the monitor to your computer, gaming console, or other HDMI-enabled device.
- DisplayPort (DP) Connection: Use a DisplayPort cable (not included) to connect the monitor to your device's DP output for high-resolution video and audio.
- USB-C Connection: For devices supporting video output over USB-C (DisplayPort Alternate Mode), use the provided USB-C to USB-C cable. This single cable can transmit video, audio, and touch signals. Note: The monitor requires its own DC 12V 3A power adapter; power delivery to the connected device via USB-C is not supported.
- USB-A for Touch Functionality: When using HDMI or DP for video, connect the USB-A to USB-C cable from your computer's USB-A port to the monitor's USB-C port to enable the touch screen feature.
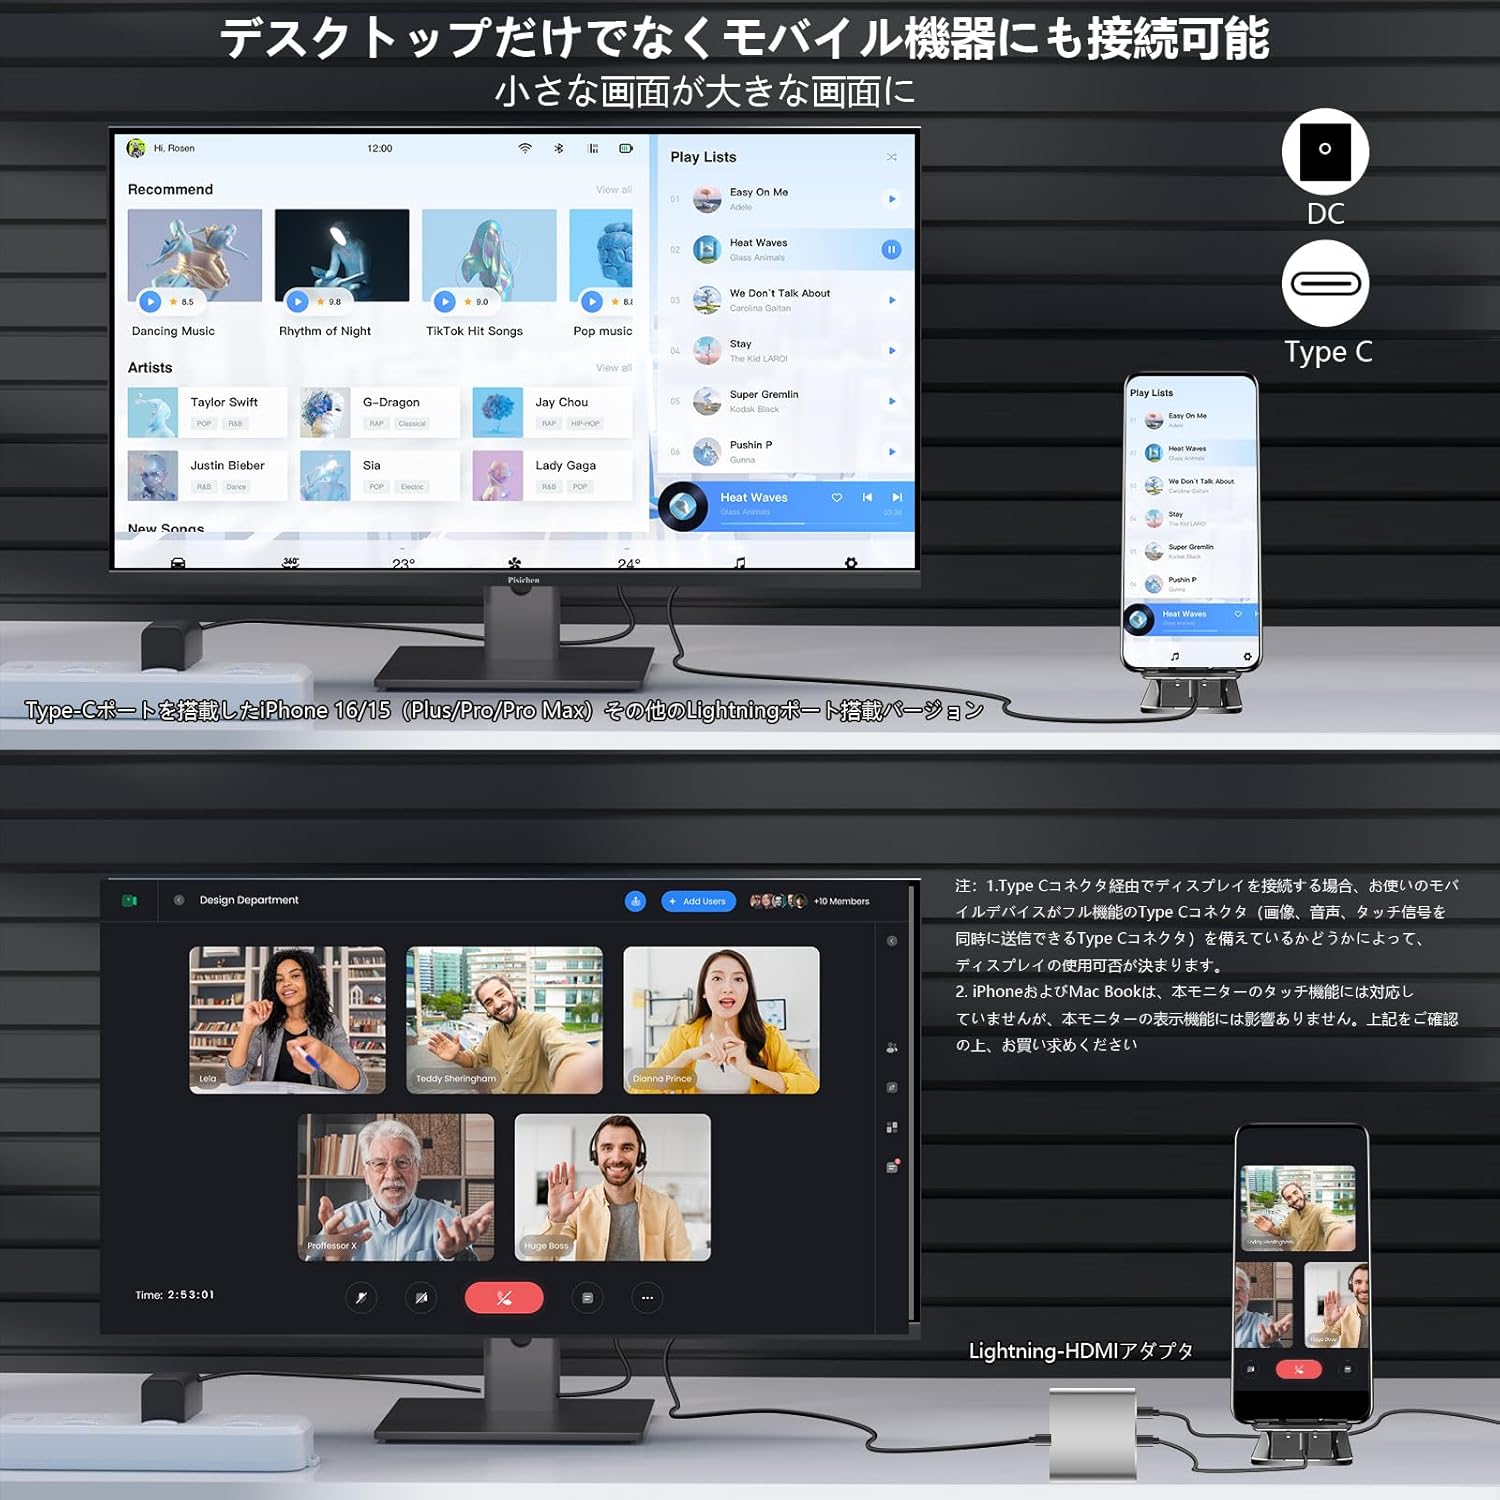
Image: Diagram showing various connection ports on the monitor, including DC power, USB-C, and HDMI, illustrating how to connect to different devices like laptops and mobile phones.

Image: An illustration demonstrating how to connect the monitor to a laptop using HDMI for video and a USB cable for touch functionality, and also showing a dual monitor setup.
Operating the Monitor
Power On/Off
Locate the power button, typically on the back or side of the monitor. Press it to turn the monitor on or off.
On-Screen Display (OSD) Menu
The OSD menu allows you to adjust various display settings. Use the physical buttons on the monitor to navigate the menu options:
- Brightness/Contrast: Adjust the overall luminance and contrast of the display.
- Color Settings: Modify color temperature, hue, and saturation to suit your preference.
- Input Source: Manually select the active input source (HDMI, DP, USB-C) if auto-detection does not work.
- Audio: Adjust the volume level for the built-in speakers.
- Eye-Care Mode: Activate Low Blue Light mode to reduce blue light emission and minimize eye strain during prolonged use.
- HDR: Enable or disable High Dynamic Range for enhanced visual experience with compatible content.
Touch Screen Functionality
The monitor features responsive 10-point multi-touch technology. Ensure the USB touch cable is properly connected to your device for this feature to function.
- Gestures: Utilize standard touch gestures such as pinch-to-zoom, swipe, tap, and drag for intuitive navigation and interaction.
- Multi-User Interaction: The 10-point touch capability allows multiple users to interact with the screen simultaneously using fingers or a passive stylus.

Image: A user pointing at the touch screen monitor displaying data analytics, demonstrating the interactive capabilities of the 10-point multi-touch feature.

Image: A man interacting with a digital menu on the touch screen monitor, illustrating the ease of use for various applications like self-service kiosks.
Maintenance
Cleaning the Monitor
- Always unplug the monitor from the power outlet before cleaning.
- Use a soft, lint-free cloth slightly dampened with water or a non-abrasive, electronics-safe screen cleaner.
- Do not spray cleaning solution directly onto the screen surface.
- Avoid using alcohol, ammonia, or abrasive cleaners, as these can damage the screen and casing.
Storage
When the monitor is not in use for extended periods, store it in a cool, dry place, away from direct sunlight, excessive heat, and extreme cold. If possible, use the original packaging for protection.
Troubleshooting
If you encounter any issues with your monitor, please refer to the following table for common problems and their solutions:
| Problem | Possible Cause | Solution |
|---|---|---|
| No image on screen | Power cable disconnected; Incorrect input source selected; Connected device not powered on or in sleep mode. | Ensure all power and video cables are securely connected. Use the OSD menu to select the correct input source. Verify that your connected device is powered on and outputting a signal. |
| Touch screen not responding | USB touch cable not connected or faulty; Operating system driver issue. | Confirm the USB-A to USB-C cable is securely connected from your computer to the monitor. Try a different USB port on your computer. Check your device's operating system for touch screen drivers or updates. |
| Screen flickering or distorted image | Video cable issue; Incorrect display resolution or refresh rate; Electromagnetic interference. | Try a different video cable. Adjust the display resolution and refresh rate in your device's display settings to match the monitor's specifications. Move the monitor away from other electronic devices that may cause interference. |
| No audio from built-in speakers | Monitor volume too low or muted; Incorrect audio output selected on device; Video cable not transmitting audio. | Increase the monitor volume via the OSD menu. In your device's sound settings, ensure the monitor is selected as the audio output device. Verify that your HDMI, DP, or USB-C cable supports audio transmission. |
Specifications
Detailed technical specifications for your Pisichen 27-inch Touch Panel Monitor:
- Model: 27''TS-2k-100hz
- Brand: Pisichen
- Screen Size: 27 inches
- Panel Type: IPS
- Resolution: 2560x1440 (QHD 2K)
- Refresh Rate: 100Hz
- Brightness: 350 nits
- Viewing Angle: 178° (Horizontal/Vertical)
- Aspect Ratio: 16:9
- Touch Technology: 10-point Multi-Touch
- Connectivity: 1x HDMI, 1x DisplayPort, 1x USB-C 3.1 (for video, audio, touch), 1x DC Power Input
- Built-in Speakers: Yes
- VESA Mount: 100x100mm
- Tilt Adjustment: -5° to 15°
- Additional Features: Anti-Glare, Anti-Flicker, Low Blue Light, HDR support
- Product Dimensions (without stand): Approximately 61.2 cm (W) x 36.3 cm (H) x 1.9 cm (D)
- Weight: Approximately 6.76 kg

Image: A diagram illustrating the precise dimensions of the Pisichen 27-inch monitor, including width, height, and thickness.
Warranty and Support
For information regarding the product warranty, please refer to the warranty card included in your package or visit the official Pisichen website. It is recommended to retain your purchase receipt as proof of purchase for any warranty claims.
For technical support or further assistance, please contact the seller directly through the platform where you purchased the product, or reach out to Pisichen customer service via the contact information provided on their official website.