1. Product Overview
The ROCAM 1025pro is a versatile alarm clock radio designed for modern living spaces. It integrates an FM radio, Bluetooth speaker, and night light, along with convenient charging ports and essential alarm functions.

Image 1.1: Front view of the ROCAM 1025pro Alarm Clock Radio, displaying the time and various icons.
Key Features:
- Compact Design: Stylish and modern fabric design suitable for any room.
- Clear Digital Display: Large, easy-to-read numbers with adjustable brightness (5 levels).
- FM Radio: Auto-scan and save up to 20 preset stations (87.5MHz to 108.0MHz).
- Bluetooth Speaker: Seamless pairing for audio streaming with 16 volume settings.
- Dual Alarm Modes: Wake up to a classic beep or your favorite radio station.
- Night Light: Integrated warm night light function.
- Charging Ports: USB and Type-C ports for device charging.
- Battery Backup: Maintains time and settings during power outages (requires plug-in for full function).
- User-Friendly Controls: Intuitive buttons and rotary knobs for easy operation, including DST mode.

Image 1.2: The ROCAM 1025pro highlighting its 3-in-1 functionality: Alarm Clock, FM Radio, and Bluetooth Speaker, shown on a bedside table.
2. Package Contents
Please check the package for the following items:
- ROCAM 1025pro Alarm Clock Radio
- DC 5V/2A Power Adapter
- 60" USB-DC Power Cable (Type-C interface)
- CR2032 Button Battery (pre-installed for backup)
- User Manual (this document)
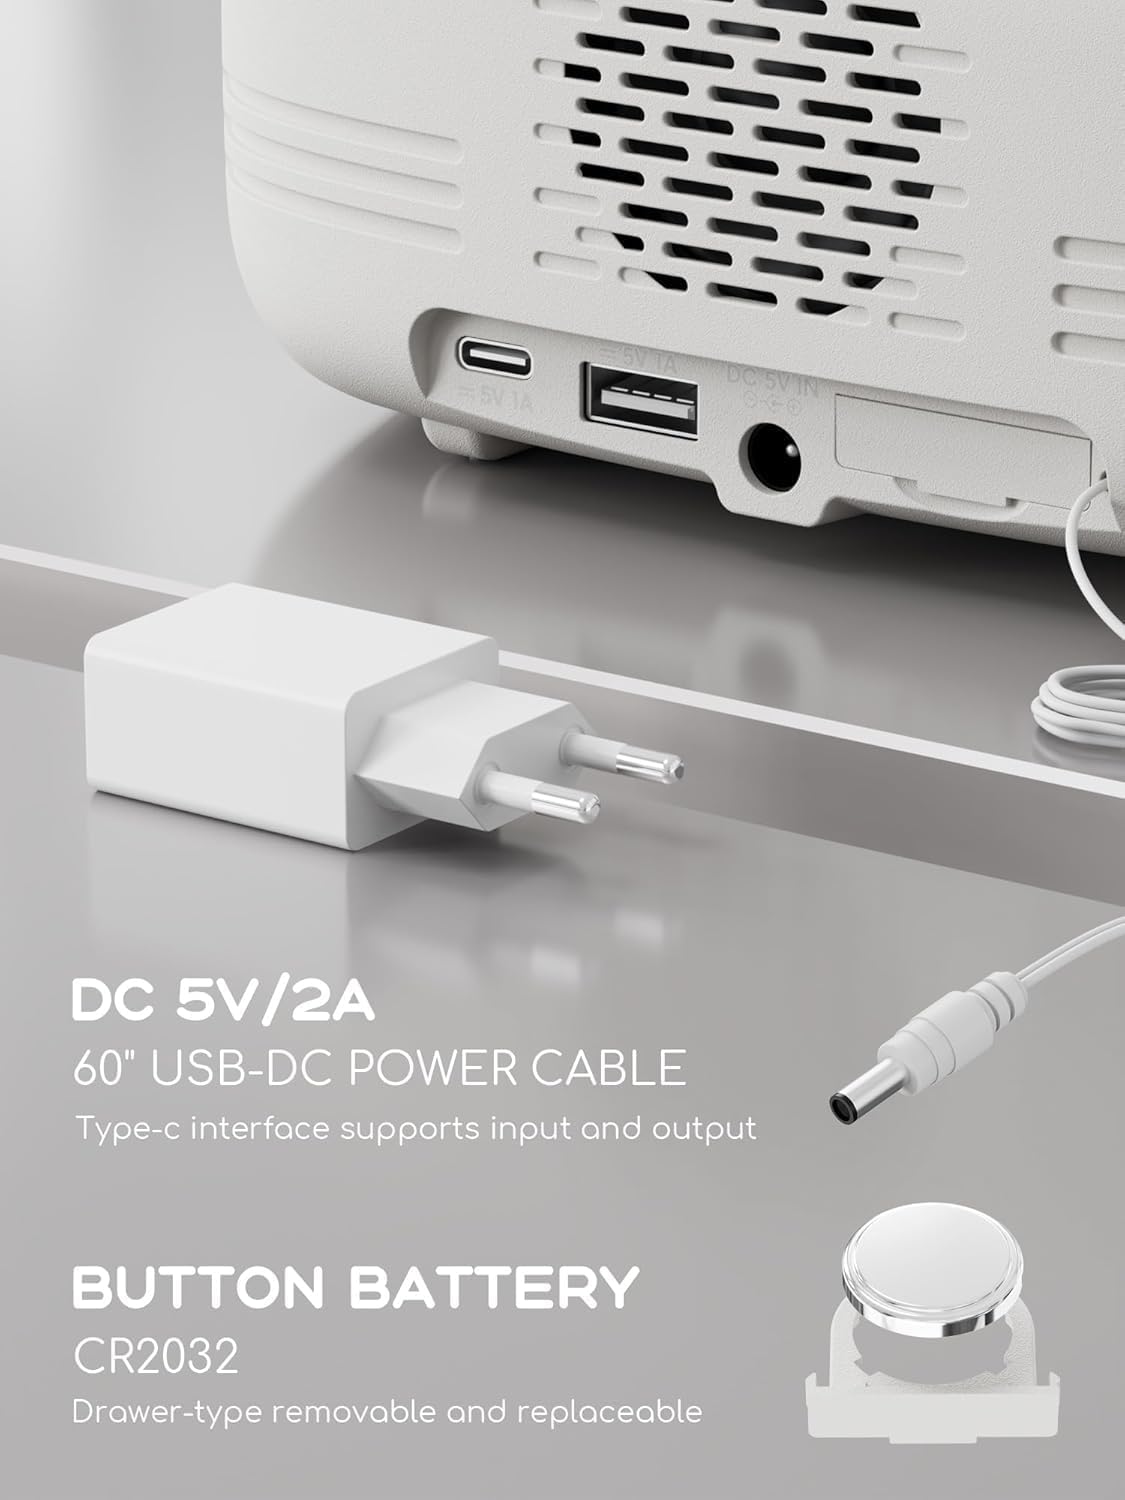
Image 2.1: Rear view of the ROCAM 1025pro showing the DC 5V/2A power input, USB-A, and Type-C ports, alongside the power adapter and CR2032 button battery.
3. Setup
3.1 Power Connection
- Connect the provided USB-DC power cable to the DC 5V IN port on the back of the alarm clock.
- Plug the power adapter into a standard wall outlet.
- The display will light up, indicating the device is powered on.
Note: The CR2032 button battery is pre-installed and provides backup power for time and settings during power outages. The clock requires continuous plug-in power for full functionality.
3.2 Initial Time Setting
Upon first power-on or after a prolonged power disconnection without battery backup, you may need to set the time.
- Press and hold the "Time/12-24" button (usually located on the top panel) until the hour digits flash.
- Rotate the "Time/Volume" knob (typically on the right side) to adjust the hour.
- Press the "Time/12-24" button again to switch to minute adjustment.
- Rotate the "Time/Volume" knob to adjust the minutes.
- Press the "Time/12-24" button once more to confirm the time.
- To switch between 12-hour and 24-hour format, briefly press the "Time/12-24" button when the time is displayed.
4. Operating Instructions
4.1 Alarm Setting
The device supports two independent alarms.
- Press the "Alarm" button (usually on the top panel) to select Alarm 1 or Alarm 2. The corresponding alarm icon will flash.
- Press and hold the "Alarm" button until the hour digits flash.
- Rotate the "Time/Volume" knob to adjust the alarm hour.
- Press the "Alarm" button again to switch to minute adjustment.
- Rotate the "Time/Volume" knob to adjust the alarm minutes.
- Press the "Alarm" button again to select the alarm source (Buzzer or FM Radio).
- Rotate the "Time/Volume" knob to choose. If FM Radio is selected, the last tuned station will be used.
- Press the "Alarm" button once more to confirm and activate the alarm. The alarm icon will remain lit.
- To deactivate an alarm, press the "Alarm" button until the alarm icon disappears.

Image 4.1: The ROCAM 1025pro displaying an alarm icon, indicating an active alarm setting.
4.2 Snooze Function
When the alarm sounds, press the "SNOOZE/LIGHT" button to activate the snooze function. The alarm will pause for approximately 9 minutes and then sound again.
4.3 Display Dimmer
To adjust the display brightness, repeatedly press the "SNOOZE/LIGHT" button when the alarm is not sounding. There are 5 levels of brightness, from very bright to off.
4.4 FM Radio Operation
- Press the "Power/Mode" button to switch to FM Radio mode. The frequency will be displayed.
- Auto Scan: Press and hold the "Scan" knob (usually on the right side) to automatically scan and save available FM stations. Up to 20 stations can be stored.
- Manual Tuning: Briefly rotate the "Scan" knob to manually tune the frequency.
- Preset Stations: Press the "Preset/Pair" button to cycle through saved preset stations.
- Volume Adjustment: Rotate the "Time/Volume" knob to adjust the radio volume (16 levels).

Image 4.2: The ROCAM 1025pro displaying an FM radio frequency, indicating FM radio mode is active.
4.5 Bluetooth Speaker Pairing
- Press the "Power/Mode" button to switch to Bluetooth mode. The Bluetooth icon will flash, indicating it's ready for pairing.
- On your mobile device, enable Bluetooth and search for "ROCAM 1025pro" (or similar name).
- Select the device to pair. Once connected, the Bluetooth icon on the clock display will stop flashing and remain solid.
- You can now stream audio from your device to the alarm clock.
- Volume Adjustment: Rotate the "Time/Volume" knob to adjust the Bluetooth audio volume (16 levels).

Image 4.3: An exploded view of the ROCAM 1025pro, showing the internal speaker components and highlighting its Bluetooth capabilities.
4.6 Night Light Function
The device features a warm night light. To activate or deactivate it, locate the dedicated night light button (if available, otherwise it might be integrated with the SNOOZE/LIGHT button or a separate touch area). The image suggests a touch-sensitive bar below the display.
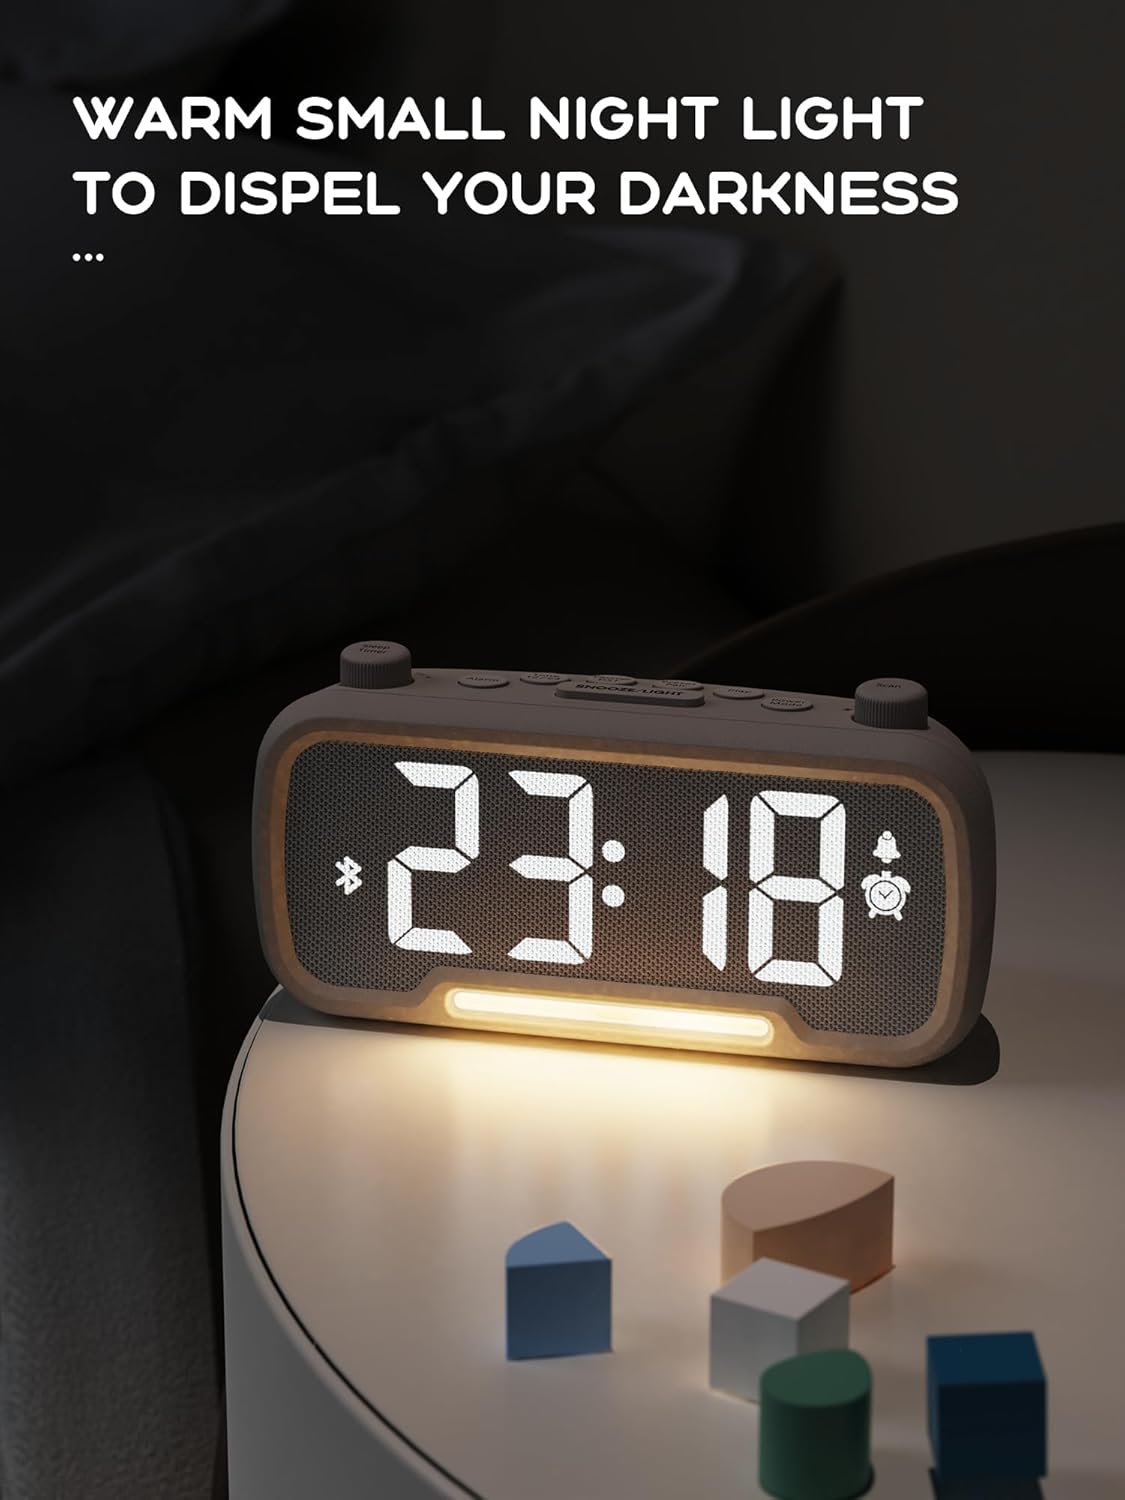
Image 4.4: The ROCAM 1025pro with its warm night light illuminated, providing ambient lighting in a dark room.
4.7 USB and Type-C Charging Ports
The alarm clock is equipped with a standard USB-A port and a Type-C port on the back for charging external devices.
- Connect your device's charging cable to the appropriate USB-A or Type-C port.
- Ensure the alarm clock is powered on and connected to a wall outlet for charging functionality.
4.8 Daylight Saving Time (DST)
To enable or disable Daylight Saving Time, briefly press the "DST" button (if available, or a combination of buttons as per specific model design). This will adjust the time by one hour forward or backward.
5. Maintenance
5.1 Cleaning
- Disconnect the power adapter before cleaning.
- Use a soft, dry cloth to wipe the exterior of the device.
- Do not use liquid cleaners, aerosols, or abrasive materials, as these may damage the surface.
5.2 Battery Replacement (CR2032)
The CR2032 button battery provides backup for time and settings. If the time and settings are lost during a brief power outage, the battery may need replacement.
- Locate the battery compartment on the back or bottom of the unit. It is typically a drawer-type compartment.
- Open the compartment using a small screwdriver or by sliding the tray out.
- Remove the old CR2032 battery.
- Insert a new CR2032 battery with the positive (+) side facing up.
- Close the battery compartment securely.
- Dispose of the old battery responsibly according to local regulations.
6. Troubleshooting
| Problem | Possible Cause | Solution |
|---|---|---|
| Display is off or not working. | Not connected to power; power outage. | Ensure the power adapter is securely plugged into a working outlet. Check household power. |
| Display is too bright/dim. | Brightness setting is incorrect. | Repeatedly press the "SNOOZE/LIGHT" button to cycle through brightness levels. |
| Alarm does not sound. | Alarm is not set or deactivated; volume is too low. | Verify alarm settings and ensure the alarm icon is lit. Increase alarm volume using the "Time/Volume" knob. |
| Cannot pair Bluetooth device. | Clock not in Bluetooth mode; device too far; already paired with another device. | Ensure the clock is in Bluetooth mode (flashing icon). Move device closer. Disconnect from other Bluetooth devices. |
| FM radio reception is poor. | Weak signal; antenna not extended. | Adjust the position of the clock. Ensure the FM antenna (if external) is fully extended. Try auto-scanning again. |
| Time/settings lost after power outage. | CR2032 backup battery is depleted or missing. | Replace the CR2032 button battery as described in Section 5.2. |
7. Specifications
| Feature | Detail |
|---|---|
| Brand | ROCAM |
| Model Number | 1025pro |
| Product Dimensions | 16.8 x 3.81 x 8.4 cm (6.6 x 1.5 x 3.3 inches) |
| Item Weight | 350 g (0.77 lbs) |
| Power Source | Corded Electric (DC 5V/2A) |
| Battery Backup | 1 x CR2032 Lithium Metal battery (included) |
| Display Type | Digital LED |
| FM Frequency Range | 87.5MHz - 108.0MHz |
| Bluetooth Version | 5.0 |
| Charging Ports | USB-A, Type-C |
| Special Features | Alarm, Bluetooth Speaker, FM Radio, Night Light, Sleep Timer, Snooze, DST, Adjustable Dimmer |
8. Warranty and Support
ROCAM products are designed for reliability and performance. For warranty information, technical support, or customer service inquiries, please refer to the contact information provided on the product packaging or the official ROCAM website.
Please retain your proof of purchase for warranty claims.


