
1. Introduction
This manual provides essential information for the safe and effective use of your XTAR USB-C to DC Charging Cable. This 6.6-foot cable is designed to connect your Starlink Mini device to a compatible USB-C power source, facilitating reliable power delivery. Its durable and compact design makes it suitable for various environments, including home, office, and outdoor use.
2. Product Features
- Direct Replacement: Replaces standard DC-to-DC cables for Starlink Mini, offering a modern USB-C connection.
- Universal USB-C Compatibility: Connects to various USB-C power sources, including portable power banks, PD chargers, and laptop chargers.
- Portable Design: Lightweight and flexible, ideal for travel, camping, RVs, and other on-the-go setups.
- Outdoor Ready: Constructed for durability to withstand frequent use in rugged outdoor conditions.
- Optimal Length: A 6.6-foot (approximately 2-meter) cable length provides flexibility in device placement.
3. Package Contents
Verify that all items are present in your package:
- 1 x XTAR USB-C to DC5521 Cable
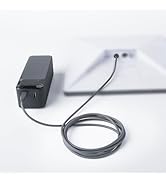
Image: The XTAR USB-C to DC Charging Cable, showing both the USB-C and DC 5521 connectors.
4. Specifications
| Brand | XTAR |
| Model Name | USB C TO DC Cable |
| Connector Type | USB Type C, DC 5521 |
| Cable Type | USB-C to DC 5521 |
| Compatible Devices | Starlink Mini (ST MINI) |
| Special Feature | ST Mini Cable |
| Recommended Uses | Powering and connecting Starlink Mini devices, outdoor and on-the-go use with USB-C power sources |
| Cable Length | 6.6 feet (approx. 2 meters) |
| Maximum Voltage | 55 Volts (DC) |
| Item Weight | 2.82 ounces |

Image: Detailed view of the cable's components, including the Starlink Mini DC (Male) connector, Starlink Waterproof Gasket, and USB Type-C (Male) connector with PD20V chip.
5. Setup Instructions
- Identify Connectors: Locate the USB-C connector and the DC 5521 connector on the cable. The DC 5521 connector is designed to fit your Starlink Mini device.
- Connect to Starlink Mini: Insert the DC 5521 connector firmly into the corresponding port on your Starlink Mini device.
- Connect to Power Source: Insert the USB-C connector into a compatible USB-C power source. Ensure your power source meets the required specifications for the Starlink Mini.
- Power Requirements:
- For optimal performance, the USB-C power source must support Power Delivery (PD) at 20V.
- A PD source must support at least 60W/20V.
- A general power source must support at least 100W/20V.

Image: The XTAR USB-C to DC cable connecting a Starlink Mini to a portable power bank in an outdoor setting.

Image: The XTAR USB-C to DC cable connecting a Starlink Mini to a wall charger in an indoor setting.

Image: Visual representation of cable compatibility, indicating it is compatible with Starlink Mini and not with Starlink (Gen 2), Starlink (Gen 3), or Flat High Performance models.

Image: An important notice detailing the power requirements: a PD source must support 60W/20V, and a general power source must support 100W/20V.
6. Operating Instructions
Once the cable is securely connected to your Starlink Mini and a compatible power source, the Starlink Mini should power on and begin operation as designed. No additional steps are required for the cable itself, as it functions as a direct power conduit.

Image: A woman working on a laptop with a Starlink Mini device powered by the XTAR USB-C to DC cable, set up inside a tent in an outdoor environment.

Image: A Starlink Mini device and its power source, connected by the XTAR USB-C to DC cable, positioned on rocky terrain near a stream, demonstrating outdoor use.
7. Maintenance
- Cleaning: Wipe the cable with a soft, dry cloth. Avoid using harsh chemicals or abrasive materials.
- Storage: Store the cable in a cool, dry place away from direct sunlight and extreme temperatures. Avoid tightly coiling or bending the cable, especially near the connectors, to prevent damage.
- Inspection: Periodically inspect the cable and connectors for any signs of wear, fraying, or damage. Discontinue use if damage is observed.
8. Troubleshooting
- Device Not Powering On:
- Ensure both the USB-C and DC 5521 connectors are fully inserted into their respective ports.
- Verify that your USB-C power source is active and providing sufficient power (refer to Section 5: Setup Instructions for power requirements).
- Test the power source with another compatible device to confirm it is functioning correctly.
- Intermittent Connection:
- Check for any visible damage to the cable or connectors.
- Ensure the connections are secure and not loose.
9. Official Product Video
Video: An official product video from XTAR demonstrating the features and usage of the XTAR Starlink Mini Cable. This video highlights the cable's compatibility and design.
10. Warranty and Support
For warranty information and customer support, please refer to the XTAR official website or contact your retailer. Keep your purchase receipt for warranty claims.
For further assistance, you may visit the XTAR Store on Amazon.


