Introduction
The Cornesty GM100 Digital Ultrasonic Thickness Gauge is a precision instrument designed for accurate measurement of material thickness using ultrasonic waves. It is ideal for various industrial applications, including steel testing, and is suitable for both fieldwork and elevated inspections. This manual provides detailed instructions for the proper setup, operation, and maintenance of your GM100 thickness gauge.
Key Features:
- Sound Velocity Measurement: Allows for measuring sound velocity with a given thickness to improve accuracy.
- Auto Calibration: Ensures precise and reliable measurements.
- Versatile Usage: Designed for use in various environments, including fieldwork and elevated inspections.
- Auto Power Off Function: Helps conserve battery life.
- Large LCD Display: Provides clear and easy-to-read measurement results.
Safety Information
Please read and understand all safety instructions before operating the device. Failure to do so may result in injury or damage to the instrument.
- Do not expose the device to extreme temperatures, humidity, or corrosive environments.
- Avoid dropping or subjecting the device to severe impact.
- Use only the specified battery type (3 * 1.5V AAA Battery).
- Do not attempt to disassemble or modify the device. Refer all servicing to qualified personnel.
- Keep the device and its accessories out of reach of children.
Package Contents
Verify that all items listed below are included in your package:
- 1 x Ultrasonic Thickness Gauge (GM100)
- 1 x Dia.10 Transducer (5KHz)
- 1 x 4mm Sample Block
- 1 x Operation Manual (This document)

Figure 1: Contents of the GM100 package. This image shows the orange and red GM100 thickness gauge, a black transducer probe with cables, and a small silver 4mm sample block.
Product Overview
Familiarize yourself with the components of the GM100 Digital Ultrasonic Thickness Gauge.

Figure 2: Front view of the GM100 Ultrasonic Thickness Gauge. The device is orange and red, featuring a large LCD screen at the top displaying "5900 m/s" and buttons below for VEL, STORE, CAL, Power, and navigation arrows.
Components:
- LCD Display: Large screen for displaying measurements, units, and status indicators.
- Transducer Port: Connects the ultrasonic probe to the main unit.
- Control Buttons:
- VEL (Velocity): Used for sound velocity measurement mode.
- STORE: For saving measurement data.
- CAL (Calibration): Initiates the auto-calibration process.
- Power Button: Turns the device on/off.
- Up/Down Arrows: For navigation and adjusting values.
- Battery Compartment: Located on the back for AAA batteries.

Figure 3: Back view of the GM100. This image shows the red back casing of the device with the battery compartment cover removed, revealing slots for three AAA batteries.
Setup
1. Battery Installation
- Locate the battery compartment on the back of the GM100.
- Slide the battery cover downwards to open it.
- Insert three (3) 1.5V AAA batteries, ensuring correct polarity (+/-).
- Replace the battery cover, sliding it upwards until it clicks into place.
2. Connecting the Transducer
- Identify the transducer cable with two connectors.
- Connect the two plugs from the transducer cable into the corresponding ports at the top of the GM100 unit. Ensure a secure connection.
- The transducer probe head should be clean and free of debris before use.
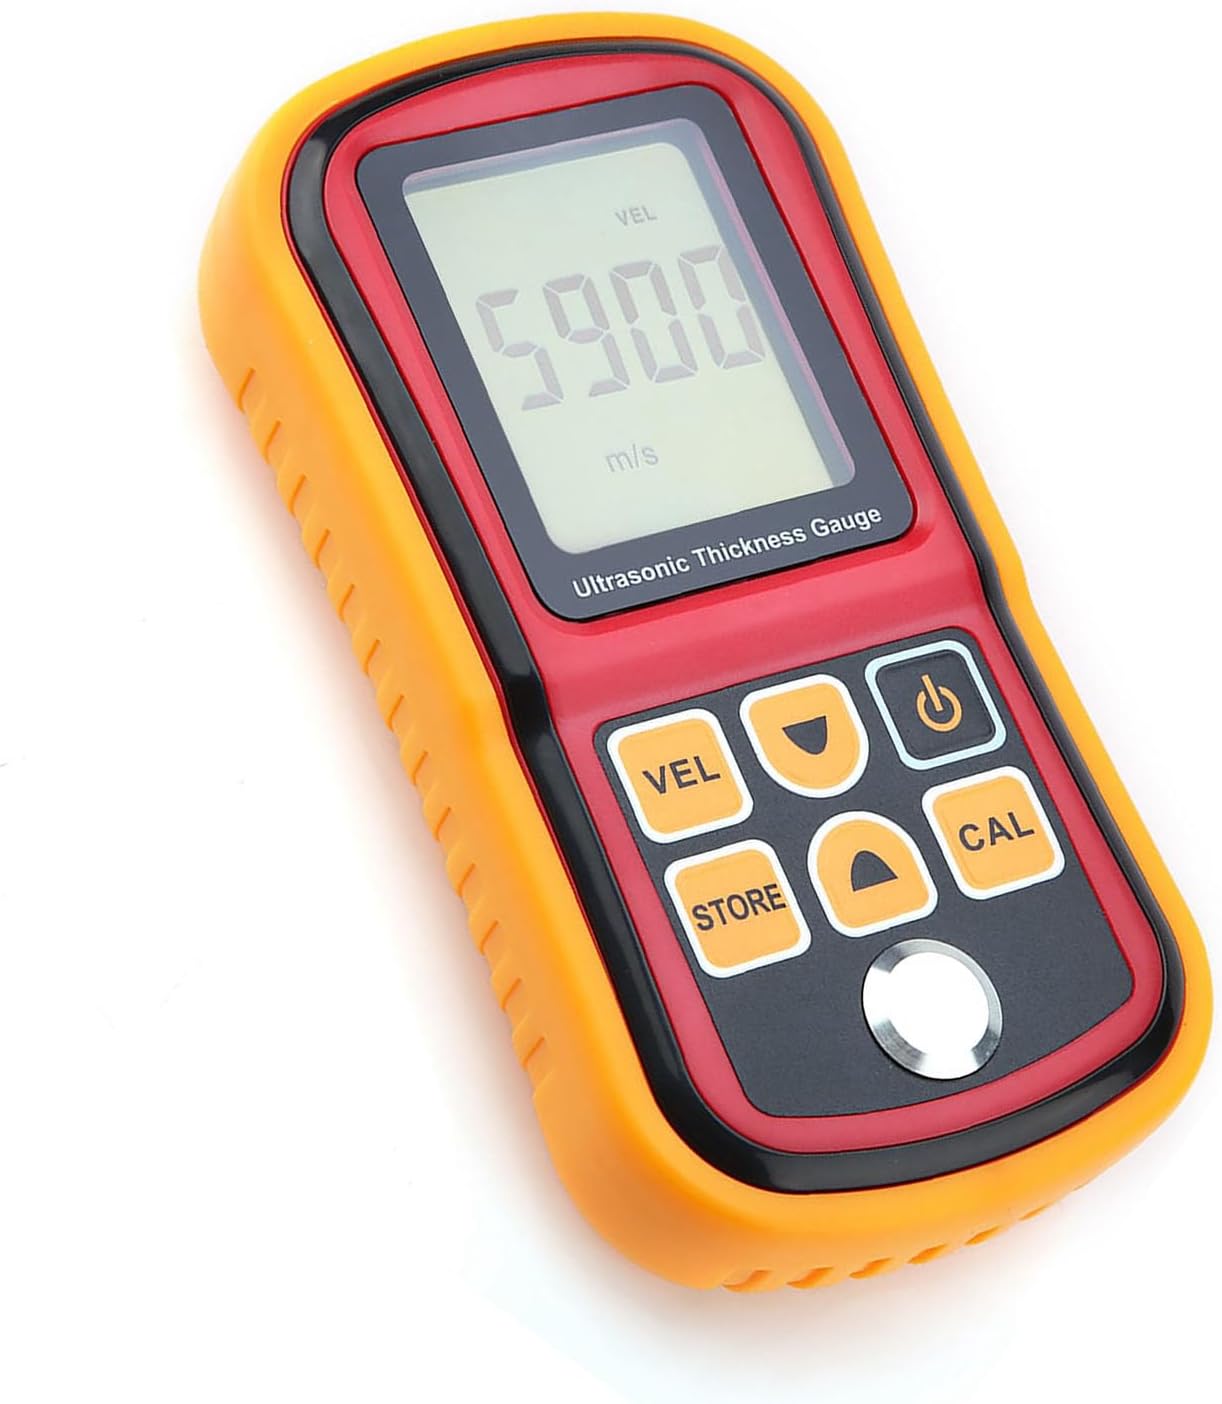
Figure 4: GM100 with transducer connected. This image shows the orange and red GM100 unit with the black transducer cable plugged into the top ports, leading to the silver transducer probe.
Operating Instructions
1. Powering On/Off
- Press the Power button (often marked with a circle and vertical line symbol) to turn the device on. The LCD will illuminate.
- The device features an auto power-off function to save battery life. It will automatically shut down after a period of inactivity.
- To manually turn off the device, press and hold the Power button.
2. Auto Calibration
Before taking measurements, it is recommended to perform an auto-calibration for optimal accuracy.
- Ensure the transducer is connected.
- Apply a small amount of coupling gel (not included) to the 4mm sample block.
- Place the transducer firmly and flatly on the 4mm sample block.
- Press the CAL button. The device will perform the calibration.
- Once calibrated, the display will show the calibrated value, typically 4.0mm.
3. Thickness Measurement
- Ensure the device is calibrated.
- Apply coupling gel to the surface of the material to be measured.
- Place the transducer firmly and flatly on the prepared surface. Ensure good contact.
- The thickness reading will be displayed on the LCD screen.
- For continuous measurement, keep the transducer in contact with the surface.
4. Sound Velocity Measurement
This function allows you to measure the sound velocity of a material if its thickness is known.
- Press the VEL button to enter sound velocity measurement mode.
- Use the Up/Down arrow buttons to input the known thickness of the material.
- Apply coupling gel and place the transducer firmly on the material.
- The device will display the calculated sound velocity for that material.
5. Data Storage (STORE)
The GM100 may have a data storage function. Refer to the on-screen prompts or the full manual for detailed instructions on saving and recalling measurements using the STORE button.
Maintenance
Cleaning
- After each use, wipe the transducer and the device body with a soft, dry cloth.
- Do not use abrasive cleaners or solvents.
- Ensure no coupling gel or other residues remain on the transducer face.
Storage
- Store the GM100 in a cool, dry place, away from direct sunlight and extreme temperatures.
- If storing for an extended period, remove the batteries to prevent leakage.
Battery Replacement
- When the low battery indicator appears on the LCD, replace the batteries as described in the "Battery Installation" section.
- Dispose of used batteries according to local regulations.
Troubleshooting
| Problem | Possible Cause | Solution |
|---|---|---|
| Device does not power on. | Dead or incorrectly installed batteries. | Check battery polarity; replace with new AAA batteries. |
| Inaccurate or unstable readings. |
|
|
| "LOW BATT" indicator. | Batteries are low. | Replace all three AAA batteries. |
Specifications
| Parameter | Value |
|---|---|
| Model | GM100 |
| Measuring Range | 1.2-300mm (steel) |
| Accuracy | ±(1%H+0.1mm) H denotes the measured thickness |
| Working Frequency | 5MHz |
| Resolution | 0.1mm |
| Minimum Limit for Tube Measuring (steel) | dia. 20*3.0mm (steel) |
| Sound Velocity Range | 1000-9999m/s |
| Power Supply | 3 * 1.5V AAA Battery (not included) |
| Weight | Approx. 400g / 14.1oz |
| Dimensions | Approx. 15 * 8 * 3.2cm / 5.9 * 3.2 * 1.3in |
| Manufacturer | Cornesty |
Warranty and Support
Specific warranty details for the Cornesty GM100 Digital Ultrasonic Thickness Gauge are typically provided with your purchase documentation or can be obtained by contacting the manufacturer directly.
For technical support, troubleshooting assistance beyond what is covered in this manual, or warranty claims, please contact Cornesty customer service through their official website or the contact information provided at the point of purchase.
Please have your product model (GM100) and purchase details ready when contacting support.