1. Introduction
This manual provides detailed instructions for the installation, operation, and maintenance of your BISOFICE 80mm Receipt Printer. Please read this manual thoroughly before using the printer to ensure proper function and to prevent damage.
The BISOFICE 80mm Receipt Printer is a high-efficiency thermal printer designed for various business environments, including retail, restaurants, and supermarkets. It features fast printing, an auto cutter, and supports both USB and LAN connections.
2. Safety Information
- Do not expose the printer to water or moisture.
- Ensure the power supply matches the printer's requirements.
- Avoid touching the thermal print head immediately after printing, as it may be hot.
- Use only specified thermal paper.
- Do not attempt to disassemble or repair the printer yourself. Contact support if issues arise.
3. Package Contents
Verify that all items are present in the package:
- BISOFICE 80mm Receipt Printer
- Thermal Paper Roll
- Power Adapter
- USB Cable
- Power Cord
- User's Manual (this document)

Figure 3.1: Included items in the BISOFICE 80mm Receipt Printer package.
4. Product Overview
The BISOFICE 80mm Receipt Printer is designed for efficient and reliable thermal printing. Key features include a fast print speed of 200mm/s and an integrated auto cutter for clean receipt separation.
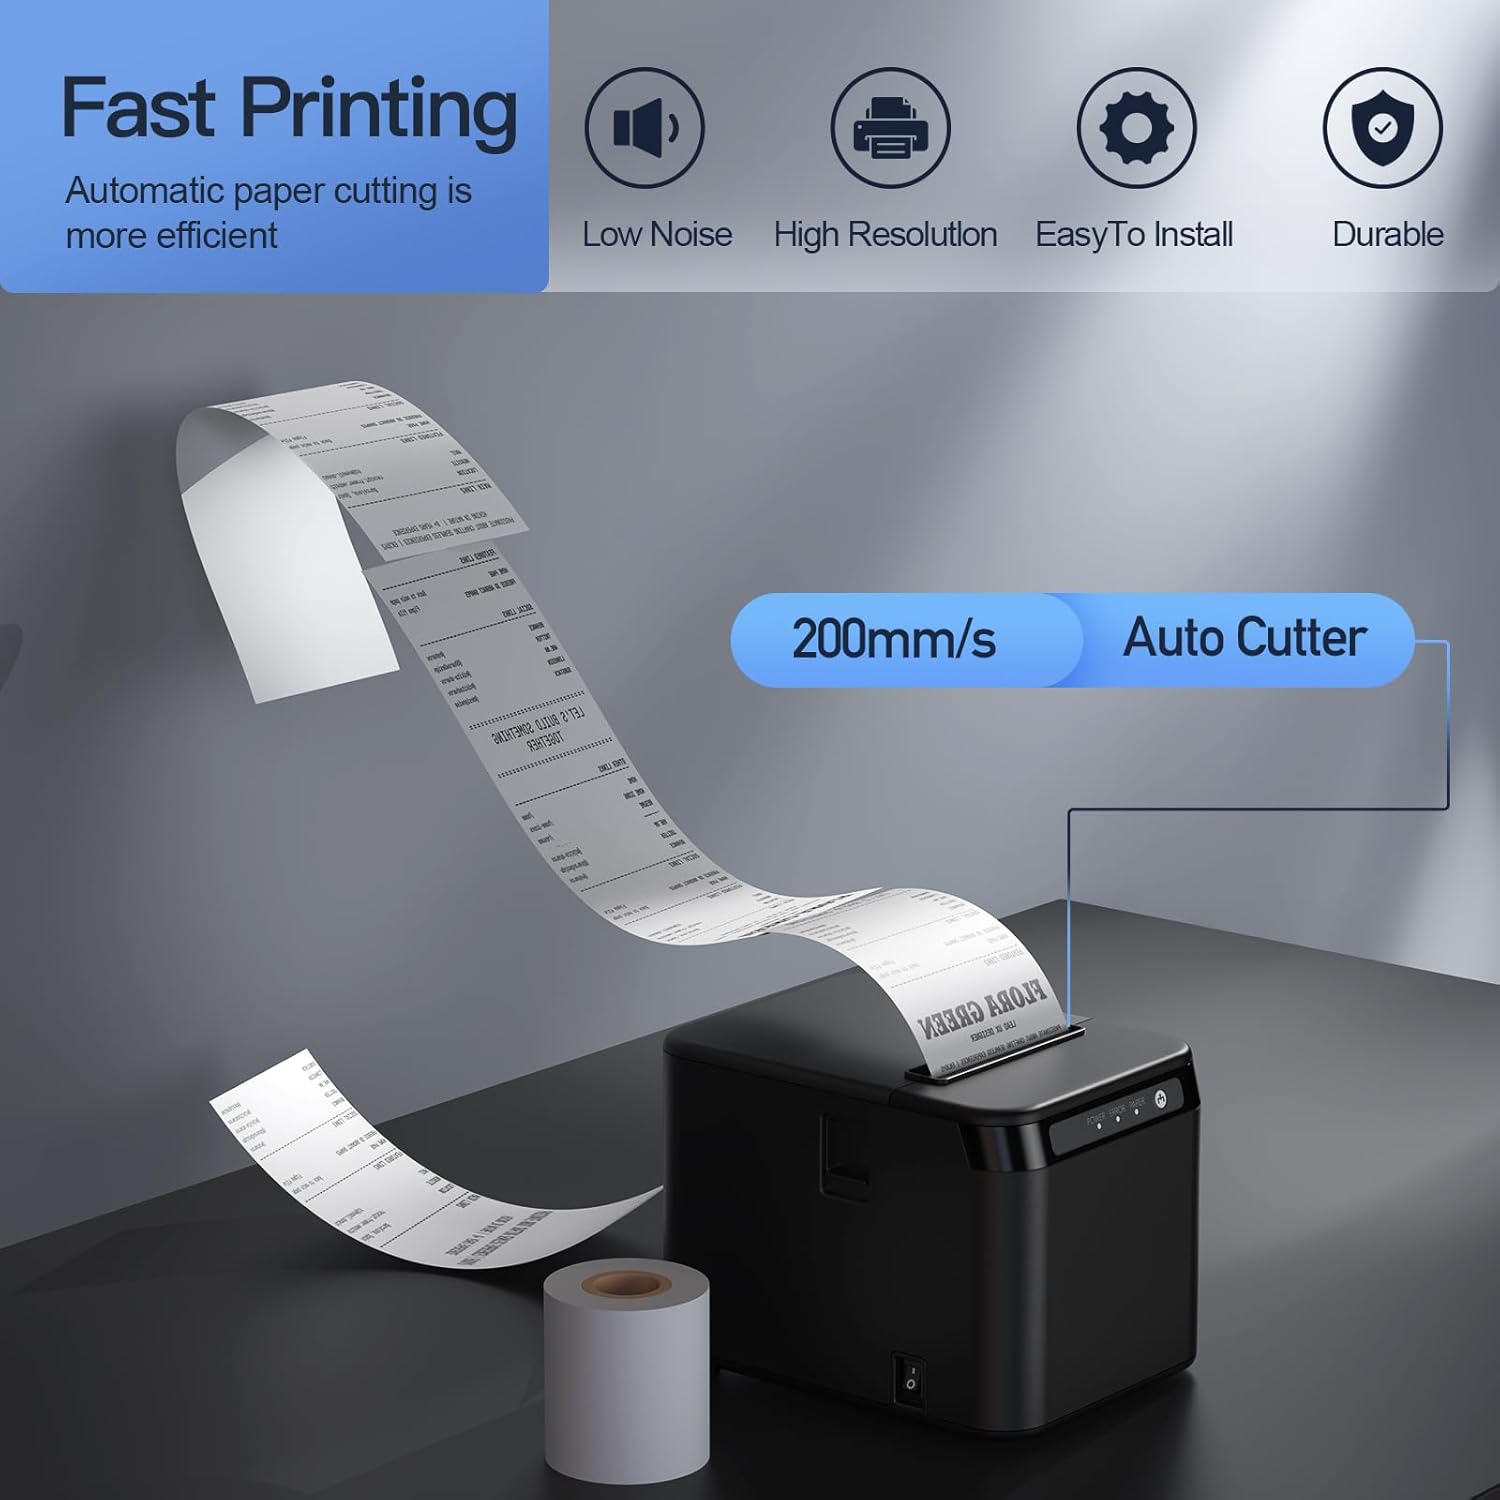
Figure 4.1: Printer features: 200mm/s speed and auto cutter.
This thermal printer operates without ink cartridges or ribbons, reducing operational costs. It uses standard 80mm thermal paper rolls.
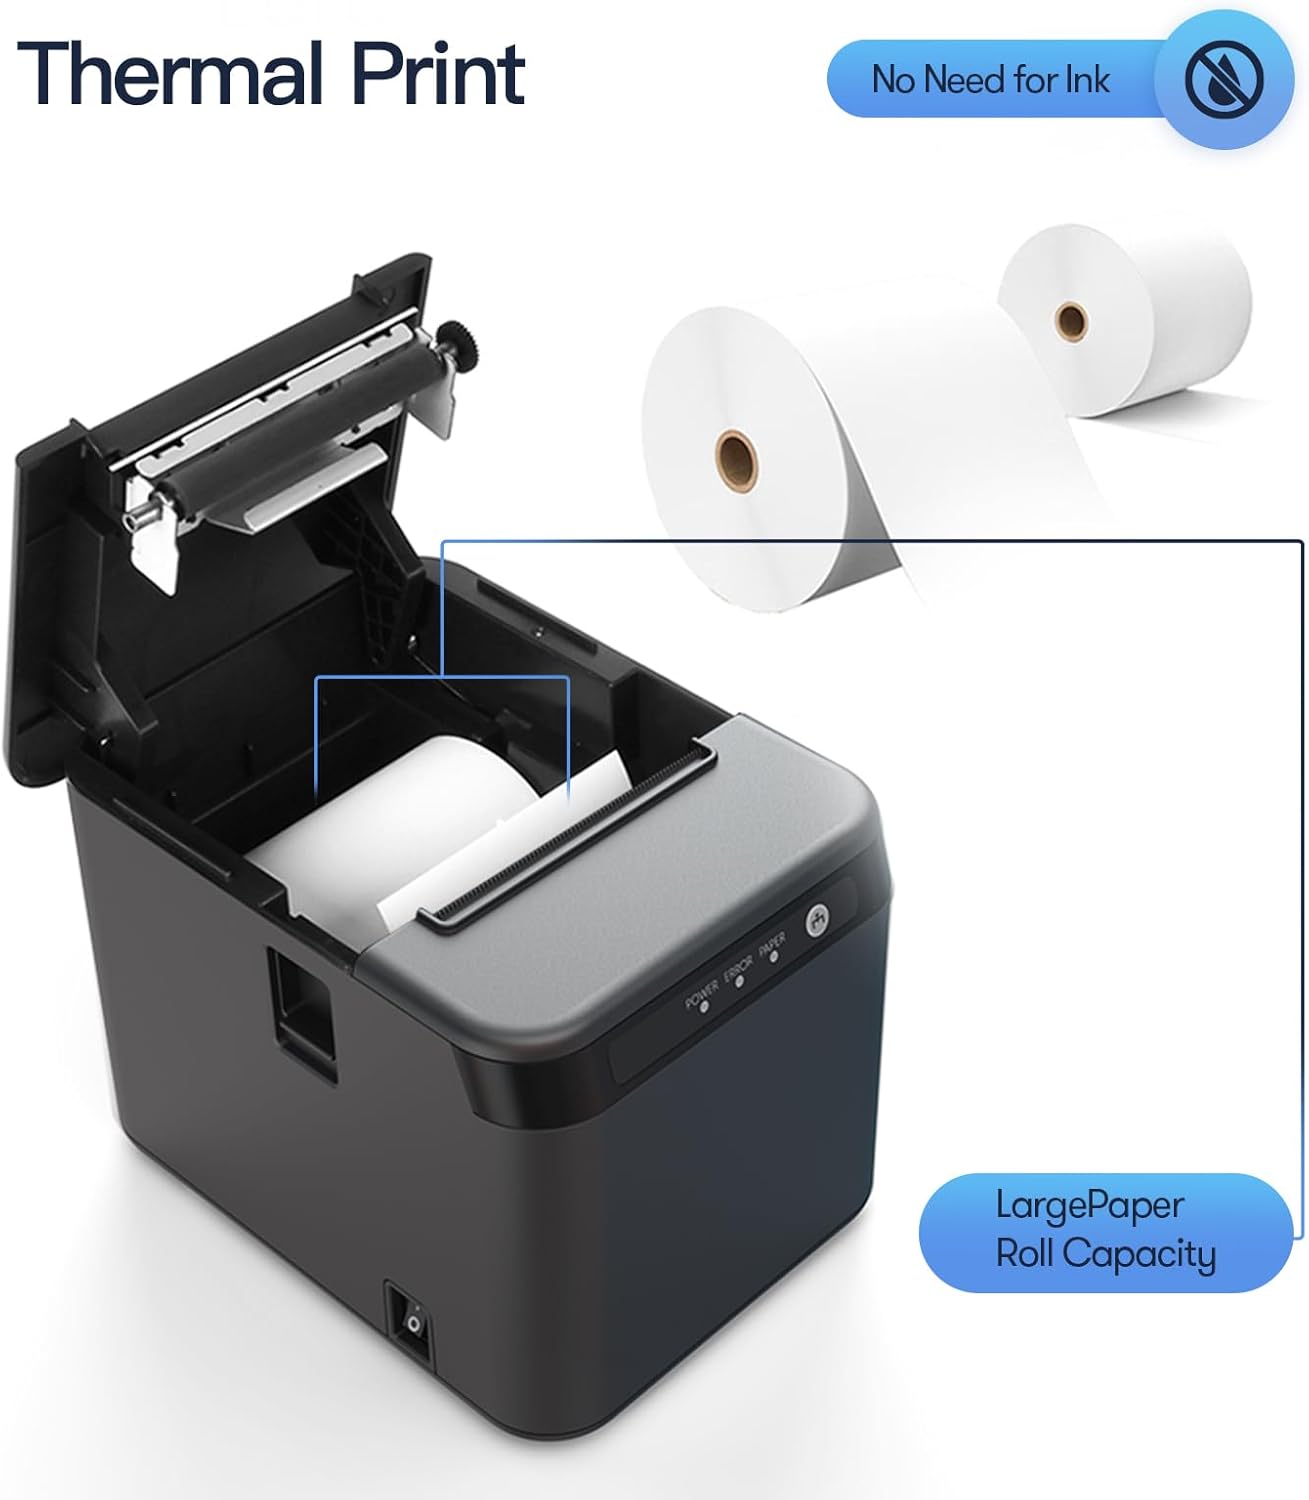
Figure 4.2: Thermal printing mechanism and paper roll capacity.
4.1 Printer Components and Ports
Familiarize yourself with the printer's external components and connection ports:

Figure 4.3: Front and rear view of the printer with labeled components and ports.
- Cover Open Button: Releases the top cover to access the paper compartment.
- Feed Button: Manually feeds paper.
- Indicator Lights: Display printer status (Power, Error, Paper).
- Switch Button: Power on/off switch.
- LAN Port: Connects to a network for Ethernet printing.
- USB Port: Connects to a computer for USB printing.
- Cash Port: Connects to a cash drawer.
- Power Port: Connects to the power adapter.
5. Setup
5.1 Loading Thermal Paper
- Press the cover open button to open the printer's top cover.
- Insert the thermal paper roll into the compartment, ensuring the paper feeds from the bottom and the leading edge extends slightly past the cutter.
- Close the top cover firmly until it clicks into place.
5.2 Connecting Cables
- Power Connection: Connect the power adapter to the printer's power port and then plug the power cord into a suitable electrical outlet.
- USB Connection: For direct connection to a computer, plug one end of the USB cable into the printer's USB port and the other end into an available USB port on your computer.
- LAN Connection: For network printing, connect an Ethernet cable from the printer's LAN port to your network router or switch.
- Cash Drawer Connection: If using a cash drawer, connect its cable to the printer's Cash port.
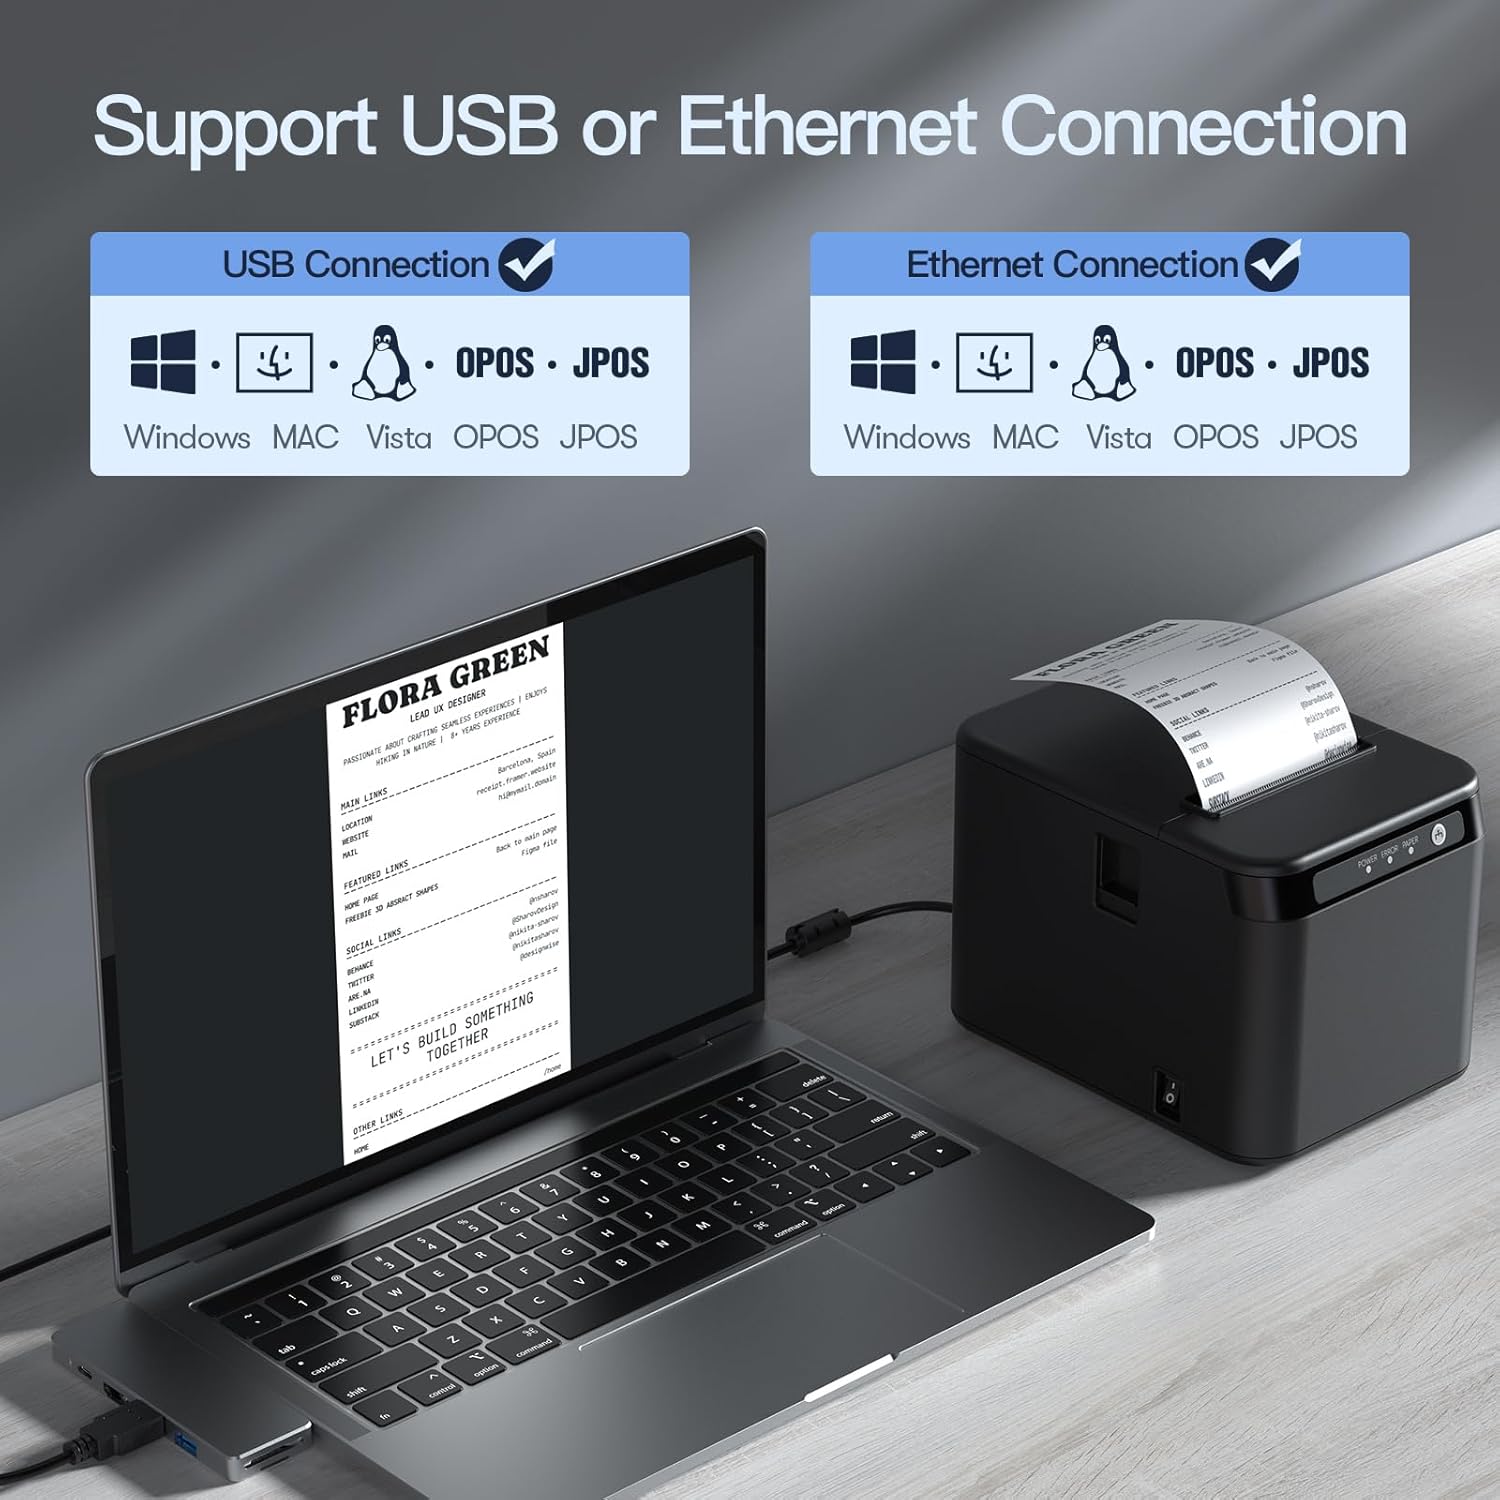
Figure 5.1: USB and Ethernet connection options.

Figure 5.2: Example of LAN connection setup.
5.3 Driver Installation
The printer requires drivers for proper communication with your computer. Drivers are typically provided on a CD or can be downloaded from the manufacturer's website. The printer is compatible with Windows XP/VISTA/7/8/10, Linux, and macOS.
- Insert the driver CD or navigate to the driver download page on the Bisofice website.
- Select the appropriate driver for your operating system (Windows, Linux, or macOS).
- Follow the on-screen instructions to complete the driver installation.
- After installation, restart your computer if prompted.
Note: Some users have reported needing to download drivers from a specific Chinese website. Refer to the support section if the provided drivers do not work.
6. Operation
6.1 Basic Printing
- Ensure the printer is powered on and connected to your computer or network.
- Open the document or application from which you wish to print (e.g., POS software, text editor).
- Select the BISOFICE 80mm Receipt Printer from your printer options.
- Initiate the print command. The printer will automatically print the receipt and use its auto cutter.
6.2 Wall Mounting
The printer features two hanging holes on the bottom for wall mounting, allowing you to save counter space.
- Identify a suitable location on a wall for mounting.
- Measure the distance between the two hanging holes on the printer's base.
- Drill two corresponding holes in the wall and insert appropriate wall anchors and screws (not included).
- Carefully align the printer's hanging holes with the screws and mount the printer securely.

Figure 6.1: Desktop and wall-mount usage scenarios.
7. Maintenance
7.1 Cleaning the Printer
Regular cleaning helps maintain print quality and extends the printer's lifespan.
- Exterior: Wipe the printer's exterior with a soft, damp cloth. Do not use harsh chemicals or abrasive cleaners.
- Thermal Print Head: Gently clean the thermal print head with an alcohol swab or a specialized thermal printer cleaning pen. Ensure the printer is off and cooled down before cleaning.
- Paper Path: Remove any paper dust or debris from the paper path using a soft brush or compressed air.
7.2 Replacing Paper Rolls
When the paper roll is depleted or running low, replace it following the steps in Section 5.1.
8. Troubleshooting
This section addresses common issues you might encounter with your BISOFICE 80mm Receipt Printer.
8.1 Common Issues and Solutions
| Problem | Possible Cause | Solution |
|---|---|---|
| Printer does not power on. | No power, faulty power adapter/cord. | Check power connections. Ensure the power outlet is functional. |
| No printing. | No paper, paper jammed, incorrect driver, loose connection. | Load paper correctly. Clear any jams. Reinstall drivers. Check USB/LAN cable connections. |
| Poor print quality. | Dirty print head, low-quality thermal paper. | Clean the thermal print head (Section 7.1). Use high-quality thermal paper. |
| Auto cutter not working. | Paper jam, cutter mechanism obstruction. | Clear any paper jams. Power cycle the printer. |
| Printer not recognized by computer. | Incorrect/missing drivers, loose USB/LAN cable. | Install or reinstall the correct drivers. Ensure cables are securely connected. Try a different USB port. |
| Incompatible with Square or iPad. | Specific software/hardware limitations. | This printer is not compatible with Square POS systems or iPads. Verify compatibility with your specific POS software before purchase. |
8.2 Indicator Light Status
- Power Light (Solid Green): Printer is on and ready.
- Error Light (Flashing Red): Indicates an error (e.g., paper jam, print head error).
- Paper Light (Flashing Red): Indicates low or no paper.
9. Specifications
| Feature | Detail |
|---|---|
| Model | ZGV9622812387288LP |
| Printing Method | Direct Thermal |
| Print Speed | Up to 200mm/sec |
| Paper Width | 80mm |
| Print Width | 72mm |
| Max Paper Roll Diameter | 83mm |
| Resolution | 576 dots/line |
| Interface | USB + LAN (Ethernet) |
| Auto Cutter | Yes |
| Operating System Compatibility | Windows XP/VISTA/7/8/10, Linux, macOS |
| Dimensions (Approx.) | 128mm (W) x 173mm (D) x 127mm (H) |
| Item Weight | 2.68 pounds (approx. 1.22 kg) |
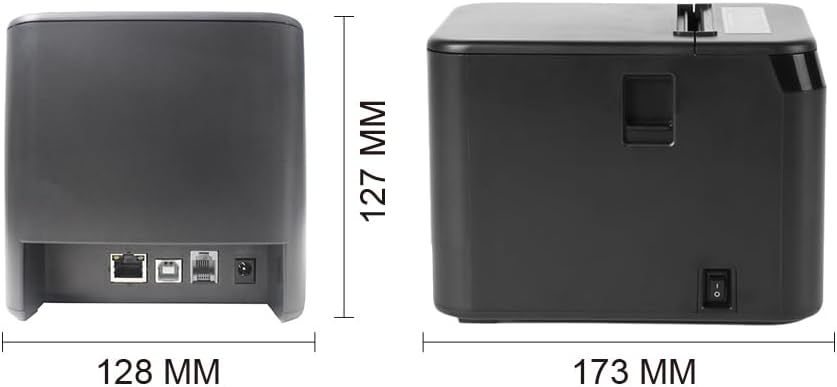
Figure 9.1: Printer dimensions.
10. Warranty and Support
For warranty information, technical support, or service inquiries, please contact Bisofice customer service through your purchase platform or the official Bisofice website. Please have your model number (ZGV9622812387288LP) and purchase date available when contacting support.
Note: Information regarding specific warranty periods was not available at the time of this manual's creation. Please refer to your product's packaging or the seller's terms for details.