1. Important Safety Instructions
Please read all instructions carefully before using the appliance. Failure to follow these instructions may result in electric shock, fire, or serious injury.
- Always ensure the power supply voltage matches the rating label on the appliance.
- Do not immerse the motor unit in water or other liquids. Clean with a damp cloth only.
- Keep hands and utensils away from moving parts during operation to prevent injury. Always use the food pusher.
- Never feed bones, nuts, or other hard, non-meat items into the grinder.
- Unplug the appliance from the outlet when not in use, before assembling or disassembling parts, and before cleaning.
- Do not operate the appliance with a damaged cord or plug, or after the appliance malfunctions or has been damaged in any manner.
- This appliance is not intended for use by persons (including children) with reduced physical, sensory or mental capabilities, or lack of experience and knowledge, unless they have been given supervision or instruction concerning use of the appliance by a person responsible for their safety.
- Ensure the grinding head is securely locked in place before operation.
- Do not overload the motor. Allow the motor to cool down after continuous use.
2. Product Overview and Package Contents
The AOBOSI 4-in-1 Electric Meat Grinder is designed for versatile food preparation, including meat grinding, sausage stuffing, and Kubbe making. It features a powerful motor and durable stainless steel components.

Image: The AOBOSI Electric Meat Grinder shown with its main unit, grinding head, and various attachments including grinding plates, blades, sausage tubes, and Kubbe accessories.
Package Contents:
- Main Motor Unit
- Grinding Head Assembly
- Food Tray
- Food Pusher
- 2 Cutting Blades
- 4 Stainless Steel Grinding Plates (3mm, 5mm, 7.5mm, Circular Segment)
- 3 Sausage Stuffing Tubes (10mm, 20mm, 30mm)
- 1 Kubbe Attachment

Image: The integrated storage box located at the back of the main unit, designed to conveniently store blades, grinding plates, and Kubbe accessories.
3. Assembly
Before first use, clean all parts that will come into contact with food. Ensure the appliance is unplugged during assembly.
Grinding Head Assembly:
- Insert the feeding screw into the grinding head.
- Place a cutting blade onto the feeding screw, ensuring the sharp edge faces outwards.
- Select the desired grinding plate and place it over the cutting blade, aligning the notches.
- Screw the fixing ring onto the grinding head until it is tight.
- Attach the assembled grinding head to the motor unit, aligning the tab with the slot, and turn clockwise until it locks securely.
- Place the food tray on top of the grinding head.

Image: A visual guide demonstrating the correct order of assembling the grinding head components, including the feeding screw, blade, grinding plate, and fixing ring.
4. Operation
Ensure the appliance is correctly assembled and plugged into a grounded outlet before operation.
4.1 Meat Grinding
- Cut meat into small pieces (approximately 1-inch cubes) that fit easily into the feeding tube. Remove any bones, gristle, or tough tendons.
- Place the prepared meat onto the food tray.
- Press the 'ON' button to start the motor.
- Feed the meat into the feeding tube using the food pusher. Never use your fingers or other utensils.
- If the grinder becomes clogged, press the 'REV' (Reverse) button to clear the obstruction. Once cleared, press 'ON' to resume grinding.
- After grinding, press the 'OFF' button and unplug the appliance.

Image: Examples of meat textures produced by the 3mm, 5mm, 7.5mm, and circular segment grinding plates, along with sausage stuffing tubes and Kubbe accessories.
4.2 Sausage Stuffing
- Assemble the grinding head with the circular segment grinding plate (without the cutting blade for a granular texture) and the desired sausage stuffing tube.
- Prepare your sausage mixture.
- Slide the casing onto the sausage stuffing tube, leaving a small overhang at the end.
- Start the grinder by pressing 'ON'.
- Feed the sausage mixture into the feeding tube using the food pusher. Guide the casing as it fills, ensuring even distribution and avoiding air pockets.
- Once the casing is filled, press 'OFF' and unplug the appliance. Twist or tie the sausages to create links.
4.3 Kubbe Making
- Assemble the grinding head with the Kubbe attachment. Ensure the cutting blade and grinding plate are removed.
- Prepare your Kubbe dough mixture.
- Start the grinder by pressing 'ON'.
- Feed the Kubbe mixture into the feeding tube using the food pusher. The attachment will form hollow Kubbe shells.
- Collect the formed Kubbe and fill them as desired.
- After use, press 'OFF' and unplug the appliance.

Image: The Kubbe attachment producing hollow Kubbe shells, ready for filling.
5. Cleaning and Maintenance
Proper cleaning and maintenance ensure the longevity and hygiene of your meat grinder.
- Always unplug the appliance before cleaning.
- Disassemble all removable parts: food tray, grinding head, feeding screw, blade, grinding plate, fixing ring, sausage tubes, and Kubbe attachment.
- Hand Washing Recommended: For aluminum parts (e.g., the main grinding head components), wash immediately after use in warm, soapy water. Use a brush to remove any remaining food particles. Rinse thoroughly and dry completely with a soft cloth to prevent oxidation and discoloration.
- Dishwasher Safe Parts: The stainless steel blades and grinding plates can be washed in a dishwasher.
- Wipe the motor unit with a damp cloth. Never immerse it in water.
- Ensure all parts are completely dry before reassembling or storing.
- Store the accessories in the integrated storage box for convenience and to prevent loss.
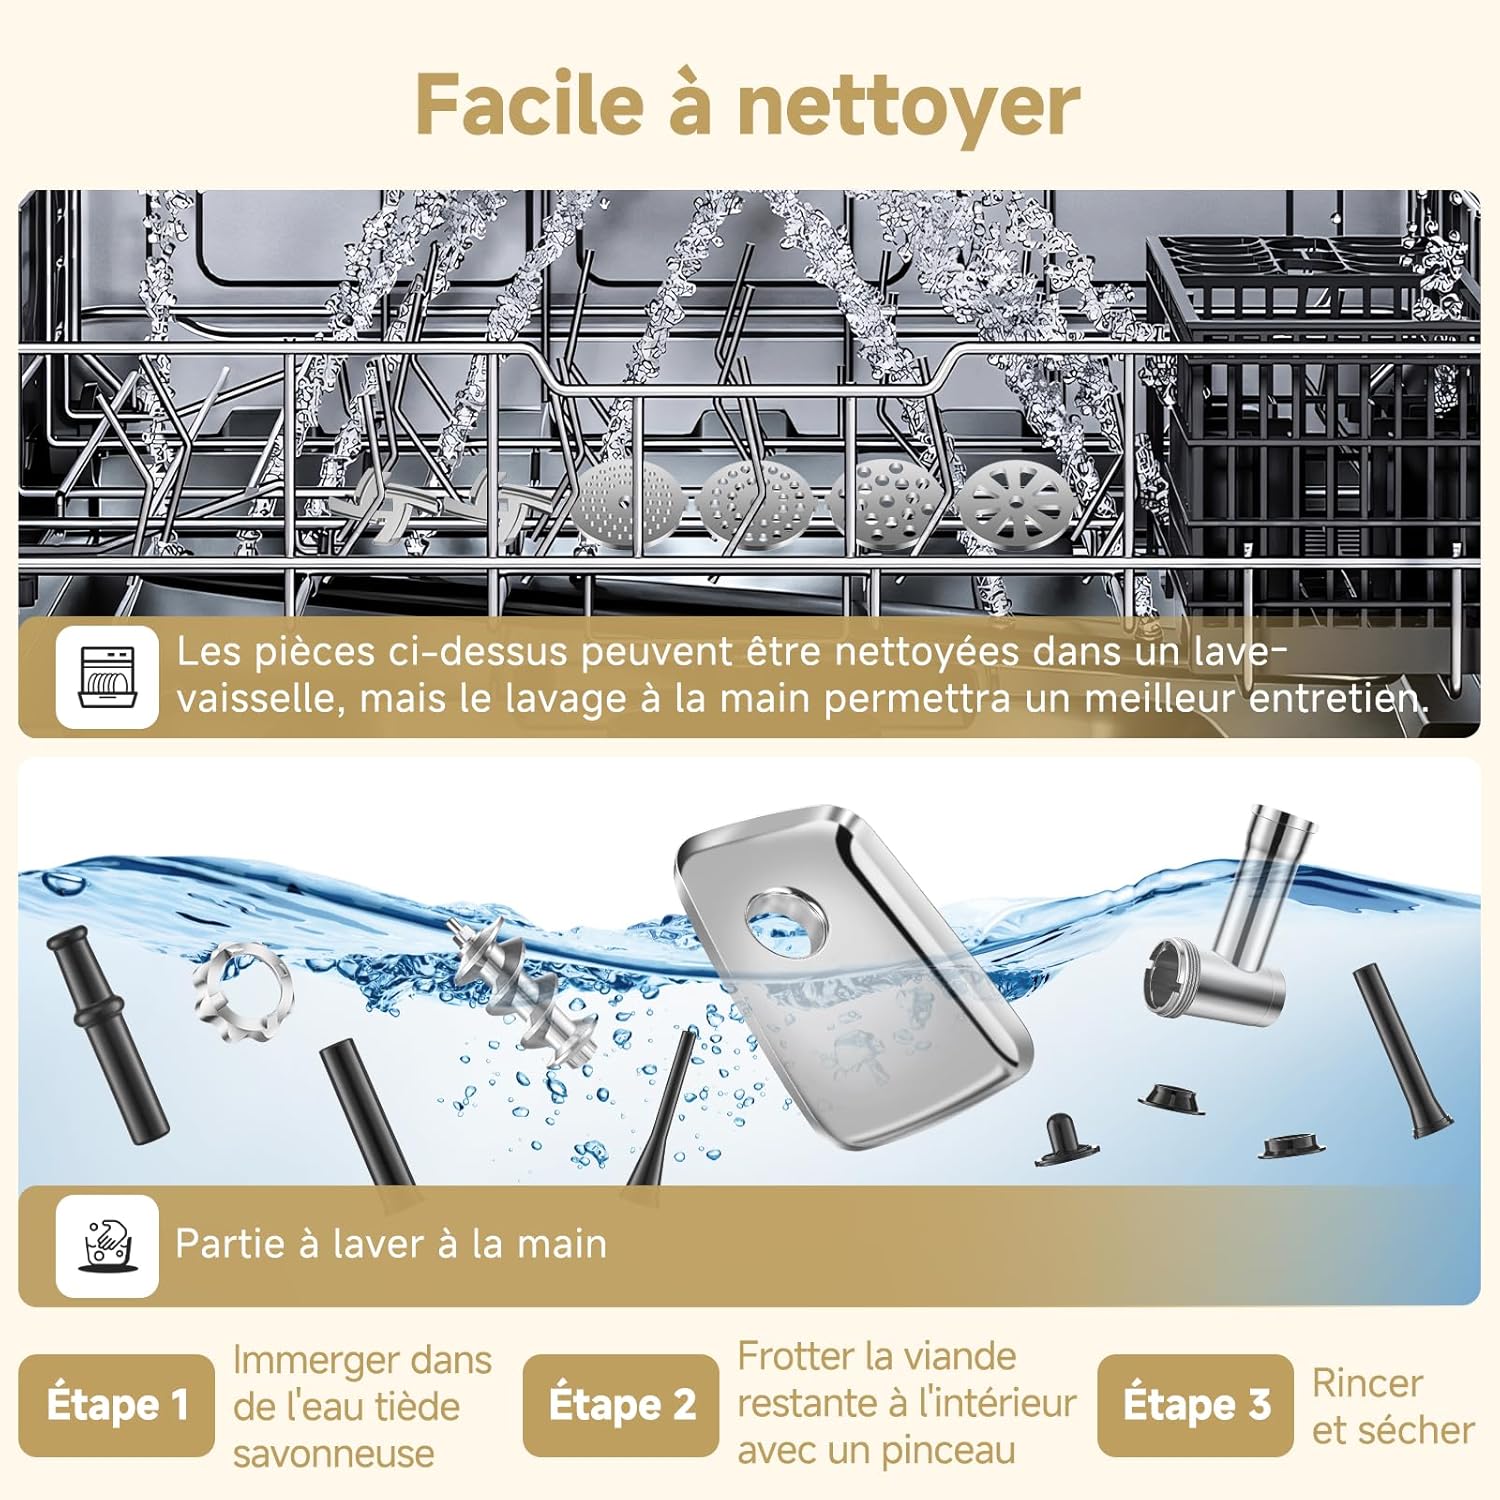
Image: A visual guide illustrating which parts are dishwasher safe (stainless steel blades and grinding plates) and which parts require hand washing (aluminum components) for optimal care.
6. Troubleshooting
If you encounter issues with your meat grinder, refer to the following common problems and solutions:
| Problem | Possible Cause | Solution |
|---|---|---|
| Motor stops during operation or meat is not grinding. | Overload, clogged grinding head, or hard object. | Press the 'REV' button to clear obstructions. If the motor stops due to overheating, unplug and let it cool for 30 minutes before restarting. Ensure meat is cut into small pieces and free of bones. |
| Grinding head is difficult to remove. | Food residue has dried and hardened. | Disassemble and clean immediately after use. If stuck, try soaking the grinding head in warm water for a few minutes to loosen residue. |
| Unusual noise or vibration. | Improper assembly or loose parts. | Unplug the appliance and check that all parts are correctly assembled and securely tightened. |
If the problem persists after attempting these solutions, please contact customer support.
7. Specifications
- Model Number: KS-MGG100
- Brand: AAOBOSI
- Rated Power: 500W
- Maximum Locking Power: 3000W
- Voltage: 230 Volts
- Dimensions (L x W x H): 39.4 x 29.79 x 19.3 cm
- Item Weight: 4.57 Kilograms
- Capacity: 3 Pounds (approx. 1.36 kg)
- Material: Stainless Steel (housing and internal components)

Image: An illustration of the internal motor components, emphasizing the 100% pure copper motor and 3000W maximum power output for efficient performance.
8. Warranty and Support
Your AOBOSI Electric Meat Grinder comes with a 2-year warranty from the date of purchase. This warranty covers manufacturing defects under normal use.
Additionally, our products benefit from lifetime support and excellent technical service.
For any questions regarding your electric meat grinder, please contact our online customer service or the brand's customer service directly for prompt assistance.
Please retain your proof of purchase for warranty claims.


