
1. Safety Information
Important: This product must be assembled by adults. Always ensure adult supervision during operation. Children should wear appropriate safety gear, including a helmet, when riding.
Age and Weight Limits: Suitable for children aged 3-8 years. Maximum load capacity is 77 lbs (35 kg).
Operating Environment: Use only on flat, dry, and private surfaces. Avoid public roads, steep inclines, and uneven terrain. Do not operate near swimming pools or other bodies of water.
Battery Safety: Use only the provided charger and battery. Do not short-circuit the battery terminals. Keep the battery away from heat sources and open flames.
Critical Safety Note: Some users have reported instances of unexpected acceleration. Always ensure the child is properly seated and secured with the seatbelt, and maintain close supervision. If unexpected behavior occurs, immediately press the emergency stop button on the remote control or turn off the vehicle.
2. Package Contents
Before beginning assembly, ensure all parts are present and undamaged. The package should contain:
- Main Ride-On Car Body (front and rear sections)
- 4 Wheels
- 2 Seats with Seatbelts
- Steering Wheel
- Remote Control
- Shovel
- Charger
- Assembly Tool (screwdriver, wrench)
- Various Screws, Washers, and Nuts
- Roll Bars and Side Mirrors
- User Manual (this document)
Below is an image showing all components included in the package.

Image Description: A top-down view of all the individual parts of the Hetoy 24V 2-Seater Ride-On Dump Truck, including the main body, four wheels, two seats, steering wheel, remote control, shovel, and various small hardware components, neatly arranged on a white surface.
3. Assembly Instructions
Follow these steps carefully for proper assembly. Refer to the assembly video for visual guidance.
- Unpack and Inspect: Carefully remove all components from the packaging. Verify that all parts listed in Section 2 are present and undamaged.
- Connect Chassis Sections: Attach the rear chassis section (dump bed area) to the front chassis section (driver's cabin). Ensure the connecting points align correctly.
- Secure Chassis: Use the provided screws to firmly secure the two chassis sections together. Refer to the video for exact screw locations.
- Install Wheels: Attach each of the four wheels to their respective axles. Secure them with the provided washers and nuts. Ensure they spin freely.
- Attach Front Bumper: Secure the front bumper to the designated slots at the front of the vehicle using the appropriate screws.
- Install Steering Wheel: Connect the wiring from the steering column to the steering wheel. Carefully slide the steering wheel onto the steering column until it clicks into place.
- Attach Roll Bars and Mirrors: Assemble the side mirrors onto the main roll bar. Then, attach the assembled roll bar to the vehicle's body.
- Install Dump Bed: Place the electric dump bed onto its designated area at the rear of the vehicle. Ensure it is properly seated and can pivot.
- Secure Seats: Place the two seats into the cabin. Secure them using the provided screws. Fasten the seatbelts.
- Connect Battery: Locate the battery compartment, typically under the hood. Connect the red and black battery terminals securely.
- Remote Control Setup: Open the battery compartment on the remote control and insert the required batteries (not included).
Video Description: This video provides a step-by-step guide on assembling the Hetoy 24V 2-Seater Ride-On Dump Truck. It demonstrates unboxing, attaching the chassis, installing wheels, securing the bumper, steering wheel, roll bars, dump bed, and seats, connecting the battery, and setting up the remote control.

Image Description: A detailed view of the electric dump bed mechanism, highlighting the 'Unlock the dump bed' lever, the 'Up Down' switch for the dump-body, and an arrow indicating the automatic upward movement of the bed. A plastic shovel is also shown.

Image Description: An interior shot of the ride-on truck's dashboard and seating area. It displays the steering wheel, accelerator pedal, and joystick for a realistic driving experience. The control console features buttons for Bluetooth, USB, Headlights, MP3 playback, and music functions.
4. Operating Instructions
4.1. Manual Operation
- Starting the Vehicle: Press the power button on the dashboard. The vehicle will emit a starting sound and the headlights may illuminate.
- Driving Forward/Backward: Use the gear shift lever (typically marked D/R for Drive/Reverse) to select the desired direction. Press the foot accelerator pedal to move.
- Steering: Use the steering wheel to control the direction of the vehicle.
- Stopping: Release the foot accelerator pedal to stop the vehicle.
4.2. Remote Control Operation
The parental remote control allows an adult to operate the vehicle for younger children or in situations requiring intervention.
- Pairing the Remote: Turn on the vehicle. Hold down the pairing button on the remote control until the indicator light flashes. Once paired, the light will remain solid.
- Remote Functions: The remote typically has buttons for Forward, Backward, Left, Right, Speed selection (3 speeds), and a Brake/Stop button.
- Emergency Stop: In case of emergency, press the 'P' (Park/Brake) button on the remote control to immediately stop the vehicle.

Image Description: A child is seated in the driver's seat of the ride-on truck, with a remote control diagram overlaid. The diagram illustrates the remote's functions: 'Forward' (up arrow), 'S' for 3-speed selection, 'Backward' (down arrow), 'Left' (left arrow), 'Right' (right arrow), and 'Brake/Stop' (P button).
4.3. Electric Dump Bed Operation
- Unlocking: Locate the dump bed lock lever (refer to image in Assembly section) and unlock it.
- Dumping: Press the 'Up' button or switch for the dump bed (located on the dashboard or near the bed) to activate the electric dumping mechanism. The bed will automatically raise to discharge its contents.
- Lowering: Press the 'Down' button or switch to lower the dump bed back into position.
4.4. Multimedia Functions
- Music Playback: The vehicle features a built-in music player. Use the controls on the dashboard to select songs or adjust volume.
- Bluetooth Connectivity: Pair your mobile device via Bluetooth to play custom music through the vehicle's speakers.
- USB/MP3 Input: Connect a USB drive or MP3 player to the designated ports on the dashboard for additional audio options.
5. Maintenance
Regular maintenance ensures the longevity and safe operation of your ride-on truck.
- Charging the Battery: The vehicle requires 2 x 12V batteries (included). Connect the charger to the charging port on the dashboard. The indicator light on the charger will show charging status. Charge for 8-12 hours before first use, and 8-12 hours after each use, or as indicated by the charger. Do not overcharge.
- Cleaning: Wipe the vehicle with a soft, damp cloth. Do not use abrasive cleaners or solvents. Avoid spraying water directly onto electrical components.
- Storage: Store the vehicle in a dry, cool place away from direct sunlight and moisture. If storing for extended periods, fully charge the battery and disconnect it. Recharge the battery every 3 months to maintain its life.
- Inspection: Periodically check all screws, nuts, and connections to ensure they are tight. Inspect wheels and tires for wear and tear.
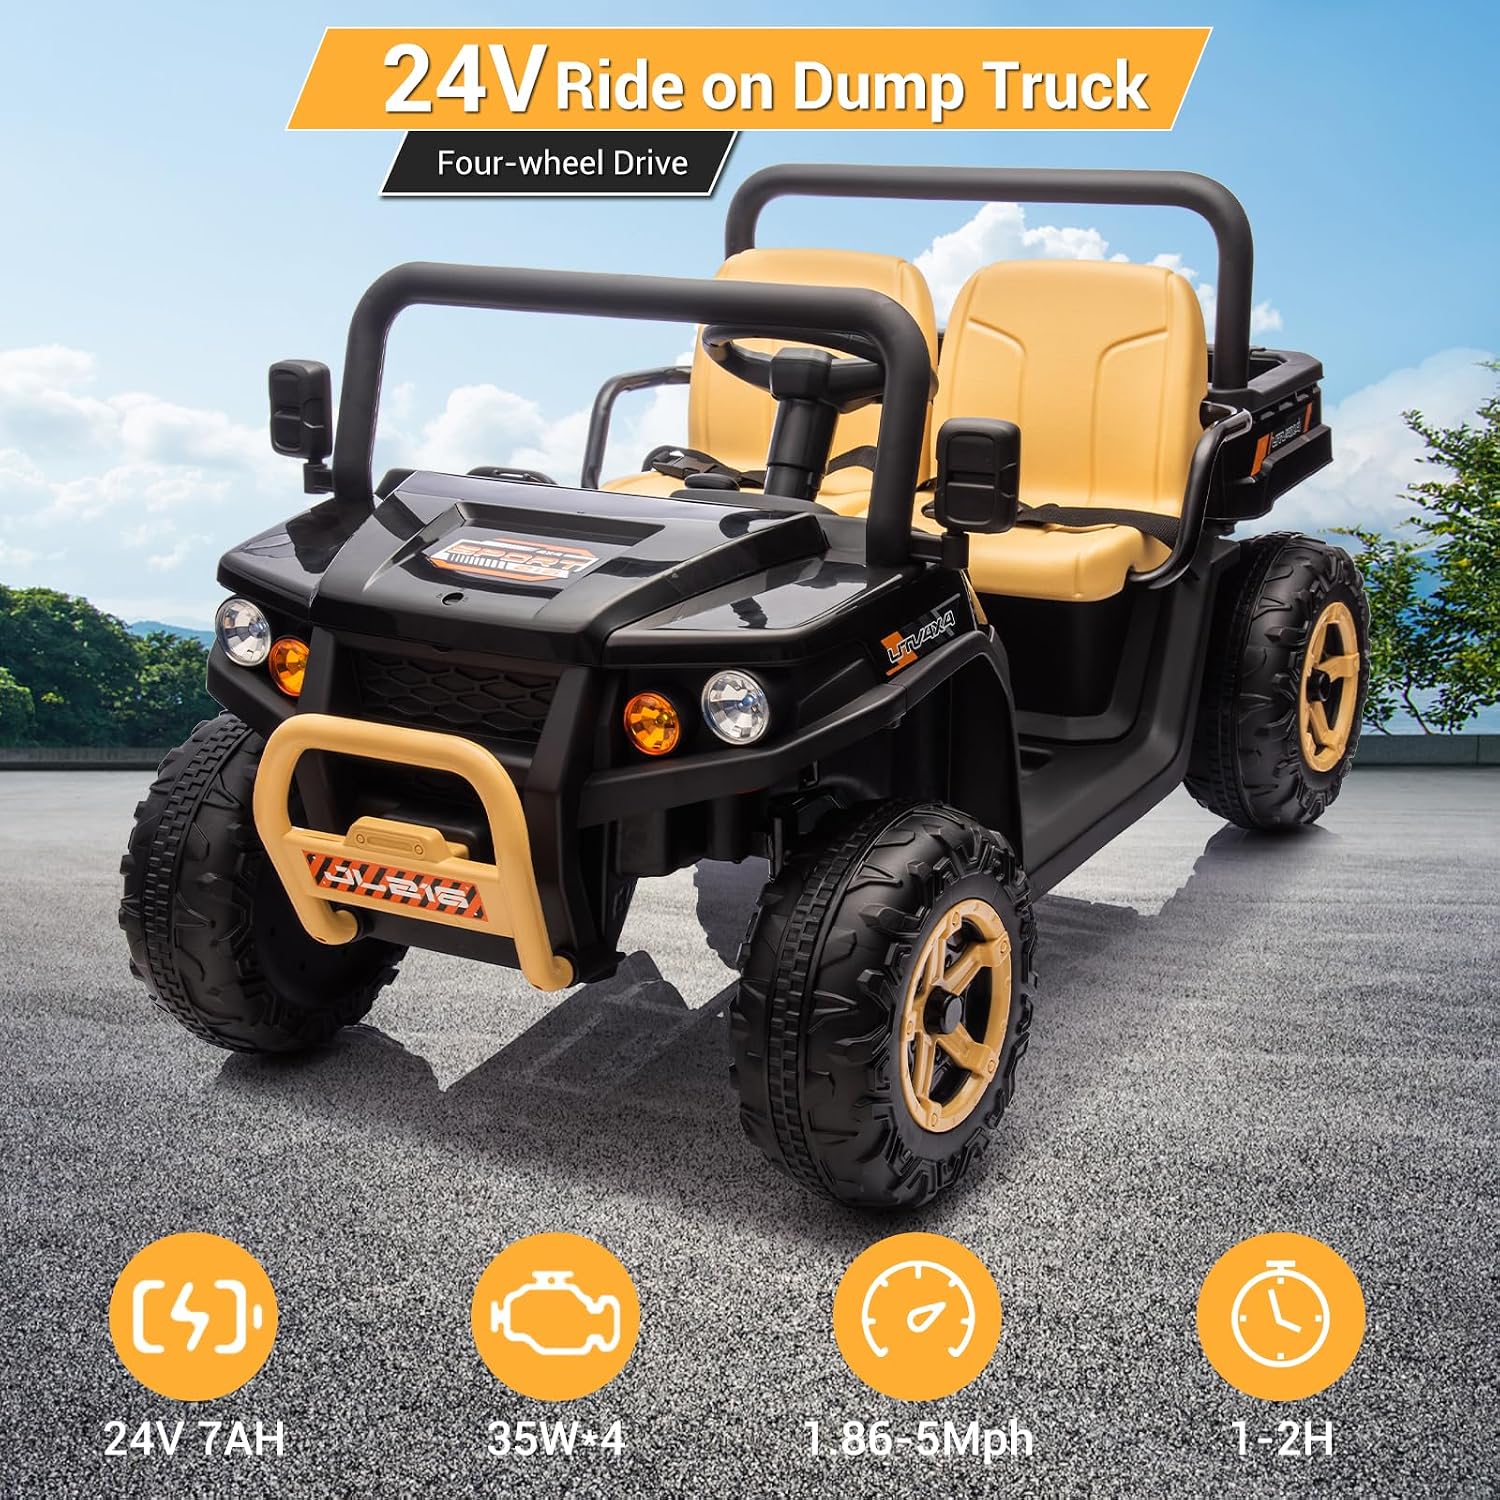
Image Description: The Hetoy 24V Ride-On Dump Truck is displayed with key specifications highlighted: 24V 7AH battery, 35W*4 motors, a speed range of 1.86-5 Mph, and a playtime of 1-2 hours on a full charge.
6. Troubleshooting
If you encounter issues with your ride-on truck, refer to the following common problems and solutions:
| Problem | Possible Cause | Solution |
|---|---|---|
| Vehicle does not move | Battery disconnected or low charge; loose wiring; blown fuse. | Check battery connections; charge battery; inspect all wiring connections; check fuse. |
| Vehicle moves slowly | Low battery charge; overloaded vehicle; operating on uneven terrain. | Charge battery fully; reduce load; operate on flat surfaces. |
| Lights/Sounds not working | Loose wiring; damaged components. | Check wiring connections to lights/speakers; contact support if components are damaged. |
| Remote control not working | Batteries dead or incorrectly installed; remote not paired. | Replace remote batteries; ensure correct polarity; re-pair remote control. |
| Unexpected acceleration / Loss of control | Potential electrical fault or interference. | Immediately press the 'P' (Brake/Stop) button on the remote. Turn off the vehicle. Do not use the vehicle until inspected by a qualified technician or contact customer support for assistance. |
7. Specifications
- Product Dimensions: 52.36 x 29.13 x 27.95 inches
- Item Weight: 63.9 pounds
- Item Model Number: uw_SnILJJ6fQ_58PJkNXgwtda
- Manufacturer Recommended Age: 3 - 8 years
- Batteries: 2 x 12V batteries (included)
- Manufacturer: Hetoy
- Release Date: October 1, 2024

Image Description: This image provides a visual representation of the ride-on truck's dimensions (52.36"L x 29.13"W x 27.95"H), suitable age (Over 37 Months), and maximum weight capacity (77 LBS).
8. Warranty and Support
Hetoy products are designed for quality and durability. For specific warranty information, please refer to the warranty card included in your product packaging or contact the seller directly.
If you have any questions, require technical assistance, or need to report an issue, please contact Hetoy customer support through the platform where you purchased the product. Please have your model number (uw_SnILJJ6fQ_58PJkNXgwtda) and purchase details ready.