1. Product Overview
The VEVOR RC Airplane 2CH-Glider is a 2.4GHz 2-channel remote control aircraft designed for beginners and kids. It features a 6-axis gyro stabilizer for stable flights and is constructed from lightweight yet durable EPP material. This model offers extended flight times with two included 350mAh batteries and boasts a unique red Cessna aircraft simulation design.
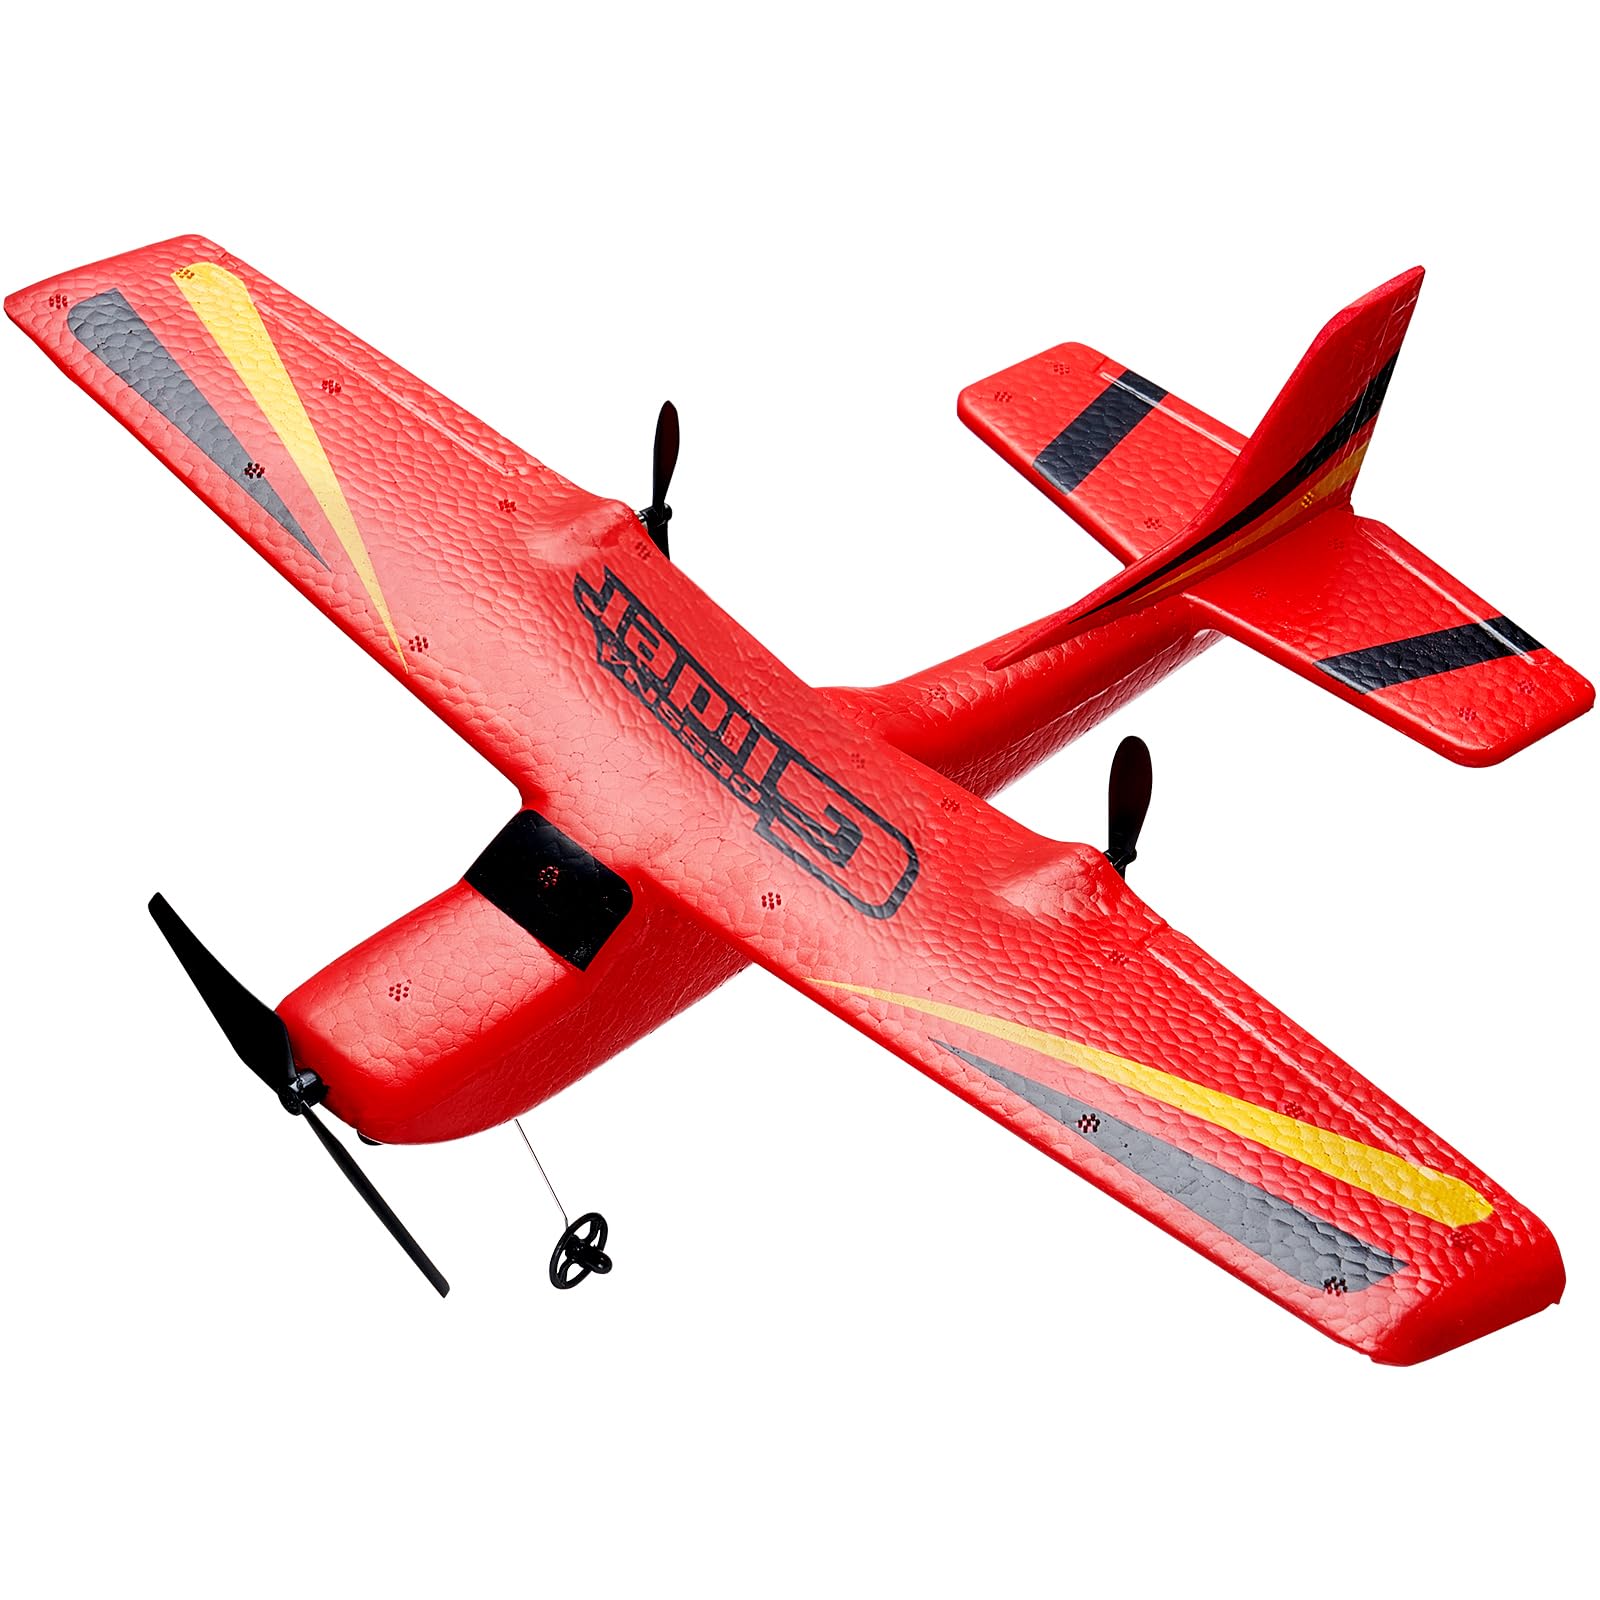
Figure 1: VEVOR RC Airplane 2CH-Glider highlighting its main features.
2. What's in the Box
Please check the package contents to ensure all items are present:
- 1 x Remote Controller
- 2 x Batteries (350mAh Lithium Ion)
- 4 x Spare Propellers
- 1 x USB Charging Cable
- 1 x Propeller Changer Tool
- 2 x Takeoff Stands

Figure 2: Product specifications and included accessories.
3. Setup Instructions
3.1. Battery Installation
- Aircraft Battery: Carefully open the battery compartment on the aircraft. Connect one of the provided 350mAh Lithium Ion batteries and secure it within the compartment.
- Remote Controller Battery: The remote controller requires three AAA batteries (not included). Open the battery compartment on the back of the controller and insert the batteries, ensuring correct polarity. Close the compartment securely.
3.2. Charging the Aircraft Battery
Use the provided USB charging cable to charge the aircraft batteries. Connect the cable to a USB power source (e.g., computer, USB wall adapter) and then to the battery. The charging time is approximately 60 minutes per battery. A full charge provides about 20 minutes of flight time. Two batteries are included for up to 40 minutes of total flight time.
3.3. Propeller Installation
The aircraft comes with propellers pre-installed. In case of damage, use the propeller changer tool and spare propellers to replace them. Ensure the correct propeller type is installed on each motor as indicated in the diagram (if available in packaging).
3.4. Takeoff Stands
Attach the two takeoff stands to the designated slots on the underside of the aircraft for ground takeoff. These can be removed for hand-thrown takeoff or water operation.
4. Operating Instructions
4.1. Pairing the Remote Controller
- Ensure the aircraft battery is connected and the aircraft is powered on.
- Turn on the remote controller.
- Move the left joystick (throttle) all the way up, then all the way down. The indicator light on the controller should become solid, indicating successful pairing.
4.2. Flight Controls
The 2.4GHz wireless control system provides a reliable connection up to 500 feet (150 meters). The built-in 6-axis gyro stabilizer assists in maintaining stable flight, making it suitable for beginners.
- Throttle (Left Joystick): Controls altitude (up/down).
- Direction (Right Joystick): Controls turning (left/right) and forward/backward movement. Turning is achieved by varying power to the propellers: more power to one side pushes the aircraft in the opposite direction.
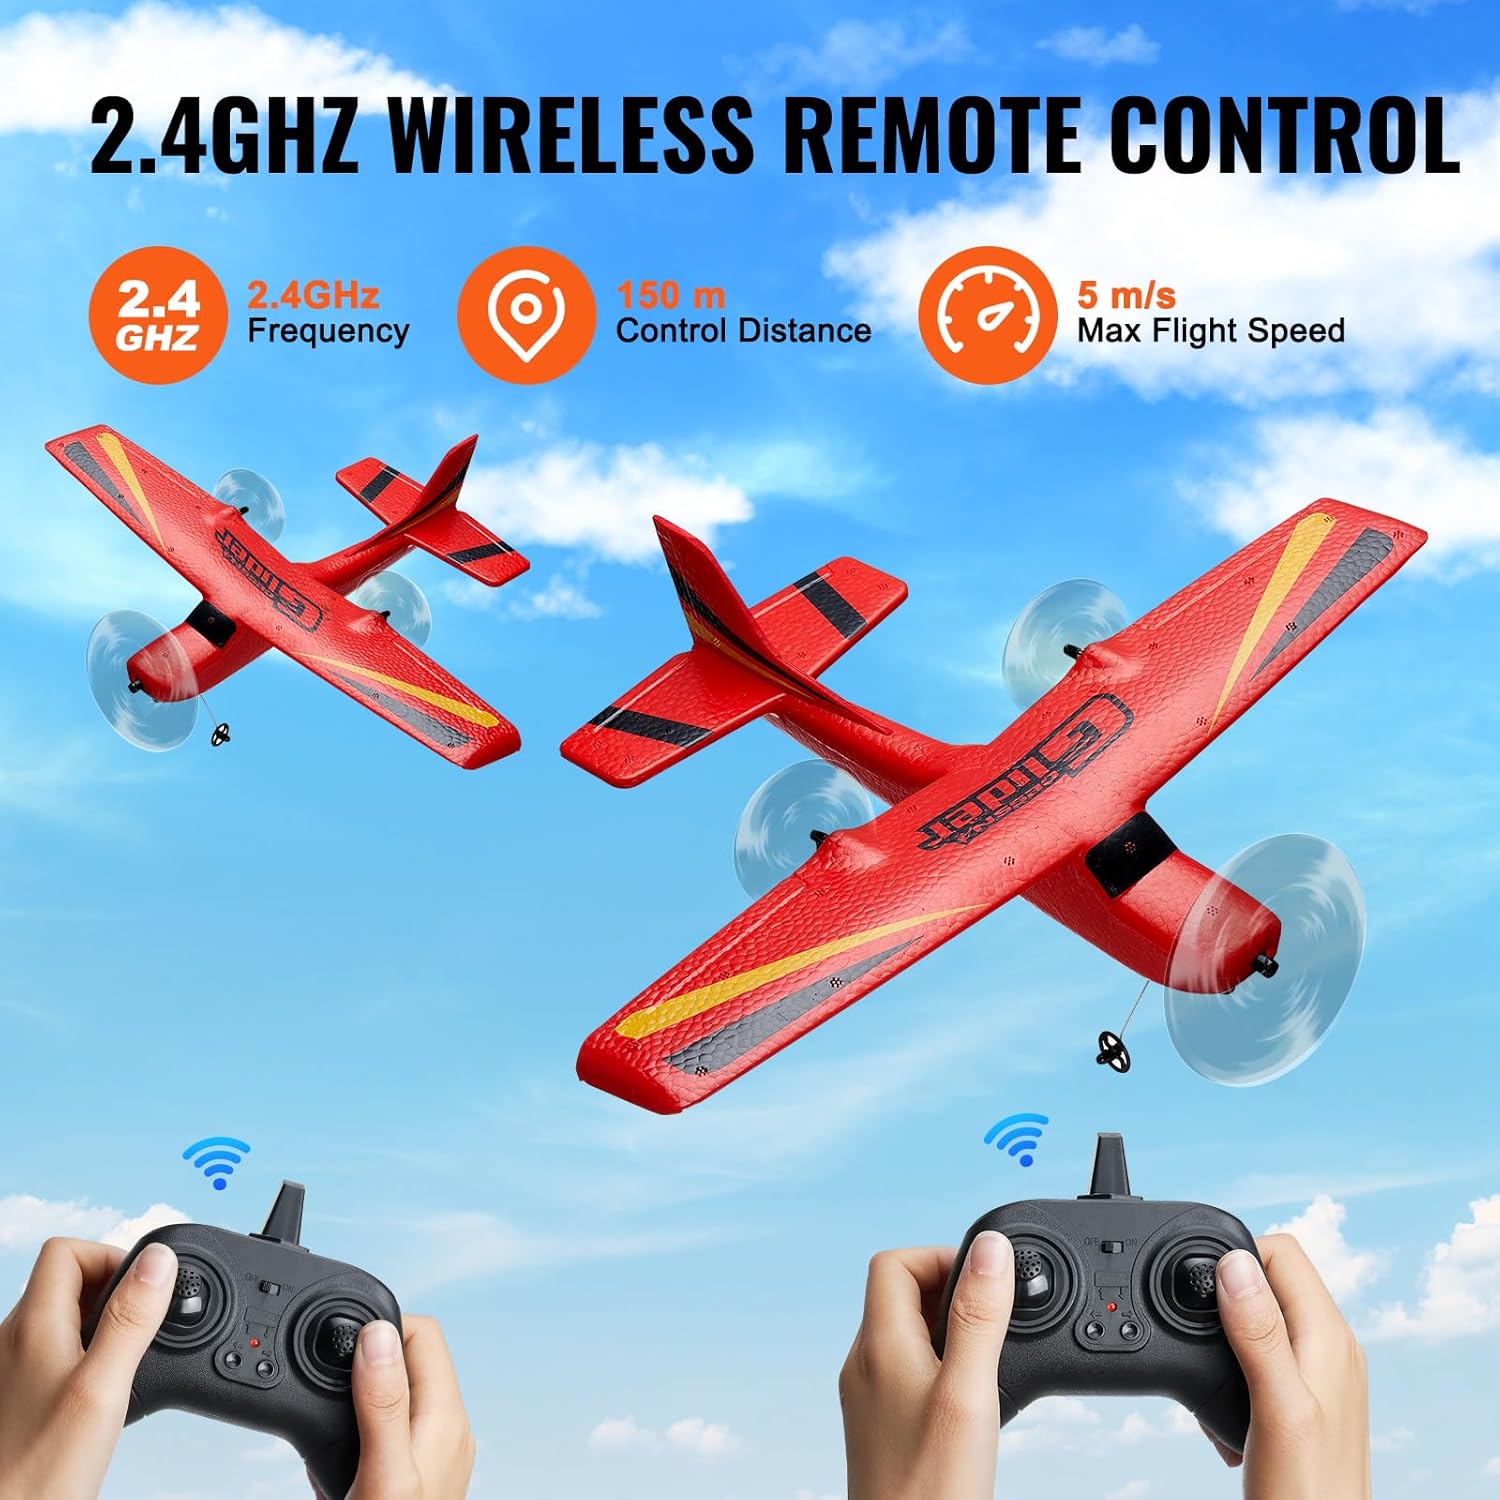
Figure 3: Remote control operation and range.

Figure 4: Child operating the VEVOR RC Airplane with remote control.
4.3. Takeoff Modes
The VEVOR RC Airplane supports two takeoff methods:
- Ground Takeoff: Place the aircraft on a flat surface with the takeoff stands attached. Gradually increase throttle for liftoff.
- Hand-Thrown Takeoff: Hold the aircraft firmly and gently throw it forward while simultaneously increasing throttle.

Figure 5: Two available takeoff modes for the aircraft.
4.4. Water Operation
This RC airplane can also operate on water, functioning like a hovercraft. It is recommended to use it in calm, non-moving waters such as lakes or pools. Avoid oceans or areas with strong currents or waves, as this may damage the aircraft.
5. Maintenance
The aircraft is made from lightweight and crash-resistant EPP material, designed to withstand minor impacts. However, proper care will extend its lifespan.
- Cleaning: After use, especially after water operation, gently wipe the aircraft with a dry cloth to remove any moisture or debris. Ensure all electronic components are dry before storage.
- Propellers: Regularly inspect propellers for damage. Replace any bent or broken propellers using the provided spare parts and tool to maintain optimal performance.
- Storage: Store the aircraft and remote controller in a cool, dry place away from direct sunlight and extreme temperatures.

Figure 6: Lightweight and durable EPP material construction.
6. Troubleshooting
- Aircraft not responding: Ensure both the aircraft and remote controller are powered on and successfully paired. Check if the remote controller batteries are fresh.
- Poor flight stability: Verify that the 6-axis gyro stabilizer is functioning correctly. Avoid flying in windy conditions, as this lightweight aircraft can be affected by strong gusts.
- Reduced flight time: Ensure batteries are fully charged. Over time, battery performance may degrade, and replacement might be necessary.
- Propellers not spinning: Check for any obstructions around the propellers. Ensure they are securely attached and undamaged.
7. Specifications
| Item Model Number | RC-Airplane (Z50) |
| Body Material | EPP |
| Propeller Material | ABS |
| Number of Remote Control Channels | 2 |
| Gyroscope Stabilizer | 6-Axis |
| Remote Control Distance | 500' / 150 m |
| Single Battery Capacity | 350mAh |
| Number of Batteries Included | 2 |
| Single Full Battery Endurance Time | Approx. 20 min |
| Full Charge Time | Approx. 60 min |
| Product Dimensions (L x W x H) | 13.78 x 11.81 x 3.54 inches (350 x 300 x 90 mm) |
| Item Weight | 4.6 ounces (0.13 kg) |
| Manufacturer Recommended Age | 12 years and up |
| Manufacturer | VEVOR |
8. Safety Information
CHOKING HAZARD: Small parts. Not for children under 3 years.
- Always operate the RC airplane in open areas, away from people, animals, and obstacles.
- Do not fly near power lines, roads, or airports.
- Adult supervision is recommended for children operating the aircraft.
- Ensure propellers are clear before powering on the aircraft.
- Do not attempt to modify the aircraft or its components.
9. Warranty and Support
For warranty information and customer support, please refer to the contact details provided in your product packaging or visit the official VEVOR website. Keep your purchase receipt for warranty claims.


