Y&H HMB12096
Y&H 120A MPPT Solar Charge Controller User Manual
Model: HMB12096
1. Introduction
This manual provides detailed instructions for the installation, operation, and maintenance of your Y&H 120A MPPT Solar Charge Controller, Model HMB12096. This device is designed to efficiently manage power flow from solar panels to various battery types, ensuring optimal charging and system protection. Please read this manual thoroughly before installation and operation to ensure safe and correct usage.
2. Safety Information
- Ensure all wiring is performed by qualified personnel and complies with local electrical codes.
- Always disconnect the solar panel and battery power before installing or adjusting the controller.
- Do not disassemble or attempt to repair the controller yourself. Contact customer support for assistance.
- Install the controller in a well-ventilated area, away from flammable materials and direct sunlight.
- Wear appropriate personal protective equipment, including eye protection and insulated gloves, during installation.
- Ensure correct polarity when connecting batteries and solar panels to prevent damage to the controller and other components.
3. Product Overview
The Y&H 120A MPPT Solar Charge Controller is a high-efficiency device designed for various solar power systems. It features advanced Maximum Power Point Tracking (MPPT) technology to maximize energy harvest from solar panels and supports a wide range of battery voltages and types.

Figure 3.1: Front View of the Y&H 120A MPPT Solar Charge Controller. This image displays the front panel of the controller, featuring an LCD screen and control buttons for system monitoring and configuration.

Figure 3.2: LCD Main Interface Description and Controller Dimensions. This image illustrates the layout of the LCD display, detailing what each numbered section represents (e.g., solar panels, input voltage, charging current, battery status). It also provides the physical dimensions of the controller: 31.5cm (12.4in) height, 21.5cm (8.47in) width, and 9.2cm (3.62in) depth.
3.1. Key Features
- MPPT Technology: Maximizes power extraction from solar panels.
- Wide Voltage Compatibility: Supports 12V, 24V, 36V, 48V, 60V, 72V, 84V, 96V battery systems.
- Multiple Battery Types: Compatible with Sealed Lead Acid, Gel, LiFePO4, Li-ion, and user-defined battery settings.
- Comprehensive Protection: Includes overcharge, overcurrent, overheating, short circuit, over-voltage, under-voltage, and fault alarm protections.
- LCD Display: Provides real-time system status and operational data.
- Lithium Battery Activation: Features a function to activate low-activity lithium batteries.

Figure 3.3: Multiple Protection Features. This diagram highlights the 8-in-1 protection mechanisms integrated into the controller, including over-charging, over-current, fault alarm, over-load, under-voltage, short-circuit, over-voltage, and over-temperature protection.
4. Setup and Installation
Proper installation is crucial for the safe and efficient operation of the solar charge controller. Follow these steps carefully.
4.1. Wiring Diagram

Figure 4.1: Solar System Wiring Diagram. This diagram illustrates the correct connection sequence: Solar Panel → Charge Controller → Battery → Power Inverter (Optional). It shows the positive and negative connections for each component.
4.2. Connection Steps
Follow the connection order below to prevent damage:
- Connect Temperature Sensor: Connect the temperature sensor to the designated port (labeled 'TEMP' on the controller). This is essential for accurate battery temperature compensation during charging.
- Connect Battery: Connect the positive and negative terminals of the battery to the corresponding battery terminals on the controller. Ensure correct polarity. The controller will automatically detect the battery voltage.
- Connect Solar Panel: Connect the positive and negative poles of the solar panel array to the solar panel input terminals on the controller. Ensure correct polarity.
- Connect RS485 Communication Line (Optional): If using external monitoring or communication, connect the RS485 communication line to the designated port.
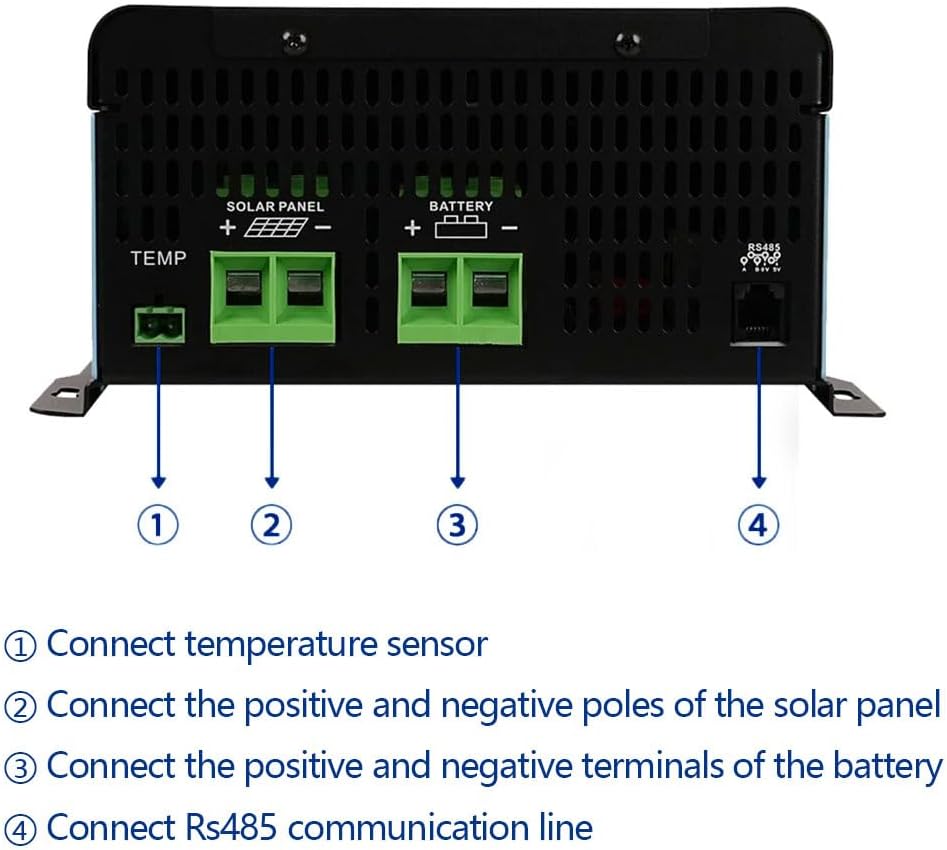
Figure 4.2: Rear Connections. This image details the connection points on the rear of the controller: (1) Temperature sensor port, (2) Solar panel positive and negative terminals, (3) Battery positive and negative terminals, and (4) RS485 communication line port.
5. Operating Instructions
5.1. Battery Type Selection
The controller is compatible with various battery types. It is critical to select the correct battery type in the controller settings to ensure proper charging and prolong battery life.

Figure 5.1: Compatible Battery Types. This image shows icons representing various battery chemistries supported by the controller: FLD (Flooded Lead Acid), GEL, SLD (Sealed Lead Acid), and LI (Lithium-ion/LiFePO4).
Refer to the controller's menu system (using the SET, UP, DOWN, CONFIRM buttons) to navigate to the battery type setting and select the appropriate option for your battery bank.
5.2. Charging Stages
The controller employs a multi-stage charging algorithm to optimize battery charging and extend battery lifespan:
- Bulk Charge: Delivers maximum current to rapidly charge the battery to approximately 80% capacity.
- Boost Charge: Charges the battery to 100% capacity at a higher voltage, ensuring full charge.
- Float Charge: Maintains the battery at a full charge by providing a small, constant voltage, preventing self-discharge.
- Equalization Charge (for certain battery types): Periodically overcharges the battery at a controlled rate to balance cell voltages and prevent sulfation.
6. Maintenance
Regular maintenance ensures the longevity and optimal performance of your solar charge controller.
- Cleanliness: Keep the controller clean and free from dust and debris. Use a dry cloth for cleaning.
- Connections: Periodically check all wiring connections for tightness and corrosion. Loose connections can cause overheating and power loss.
- Ventilation: Ensure the installation area remains well-ventilated to prevent overheating of the controller.
- Battery Inspection: Regularly inspect your batteries for any signs of damage, leakage, or corrosion.
- Firmware Updates: Check the manufacturer's website for any available firmware updates that may improve performance or add features.
7. Troubleshooting
The controller includes multiple protection features to prevent damage. If an issue arises, the LCD display may show error codes or warnings. Consult the table below for common issues and potential solutions.
| Issue/Error Indication | Possible Cause | Solution |
|---|---|---|
| Over-Charging Protection | Battery voltage exceeds safe limit. | Controller automatically stops charging. Verify battery type setting is correct. |
| Over-Current Protection | Current exceeds controller's rated limit. | Reduce load or solar input. Check for short circuits in wiring. |
| Over-Temperature Protection | Internal temperature is too high. | Ensure adequate ventilation. Reduce ambient temperature if possible. Check for blocked cooling fins. |
| Short-Circuit Protection | Short circuit detected in PV or battery connections. | Immediately disconnect power. Inspect all wiring for shorts. Correct and reconnect. |
| Over-Voltage Protection | Input voltage from PV array is too high. | Verify PV array voltage (VOC) does not exceed 230V. Adjust panel configuration if necessary. |
| Under-Voltage Protection | Battery voltage is too low. | Charge battery or reduce load. Check battery health. |
| Fault Alarm | General system error. | Check all connections and system parameters. If persistent, contact support. |
8. Specifications
Technical parameters for the Y&H 120A MPPT Solar Charge Controller (Model HMB12096).
| Parameter | Value |
|---|---|
| Model Number | HMB12096 |
| Rated Charge Current | 120A |
| System Voltage | 12V/24V/36V/48V/60V/72V/84V/96V Auto |
| Max PV Input Voltage (VOC) | 230V |
| Max PV Input Power (12V Battery) | 1440W |
| Max PV Input Power (24V Battery) | 2880W |
| Max PV Input Power (36V Battery) | 4320W |
| Max PV Input Power (48V Battery) | 5760W |
| Max PV Input Power (60V Battery) | 7200W |
| Max PV Input Power (72V Battery) | 8640W |
| Max PV Input Power (84V Battery) | 10080W |
| Max PV Input Power (96V Battery) | 11520W |
| Compatible Battery Types | Sealed Lead Acid, Gel, LiFePO4, Li-ion, User-defined |
| Display Type | LCD |
| Product Dimensions (L x W x H) | 16.38 x 12.87 x 7.09 inches (41.6 x 32.7 x 18 cm) |
| Item Weight | 9.99 pounds (4.54 kg) |
| Material | Plastic |
| Color | Blue |
9. Applications
The Y&H 120A MPPT Solar Charge Controller is suitable for a wide range of solar power applications, supporting various battery types and working environments.
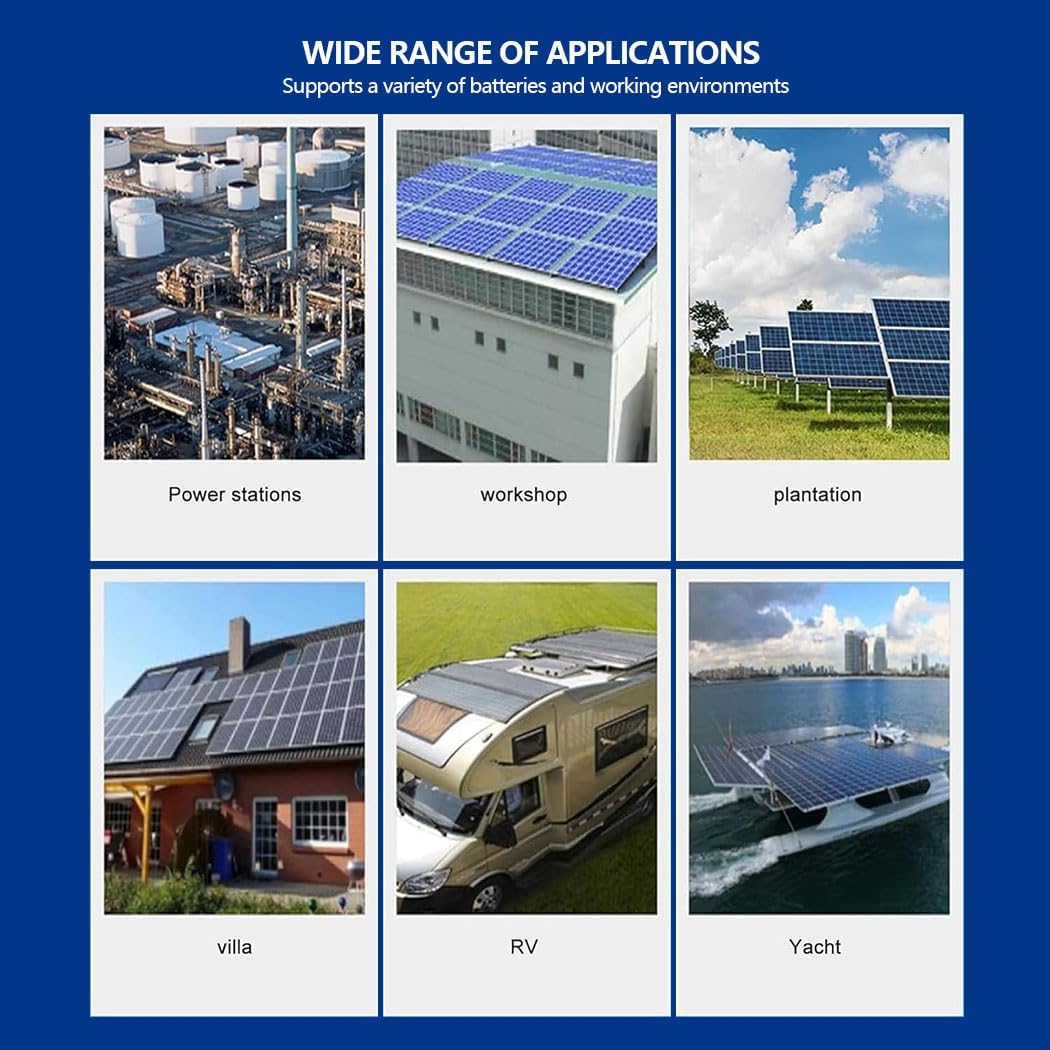
Figure 9.1: Wide Range of Applications. This image displays various environments where the solar charge controller can be utilized, including power stations, workshops, plantations, villas, RVs, and yachts, demonstrating its versatility.
10. Warranty and Support
For warranty information, technical support, or service inquiries, please refer to the contact information provided with your purchase or visit the official Y&H website. Keep your purchase receipt as proof of purchase for warranty claims.
Related Documents - HMB12096
 |
Renogy RCC60RVRE Solar MPPT Charge Controller User Manual This user manual provides comprehensive instructions for the Renogy RCC60RVRE Solar MPPT Charge Controller, covering installation, operation, features, specifications, maintenance, safety guidelines, and support information. |
 |
ICharger MPPT 6048 User Manual - Easun Power User manual for the Easun Power ICharger MPPT 6048 MPPT Solar Charge Controller. Provides installation steps, operating modes, error codes, and technical specifications. |
 |
Renogy RCC60RVRE Solar MPPT Charge Controller User Manual This user manual provides comprehensive instructions for the Renogy RCC60RVRE Solar MPPT Charge Controller, covering its features, installation, operation, monitoring, specifications, maintenance, and safety guidelines for 12V/24V/36V/48V systems. |
 |
Renogy Solar MPPT Charge Controller RCC60RVRE-G1 User Manual User manual for the Renogy 12V/24V/36V/48V 60A Solar MPPT Charge Controller (Model RCC60RVRE-G1). Covers features, installation, wiring, monitoring, LCD display, settings, error codes, specifications, and maintenance. |
 |
User Manual: Boost Solar Charge Controller MPPT 10A 24V-72V User manual for the Boost Solar Charge Controller MPPT 10A 24V-72V for electric vehicles. Includes manufacturer details, compliance info, and usage instructions. |
 |
ECO-WORTHY Solar Charge Boost Controller User Manual User manual for the ECO-WORTHY Solar Charge Boost Controller, detailing features, technical specifications, settings, installation, and troubleshooting for 24V/36V/48V/60V/72V battery systems, suitable for golf carts and off-grid power. |
Ask a question about this manual
Ask about setup, troubleshooting, compatibility, parts, safety, or missing instructions. Manuals+ will review the question and use this page’s manual context to help answer it.