1. Introduction
This manual provides detailed instructions for the installation, operation, and maintenance of your FITCAMX 4K Dash Cam, Model 6329. Designed for seamless integration with Mercedes-Benz GLC (W204/W205) and C Class (X253) vehicles, this dash cam offers UHD 2160P video recording, WiFi connectivity, G-Sensor functionality, and loop recording for enhanced driving safety and evidence capture.
Please read this manual thoroughly before using the product to ensure correct installation and optimal performance.
2. Product Overview
2.1 Key Features
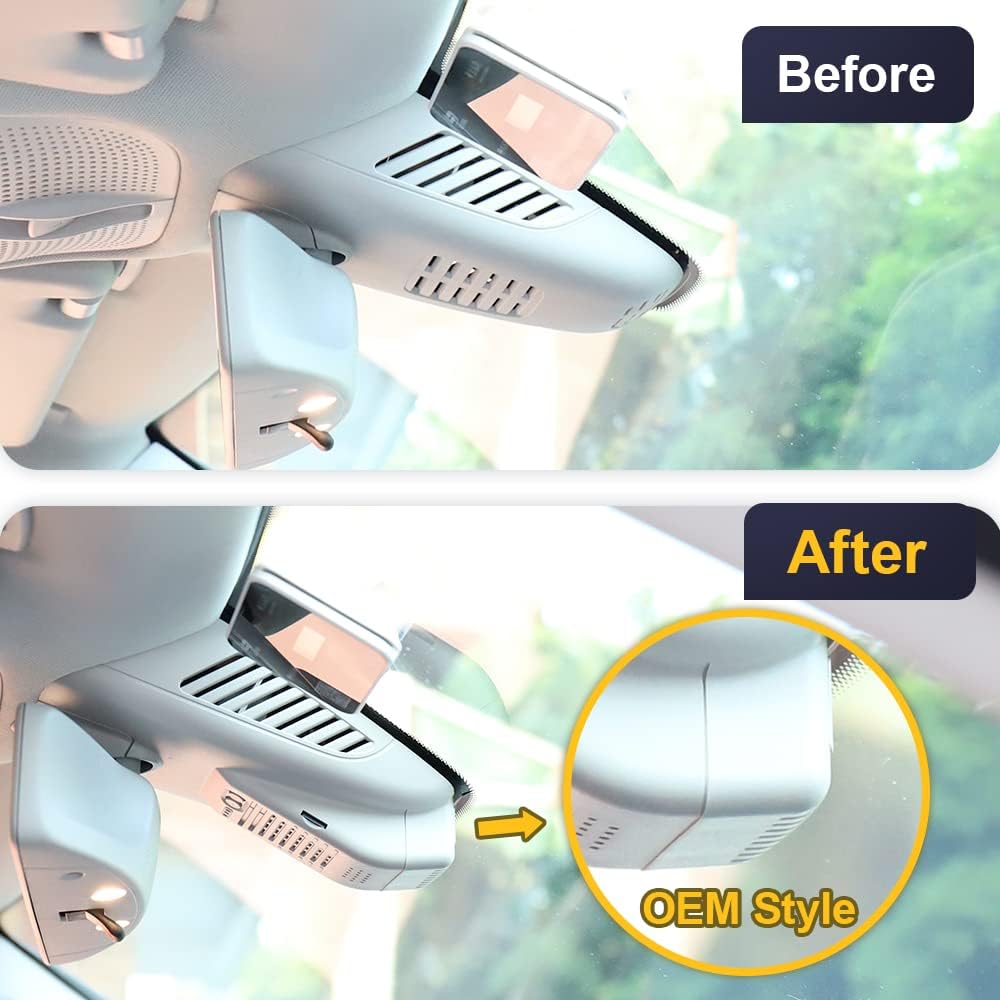
- Integrated OEM Style: Designed to blend seamlessly with your vehicle's interior, appearing as a factory-installed option.
- UHD 2160P Video Quality: Captures footage with exceptional clarity at 2160P/30fps using an f/1.6 large aperture lens and CMOS sensor. Features Wide Dynamic Range (WDR) technology for clear recording in various lighting conditions.
- Easy Operation & WiFi Connectivity: Connects to the FITCAMX APP via built-in 2.4Ghz WiFi for real-time video viewing and easy file management.
- Loop Recording: Automatically overwrites the oldest footage with new recordings when the storage is full, ensuring continuous recording.
- G-Sensor: Detects sudden collisions and automatically locks the current video to a protected file, preventing it from being overwritten.
- Durable Construction: Made from high-density ABS+PC material, temperature-resistant from -20°C to 85°C (-4°F to 185°F).
2.2 What's in the Box
- 1x FITCAMX 4K Dash Cam
- 1x Power Cable
- 1x User Manual
- 1x 64GB Memory Card
- 1x Removal Pry Tool
3. Specifications
| Brand | FITCAMX |
| Model Name | Model 6329 |
| Compatible Vehicle Style | Mercedes-Benz GLC (W204/W205), C Class (X253) |
| Video Capture Resolution | Front 2160P Only |
| CPU | Novatek |
| APP | Android and iOS |
| Shell Material | PC+ABS |
| Aperture | f/1.6 |
| WiFi | 2.4Ghz |
| Item Weight | 1.5 pounds |
| Product Dimensions | 12 x 9 x 4 inches |
4. Installation Guide
The FITCAMX dash cam is designed for easy, plug-and-play installation without damaging your vehicle's original wiring. Please follow these steps carefully.
4.1 Identify Correct Model
Ensure you have the correct FITCAMX model (Model 6329) for your Mercedes-Benz GLC or C Class by comparing the shape of your vehicle's mirror housing cover with the image below.

4.2 Preparation
- Turn off your vehicle's engine and ensure all power is off before beginning installation.
- Locate the original mirror housing cover in your vehicle.
4.3 Step-by-Step Installation
- Remove Original Cover: Use the provided pry tool to carefully remove the original plastic cover from your rearview mirror housing. Start from the middle bottom and gently work your way around.
- Disconnect Power Plug: Locate the gray power plug connected to your vehicle's original mirror housing. Disconnect it.
- Connect Y-Cable: Connect the provided Y-cable from the FITCAMX dash cam to the vehicle's power plug. Ensure a secure connection.
- Transfer Clips: Transfer any necessary plastic clips from the original cover to the new FITCAMX dash cam housing.
- Install FITCAMX Dash Cam: Align the FITCAMX dash cam housing with the mirror housing and gently push it into place until it clicks securely. Ensure all wires are neatly tucked away.

4.4 Installation Video Tutorial
For a visual step-by-step guide, please refer to the official installation video below. This video demonstrates the process for Mercedes-Benz vehicles, which is similar to your Model 6329.
5. Operating Instructions
5.1 Power On/Off
The dash cam will automatically power on and begin recording when your vehicle starts. It will power off automatically when the vehicle is turned off.
5.2 WiFi Connection & App Usage
To access live footage, review recordings, and adjust settings, connect your smartphone to the dash cam via the FITCAMX App.
- Download App: Download the "FITCAMX" app from the App Store (iOS) or Google Play Store (Android).
- Enable WiFi: Ensure your dash cam is powered on.
- Connect to Dash Cam WiFi: On your smartphone, go to WiFi settings and connect to the network named "CAR_LHD" or "CARDV" followed by a series of characters. The default password is "12345678".
- Open FITCAMX App: Launch the app. It should automatically connect to the dash cam.
- Live View & Playback: You can view live footage, browse recorded videos in the "Camera File" section, and download them to your phone.
- Settings: Adjust video resolution, loop recording duration, exposure compensation, and other settings within the app.

5.3 G-Sensor & Emergency Recording
The built-in G-Sensor automatically detects sudden impacts or rapid acceleration/deceleration. When triggered, it locks the current video segment, preventing it from being overwritten by loop recording. These emergency files are stored in a separate folder within the app for easy access.
6. Maintenance
- SD Card Formatting: It is recommended to format the included 64GB MicroSD card monthly to ensure optimal performance and prevent data corruption. This can be done through the FITCAMX App settings. The dash cam supports up to 256GB MicroSD cards.
- Lens Cleaning: Regularly clean the dash cam lens with a soft, lint-free cloth to ensure clear video quality. Avoid abrasive materials or harsh chemicals.
- Firmware Updates: Check the FITCAMX App periodically for firmware updates to ensure your dash cam has the latest features and bug fixes.
7. Troubleshooting
- Dash Cam Not Powering On:
- Ensure the vehicle's ignition is on.
- Check all cable connections to ensure they are secure.
- Verify the vehicle's power source is active.
- WiFi Connection Issues:
- Ensure the dash cam is powered on.
- Restart your smartphone's WiFi and try reconnecting.
- Confirm you are connecting to the correct WiFi network (CAR_LHD/CARDV) and using the correct password (12345678).
- Move closer to the dash cam to improve signal strength.
- Video Playback/Recording Issues:
- Format the SD card via the app settings.
- Ensure the SD card is properly inserted.
- Check if the SD card is full; loop recording should manage this, but manual checks are good.
- Verify the video resolution settings in the app.
- G-Sensor Not Triggering/Too Sensitive:
- Adjust the G-Sensor sensitivity settings in the FITCAMX App.
8. Warranty and Customer Support
FITCAMX is committed to providing high-quality products and excellent customer service. Our dash cams are made of high-density ABS+PC material and undergo strict quality verification.
If you encounter any issues or have questions regarding your FITCAMX 4K Dash Cam, please do not hesitate to contact our customer service team for prompt technical support. Refer to the contact information provided with your product packaging or visit the official FITCAMX website for assistance.


