1. Introduction
This manual provides detailed instructions for the proper use, setup, operation, and maintenance of your CPVAN Remote Control. This remote control is specifically designed to work with CPVAN FSI-3001 Smoke Alarms, FSI-3002 Heat Alarms, and FSI-3003 Carbon Monoxide Detectors, operating on a 433MHz frequency. It allows for convenient testing and silencing of your interconnected alarm system.

Figure 1.1: The CPVAN remote control facilitates interaction with an interlinked alarm system, allowing for centralized control of multiple smoke, heat, and carbon monoxide detectors within a home environment.
2. Product Overview
The CPVAN Remote Control features a simple, intuitive design with essential buttons for managing your compatible CPVAN alarms.

Figure 2.1: Key components of the CPVAN Remote Control. The Indicator Light shows operational status, the Test/Hush Button is used for testing and silencing alarms, and the Pairing Button (Sync) is for connecting with compatible detectors.
Components:
- Indicator Light: Displays status (e.g., pairing, button press confirmation).
- TEST/Hush Button: Used to test the alarm system or silence a sounding alarm.
- Sync Button: Used for pairing the remote control with compatible CPVAN alarms.
3. Setup
3.1 Battery Installation
The remote control requires one 23A 12V battery (typically pre-installed). If replacement is needed, follow these steps:
- Locate the battery compartment cover on the back of the remote control.
- Slide the cover open.
- Insert one 23A 12V battery, ensuring the correct polarity (+/-) as indicated inside the compartment.
- Slide the battery compartment cover back into place until it clicks securely.
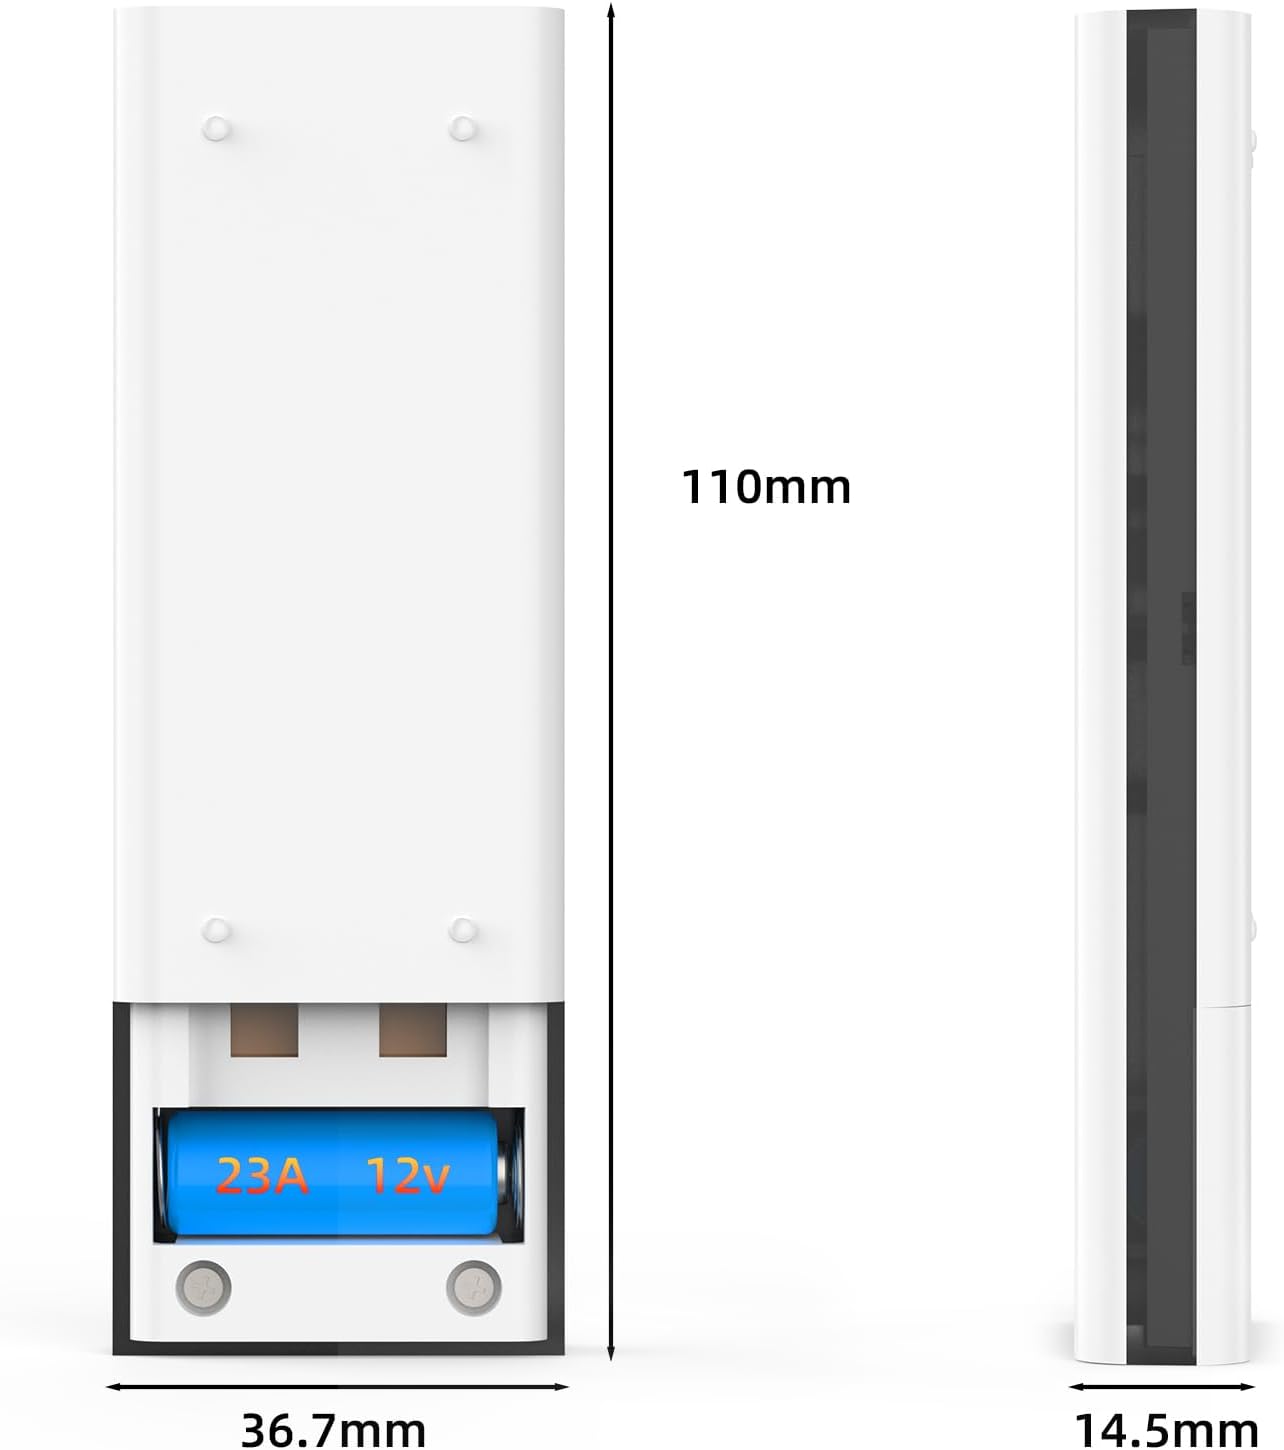
Figure 3.1: View of the CPVAN remote control's battery compartment with a 23A 12V battery installed.
3.2 Pairing with Alarms
To ensure the remote control functions correctly with your CPVAN alarms, it must be paired. Refer to your specific CPVAN alarm's manual for detailed pairing instructions, as the process may vary slightly between models (FSI-3001, FSI-3002, FSI-3003). Generally, the pairing process involves:
- Ensure your CPVAN alarms are powered on and within range.
- Activate the pairing mode on your CPVAN alarm (usually by pressing a button on the alarm itself).
- While the alarm is in pairing mode, press and hold the Sync Button on the remote control until the indicator light on the remote flashes or the alarm confirms successful pairing.
- Test the connection by pressing the TEST/Hush Button on the remote control.
4. Operating Instructions
The remote control provides convenient functions for managing your CPVAN alarm system.
4.1 Testing Alarms
Regularly test your alarms to ensure they are functioning correctly. It is recommended to test your alarms at least once a month.
- To test all paired alarms, simply press the TEST/Hush Button on the remote control.
- All interconnected alarms should sound briefly.
- Release the button to stop the test.
4.2 Silencing (Hush) Alarms
In the event of a nuisance alarm (e.g., from cooking fumes), you can temporarily silence the alarms using the remote control.
- When an alarm is sounding, press the TEST/Hush Button on the remote control.
- The alarms should temporarily silence for a period (refer to your alarm's manual for the exact duration of the hush period).
- The alarm will automatically reset after the hush period if the smoke/heat/CO condition has cleared. If the condition persists, the alarm will sound again.

Figure 4.1: The CPVAN remote control offers a convenient way to test and mute alarms, eliminating the need for ladders or reaching devices.
5. Maintenance
5.1 Battery Replacement
The remote control uses one 23A 12V battery. If the remote control's indicator light does not illuminate or its functions become unreliable, it may be time to replace the battery. Follow the instructions in Section 3.1 for battery installation.
5.2 Cleaning
To maintain the remote control's appearance and functionality:
- Wipe the surface with a soft, dry cloth.
- Do not use abrasive cleaners, solvents, or strong chemicals, as these can damage the plastic.
- Avoid getting moisture into the remote control's internal components.
6. Troubleshooting
If you experience issues with your CPVAN Remote Control, refer to the following common problems and solutions:
| Problem | Possible Cause | Solution |
|---|---|---|
| Remote control does not respond. | Dead or incorrectly installed battery. | Replace the 23A 12V battery, ensuring correct polarity. |
| Alarms do not respond to remote control. | Remote not paired with alarms, or out of range. | Ensure alarms are within range. Re-pair the remote control with your alarms (refer to Section 3.2). |
| Remote control indicator light flashes erratically. | Low battery or interference. | Replace the battery. Ensure no strong radio frequency interference sources are nearby. |
| Alarms do not silence after pressing Hush button. | Smoke/heat/CO concentration is too high, or remote not paired. | Ventilate the area. If the alarm continues, it indicates a genuine threat. Re-pair the remote if necessary. |
7. Specifications
The following are the technical specifications for the CPVAN Remote Control:
| Feature | Specification |
|---|---|
| Model Number | FSI-3001 (Remote Control) |
| Operating Frequency | 433MHz |
| Power Source | 1 x 23A 12V Battery |
| Material | ABS |
| Product Dimensions | 1 x 3 x 5 cm (approx.) |
| Item Weight | 50 Grams |
| Compatible Alarms | CPVAN FSI-3001 Smoke Alarm, FSI-3002 Heat Alarm, FSI-3003 Carbon Monoxide Detector |
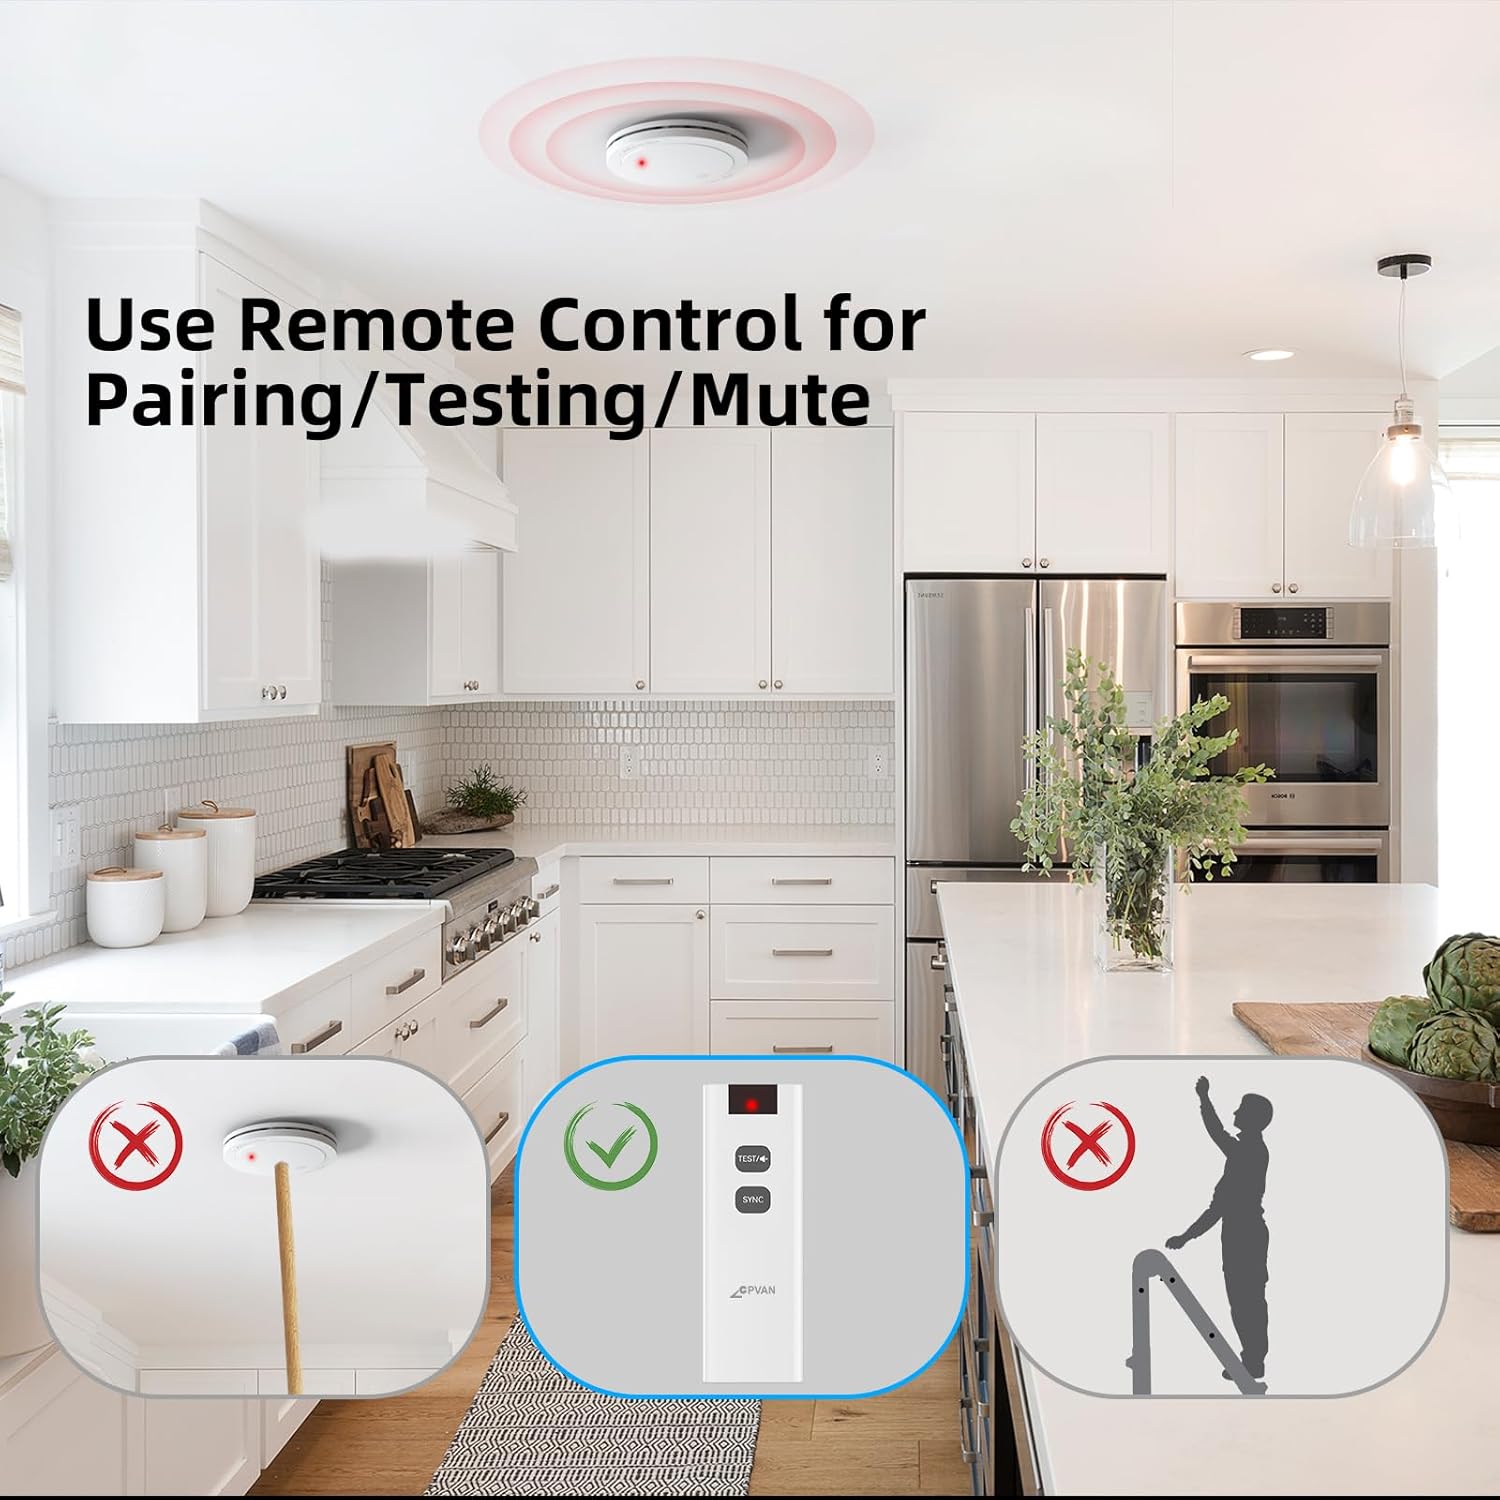
Figure 7.1: Dimensions of the CPVAN Remote Control.
8. Warranty and Support
For warranty information and technical support, please refer to the documentation provided with your CPVAN alarms or visit the official CPVAN website. Keep your purchase receipt as proof of purchase for any warranty claims.
For further assistance, please contact CPVAN customer service through the contact information provided on their official website or product packaging.