VEVOR 3KW Spot Welder Dent Puller (Model 90E) Instruction Manual
Model: 90E | Brand: VEVOR
1. Introduction
This manual provides essential information for the safe and effective operation, maintenance, and troubleshooting of your VEVOR 3KW Spot Welder Dent Puller, Model 90E. This professional-grade tool is designed for efficient dent removal from steel car body panels, offering precise control for various repair tasks. Please read this manual thoroughly before initial use and retain it for future reference.

Figure 1: VEVOR 3KW Spot Welder Dent Puller with its comprehensive accessory kit.
2. Safety Information
Always prioritize safety when operating welding equipment. Failure to follow safety guidelines can result in serious injury or equipment damage.
- Personal Protective Equipment (PPE): Always wear appropriate welding gloves, a welding helmet with proper shade, safety glasses, and protective clothing to shield against sparks, heat, and UV radiation.
- Ventilation: Ensure adequate ventilation in the work area to disperse welding fumes.
- Fire Hazards: Keep flammable materials away from the welding area. Have a fire extinguisher readily available.
- Electrical Safety: Ensure the power supply matches the unit's requirements (110V as per product title). Do not operate with damaged cables or plugs. Avoid welding in damp or wet conditions.
- Grounding: Always ensure the workpiece is properly grounded to prevent electrical shock.
- Children and Bystanders: Keep children and unauthorized personnel away from the work area.
3. Product Overview and Components
The VEVOR 3KW Spot Welder Dent Puller is designed for versatility and efficiency in auto body repair. It features a robust main unit and a comprehensive set of accessories.
Main Unit (VEVOR SPOT 90E)
The main unit houses the power supply, control panel, and connections for the welding guns and ground clamp. It features a portable handle for easy transport.

Figure 2: The VEVOR 3KW Spot Welder Dent Puller main unit, highlighting its 3000W power.
Included Accessories
The kit includes a variety of tools for different dent repair scenarios:
- Dual Welding Guns: Allows for simultaneous welding of two different studs, improving efficiency.
- Slide Hammer: Used for pulling studs and washers to remove dents.
- Carbon Rods: For shrinking stretched metal.
- Round Washers: For general dent pulling.
- Triangle Washers: For specific dent pulling applications.
- Wiggle Wire: For pulling larger areas of dents.
- Pulling Tabs/Claws: Various shapes for different pulling needs.
- Hot Pressing Tool: For specific metal shaping tasks.
- Ground Clamp: Essential for completing the welding circuit.
- Consumables Box: For organized storage of small parts.

Figure 3: A complete view of the VEVOR Spot Welder Dent Puller and its accessories.
4. Setup
Follow these steps to prepare your dent puller for operation:
- Unpacking: Carefully remove all components from the packaging. Inspect for any shipping damage.
- Placement: Place the main unit on a stable, dry, and level surface. Ensure adequate space around the unit for ventilation.
- Connect Welding Guns: Attach the two welding guns to the designated ports on the front panel of the main unit. Ensure connections are secure.
- Connect Ground Clamp: Connect the ground clamp cable to the appropriate terminal on the main unit. Securely attach the ground clamp to a clean, bare metal section of the vehicle body, close to the repair area, to ensure a good electrical connection.
- Power Connection: Connect the power cord to a suitable 110V power outlet. Note: While the product title indicates 110V, some models may be 220V. Always verify the voltage requirement on your specific unit's label before connecting to power.
5. Operating Instructions
The VEVOR 90E offers both automatic and manual welding modes, along with 7 functional modes for various repair tasks.
Control Panel Overview
The control panel features digital displays for settings, mode selection buttons, and power adjustments.

Figure 4: The control panel displaying the 7 functional welding modes.
Welding Modes
- Manual Mode: Allows for fine-tuning of weld spots, ideal for precision work on complex or intricate dents.
- Automatic (Contact) Mode: Provides exceptional efficiency for large dents. Welding initiates automatically upon contact with the panel.
7 Functional Modes
Select the appropriate mode based on the repair task and type of attachment:
- Triangle Washer Welding: For pulling larger dents.
- Round Washer Welding: For general dent pulling.
- Stud Welding: For attaching studs for pulling.
- Wiggle Wire Welding: For pulling elongated dents.
- Hot Pressing/Shrinking: For shrinking stretched metal.
- Carbon Rod Heating: For heating and shrinking metal.
- Single-Sided Spot Welding: For specific spot welding applications.

Figure 5: Versatile applications of the dent puller kit.
General Dent Repair Process
- Prepare Surface: Clean the dented area thoroughly, removing any paint, rust, or contaminants to ensure a good electrical connection.
- Select Mode and Attachment: Choose the appropriate welding mode and attachment (e.g., stud, washer, wiggle wire) for the dent size and type.
- Attach Ground: Ensure the ground clamp is securely attached to the workpiece.
- Weld Attachment: Place the chosen attachment against the dented area and activate the welding gun. For automatic mode, simply make contact. For manual mode, press the trigger.
- Pull Dent: Use the slide hammer or pulling tabs to gently pull the dent outwards. Work gradually from the edges towards the center.
- Remove Attachment: Once the dent is pulled, twist or break off the welded attachment. Grind smooth any remaining weld points.
6. Maintenance
Regular maintenance ensures the longevity and optimal performance of your VEVOR Spot Welder Dent Puller.
- Cleaning: After each use, clean the welding guns, cables, and main unit with a dry cloth. Remove any metal dust or debris.
- Cable Inspection: Periodically inspect all cables for cuts, fraying, or damage. Replace damaged cables immediately.
- Accessory Storage: Store all accessories in the provided toolbox or a clean, dry place to prevent loss or damage.
- Ventilation Grilles: Ensure the ventilation grilles on the main unit are free from obstructions to prevent overheating.
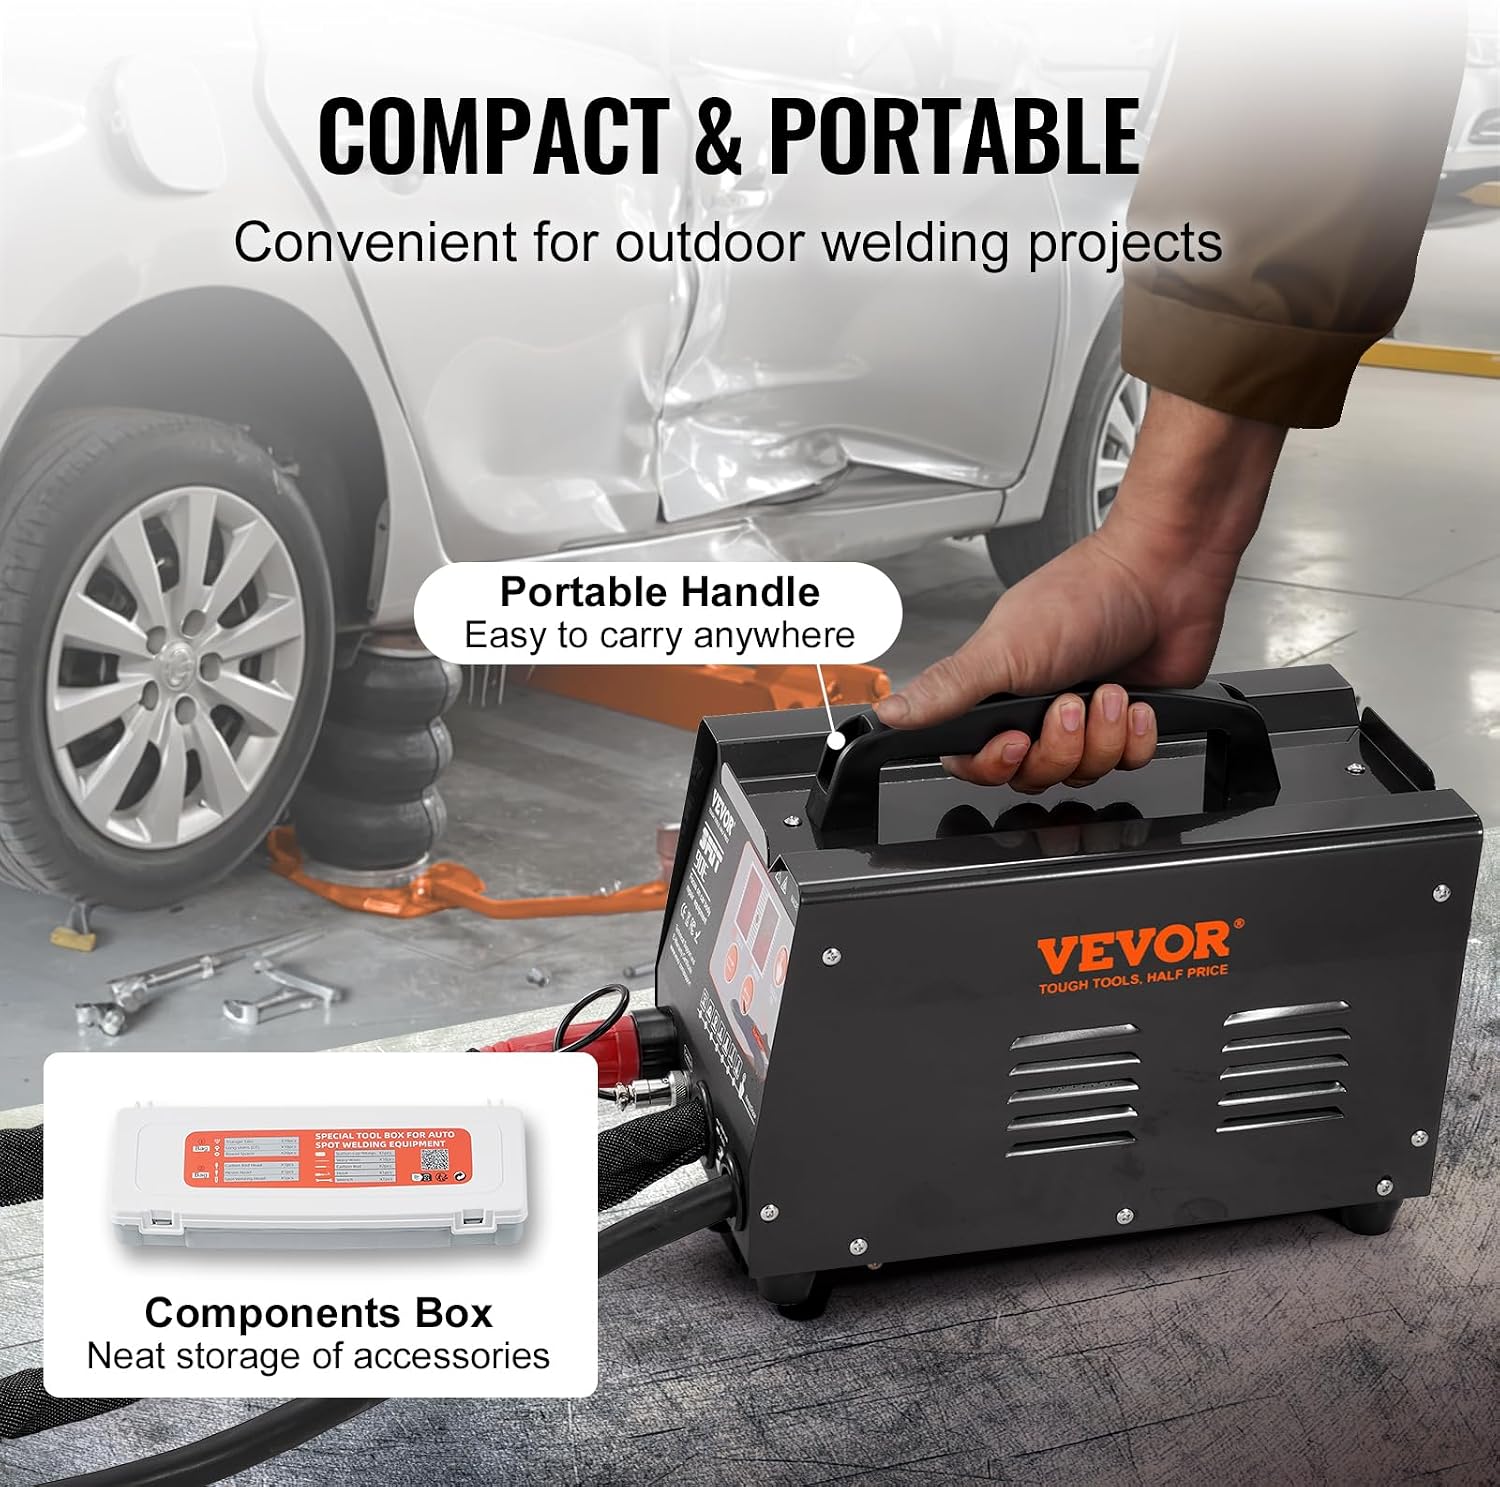
Figure 6: The compact and portable design of the unit, featuring a convenient handle.
7. Troubleshooting
If you encounter issues with your dent puller, refer to the following common problems and solutions:
| Problem | Possible Cause | Solution |
|---|---|---|
| No welding power / Weak weld | Poor ground connection, dirty workpiece, incorrect settings, insufficient power supply. | Ensure ground clamp is on clean, bare metal. Clean workpiece surface. Adjust power settings. Verify power supply voltage. |
| Unit overheats and shuts down | Prolonged continuous operation, blocked ventilation. | Allow unit to cool down. Ensure ventilation grilles are clear. Reduce duty cycle. |
| Welding gun not firing | Loose connection, faulty trigger, incorrect mode selection. | Check welding gun cable connections. Ensure correct mode is selected. Contact support if trigger is suspected faulty. |
If troubleshooting steps do not resolve the issue, please contact VEVOR customer support.
8. Specifications
Key technical specifications for the VEVOR 3KW Spot Welder Dent Puller, Model 90E:
- Item Model Number: 90E
- Rated Power: 3000W
- Net Weight: 47.3 lbs / 21.45 kg
- Welding Way: Manual / Contact Welding
- Welding Materials: Carbon Steel, Stainless Steel, Iron
- Product Dimensions: 12.2 x 10.83 x 9.65 inches (310 x 275 x 245 mm)
- Voltage: 110V (Please verify your specific unit's label for exact voltage requirements)

Figure 7: Product dimensions and key specifications.
9. Warranty and Support
VEVOR is committed to providing quality products and customer satisfaction.
- Returns: This product is eligible for 30-day easy returns. Refer to your purchase platform for detailed return policies.
- Protection Plan: A 2-Year Protection Plan may be available for purchase separately to extend coverage.
- Customer Support: For technical assistance, warranty claims, or any product-related inquiries, please contact VEVOR customer support. Visit the official VEVOR website or your purchase platform for contact information.


