
1. Introduction
This manual provides detailed instructions for the installation, operation, and maintenance of the GUETNEU XS-036-WK-1 110/220V Temperature Controller. This device is designed for precise temperature management in various environments, offering both heating and cooling control modes, along with a countdown timer function.
Key features include:
- High-Quality Flame Retardant PA66 Material: Ensures durability, heat resistance, and safety with a 94V-0 flame retardant rating.
- Three Operating Modes: Heat, Cool, and Countdown, allowing versatile temperature control.
- High-Precision Temperature Control: Accurate monitoring with a temperature probe, minimizing error and energy consumption.
- User-Friendly Interface: Clear LED display and indicator lights for operational status, with easy-to-understand controls.
- Wide Application Range: Suitable for aquaculture, hatcheries, greenhouse cultivation, and geothermal heating.

2. Safety Information
Please read and understand all safety warnings and instructions before installing or operating this device. Failure to do so may result in electric shock, fire, or serious injury.
- Ensure the power supply is disconnected before any wiring or maintenance.
- This switch is not intended to serve as the main disconnect. Install a miniature circuit breaker or a leakage protection device with overload and short-circuit protection upstream of this product.
- Do not exceed the rated voltage (110/220V AC) and current (63A) of the device.
- The temperature probe must be securely connected to ensure accurate readings and safe operation.
- Avoid installing the device in areas with high humidity or extreme temperatures outside its operating range.
3. Product Features Overview
The GUETNEU XS-036-WK-1 offers several features designed for efficient and reliable temperature control:

- LED Display: Provides clear, real-time temperature readings.
- Three Modes: Easily switch between Heating, Cooling, and Countdown modes.
- PA66 Material: Constructed from premium PA66 for insulation, heat resistance, and chemical resistance.
- 94V-0 Flame Retardant: Enhances safety by preventing fire spread.
- High Precision Temperature: Ensures accurate temperature monitoring and control.
4. Installation and Wiring
Proper installation is crucial for the safe and effective operation of the temperature controller. This device is designed for DIN rail mounting.
4.1. DIN Rail Mounting
The controller features a sliding rail clip for easy installation onto a standard DIN rail. Ensure the rail is securely mounted before attaching the device.
4.2. Connecting the Temperature Probe
The temperature probe connects to the dedicated port on the side of the controller. Ensure a firm and secure connection.

The probe cable length is approximately 6.56 feet (2 meters), allowing for flexible placement to monitor the desired temperature accurately.
4.3. Electrical Wiring
Connect the input terminals (N and L) at the top of the device to your 110/220V AC power supply. Connect the output terminals (N and L) at the bottom to the load (e.g., heating element, cooling fan). Always ensure proper polarity (Neutral to N, Line to L).

5. Operating Instructions
The controller features an LED display and three buttons: On/Off, SET, +, and - for configuration.
5.1. Setting Temperature Parameters
Press the "SET" button to enter the setting sequence. Use the "+" and "-" buttons to adjust the values. The sequence typically involves setting the Operating Temperature and Stop Temperature.

5.2. Heating Mode
In Heating Mode, the device activates when the operating temperature is below the set operating temperature and deactivates when it reaches the set stop temperature. This mode is suitable for applications requiring temperature increase.

5.3. Cooling Mode
In Cooling Mode, the device activates when the operating temperature is above the set operating temperature and deactivates when it drops to the set stop temperature. This mode is ideal for applications requiring temperature reduction.
5.4. Countdown Mode
Press the "SET" button to switch to the countdown timer function. Use the "+" and "-" buttons to adjust the timer from 1 minute to 24 hours. When the countdown begins, the blue light will illuminate, and the device will automatically power off the output terminal once the timer expires.
6. Temperature Calibration
After powering on, press and hold the "SET" button for more than 5 seconds to enter the temperature calibration function. You can adjust the temperature deviation by ±10°C to fine-tune accuracy. This feature ensures the product's temperature readings align with your specific requirements.
7. Specifications
Refer to the table below for detailed technical specifications of the GUETNEU XS-036-WK-1 Temperature Controller.

| Parameter | Value |
|---|---|
| Brand | GUETNEU |
| Model Number | XS-036-WK-1 |
| Material | PA66 |
| Color | White |
| Rated Voltage | 110/220 VAC |
| Rated Current | 30/63 A |
| Rated Frequency | 50/60 Hz |
| Ambient Humidity | <95% |
| Power Consumption | <2 W |
| Mounting Type | DIN Rail Mount |
| Ambient Temperature | -25°C to 60°C |
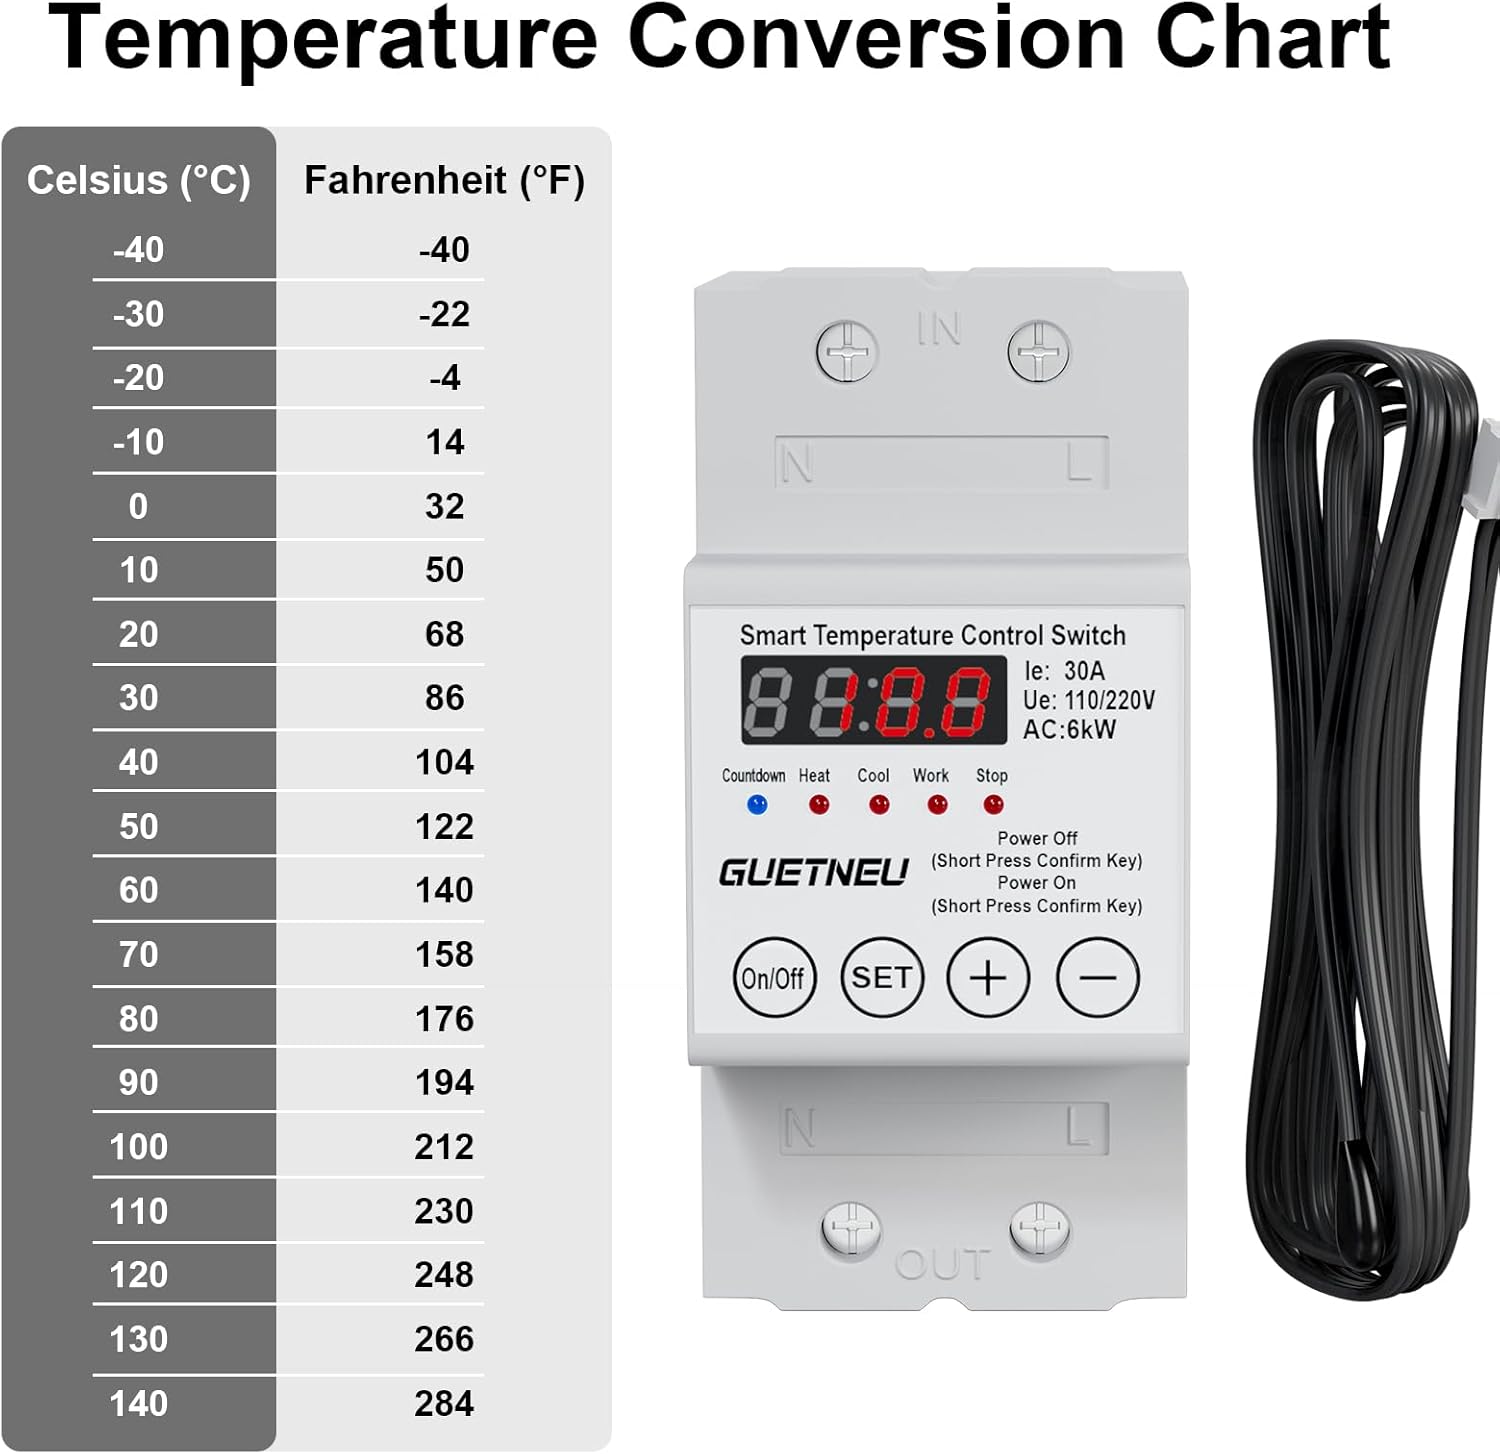
| Temperature Control Range | -40°C to 140°C (-40°F to 284°F) |
| Inductive Load | 8 kW (Motor Type) |
| Resistive Load | 18 kW (Heating and Lighting) |
| Item Weight | 7 ounces |
| Package Dimensions | 3.98 x 3.15 x 2.32 inches |

8. Applications
The GUETNEU XS-036-WK-1 Temperature Controller is versatile and can be used in a wide range of applications requiring precise temperature regulation:

- Aquaculture: Maintaining optimal water temperatures for aquatic life.
- Hatcheries: Ensuring stable temperatures for egg incubation.
- Greenhouse Cultivation: Regulating ambient temperature for plant growth.
- Geothermal Heating: Controlling heating systems for efficient energy use.
9. Maintenance and Troubleshooting
9.1. Maintenance
- Regularly inspect all wiring connections to ensure they are secure.
- Keep the device clean and free from dust and debris. Use a soft, dry cloth for cleaning.
- Ensure the temperature probe is clean and undamaged for accurate readings.
9.2. Troubleshooting
- Device not powering on: Check the power supply and ensure all connections are correct. Verify the upstream circuit breaker is not tripped.
- Inaccurate temperature readings: Ensure the temperature probe is correctly inserted and not damaged. Calibrate the temperature if necessary (refer to Section 6).
- Load not activating/deactivating: Verify the operating and stop temperatures are set correctly for the desired mode (Heating/Cooling). Check the load's power connection and functionality.
- Countdown timer issues: Ensure the timer is set within the 1 minute to 24-hour range.
10. Warranty and Support
For warranty information and technical support, please refer to the product packaging or contact GUETNEU customer service directly. Keep your purchase receipt for warranty claims.