
Netzu 6210ZD
Netzu Vibrating Alarm Clock User Manual
Model: 6210ZD | Brand: Netzu
1. Safety Information
Please read these instructions carefully before using the alarm clock. Keep this manual for future reference.
- Do not expose the device to extreme temperatures, direct sunlight, or high humidity.
- Avoid dropping or subjecting the device to strong impacts.
- Use only the provided power adapter.
- Keep out of reach of children.
- Do not attempt to disassemble or repair the device yourself. Contact qualified service personnel.
2. Package Contents
- Netzu Vibrating Alarm Clock (Black)
- Bed Shaker
- Power Adapter
- User Manual
3. Product Overview
The Netzu Vibrating Alarm Clock is designed for heavy sleepers, offering multiple wake-up modes including a powerful bed shaker. It features a clear digital display that shows time, temperature, date, and day of the week.

Image: The Netzu Vibrating Alarm Clock with its connected bed shaker, displaying time, temperature, and date.

Image: A visual representation of the alarm clock's display showing time, date, temperature, and day of the week simultaneously.
4. Setup
4.1 Power Connection
Connect the provided power adapter to the DC IN port on the back of the alarm clock and plug it into a standard wall outlet. The display will light up.

Image: The alarm clock connected to a wall outlet via its power adapter.
4.2 Battery Backup (Not Included)
For backup during power outages, insert 2x AAA batteries (not included) into the battery compartment. This will preserve time settings but the display will not be active during an outage.
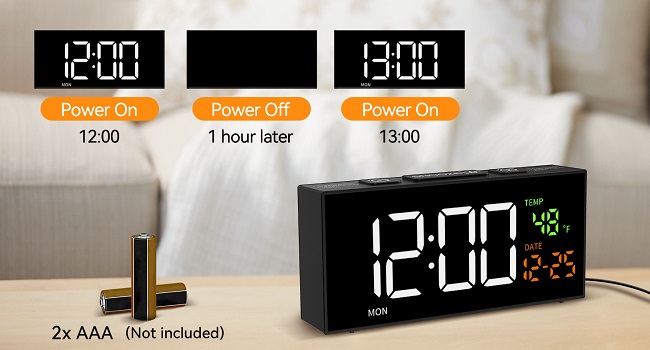
Image: Illustration showing the battery compartment for AAA batteries, which provide backup power.
4.3 Setting Time and Date
To set the current time and date:
- Long press the [SET] button to enter time setting mode.
- Use the [+] or [-] buttons to adjust the hour. Press [SET] to confirm.
- Use the [+] or [-] buttons to adjust the minute. Press [SET] to confirm.
- Continue this process to set the year, month, and day. The day of the week will automatically adjust based on the date.
Video: A step-by-step guide on how to set the date and time on the Netzu Vibrating Alarm Clock.
5. Operating Instructions
5.1 Setting Alarms
The clock supports two independent alarms. Each alarm can be set for Daily, Weekday (Mon-Fri), or Weekend (Sat-Sun) modes.

Image: Graphic illustrating the two alarm settings and the three alarm modes: Daily, Weekday, and Weekend.
5.2 Wake-up Modes
Choose from three distinct wake-up modes:
- Vibration Only: The bed shaker activates without sound.
- Ringing Only: The alarm sound plays without vibration.
- Vibration + Ringing: Both the bed shaker and alarm sound activate simultaneously.

Image: Icons representing the three wake-up modes: Vibration, Sound, and Vibration + Sound.
Video: Demonstration of the three wake-up modes (ringing and vibration, vibration only, ringing only) and how to adjust them.
5.3 Alarm Tones and Volume
The clock offers 10 alarm tones and 4 adjustable volume levels (90dB, 100dB, 105dB, 110dB).

Image: Graphic showing 10 optional alarm tones (Chime, 7 Soft Music, Ring, Beep) and 4 adjustable volume levels.
5.4 Brightness Adjustment
The display has 5 levels of brightness. Press the [SNOOZE/DIMMER] button to cycle through brightness levels or turn the display off.

Image: Illustration of the 5 brightness levels, from off to maximum illumination.
5.5 Snooze Function
When an alarm sounds, press the large [SNOOZE] button on top to activate a 9-minute snooze. The alarm will sound again after 9 minutes.
5.6 Daylight Saving Time (DST)
Long press the [DST] button to manually turn DST on or off. This will adjust the time by one hour forward or backward.

Image: Graphic showing the clock display before and after activating Daylight Saving Time (DST).
5.7 Display Formats
Toggle between 12-hour and 24-hour time formats, and Celsius (°C) or Fahrenheit (°F) for temperature display using the respective buttons.

Image: Visual comparison of the 12-hour and 24-hour time display formats, and switchable Celsius/Fahrenheit temperature units.
5.8 Bed Shaker Placement
For optimal effectiveness, place the bed shaker under your pillow, under a fitted sheet, or even in a steel bowl to amplify the vibration.
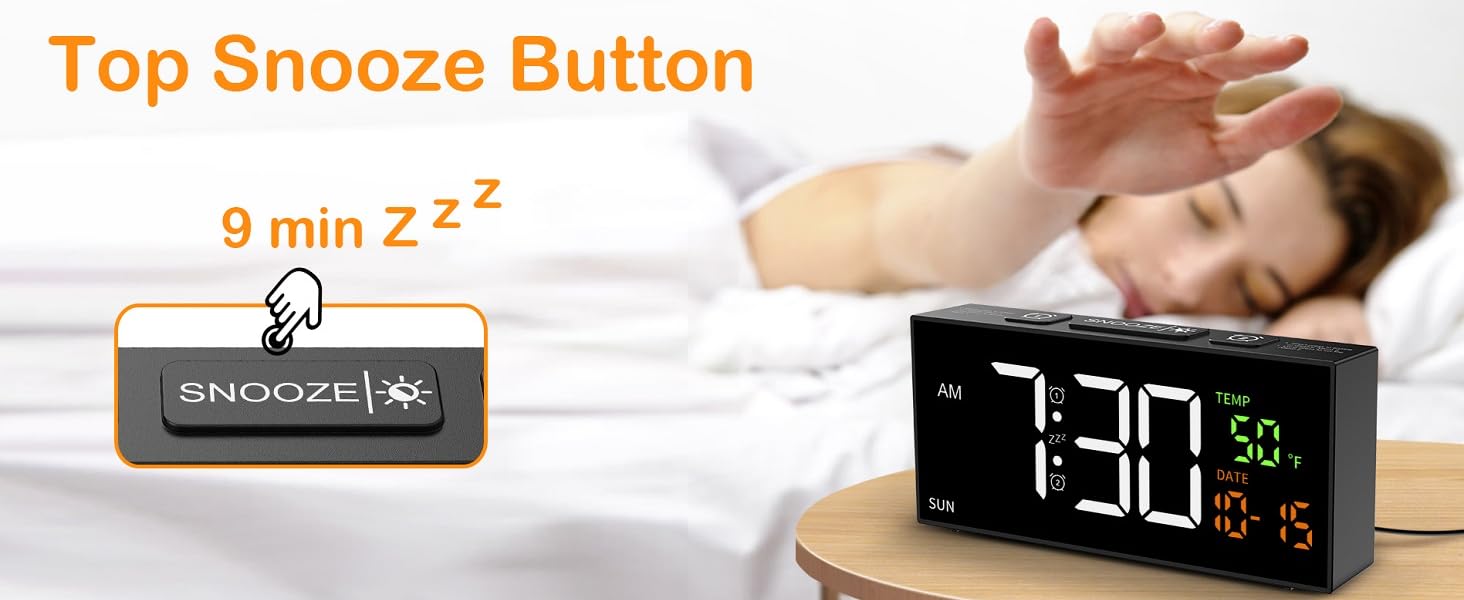
Image: Three common placements for the bed shaker: under a pillow, in a steel bowl, and under a fitted sheet.
6. Maintenance
To ensure the longevity of your Netzu Vibrating Alarm Clock:
- Clean the device with a soft, dry cloth. Do not use liquid cleaners or abrasive materials.
- Keep the bed shaker free from dust and debris.
- Store the clock in a cool, dry place when not in use for extended periods.
7. Troubleshooting
| Problem | Possible Cause | Solution |
|---|---|---|
| Clock display is off. | No power or power outage. | Ensure power adapter is securely plugged in. Check power outlet. If using battery backup, display will be off during outage. |
| Alarm does not sound/vibrate. | Alarm not set, wrong mode, or volume too low. | Verify alarm settings (time, mode, active). Check alarm volume. Ensure bed shaker is properly connected. |
| Time/Date is incorrect. | Not set correctly or power interruption. | Follow instructions in Section 4.3 to reset time and date. Ensure battery backup is installed for power interruptions. |
| Display is too bright/dim. | Brightness level needs adjustment. | Press the [SNOOZE/DIMMER] button to cycle through brightness levels. |
8. Specifications
| Feature | Detail |
|---|---|
| Brand | Netzu |
| Model Number | 6210ZD |
| Color | Black |
| Display Type | Digital |
| Power Source | Corded Electric |
| Product Dimensions | 3.1"W x 6.5"H |
| Item Weight | 13.4 ounces |
| Special Features | Loud Alarm, Large Display, Temperature Display, Adjustable Brightness, Adjustable Volume, Bed Shaker |
| Alarm Modes | 3 (Vibration, Ringing, Vibration + Ringing) |
| Alarm Tones | 10 |
| Brightness Levels | 5 |
| Snooze Duration | 9 minutes |
9. Warranty and Support
For warranty information or technical support, please refer to the product packaging or contact Netzu customer service directly. Keep your purchase receipt as proof of purchase.
Ask a question about this manual
Ask about setup, troubleshooting, compatibility, parts, safety, or missing instructions. Manuals+ will review the question and use this page’s manual context to help answer it.