
1. Introduction
This manual provides detailed instructions for the assembly, use, and maintenance of your WLIVE TV Stand, Model ADSG620. Please read this manual thoroughly before assembly and use to ensure proper installation and safe operation. Keep this manual for future reference.
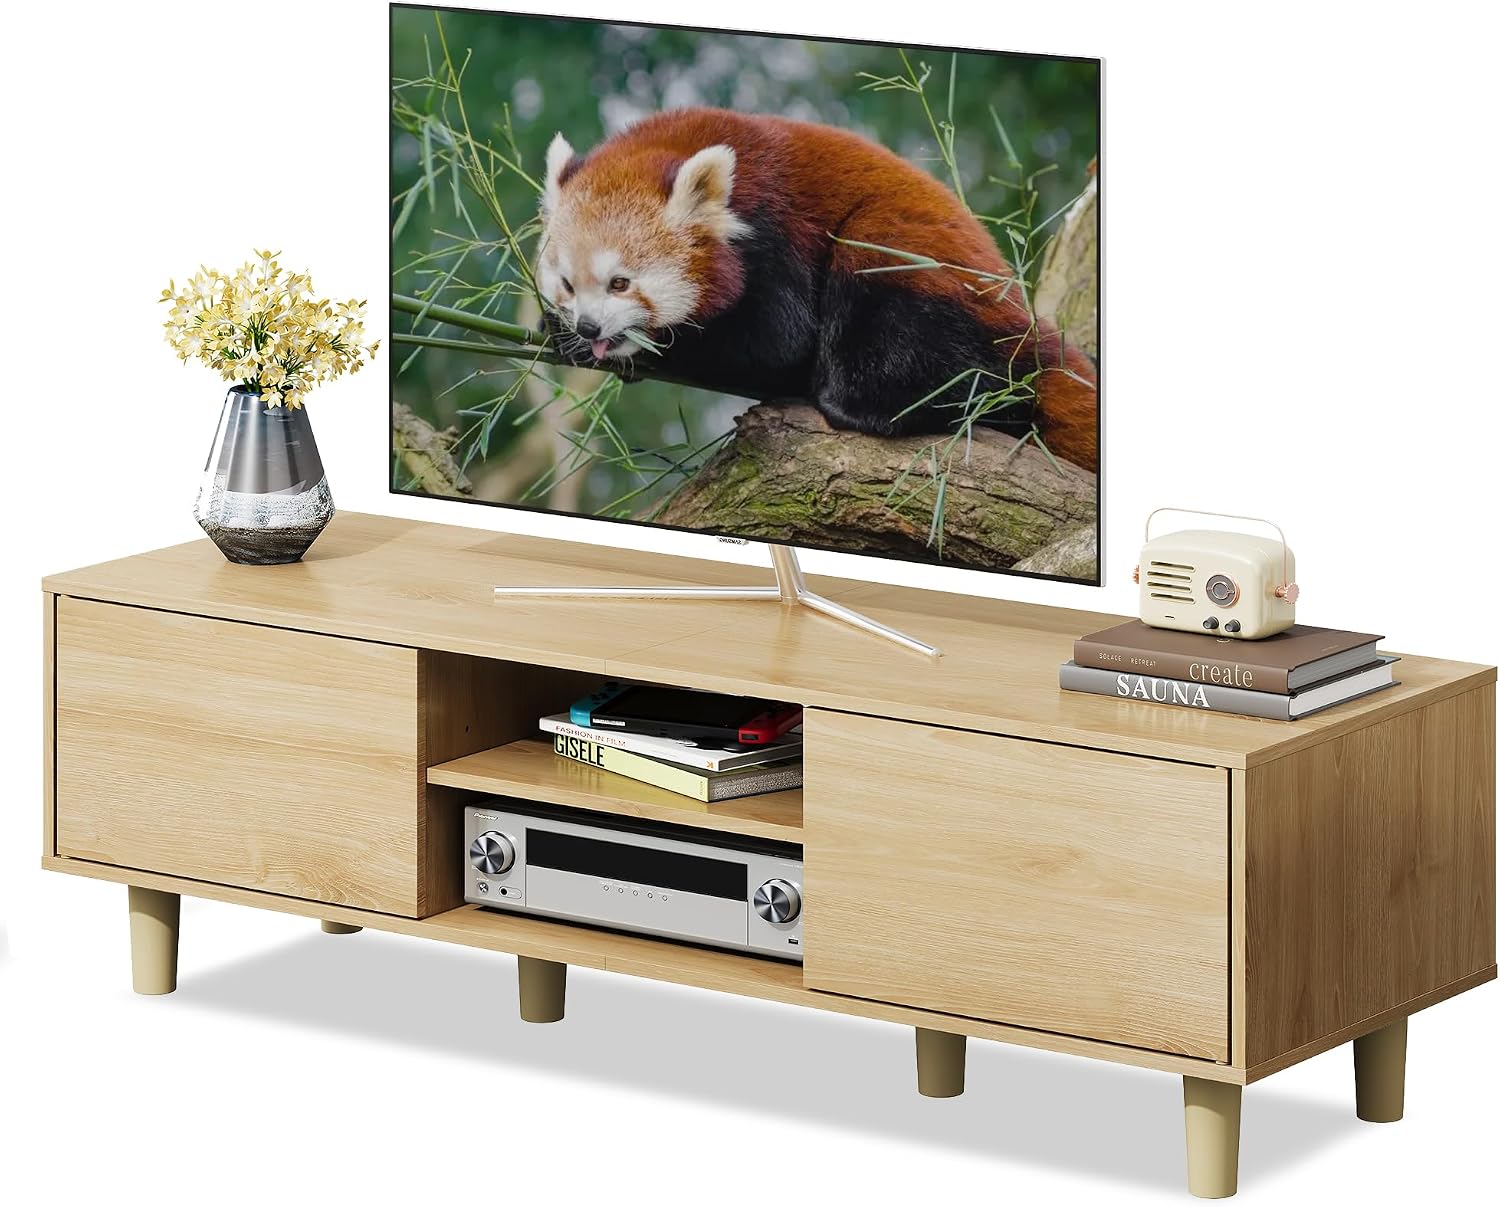
Figure 1: WLIVE TV Stand Model ADSG620 (120cm Width, Natural) in a typical setup.
2. Safety Information
WARNING: This product requires assembly. Exercise caution during assembly due to potentially sharp edges and small parts. Keep small parts away from children.
- The maximum load capacity for each door storage section is 25 kg.
- The maximum load capacity for the top panel is 30 kg.
- Exceeding these specified load capacities may result in product damage or instability, posing a risk of injury.
- Ensure the TV stand is placed on a flat, stable surface to prevent tipping.
3. Package Contents
Before beginning assembly, verify that all components listed below are present and undamaged. If any parts are missing or damaged, please contact customer support.
- Top Panel
- Side Panels (x2)
- Bottom Panel
- Central Shelf
- Door Panels (x2)
- Legs (x6)
- Hardware Pack (screws, dowels, hinges, cable management rings, screw hole stickers)
- Assembly Manual
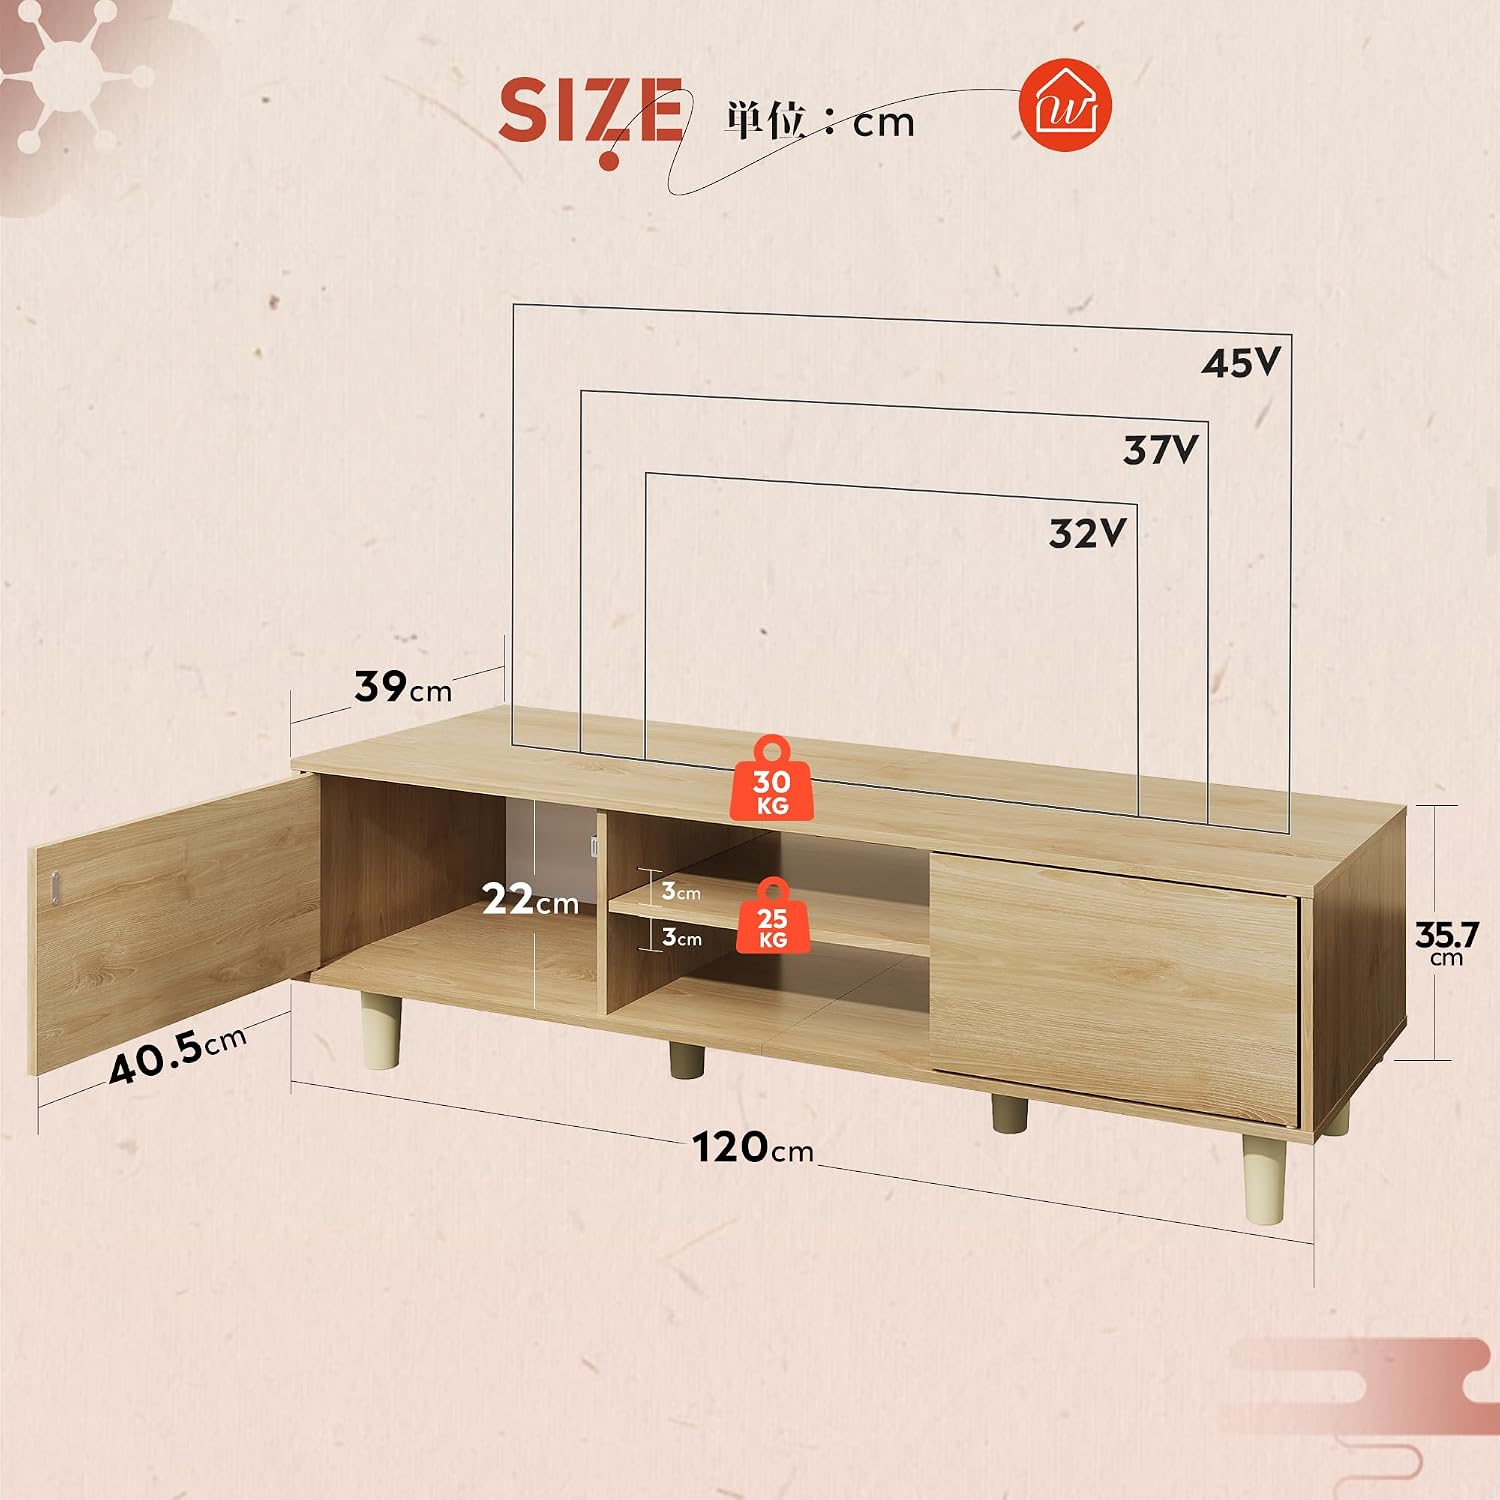
Figure 2: Product dimensions and internal measurements. Please refer to the diagram for specific sizes.
4. Assembly Instructions
Assembly is required for this product. It is recommended to have ample space and sufficient time for assembly. Follow the numbered steps provided in the included assembly diagram (not shown here) for best results.
- Prepare the Area: Clear a spacious, clean, and flat area for assembly. Lay down a blanket or cardboard to protect the floor and product parts.
- Identify Parts: Unpack all components and identify them using the provided parts list and diagrams. Each part may have a label for easy identification.
- Assemble the Frame: Attach the side panels to the bottom panel and central support using the designated hardware.
- Install the Central Shelf: The central shelf is adjustable to three different height levels. Select the desired height and secure it.
- Attach the Top Panel: Secure the top panel to the assembled frame.
- Install the Doors: Attach the hinges to the door panels and then to the main frame. Ensure doors open and close smoothly.
- Attach the Legs: Secure the six support legs to the bottom of the TV stand.
- Apply Screw Hole Stickers: Use the provided stickers to cover visible screw holes for a clean finish.

Figure 3: Detail of screw hole covers and door hinges, designed for straightforward assembly.
5. Product Features
- Large Capacity Door Storage: The left and right compartments feature doors for concealed storage. Each compartment measures approximately 43.7 cm (width) x 22 cm (depth), capable of storing about 150 CDs or 67 DVDs. This design helps keep your living space tidy.
- Adjustable Open Rack: The central open shelf is adjustable to three different height levels, allowing you to customize storage space for various items. Its open-back design promotes air circulation, which is beneficial for electronic devices. The central open space measures 59 cm (width) x 22 cm (depth), suitable for two AV devices such as recorders, soundbars, or DVD players.
- Spacious Top Panel: The top surface provides ample space, measuring 120 cm (width) x 39 cm (depth). It can accommodate TVs up to 60 inches. The low-type design, with a height of 35.7 cm, helps reduce visual clutter and creates a more open feel in smaller rooms.
- Integrated Cable Management: The TV stand features cable holes at the back of the unit. This design allows for neat routing of cables from electronic devices to the TV, maintaining a clean appearance. It also helps prevent children and pets from interfering with wiring.
- Sturdy Construction: Constructed from E1 grade melamine particle board with a thickness of 1.5 cm, ensuring durability and stability. The rectangular overall structure, supported by six robust legs, provides excellent load-bearing capacity. The top panel can support up to 40 kg, each door compartment up to 30 kg, and the overall structure has a total load capacity of 100 kg.

Figure 4: Large capacity door storage for various media and accessories.

Figure 5: Adjustable central shelf and open-back design for optimal airflow and cable management.
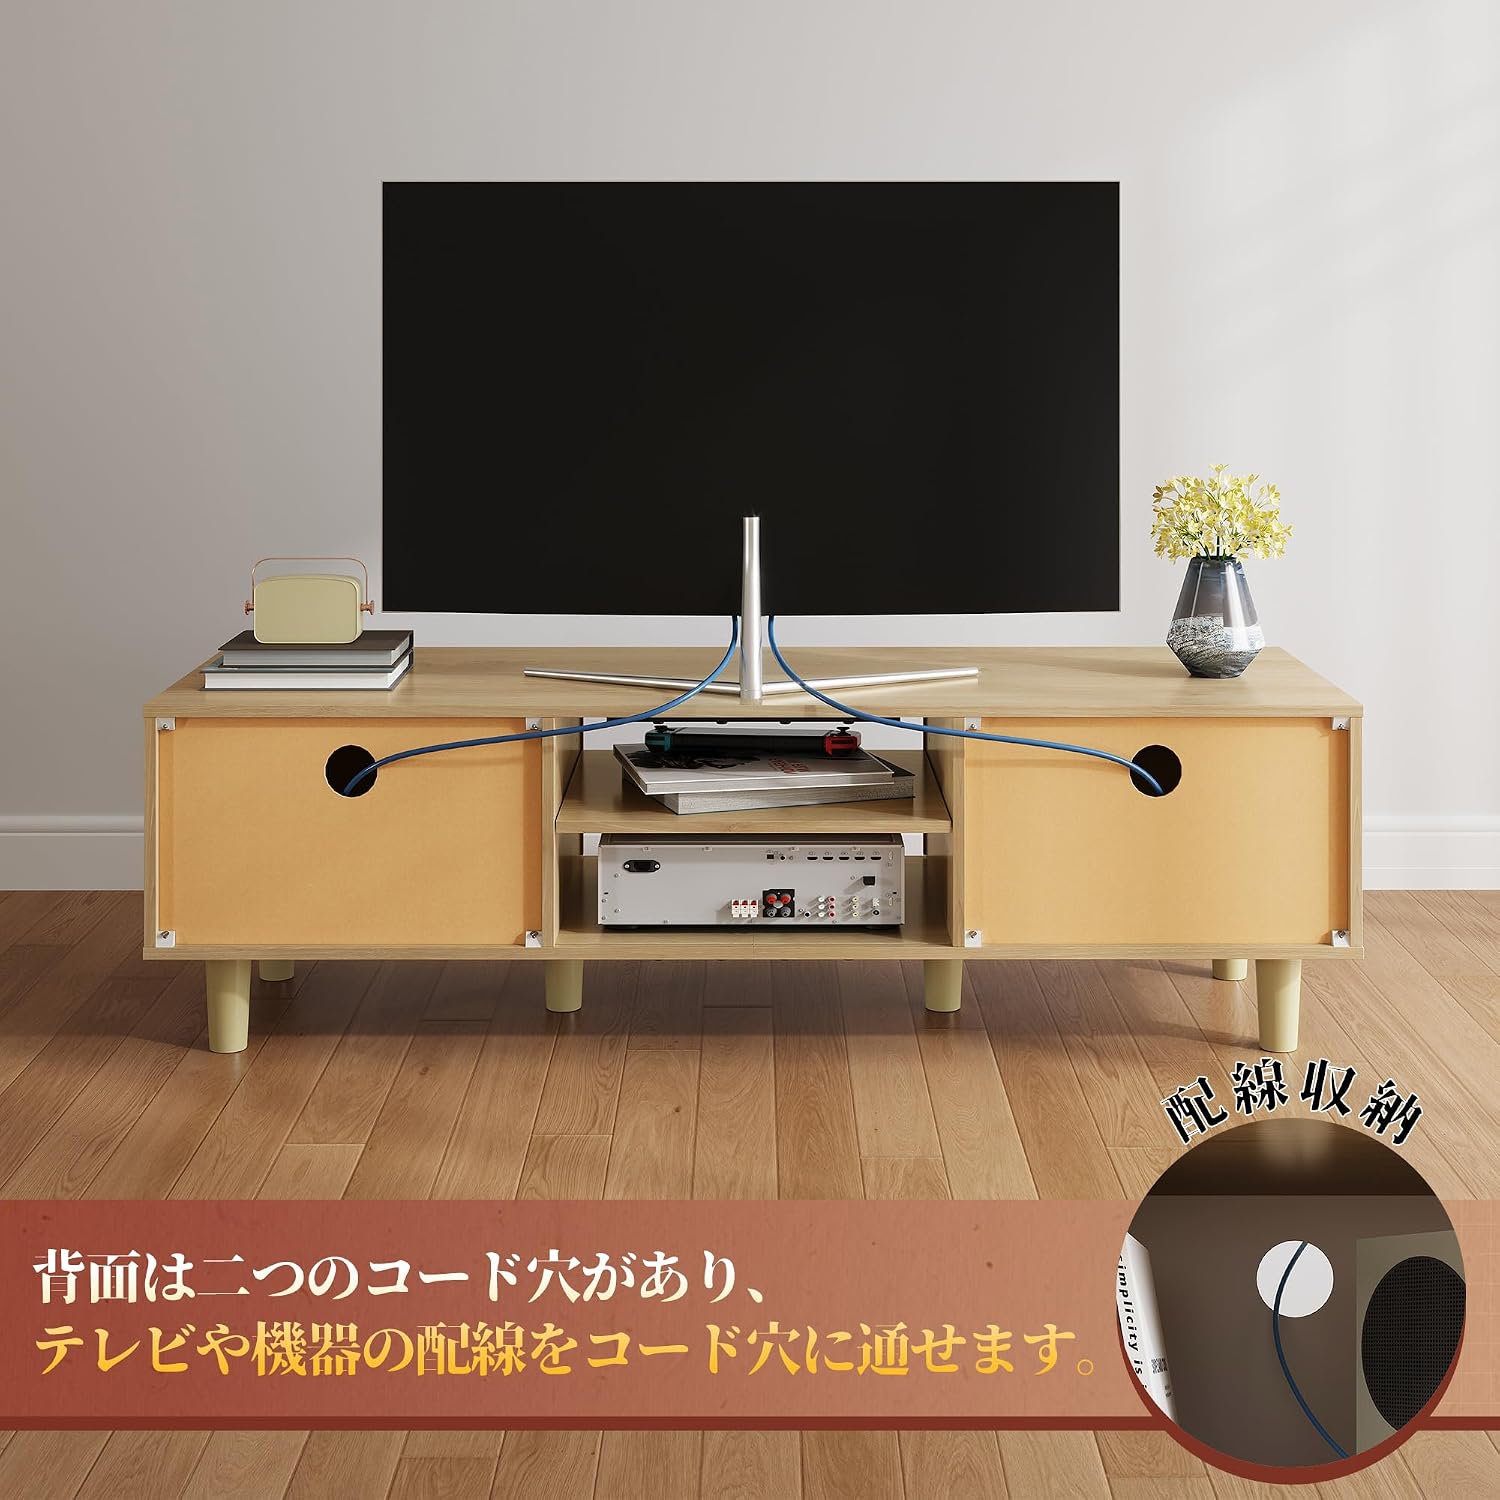
Figure 6: Rear cable management holes for organized wiring.

Figure 7: Six robust legs provide enhanced stability and support.
6. Usage Guidelines
- Placement: Position the TV stand on a level, stable floor surface. Avoid placing it in direct sunlight or near heat sources to prevent material degradation.
- TV Compatibility: This stand is designed to support TVs up to 60 inches. Ensure your TV's base fits within the top panel dimensions (120 cm W x 39 cm D) and its weight does not exceed the 30 kg top panel load capacity.
- Weight Distribution: Distribute weight evenly across the top panel and within the storage compartments. Avoid concentrating heavy items in one area.
- Cable Management: Utilize the cable holes at the back to organize and conceal wires from your TV and other media devices. This improves aesthetics and reduces tripping hazards.
7. Maintenance
- Cleaning: Wipe the surfaces with a soft, damp cloth. Avoid using harsh chemicals, abrasive cleaners, or excessive moisture, as these can damage the finish.
- Dusting: Regularly dust the stand to prevent buildup.
- Inspection: Periodically check all screws and connections to ensure they remain tight. Retighten if necessary.
- Avoid Scratches: Use coasters or protective pads under items placed on the top panel to prevent scratches.
8. Troubleshooting
- Wobbly Stand: Ensure all screws are securely tightened. Check that the stand is on a level surface; use shims if necessary to stabilize.
- Doors Not Closing Properly: Check hinge alignment and adjustment. Ensure no obstructions are preventing the doors from closing fully.
- Missing Parts: If you discover missing parts during assembly, do not proceed. Contact customer support immediately for assistance.
- Difficulty Assembling: Refer to the detailed assembly diagrams. If issues persist, consider seeking assistance from another person.
9. Specifications
| Attribute | Specification |
|---|---|
| Brand | WLIVE |
| Model Number | ADSG620 |
| Color | Natural |
| Style | Modern |
| Product Dimensions (L x W x H) | 120 cm x 39 cm x 35.7 cm |
| Product Weight | 17 kg |
| Assembly Required | Yes |
| Top Panel Load Capacity | 30 kg |
| Door Storage Load Capacity (each) | 25 kg |
| Overall Load Capacity | 100 kg |
| Material | E1 Grade Melamine Particle Board |
10. Warranty and Support
WLIVE offers a one-year warranty for this product from the date of purchase. This warranty covers manufacturing defects under normal use. Please retain your proof of purchase for warranty claims.
For customer support, missing parts, or warranty inquiries, please contact WLIVE customer service through the retailer where the product was purchased.