
1. Introduction
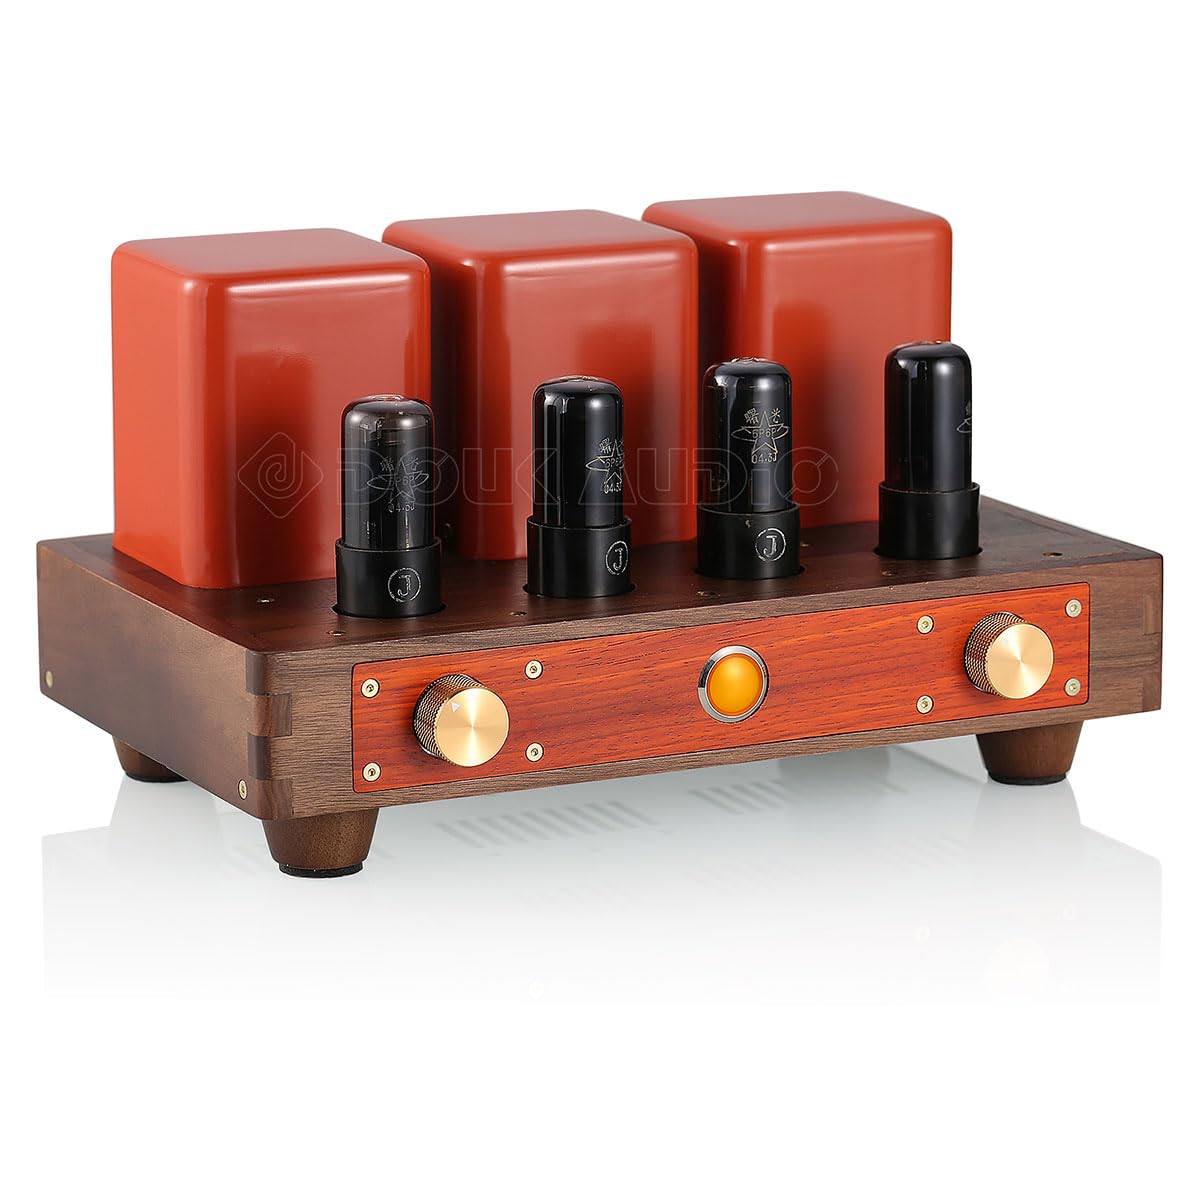
The Nobsound HiFi 6P6P Vacuum Tube Push-Pull Amplifier is designed to provide a high-fidelity audio experience. This amplifier utilizes four 6P6P vacuum tubes in a push-pull configuration, combined with an OPA2604 driver stage, to effectively filter digital sound from audio sources. This design significantly reduces background noise and enhances dynamic performance, delivering a harmonious, warm, detailed, and smooth sound characteristic of vacuum tube amplifiers. It is suitable for driving common bookshelf speakers and high-sensitivity floor-standing speakers.
2. Safety Instructions
- Power Supply: Ensure the amplifier is connected to a power outlet with the correct voltage as specified on the device. Use only the provided power cord.
- Ventilation: Place the amplifier in a well-ventilated area. Do not block ventilation openings. Maintain adequate space around the unit for proper airflow to prevent overheating, especially due to the heat generated by vacuum tubes.
- Moisture: Do not expose the amplifier to rain, moisture, or excessive humidity. Avoid placing liquids near the unit.
- Heat: Keep the amplifier away from direct sunlight, radiators, heat registers, stoves, or other heat-producing appliances. Vacuum tubes operate at high temperatures; avoid touching them during operation or immediately after shutdown.
- Foreign Objects: Do not insert any objects into the openings of the amplifier. This could cause electric shock or damage.
- Servicing: Do not attempt to service this product yourself. Refer all servicing to qualified service personnel. Opening the unit may expose you to dangerous voltages or other hazards.
- Tube Handling: Handle vacuum tubes with care. Ensure they are properly seated in their sockets before powering on the unit.
- Grounding: Ensure proper grounding to prevent electrical hazards.
3. Package Contents
Please check the package for the following items:
- Main Amplifier Unit * 1
- 6P6P Vacuum Tubes * 4
- Power Cord * 1

4. Product Features
- Advanced Audio Filtering: The amplifier uses four 6P6P vacuum tubes in a push-pull configuration with an OPA2604 driver stage. This design effectively filters digital sound from common audio sources, significantly reducing background noise and improving dynamic performance.
- Wide Frequency Response: Boasts a broad frequency response of 30-30kHz (-1dB), ensuring comprehensive coverage from rich low-mid frequencies to clear high frequencies.
- High Output Power: Features a push-pull circuit design providing a maximum output of 12W+12W, suitable for various speaker types.
- Optimized Power Supply and Transformers: Incorporates a self-developed high-frequency power supply and high-quality Japanese Z11 output transformers to enhance performance and ensure system stability. It is equipped with a standard ICE socket.
- Artistic Design: Crafted with natural walnut and rosewood materials, featuring red decorative accents that create a unique artistic aesthetic. The front panel includes a volume knob and a power indicator lamp.
- User-Friendly Interface: Equipped with RCA audio inputs and banana speaker audio outputs for convenient connectivity. Includes 2A fuse protection for safety.
5. Setup
5.1 Unpacking and Inspection
- Carefully remove the amplifier and all accessories from the packaging.
- Inspect all components for any signs of damage during transit. If any damage is found, contact your retailer immediately.
5.2 Tube Installation
The 6P6P vacuum tubes may be shipped separately to prevent damage. Install them as follows:
- Identify the four tube sockets on the top panel of the amplifier.
- Carefully align the pins of each 6P6P vacuum tube with the corresponding holes in the socket. The tubes are keyed, so they will only fit in one orientation.
- Gently push each tube straight down into its socket until it is firmly seated. Do not force the tubes.
5.3 Connecting Audio Sources (RCA Input)
Connect your audio source (e.g., CD player, DAC, phone, tablet, TV set-top box, computer) to the RCA input terminals on the rear panel of the amplifier.
- Use high-quality RCA cables.
- Connect the left channel (white/L) output of your source device to the left RCA input of the amplifier.
- Connect the right channel (red/R) output of your source device to the right RCA input of the amplifier.

5.4 Connecting Speakers (Banana Plug Output)
Connect your passive speakers to the banana plug output terminals on the rear panel. The amplifier supports both 4Ω and 8Ω speakers.
- Ensure the amplifier is turned off before connecting speakers.
- Connect the positive (+) terminal of your left speaker to the corresponding positive terminal (4Ω or 8Ω, depending on your speaker's impedance) for the left channel on the amplifier.
- Connect the negative (-) terminal of your left speaker to the corresponding negative terminal (G) for the left channel on the amplifier.
- Repeat the process for the right speaker, connecting it to the right channel output terminals.
- Ensure all connections are secure to prevent short circuits.


5.5 Power Connection
- Connect the provided power cord to the IEC power inlet on the rear panel of the amplifier.
- Plug the other end of the power cord into a suitable wall outlet.

6. Operating Instructions
6.1 Powering On/Off
- To power on the amplifier, press the power switch located on the front panel. The power indicator lamp will illuminate.
- Allow a few moments for the vacuum tubes to warm up before expecting optimal sound. This warm-up period is normal for tube amplifiers.
- To power off, press the power switch again. The indicator lamp will turn off.
6.2 Volume Control
Adjust the audio output level using the volume knob on the front panel. Turn clockwise to increase volume and counter-clockwise to decrease it.

7. Maintenance
- Cleaning: Disconnect the power before cleaning. Use a soft, dry cloth to wipe the exterior of the amplifier. Do not use liquid cleaners or abrasive materials.
- Ventilation: Regularly check that the ventilation openings are clear of dust and debris. Ensure the amplifier is always placed in an area with good airflow.
- Tube Care: Vacuum tubes have a finite lifespan. If you notice a degradation in sound quality or if a tube fails, it may need replacement. Consult qualified personnel for tube replacement to ensure correct type and installation.
- Fuse Replacement: The amplifier is equipped with a 2A fuse. If the unit does not power on, check the fuse located near the power inlet on the rear panel. Replace it only with a fuse of the same type and rating.
8. Troubleshooting
| Problem | Possible Cause | Solution |
|---|---|---|
| No power | Power cord not connected; Power outlet faulty; Blown fuse | Check power cord connection; Try a different outlet; Replace fuse (2A) |
| No sound | Input source not connected; Speaker cables loose; Volume too low; Faulty tubes | Check RCA input connections; Secure speaker cables; Increase volume; Check/replace tubes |
| Distorted sound | Input signal too strong; Faulty tubes; Speaker impedance mismatch | Reduce input volume from source; Check/replace tubes; Ensure speakers match 4Ω/8Ω output |
| Humming or buzzing noise | Ground loop; Nearby electronic interference; Faulty tubes | Ensure proper grounding; Move amplifier away from other electronics; Check/replace tubes |
9. Specifications
| Feature | Specification |
|---|---|
| Brand | Nobsound |
| Model | DJ585 |
| Output Power | 12W + 12W (4Ω/8Ω) |
| Frequency Response | 30-30kHz (-1dB) |
| Input Sensitivity | 400mV |
| Signal-to-Noise Ratio (SNR) | -80dB |
| Residual Noise | <0.5mVac |
| Input Interface | RCA Audio Input |
| Output Interface | Banana Speaker Audio Output |
| Included Tubes | 4 x 6P6P Vacuum Tubes |
| Fuse | 2A |
| Product Weight | 7.8 kg (17.19 lbs) |
| Package Weight | 9.0 kg (19.84 lbs) |
| Dimensions (W x D x H) | Approximately 316mm x 193mm x 176mm (12.44in x 7.59in x 6.92in) |
10. Warranty and Support
For warranty information, technical support, or service inquiries, please refer to the documentation provided with your purchase or contact Nobsound customer support through your retailer or the official Nobsound website. Please have your model number (DJ585) and purchase details ready when contacting support.

