
Introduction
This manual provides comprehensive instructions for the assembly, operation, and maintenance of your Keyluv Queen Floating Bed Frame. Please read this manual thoroughly before assembly and use to ensure proper installation and safe operation. Keep this manual for future reference.
Safety Information
- Exercise caution around sharp edges during assembly.
- Ensure the bed frame is fully assembled and stable before placing a mattress or using it.
- Do not exceed the maximum weight capacity of 1000 lbs (including mattress).
- Keep all small parts and packaging materials away from children to prevent choking hazards.
- Do not use power tools for assembly unless specifically instructed, as this may damage the frame.
Package Contents
Verify that all components are present before beginning assembly. All parts are typically included in a single package.
- Headboard with integrated LED lights and charging station
- Side rails (2)
- Footboard
- Center support beam(s)
- Wooden slats
- Hardware pack (screws, bolts, washers, Allen wrench)
- LED light remote control (if applicable)
- Power adapter for LED lights and charging station

Figure 1: Overview of bed frame dimensions and packaging. The bed frame supports up to 1000 lbs and comes in one box.
Assembly Instructions
Assembly is designed to be straightforward and typically requires no special tools beyond what is provided. Follow the numbered steps in your included instruction booklet. Below are general guidelines and key components.
- Unpack and Identify Parts: Lay out all components and hardware. Compare them against the parts list in your instruction booklet.
- Assemble Headboard: Attach any necessary supports or decorative elements to the headboard as per instructions.
- Connect Side Rails: Securely attach the side rails to the headboard and footboard using the provided hardware. Ensure all connections are tight.
- Install Center Support: Place the center support beam(s) and legs (if separate) into position and secure them to the frame.
- Place Slats: Distribute the wooden slats evenly across the frame. Many slats include EVA noise-reducing strips and may attach with Velcro or screws to prevent movement.

Figure 2: Wooden slats often feature Velcro for secure attachment to the bed frame, minimizing noise and movement.

Figure 3: Detail of the metal frame connection points, showing how components are secured with screws for stability.

Figure 4: A stack of wooden slats, which provide support for the mattress and eliminate the need for a box spring.

Figure 5: Illustrates how a wooden slat is properly attached to the bed frame for stability and mattress support.
Mattress Recommendation: A mattress thickness of 8-12 inches is recommended for optimal comfort and aesthetic with this platform bed, as no box spring is needed.

Figure 6: Recommended mattress thickness for use with the Keyluv Floating Bed Frame.
Operating Instructions
LED Lighting System
The bed frame features integrated RGB LED light strips. These lights can be controlled via a remote control or a dedicated mobile application (if provided). The system supports over 60,000 color options and various lighting modes.
- Power On/Off: Use the power button on the remote or in the app to turn the lights on or off.
- Color Selection: Select desired colors from the color palette on the remote or app.
- Brightness Adjustment: Adjust the brightness levels to your preference.
- Mode Selection: Choose from various dynamic lighting modes (e.g., flashing, fading, smooth transitions).
- Timing Setting: Set timers for the lights to turn on or off automatically.

Figure 7: The bed frame illuminated by LED lights, demonstrating control options via remote and mobile app.

Figure 8: The LED lights on the headboard and underneath the bed can be operated independently.
Headboard Charging Station
The headboard is equipped with a charging station featuring 3 USB ports and 1 Type-C port. This allows for convenient charging of electronic devices.
- Connection: Ensure the bed frame's power adapter is plugged into a functional wall outlet.
- Charging Devices: Connect your devices (phones, tablets, etc.) to the available USB or Type-C ports using appropriate cables.
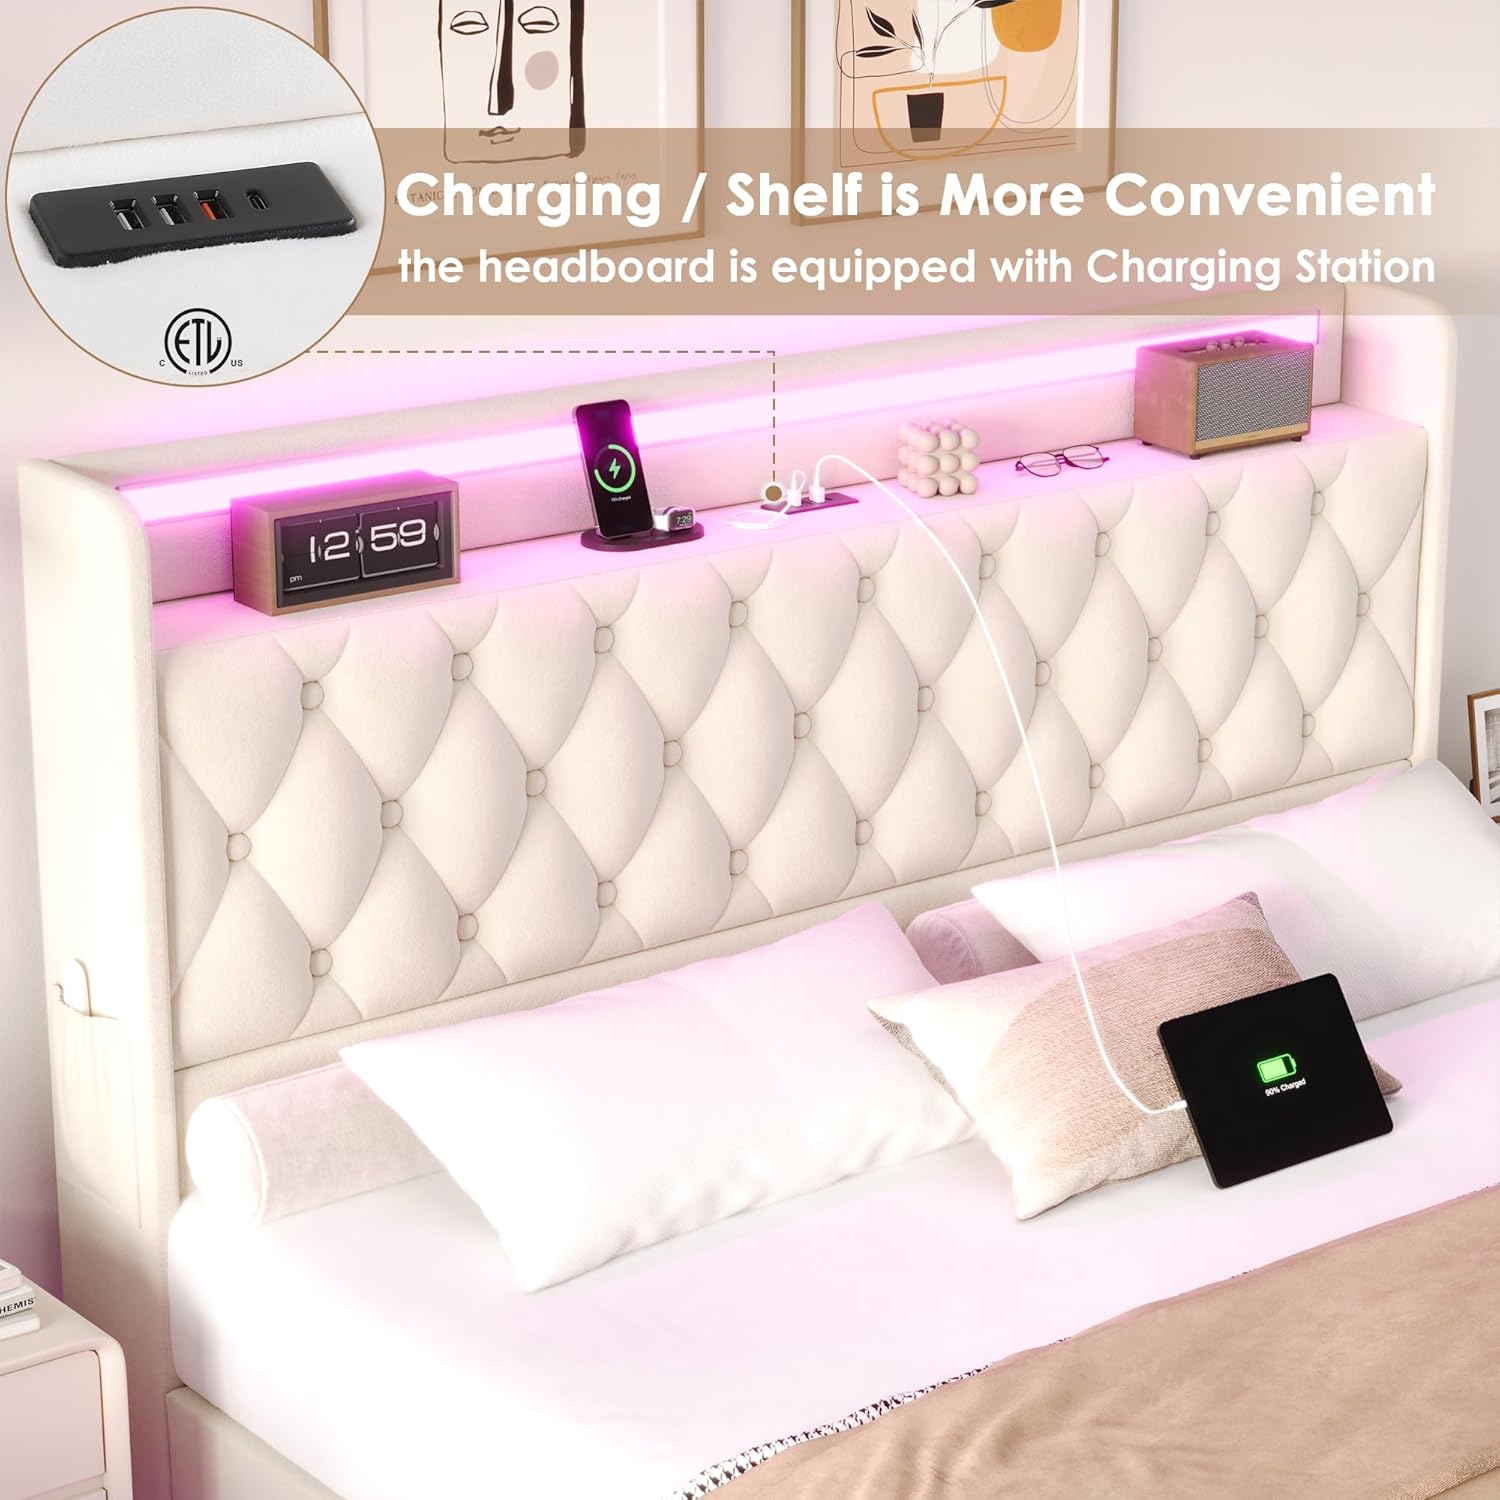
Figure 9: The integrated charging station on the headboard, featuring multiple USB and Type-C ports.

Figure 10: Demonstrates the convenience of charging devices directly from the headboard.
Maintenance
- Cleaning the Upholstery: For general cleaning, gently vacuum the velvet upholstery with a soft brush attachment. For spills, blot immediately with a clean, dry cloth. For stubborn stains, consult a professional upholstery cleaner. Avoid harsh chemicals.
- Frame Inspection: Periodically check all bolts and screws to ensure they remain tight. Re-tighten if necessary to maintain stability and prevent noise.
- LED Lights: The LED strips are designed for long life and typically do not require maintenance. If issues arise, refer to the troubleshooting section.
- Charging Ports: Keep the USB and Type-C ports free of dust and debris. Use a soft, dry cloth to clean if needed.

Figure 11: Detail of the upholstered velvet material and button-tufted design, highlighting the need for gentle cleaning.
Troubleshooting
| Problem | Possible Cause | Solution |
|---|---|---|
| Bed frame is wobbly or noisy. | Loose connections; uneven floor; missing EVA strips. | Re-tighten all bolts and screws. Ensure the bed is on a level surface. Check if EVA noise-reducing strips are properly installed on slats. |
| LED lights are not working. | Power adapter unplugged; remote battery dead; loose connection to LED strip. | Check if the power adapter is securely plugged into the wall and the bed frame. Replace remote control batteries. Inspect the connection between the LED strip and its power source. |
| Charging station is not functioning. | Power adapter unplugged; device cable faulty; device not compatible. | Ensure the bed frame's power adapter is plugged in. Try a different charging cable. Test with another device to confirm compatibility. |
Specifications
- Size: Queen
- Product Dimensions: 86"L x 61"W x 46"H
- Special Feature: LED lights, Charging Station (3 USB, 1 Type-C)
- Color: Beige
- Finish Type: Upholstered
- Included Components: Headboard, Frame, Slats
- Compatible Mattress Size: Queen
- Brand: Keyluv
- Furniture Finish: Beige Velvet
- Assembly Required: Yes
- Form Factor: Floating
- Headboard Material: Velvet
- Material: Metal, Wood, Velvet
- Style: Modern
- Weight Capacity: Up to 1000 lbs
- Recommended Mattress Thickness: 8-12 inches (no box spring needed)
Warranty and Support
For warranty information or technical support, please refer to the contact details provided with your purchase documentation or visit the official Keyluv website. Keep your proof of purchase for any warranty claims.