
1. Safety Information
WARNING:
- Always use safety belts when the child is in the bassinet.
- Never leave the child unattended.
- Always follow assembly and disassembly instructions carefully to prevent injuries.
- Ensure all locking mechanisms are securely engaged before placing a child in the playard or bassinet.
- Do not use if any parts are broken, torn, or missing.
- Do not use accessories or replacement parts other than those approved by the manufacturer.
- Keep small parts away from children during assembly.
2. Product Overview
The HARPPA 6-in-1 Pack and Play is a versatile baby care solution designed to adapt to your child's needs from infancy through toddlerhood. This multi-functional unit seamlessly transforms between a bassinet, bedside sleeper, playard, changing table, and travel crib. It features dual height settings, a built-in storage pocket, and is constructed with durable metal and Oxford cloth, meeting stringent ASTM safety standards.
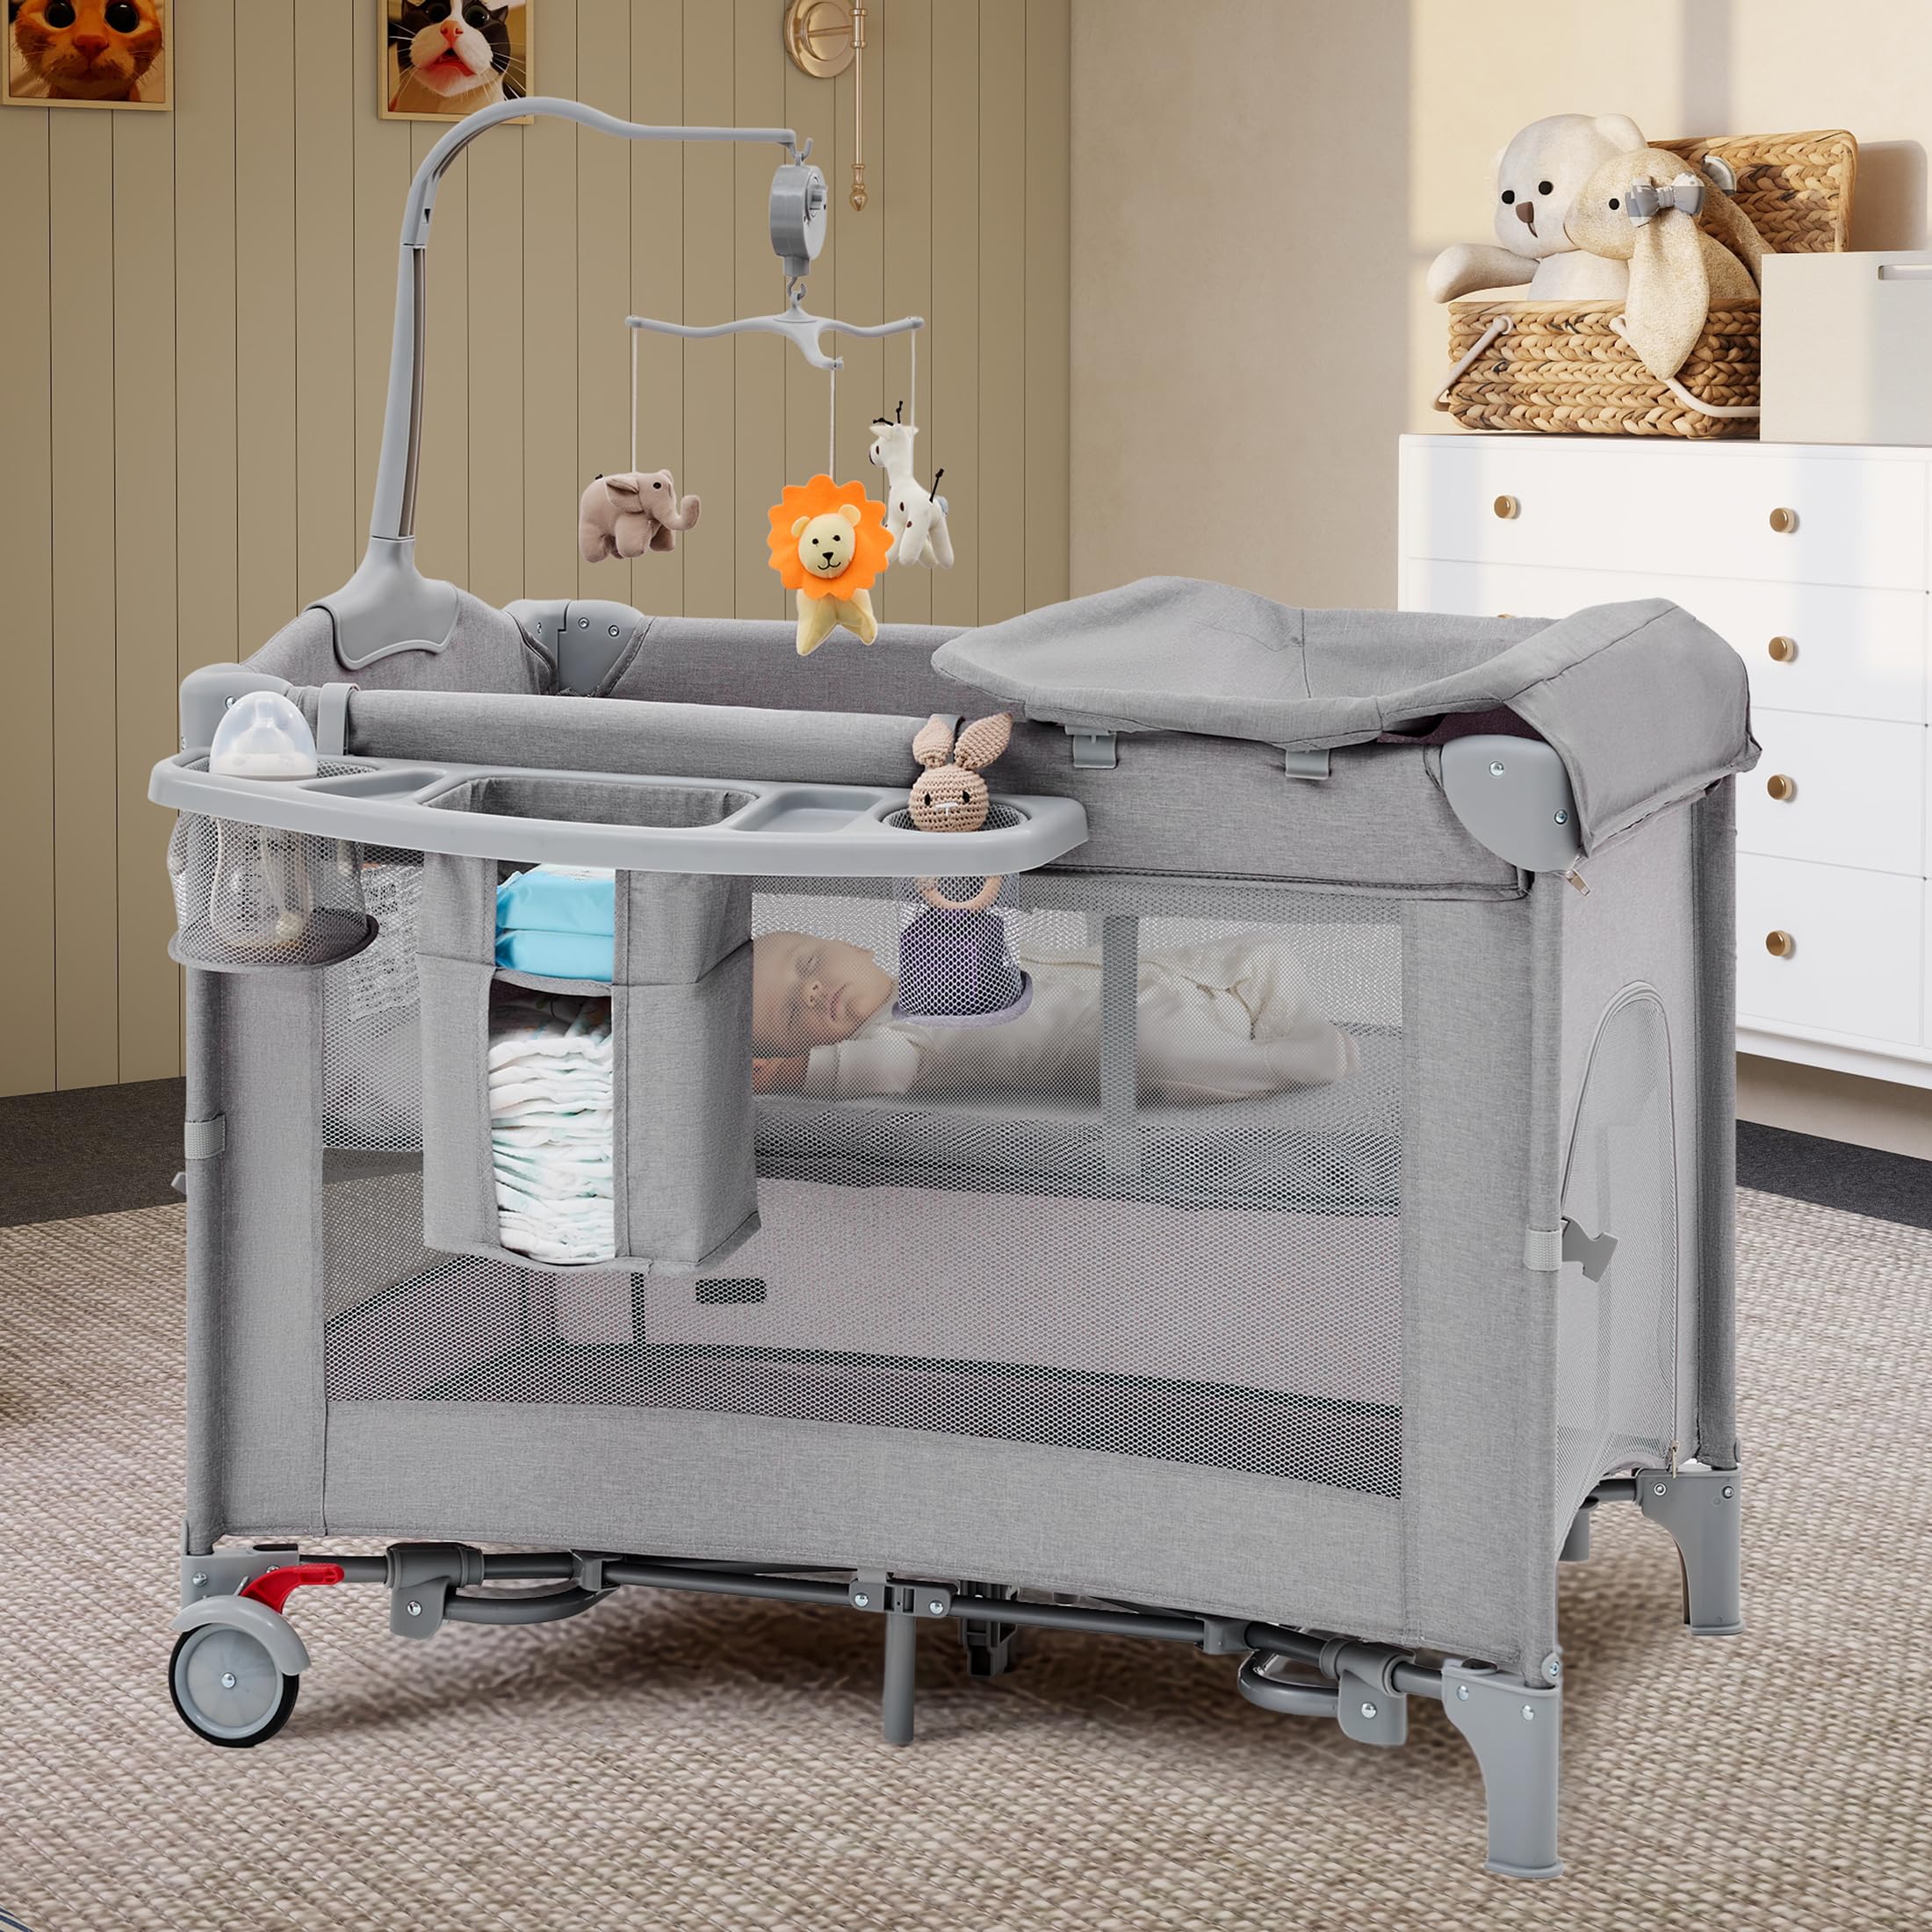
Its portable design and quick assembly make it an ideal companion for travel or for use in various rooms within your home.
3. Setup Instructions
3.1 Unboxing
Carefully remove all components from the packaging. Ensure all parts listed in the "Included Components" section are present before beginning assembly.
3.2 General Assembly Overview
The following video provides a comprehensive guide to assembling and using the HARPPA 6-in-1 Pack and Play. Refer to the specific steps below for detailed instructions on each component.
3.3 Assembling the Main Playard Frame
- Unfasten the strap securing the folded playard.
- Pull up on the crossbar until the playard begins to unfold.
- Push the center base downward firmly until it locks into place.
- Ensure all four handrails are securely locked by pulling them upwards until they click.

3.4 Installing the Bassinet Mattress Support
For the elevated bassinet level, insert the two mattress support brackets into the fabric sleeves located on the upper sides of the playard. These brackets provide the necessary support for the bassinet mattress.

3.5 Attaching the Storage Bag
Hook the storage bag onto the side rail of the playard. This accessory provides convenient storage for baby essentials.

3.6 Attaching the Diaper Changing Table
Secure the diaper changing table onto the top rails of the playard. Ensure it is firmly attached and stable before use. The changing table can be flipped aside when not in use.

3.7 Assembling and Attaching the Music Mobile
Assemble the music mobile by connecting its components. Once assembled, insert the mobile's base into the designated slot on the playard's top rail. Ensure it is securely fastened and the plush toys hang freely.

3.8 Installing Rocking Tubes (Optional)
To enable the rocking feature, place the playard on its side and attach the two curved rocking tubes to the designated points on the bottom frame. Ensure they are securely clicked into place.

4. Operating Instructions
4.1 Using as a Bedside Sleeper
To use as a bedside sleeper, unzip one side of the playard. Press and hold the buttons on each end of the side rail to lower it, allowing the playard to merge with your bed. Secure the playard to your bed using the provided safety straps. Adjust the height as needed using the dual height settings.

The playard features 4 adjustable height levels for bedside use, ranging from 23 inches to 29.5 inches from the floor to the top of the mattress.

4.2 Moving the Playard
The playard is equipped with lockable wheels for easy mobility. To move, unlock the wheels and roll the playard to the desired location. Always lock the wheels when the playard is stationary to ensure stability.

4.3 Folding for Travel
The playard is designed for quick folding and unfolding, making it convenient for travel. Follow the disassembly instructions in reverse to fold the unit compactly. It comes with a travel bag for easy transport.

5. Maintenance
- Cleaning Fabric Parts: Use a damp cloth with mild soap and water to wipe down fabric surfaces. Allow to air dry completely. Do not use bleach or harsh detergents.
- Cleaning Hard Surfaces: Wipe plastic and metal parts with a damp cloth.
- Mattress Care: The foldable mattress can be wiped clean with a damp cloth. Ensure it is completely dry before re-inserting into the playard.
- Regular Inspection: Periodically check all parts for wear, damage, or loose fasteners. Discontinue use if any part is broken or missing.
6. Troubleshooting
- Playard does not lock into place during assembly:
- Ensure the center base is pushed down completely before attempting to lock the side rails. The side rails must be pulled up firmly until they click into position. If the center base is not fully lowered, the side rails will not lock.
- Side rail will not lower for bedside sleeper mode:
- Confirm that the buttons on both ends of the side rail are pressed simultaneously and held down while lowering the rail. Check for any obstructions preventing the rail from moving freely.
- Music mobile is not working:
- Check if the mobile is correctly assembled and securely attached. Ensure the winding mechanism (if applicable) is fully wound.
7. Specifications
| Feature | Detail |
|---|---|
| Brand | HARPPA |
| Model | B0DKFQ1RGN |
| Age Range | Birth to 36 months |
| Weight Capacity (Upper Tier) | Up to 20 lbs |
| Weight Capacity (Lower Section) | Up to 33 lbs |
| Weight Capacity (Changing Area) | Up to 20 lbs (or 6 months) |
| Item Weight | 25 Pounds |
| Item Dimensions (L x W x H) | 39.3 x 27.5 x 32.28 inches |
| Material Type | Metal, Oxford Cloth |
| Assembly Time | 10-15 minutes (no tools required) |
| Color | Grey |
7.1 Included Components
- Play Yard
- Carrying Bag
- Foldable Mattress
- Diaper Changer
- Music Box (Mobile with plush toys)
8. Warranty & Support
For warranty information or customer support, please refer to the contact details provided with your purchase or visit the official HARPPA website. Keep your proof of purchase for any warranty claims.