
Milerong US-S61
Contents
Milerong S61-3Channel-2.5K Dash Cam User Manual
Model: US-S61 | Brand: Milerong
1. Introduction
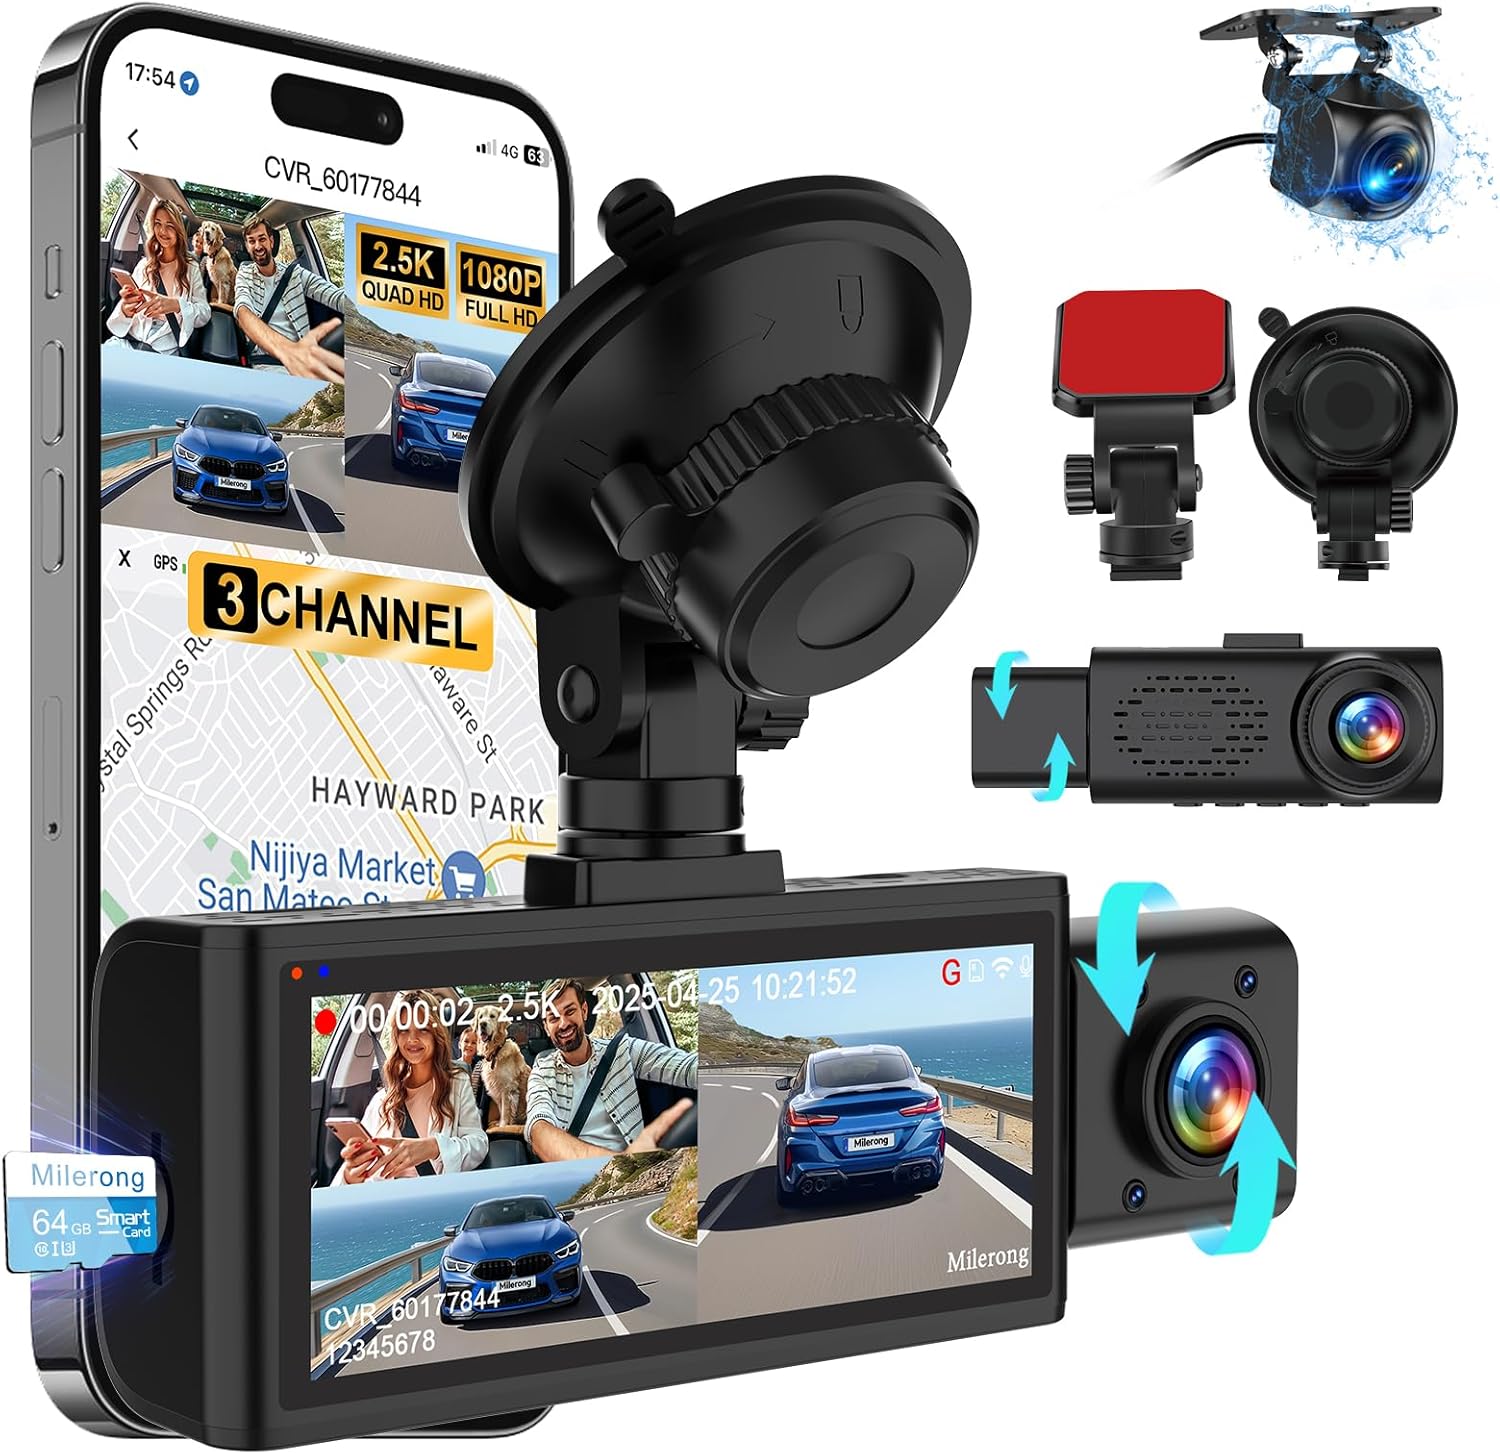
The Milerong S61-3Channel-2.5K Dash Cam is a state-of-the-art vehicle recording system designed to provide comprehensive surveillance of your car's surroundings and interior. Featuring three cameras (front, rear, and inside), advanced night vision, and smart recording functions, it ensures reliable evidence capture for enhanced driving safety and security.
2. What's in the Box
Please verify that all components are included in your package:
- FHD Dash Cam Front Inside and Rear
- Rear Camera Cable (20ft)
- Type-C Car Charger
- Suction Cup and Wire Trim Tool
- Waterproof Rear Camera
- USB Card Reader
- User Manual
- Cable Hiding Clips
- 64GB Card (pre-installed)


3. Setup and Installation
3.1 Mounting the Dash Cam
The dash cam can be mounted using either the provided suction cup or adhesive bracket. For optimal stability and ease of removal, the suction cup mount is recommended for windshield installation.
- Clean the desired area on your windshield thoroughly to ensure a strong suction.
- Attach the dash cam to the suction cup mount.
- Press the suction cup firmly against the windshield and turn the locking mechanism to secure it.
3.2 Connecting the Cameras and Power
The Milerong S61 features a main unit with front and interior cameras, and a separate rear camera.
- Connect the rear camera cable to the main dash cam unit's AV-IN port.
- Route the rear camera cable to the back of your vehicle. For the reversing assist line function, connect the red wire of the rear camera to the positive pole of your vehicle's reversing light.
- Connect the Type-C car charger cable to the dash cam's Type-C port and plug the other end into your car's cigarette lighter port. The dash cam will automatically power on and begin recording when your car starts.
- Use the provided wire trim tool and cable hiding clips to neatly route and secure all cables along your car's interior trim, ensuring they do not obstruct your view or driving.


4. Operating Instructions
4.1 Display and Controls
The dash cam features a 3.16-inch LCD display that can show simultaneous views from all three cameras. Control buttons are located on the bottom of the main unit for easy navigation through settings and modes.

4.2 Recording Modes
- Loop Recording: The dash cam continuously records, automatically overwriting the oldest files when the memory card is full. Locked emergency videos will not be overwritten.
- G-Sensor: Built-in G-sensor detects sudden shocks or collisions. When triggered, it automatically locks the current video footage to prevent it from being overwritten, securing crucial evidence.
- 24-Hour Parking Monitor: After parking and powering off, the dash cam enters standby mode. If a shock is detected, it will automatically turn on and record a 15-second video. For continuous 24-hour parking monitoring, a hardwire kit (sold separately) is required.


4.3 Night Vision and Image Quality
The dash cam is equipped with F1.8 large aperture, 4pcs IR LED lights, and professional WDR + HDR technology to ensure clear recording day and night, even in low-light conditions.
- Front Camera: 2.5K QHD resolution with 170° wide angle.
- Inside Camera: 1080P resolution with 140° wide angle and auto IR lights for clear cabin videos.
- Rear Camera: 1080P resolution with 150° wide angle and waterproof design.


4.4 Wi-Fi and App Control
The built-in Wi-Fi allows you to connect the dash cam to your smartphone via the free “Elook Pro” App (compatible with Android and iOS devices). This enables real-time video viewing, playback, downloads, and video editing.
- App Name: Elook Pro
- Wi-Fi Range: 3-5 meters (10-16 feet)
- Features: Preview, Download, Share, Review, Video Edit.


5. Maintenance
- Regularly check the dash cam's mounting to ensure it is secure.
- Clean the camera lenses periodically with a soft, dry cloth to maintain clear video quality.
- Format the 64GB SD card regularly (e.g., once a month) to prevent data corruption and ensure optimal performance. Back up any important footage before formatting.
- If the dash cam freezes or encounters minor issues, use a needle to insert into the small hole on the "RE" (Reset) button to restart the device.
6. Troubleshooting
6.1 Rear Camera Not Working
If the rear camera is not displaying footage, ensure that the cable is fully and correctly inserted into both the rear camera and the main dash cam unit. Check for any kinks or damage in the cable.

6.2 Device Freezing
If the dash cam freezes or becomes unresponsive, locate the "RE" (Reset) button (usually a small pinhole) on the device. Use a thin object like a paperclip or needle to press and hold the button for a few seconds to restart the unit.
7. Specifications
| Feature | Detail |
|---|---|
| Model Name | S61 Dash Cam Front Rear and Inside |
| Product Dimensions | 5.71 x 3.54 x 4.53 inches |
| Item Weight | 1.23 pounds |
| Item Model Number | US-S61 |
| Batteries | 2 A batteries required (included) |
| Connectivity Technology | Wi-Fi |
| Special Features | Loop Recording, Built-In WiFi, Night Vision, App Control |
| Video Capture Resolution | 2160p (Front) |
| Mounting Type | Windshield Mount |
| Manufacturer | Milerong |
| Country of Origin | China |
8. Warranty and Support
- Warranty: This product comes with a 12+12 month warranty.
- Return Policy: Enjoy a 30-day return policy for worry-free purchase.
- After-Sales Service: Milerong provides lifetime after-sales service to every customer.
- Contact Us: For any questions, issues, or accessory damage, please contact customer service. We aim to resolve your issues within 24 hours.
Thank you for choosing Milerong products. Drive safely!
Ask a question about this manual
Ask about setup, troubleshooting, compatibility, parts, safety, or missing instructions. Manuals+ will review the question and use this page’s manual context to help answer it.