
Introduction
Welcome to your new NR NIRIDER 30 Inch Amber LED Light Bar and LED Cubes. This manual provides detailed instructions for the proper installation, operation, and maintenance of your lighting system. Please read this manual thoroughly before installation and use to ensure safe and optimal performance.
Package Contents
Verify that all items listed below are included in your package:
- 30 Inch Amber LED Light Bar
- Wiring Harness
- Amber LED Cubes (Pair)
- Mounting Brackets and Hardware
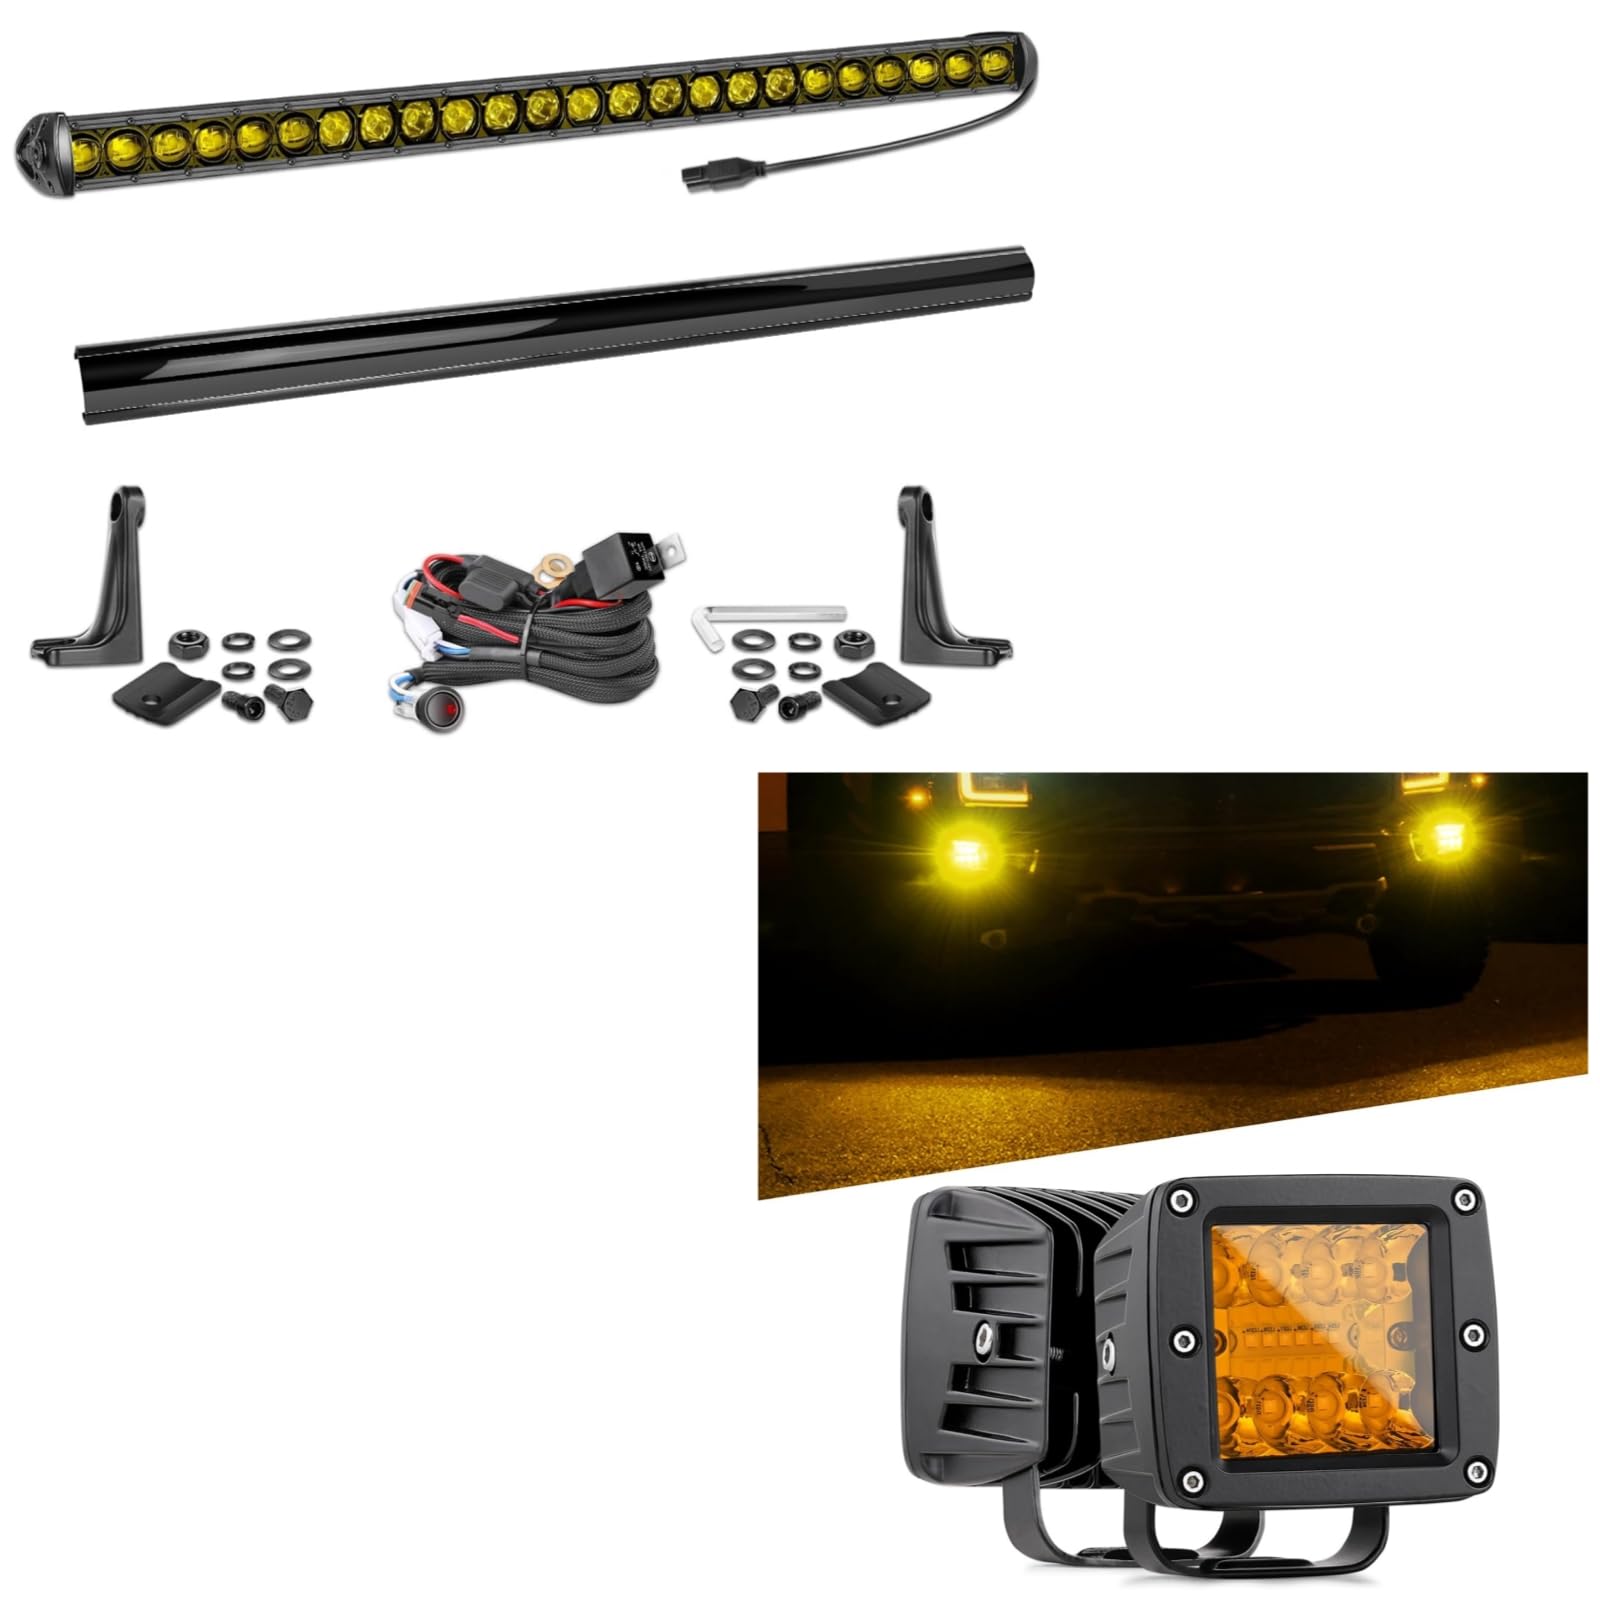
Image showing the complete package contents: 30-inch amber LED light bar, wiring harness, amber LED cube lights, and mounting hardware.
Product Features
The NR NIRIDER lighting system is engineered for durability and performance. Key features include:
- High-Quality LED Chips: Powered by imported LED super bright P8 5W Chips for superior illumination.
- Durable Construction: Features a robust aluminum housing and a scratch-resistant lens for long-lasting use.
- Efficient Heat Dissipation: Designed with a smooth heat sink to effectively manage temperature and extend LED lifespan.
- Adjustable Mounting: Equipped with 360° adjustable brackets for versatile positioning and beam direction.
- Advanced Optics: Utilizes 5D optics for optimized light distribution and enhanced visibility.
- Shockproof Design: Includes shockproof rubber pads to withstand vibrations and impacts.

Diagram illustrating the key features of the LED light bar, including P8 5W LED chips, smooth heat sink, 360° adjustable brackets, scratch-resistant lens, 5D optics, aluminum housing, and shockproof rubber pad.

Examples of the amber LED light bar installed on various vehicles, demonstrating its compact and hidden low-profile design on front bumpers, lower bumpers, and roof racks.

Close-up view of the amber LED cube lights, showing their square shape and illumination.

Detailed views of the amber LED cube lights, highlighting the front, side, back, and internal LED arrangement.

Examples of the amber LED cube lights installed on various vehicles, showcasing their application as auxiliary lighting.
Setup and Installation
Proper installation is crucial for the performance and longevity of your LED lighting system. It is recommended that installation be performed by a qualified professional.
Safety Precautions
- Disconnect the vehicle's battery before starting any electrical work to prevent electrical shock or damage.
- Wear appropriate safety gear, including eye protection, during installation.
- Ensure all connections are secure and properly insulated to prevent short circuits and ensure reliable operation.
- Do not exceed the specified voltage for the light bar and cubes (typically 12V DC for automotive applications).
Mounting the Light Bar and Cubes
- Choose Mounting Location: Select a suitable location on your vehicle (e.g., bumper, roof rack, grille) that provides clear light projection and does not obstruct vehicle functions or legal requirements. Ensure the surface is strong enough to support the weight of the lights.
- Attach Brackets: Secure the adjustable mounting brackets to the light bar and cubes using the provided hardware. Do not fully tighten at this stage to allow for adjustment.
- Position and Secure: Mount the light bar and cubes to the chosen location on your vehicle. Adjust the angle for optimal light beam direction. Once satisfied with the position, tighten all mounting bolts securely to prevent movement.
Wiring Instructions
The included wiring harness simplifies the electrical connection. Follow these steps carefully:
- Connect Light Bar/Cubes: Plug the connectors from the light bar and LED cubes into the corresponding connectors on the wiring harness. Ensure a snug fit.
- Connect to Power Source: Connect the positive (+) wire (usually red) of the harness to a fused 12V DC power source (e.g., the vehicle's battery positive terminal or a dedicated auxiliary fuse box). Ensure an appropriate fuse is in place.
- Connect to Ground: Connect the negative (-) wire (usually black) of the harness to a suitable, clean ground point on the vehicle chassis.
- Connect Switch: Install the included switch in a convenient and accessible location within the vehicle's cabin. Connect the switch wires to the harness as per the wiring diagram provided with the physical product.
- Test Functionality: Reconnect the vehicle's battery. Turn on the ignition (if applicable) and test the light bar and cubes using the installed switch to ensure they function correctly. Check for proper illumination and switch operation.
Operating Instructions
To operate your NR NIRIDER LED lighting system:
- Ensure the vehicle's ignition is in the "ON" or "ACC" (Accessory) position if the lights are wired to an ignition-switched circuit.
- Press the installed switch to turn the amber LED light bar and cubes ON.
- Press the switch again to turn the lights OFF.
Adjust the angle of the light bar and cubes as needed for different driving conditions or off-road scenarios to optimize light coverage.
Maintenance
To ensure the longevity and optimal performance of your LED lighting system, follow these maintenance guidelines:
- Cleaning: Regularly clean the lens with a soft cloth and mild soap and water. Avoid abrasive cleaners, solvents, or high-pressure washers directly on the lens, as these could scratch the surface or damage seals.
- Inspection: Periodically inspect all wiring connections for corrosion, fraying, or damage. Ensure mounting hardware remains tight and secure to prevent vibration-induced issues.
- Heat Sink: Keep the heat sink fins clear of dirt, mud, and debris to ensure proper heat dissipation. Blocked fins can lead to overheating and reduced LED lifespan.
Do not attempt to open or modify the light bar or cubes, as this may void the warranty and cause irreparable damage to the product.
Troubleshooting
If you encounter issues with your NR NIRIDER LED lighting system, refer to the following common problems and solutions:
Lights Do Not Turn On
- Check Power Connection: Ensure the positive wire is securely connected to a 12V power source and that the fuse in the wiring harness is intact and not blown. Replace if necessary.
- Check Ground Connection: Verify the negative wire is securely connected to a clean, unpainted ground point on the vehicle chassis.
- Check Wiring Harness: Inspect the entire wiring harness for any visible damage, cuts, or loose connections.
- Check Switch: Ensure the switch is functioning correctly. You can test it by temporarily bypassing it (if safe to do so) to see if the lights illuminate.
Lights Flicker or Are Dim
- Check Voltage: Ensure the vehicle's electrical system is providing a stable 12V power supply. Low voltage can cause dimming or flickering.
- Check Connections: Loose or corroded electrical connections can cause flickering or dimming. Clean and secure all connections, especially at the battery and ground points.
Moisture Inside Lens
- While the lights are designed to be water-resistant, extreme temperature changes can sometimes cause temporary condensation inside the lens. This usually dissipates on its own. If persistent or if water droplets are visible, inspect the seals around the lens for damage or improper seating.
Specifications
| Feature | Detail |
|---|---|
| Brand | NR NIRIDER |
| Model | B0DKFBFHYK |
| Light Bar Size | 30 Inch |
| Light Color | Amber |
| LED Chip Type | P8 5W |
| Housing Material | Aluminum |
| Lens Type | Scratch Resistant |
| Optics | 5D |
| Mounting | 360° Adjustable Brackets |
| ASIN | B0DKFBFHYK |
Note: Additional specifications such as wattage, voltage, and IP rating may be available on the product packaging or manufacturer's website.
Warranty and Support
For warranty information or technical support regarding your NR NIRIDER 30 Inch Amber LED Light Bar and LED Cubes, please refer to the documentation included with your product or contact NR NIRIDER customer service directly. It is important to keep your purchase receipt as proof of purchase for any warranty claims.
NR NIRIDER Customer Service:
Contact information not provided in this manual. Please refer to the manufacturer's official website or product packaging for the most current support details.