
1. Introduction
Thank you for choosing the GUWIEYG 3.5kW/16A Type 2 Portable EV Charger. This manual provides essential information for the safe and efficient operation of your charger. Please read it thoroughly before use and keep it for future reference.
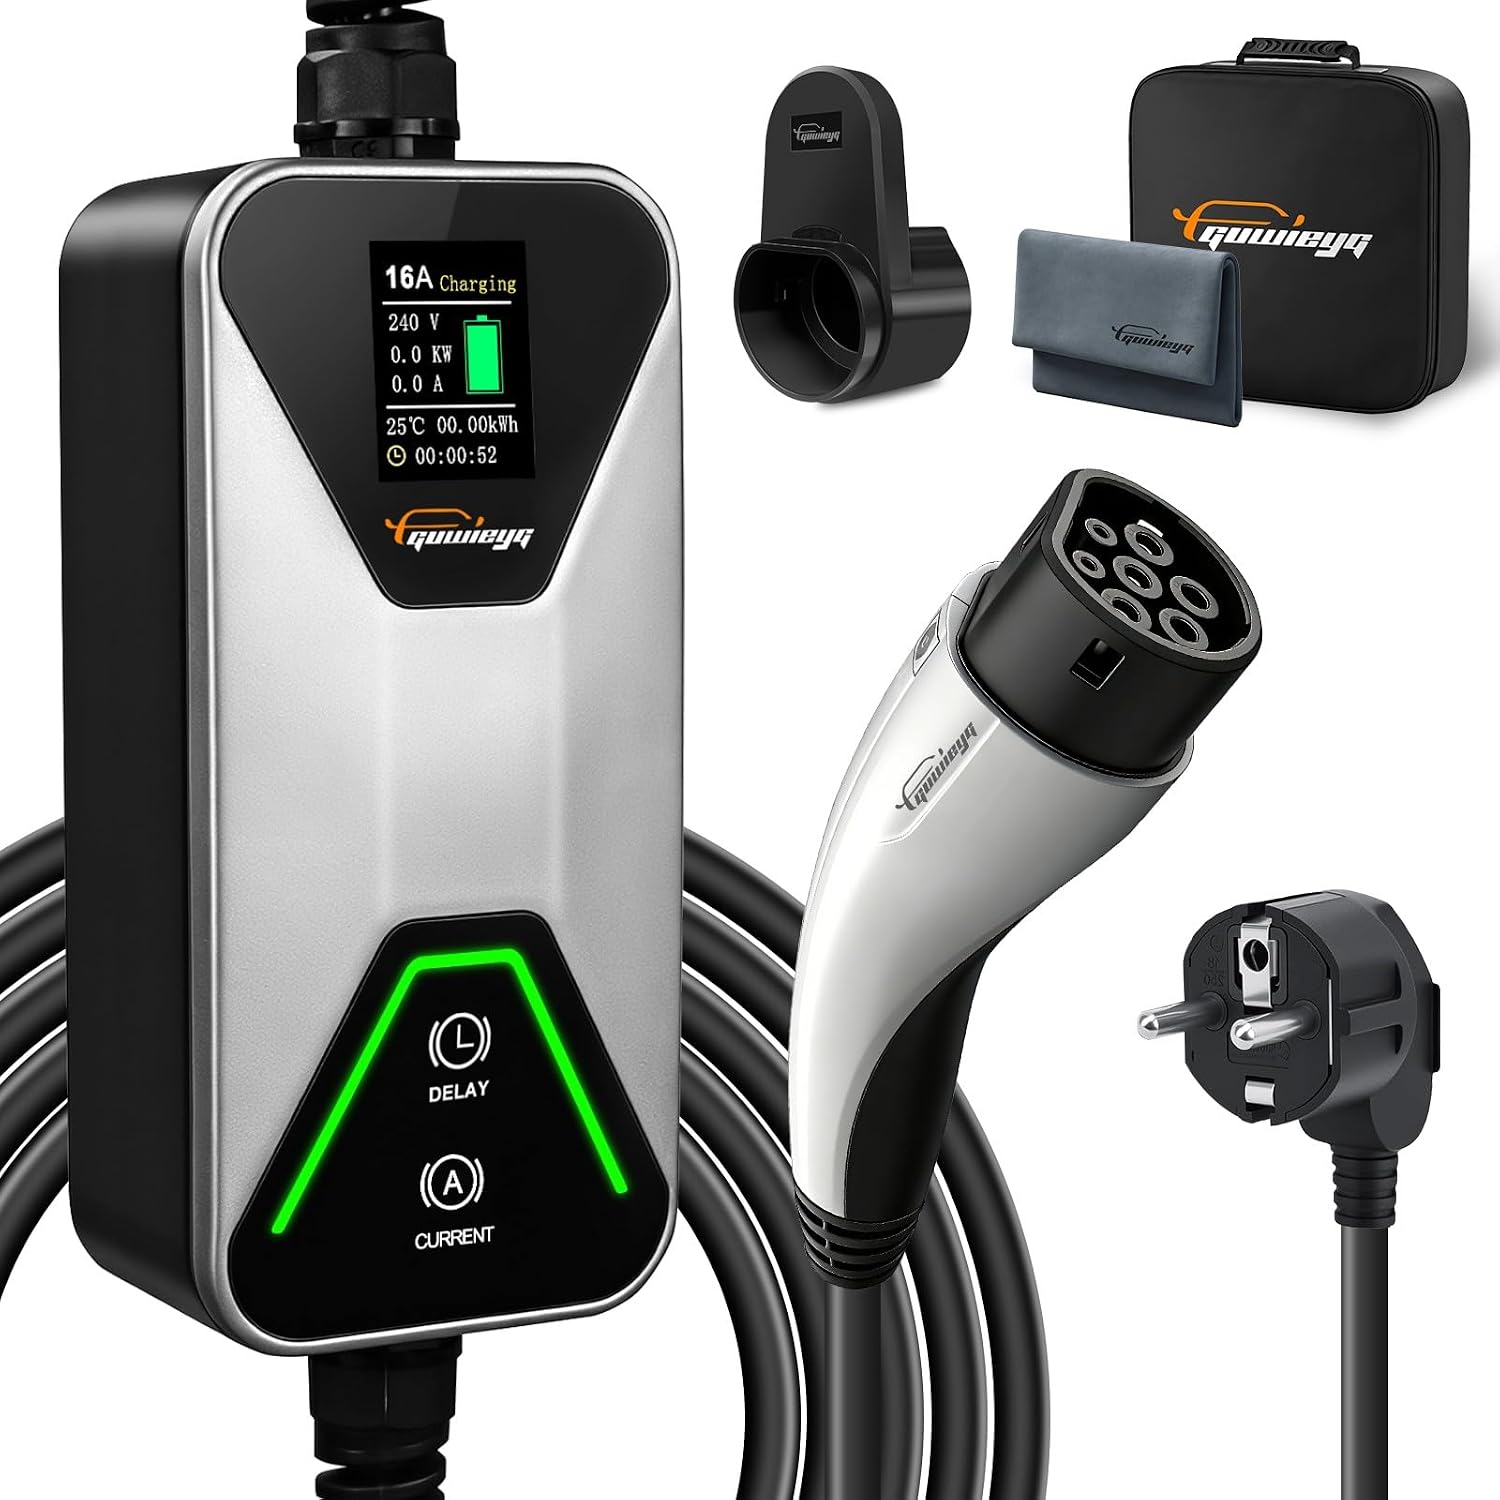
Image: The GUWIEYG 3.5kW/16A Type 2 Portable EV Charger connected to an electric vehicle, showcasing its design and 5-meter cable.
2. Safety Information
Always follow these safety precautions to prevent injury or damage:
- Do not use the charger if the cable or connector is damaged.
- Ensure the charging port on your vehicle is clean and dry before connecting.
- Do not attempt to open, disassemble, or modify the charger.
- Keep children and pets away from the charging area.
- Avoid submerging the charger in water, despite its water-resistant rating.
- Always connect the charger to a properly grounded outlet.
- Disconnect the charger from the power source before cleaning or maintenance.

Image: An illustration highlighting the charger's comprehensive safety features, including protections against overcurrent, residual current, ground faults, over/under voltage, frequency, and temperature.
3. Package Contents
Verify that all items are present in your package:
- GUWIEYG Type 2 Portable EV Charger (3.5kW/16A)
- Carrying Bag
- Wall Mount Bracket
- Cleaning Cloth
- User Manual (this document)
- Mounting Screws and Anchors

Image: A visual representation of the package contents, including the charger unit, carrying bag, wall mount, cleaning cloth, and mounting hardware.
4. Product Features
- Fast Charging: The Type 2 electric vehicle charging cable charges your car faster. The current can be adjusted, offering options of 8 A/10 A/13 A/16 A to meet various charging needs, supporting a maximum current of 16 A and 3.5 kW power.
- Wide Compatibility: This electric vehicle charger is suitable for electric vehicles or PHEVs that comply with Type 2 (IEC 62196-2) standards, providing high compatibility and eliminating charging concerns.
- Digital Display & Scheduled Charging: The charging cable features a digital display. Not only can the current be adjusted, but the delay button can also be set to start charging up to 12 hours later, helping to avoid peak energy consumption.
- Safe and Durable: The Type 2 EV charger operates effectively in temperatures from -30 ℃ to 50 ℃. It features IP65 waterproofing and adjustable physical buttons for responsive control, even in extreme weather conditions.
- Portable Design: The package includes a Type 2 charger, a carrying bag, a wall mount, a cleaning cloth, and a stand, making it perfect for home use and emergency charging, addressing your charging needs.

Image: The charger's LED screen displaying adjustable current settings (8A, 10A, 13A, 16A) and delay options for scheduled charging.

Image: The EV charger connected to a car during rainfall, demonstrating its IP65 waterproof and durable design for outdoor use.
5. Setup
5.1 Wall Mount Installation (Optional)
- Choose a suitable location near a grounded power outlet, ensuring the 5-meter cable can reach your vehicle's charging port.
- Use the provided wall mount bracket as a template to mark drilling points.
- Drill holes and insert the anchors.
- Secure the wall mount bracket using the provided screws.
- Hang the charger unit onto the mounted bracket.
5.2 Portable Use
For portable use, simply place the charger on a stable, dry surface. Ensure the cable is not a tripping hazard and is protected from damage.

Image: Illustrates the charger's versatility for both permanent wall-mounted home charging and portable use with a carrying bag for travel.
6. Operating Instructions
6.1 Connecting the Charger
- Plug the charger's power plug into a standard, grounded wall outlet. The digital display will illuminate.
- Open your vehicle's charging port cover.
- Insert the Type 2 connector firmly into your vehicle's charging port. Ensure a secure connection.
- The charger will perform a self-check, and the display will show charging status.
6.2 Adjusting Current (8A/10A/13A/16A)
- Press the "CURRENT" button on the charger unit to cycle through available current options: 8A, 10A, 13A, 16A.
- Select the desired current based on your vehicle's requirements and the power supply capacity.
6.3 Setting a Charging Delay (Up to 12 Hours)
- Press the "DELAY" button to set a delayed start time for charging.
- Each press will increase the delay by one hour, up to a maximum of 12 hours.
- This feature is useful for charging during off-peak electricity hours.

Image: A graphic illustrating the scheduled charging feature, allowing users to set a delay to charge during off-peak hours and optimize electricity costs.
6.4 Disconnecting the Charger
- Once charging is complete, or if you need to stop charging, first disconnect the Type 2 connector from your vehicle's charging port.
- Then, unplug the charger's power plug from the wall outlet.
- Store the cable neatly in the carrying bag or on the wall mount.
7. Maintenance
- Cleaning: Use the provided cleaning cloth or a soft, dry cloth to wipe the charger unit and cables. Do not use abrasive cleaners or solvents. Ensure the charger is unplugged before cleaning.
- Storage: When not in use, store the charger in its carrying bag in a dry, cool place, away from direct sunlight and extreme temperatures.
- Inspection: Regularly inspect the charging cable and connectors for any signs of wear, damage, or corrosion. If any damage is found, discontinue use immediately and contact support.
8. Troubleshooting
| Problem | Possible Cause | Solution |
|---|---|---|
| Charger not turning on. | No power from outlet; faulty outlet; charger malfunction. | Check the wall outlet with another device. Try a different outlet. If still no power, contact support. |
| Charging not starting. | Loose connection; vehicle charging port issue; incorrect current setting; delay timer active. | Ensure both ends of the cable are securely connected. Check vehicle's charging status. Adjust current setting. Check if a delay timer is set. |
| Charging is slow. | Low current setting; vehicle's charging limit; power supply limitation. | Increase the current setting on the charger (up to 16A). Consult your vehicle's manual for its charging capabilities. Ensure the power outlet can supply sufficient current. |
| Error message on display. | Internal fault; external condition (e.g., over-temperature). | Note the error code (if any). Disconnect and reconnect the charger. If the error persists, contact support. |
9. Specifications
| Feature | Detail |
|---|---|
| Brand | GUWIEYG |
| Model Number | 3.5kW/16A |
| Connector Type | Type 2 (IEC 62196-2) |
| Output Power | 3.5 kW |
| Current Rating | Adjustable 8A/10A/13A/16A |
| Output Voltage | 230 Volts (AC) |
| Cable Length | 5 meters |
| Operating Temperature | -30 ℃ to 50 ℃ |
| Waterproof Rating | IP65 |
| Compliant Specifications | CE |
| Item Weight | 3.1 Kilograms |
| Country of Origin | China |
10. Warranty and Support
GUWIEYG products are designed for reliability and performance. For warranty information, technical support, or any questions regarding your charger, please refer to the contact information provided with your purchase or visit the official GUWIEYG website.
Please retain your proof of purchase for warranty claims.