
homeTro HM3
Contents
homeTro Walking Pad Treadmill HM3 User Manual
Model: HM3 | Brand: homeTro
1. Introduction
This user manual provides essential information for the safe and effective operation, maintenance, and troubleshooting of your homeTro Walking Pad Treadmill, Model HM3. Please read this manual thoroughly before initial use and retain it for future reference.
2. Important Safety Instructions
To reduce the risk of serious injury, always follow basic precautions when using this appliance, including the following:
- Read all instructions before using the treadmill.
- Keep children and pets away from the treadmill.
- Place the treadmill on a flat, stable surface.
- Ensure adequate clearance around the treadmill (at least 2 meters behind and 0.6 meters on each side).
- Do not operate the treadmill if it has a damaged cord or plug, or if it is not working properly.
- Wear appropriate exercise clothing and athletic shoes.
- Do not use the treadmill outdoors or in damp areas.
- The maximum user weight capacity for this treadmill is 265 lbs (120 kg).
- Always hold onto the handrails (if applicable) when starting or stopping the treadmill.
- Disconnect the power cord when not in use or before cleaning/maintenance.
3. Package Contents
Verify that all components are present and undamaged. If any items are missing or damaged, contact customer support.
- homeTro Walking Pad Treadmill (Model HM3)
- Remote Control
- 5mm Hex Wrench
- Front Foot Pads (x2)
- Silicone Oil (20ml)
- User Manual (this document)
- Power Cord

4. Setup Instructions
The homeTro Walking Pad Treadmill HM3 requires minimal assembly and is designed for quick setup.
- Unpack the Treadmill: Carefully remove the treadmill and all accessories from the packaging.
- Positioning: Place the treadmill on a firm, level surface. Ensure there is sufficient space around the unit for safe operation.
- Adjust Incline (Optional): The treadmill features an adjustable incline. Locate the incline adjustment mechanism at the rear of the treadmill. You can set it to 0%, 4%, or 9% incline by manually adjusting the support legs.

Image: A close-up view of the treadmill's adjustable incline mechanism, showing options for 4% and 9% incline settings. - Connect Power: Plug the power cord into the treadmill's power input, then into a grounded electrical outlet.
- Remote Control: Ensure the remote control has working batteries. The remote is essential for operating the treadmill.
5. Operating Instructions
The homeTro Walking Pad Treadmill HM3 offers various modes for your fitness needs.
5.1 Power On/Off
- To power on, press the power button on the treadmill or the remote control. The LED display will illuminate.
- To power off, press and hold the power button on the remote control or switch off the main power on the treadmill.
5.2 Using the Remote Control
The remote control allows you to adjust speed, start/stop, and mute sounds.
- Start/Stop: Press the play/pause button to start or stop the treadmill belt.
- Speed Adjustment: Use the '+' and '-' buttons to increase or decrease the speed.
- Mute Function: Press the mute button to silence operational sounds.
- Pause Function: The remote includes a pause function to temporarily stop your workout without losing data.

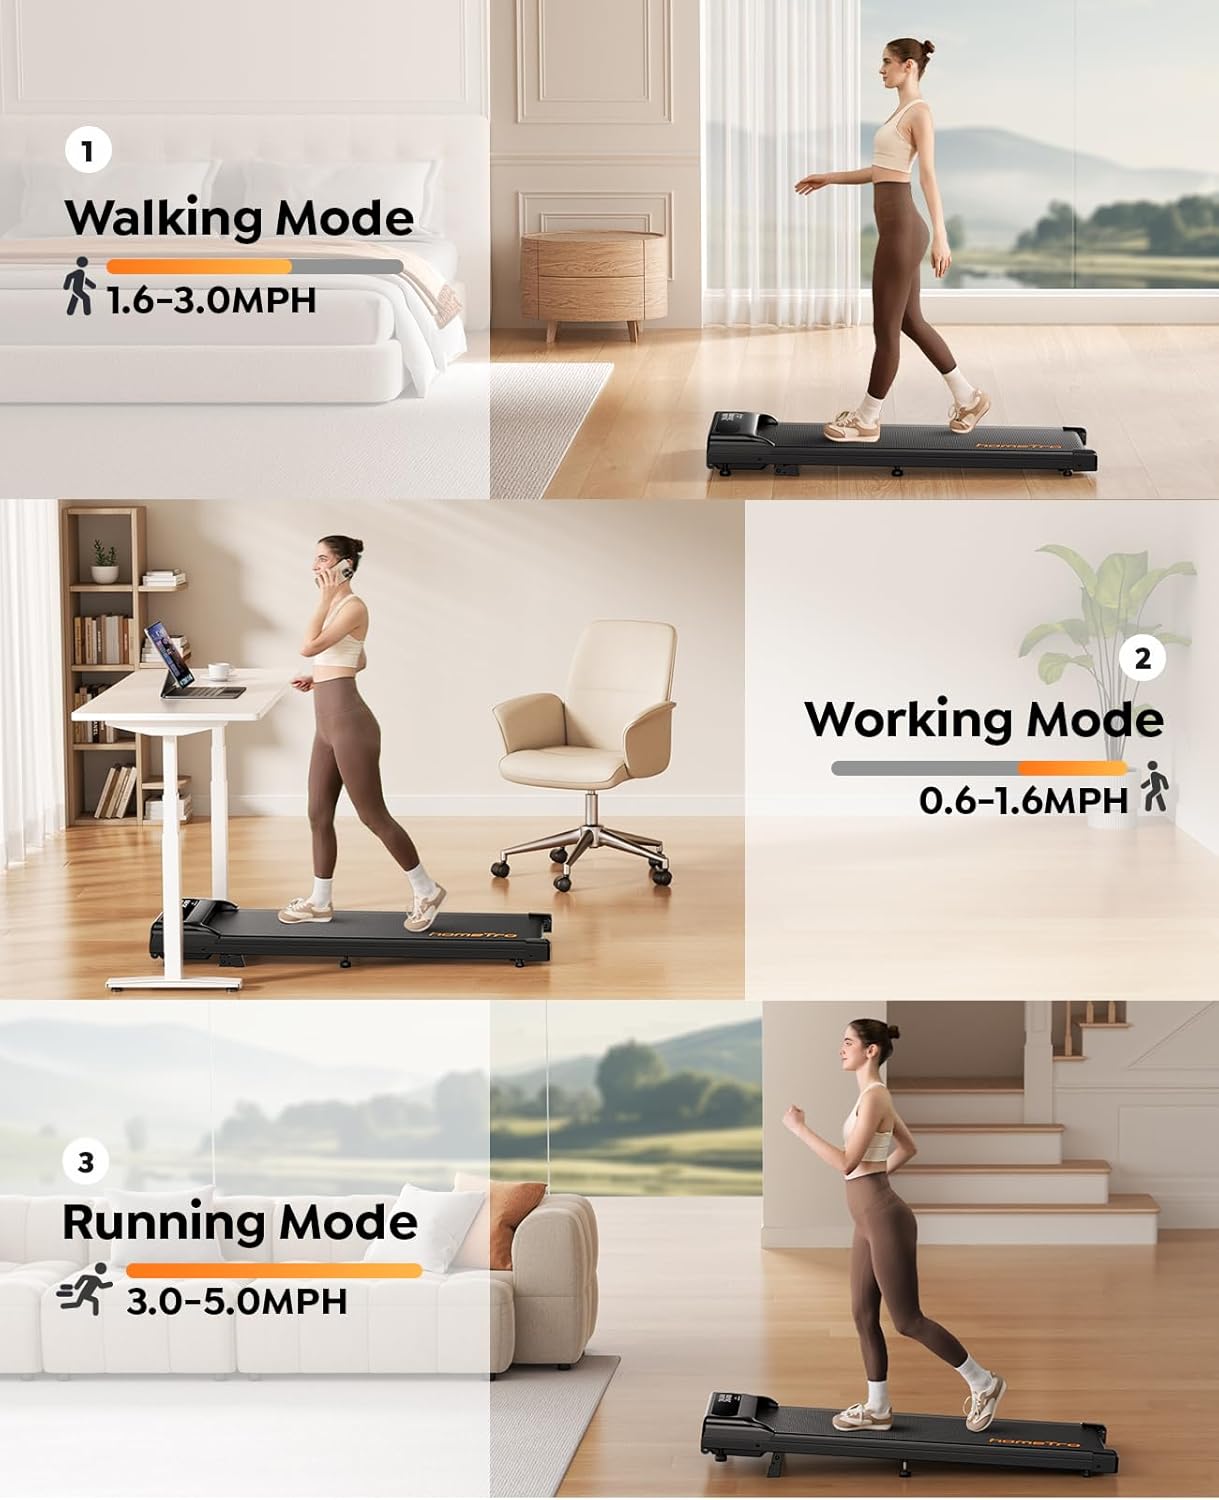
5.3 Exercise Modes
The treadmill supports various exercise intensities:
- Walking Mode: Ideal for light activity, typically 1.6-3.0 MPH.
- Working Mode (Under Desk): Slower speeds, 0.6-1.6 MPH, suitable for use while working at a standing desk.
- Running Mode: Higher speeds, 3.0-5.0 MPH, for more intense cardio workouts.
6. Smart APP Connectivity
Enhance your workout experience by connecting your treadmill to the Fitshow APP via Bluetooth.
- Download the App: Download the "Fitshow" application from your device's app store.
- Enable Bluetooth: Ensure Bluetooth is enabled on your smartphone or tablet.
- Connect to Treadmill: Open the Fitshow APP, search for available devices, and select "homeTroHM3" to connect.
- Workout Tracking: The app allows you to track your workout data, set goals, and access various training programs.

7. Maintenance
Regular maintenance ensures the longevity and optimal performance of your treadmill.
7.1 Cleaning
- Always unplug the treadmill before cleaning.
- Wipe down the treadmill surface with a damp cloth. Avoid abrasive cleaners.
- Regularly clean the area around the treadmill to prevent dust and debris from entering the motor housing.
7.2 Lubrication
The running belt requires periodic lubrication to reduce friction and extend its lifespan. Use the provided silicone oil.
- Unplug the treadmill.
- Loosen the belt tension by turning the rear roller bolts counter-clockwise (usually 2-3 turns).
- Lift the edge of the running belt and apply a small amount of silicone oil directly onto the center of the deck, underneath the belt.
- Tighten the belt tension by turning the rear roller bolts clockwise until the belt is snug but not overly tight.
- Plug in the treadmill and run it at a low speed (e.g., 1 MPH) for a few minutes to distribute the lubricant.
7.3 Belt Adjustment
If the running belt shifts to one side, it needs adjustment.
- If the belt shifts to the right, turn the right rear roller bolt clockwise by a quarter turn.
- If the belt shifts to the left, turn the left rear roller bolt clockwise by a quarter turn.
- Run the treadmill at a low speed and observe the belt. Repeat adjustments as needed until the belt is centered.
8. Troubleshooting
This section addresses common issues you might encounter with your treadmill.
| Problem | Possible Cause | Solution |
|---|---|---|
| Treadmill does not power on. | Power cord not plugged in; power switch off; circuit breaker tripped. | Ensure power cord is securely plugged in. Check the power switch on the treadmill. Reset the household circuit breaker if necessary. |
| Belt stops or slips during use. | Belt too loose; insufficient lubrication; motor overload. | Adjust belt tension (see Section 7.3). Lubricate the running belt (see Section 7.2). Reduce user weight or intensity. |
| Unusual noise from the treadmill. | Loose components; belt misalignment; motor issue. | Check for loose screws and tighten them. Adjust belt alignment (see Section 7.3). If noise persists, contact customer support. |
| Remote control not responding. | Dead batteries; remote out of range; interference. | Replace remote control batteries. Ensure you are within range of the treadmill. Remove any obstructions between the remote and the treadmill. |
9. Specifications
| Feature | Detail |
|---|---|
| Model | HM3 |
| Brand | homeTro |
| Motor Power | 3.0 HP |
| Speed Range | 0.6 - 5.0 MPH |
| Incline Levels | Adjustable (0%, 4%, 9%) |
| Maximum User Capacity | 265 lbs (120 kg) |
| Running Belt Dimensions | Approximately 38.58" L x 14.96" W |
| Product Dimensions (L x W x H) | 116 x 48.5 x 18 cm (45.7 x 19 x 7.1 inches) |
| Item Weight | 20 kg (44.1 lbs) |
| Display Type | LED (shows Speed, Time, Distance, Calories) |
| Connectivity | Bluetooth (for Fitshow APP) |
| Material | Alloy Steel, Metal, Plastic |


10. Warranty and Support
For warranty information, technical support, or to order replacement parts, please refer to the contact information provided with your purchase or visit the official homeTro website. Keep your purchase receipt as proof of purchase for warranty claims.
Manufacturer: homeTro
Date First Available: March 3, 2025
Documents and downloads
Ask a question about this manual
Ask about setup, troubleshooting, compatibility, parts, safety, or missing instructions. Manuals+ will review the question and use this page’s manual context to help answer it.