1. Product Overview
The JODSONE UV LED Nail Lamp is designed for efficient curing of various gel nail polishes. It features a high power output, multiple timer settings, and an automatic sensor for user convenience. This manual provides detailed instructions for safe and effective use of your nail lamp.

Figure 1: Front view of the JODSONE UV LED Nail Lamp, showing the digital display and timer buttons.
2. Safety Precautions
- Read all instructions before using the appliance.
- Do not expose the device to water or other liquids.
- Do not use if the power cord or plug is damaged.
- Keep out of reach of children.
- Unplug the device when not in use or before cleaning.
- Avoid direct eye contact with the UV/LED light.
- Use only with compatible gel polishes.
3. Package Contents
Verify that all items are present in the package:
- JODSONE UV LED Nail Lamp (Model SUN X20 MAX)
- Power Adapter
- Instruction Manual (this document)
4. Setup
- Unpack the Device: Carefully remove the nail lamp and all accessories from the packaging.
- Position the Lamp: Place the nail lamp on a stable, flat surface. Ensure there is adequate space around the device for ventilation.
- Connect Power: Insert the power adapter into the DC input port on the back of the nail lamp. Plug the other end of the adapter into a suitable electrical outlet (110V AC).
- Detachable Base: The lamp features a detachable base for easier cleaning and use with feet. To detach, gently pull the base downwards from the main unit. To reattach, align the grooves and push upwards until it clicks into place.

Figure 2: Illustration of the detachable base design, allowing for easier cleaning and versatile use.
5. Operating Instructions
5.1 Power On/Off
The lamp powers on automatically when plugged in. The LCD display will illuminate. To turn off, unplug the device from the power outlet.
5.2 Automatic Sensor Function
The JODSONE nail lamp is equipped with a smart infrared sensor. When your hand or foot is placed inside the lamp, the light will automatically turn on. Removing your hand or foot will cause the light to turn off. The default timer setting for automatic activation is 120 seconds if no specific timer button is pressed.

Figure 3: The smart auto sensor detects hand insertion to automatically activate the lamp.
5.3 Timer Settings
The lamp offers four preset timer buttons for precise curing control:
- 10s: Ideal for thin gel polish layers.
- 30s: Recommended for regular color gel polish.
- 60s: Suitable for dark color or thick gel polish.
- 99s: Low heat mode, designed for a more comfortable curing experience, especially for sensitive nails or builder gels.
Press the desired timer button before placing your hand or foot inside the lamp. The LCD display will show the countdown. If you place your hand/foot in without selecting a timer, it will default to 120 seconds.

Figure 4: The LCD display and timer buttons for selecting specific curing durations.
5.4 Curing Gel Polish
- Prepare your nails by applying your chosen gel base coat, color coat, or top coat according to the gel polish manufacturer's instructions.
- Select the appropriate timer setting on the nail lamp based on the gel type and thickness.
- Place your hand or foot fully into the lamp. The light will activate, and the timer will begin counting down.
- Keep your hand or foot still until the timer completes.
- Remove your hand or foot. The lamp will turn off automatically.
- Repeat for each layer of gel polish as required.
The lamp is equipped with 72 UV/LED beads, providing comprehensive coverage for fast and even curing without dead spots.

Figure 5: The interior of the lamp highlighting the 72 UV/LED beads for efficient curing.
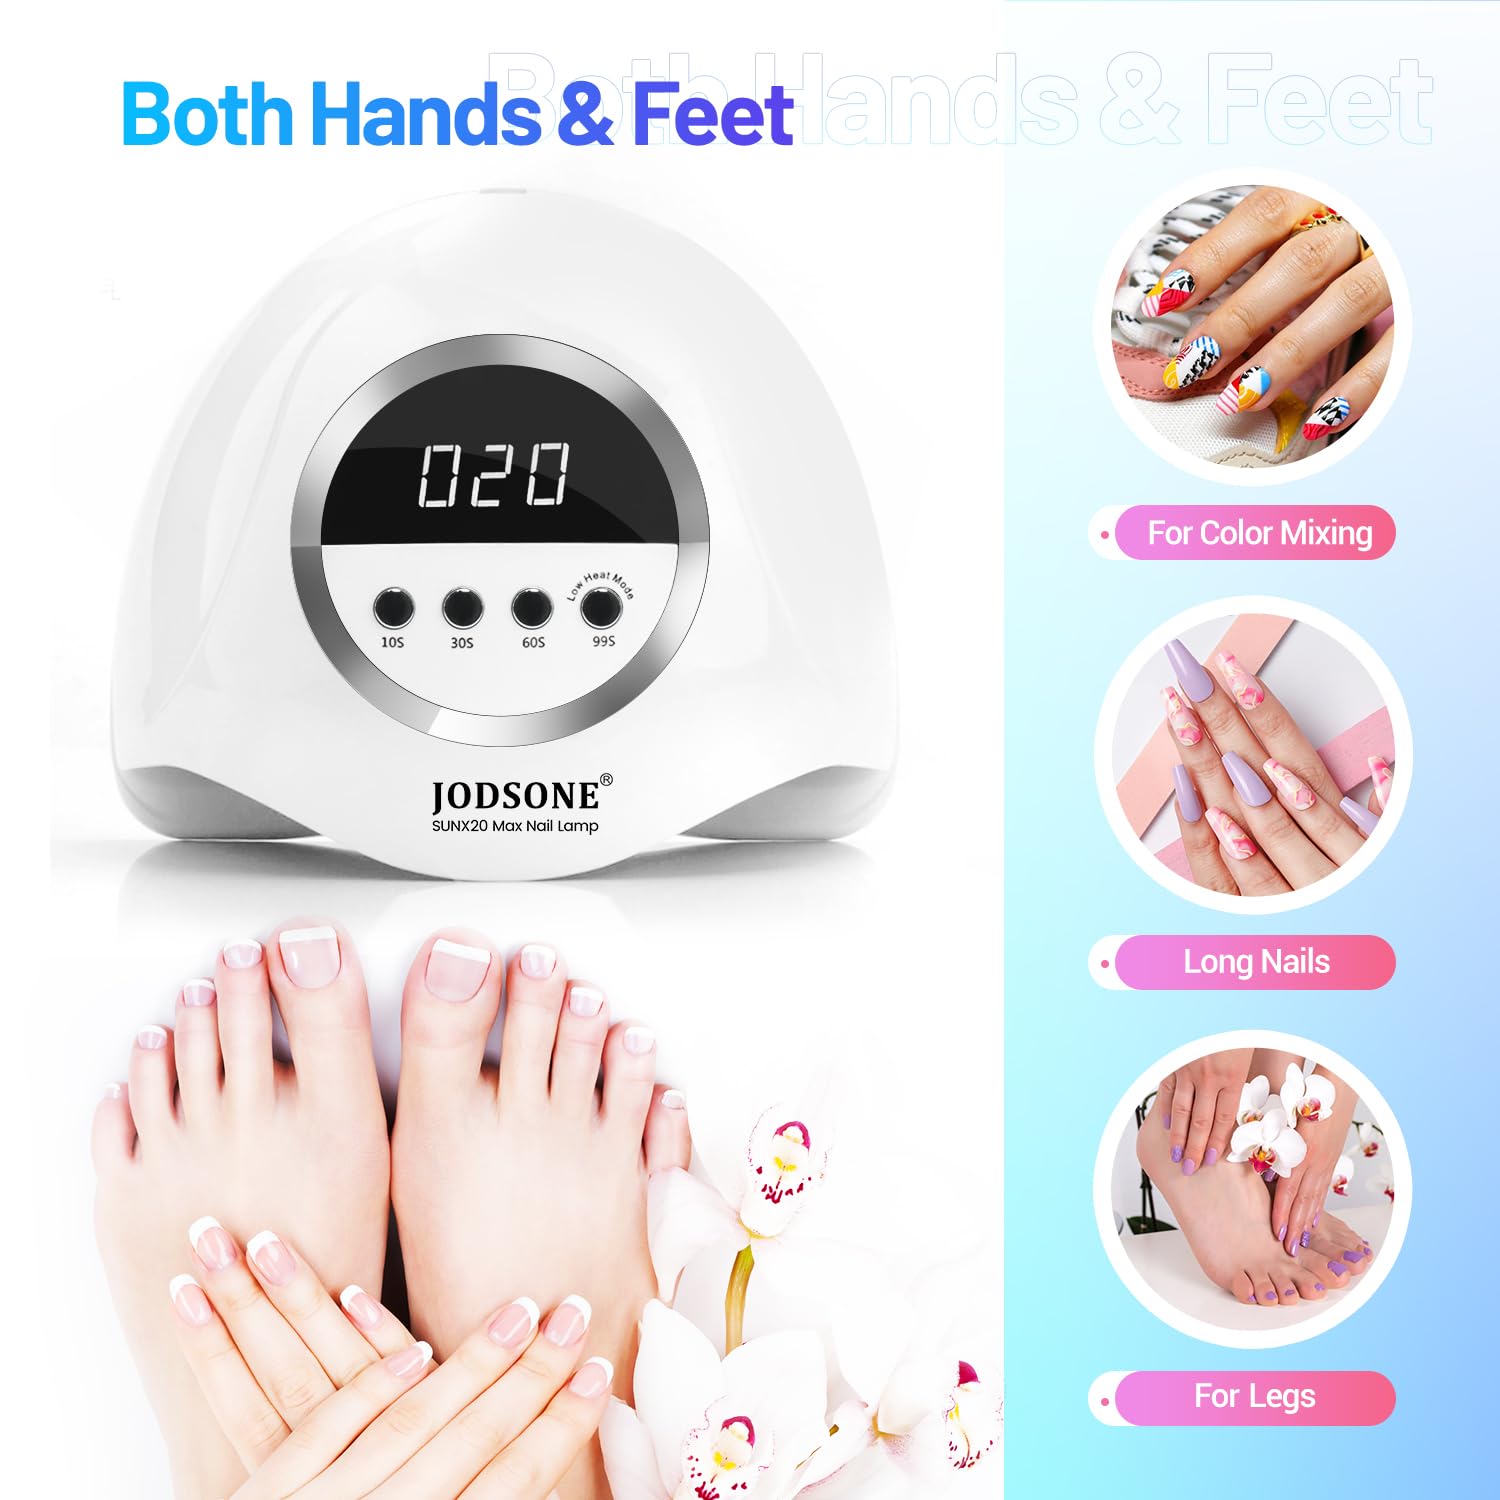
Figure 6: The lamp's design accommodates both hands and feet for versatile use.
6. Maintenance
6.1 Cleaning
- Always unplug the device before cleaning.
- Wipe the exterior of the lamp with a soft, dry cloth.
- For stubborn stains, a slightly damp cloth with mild soap can be used, then wipe dry immediately.
- Do not use abrasive cleaners, solvents, or harsh chemicals, as these can damage the surface.
- Ensure no liquid enters the interior of the device.
6.2 Storage
Store the nail lamp in a cool, dry place away from direct sunlight and moisture. Keep it in its original packaging or a protective cover to prevent dust accumulation.
7. Troubleshooting
| Problem | Possible Cause | Solution |
|---|---|---|
| Lamp does not turn on. | Not plugged in correctly; power outlet issue; damaged power cord. | Ensure the power adapter is securely plugged into both the lamp and the wall outlet. Test the outlet with another device. Inspect the power cord for damage. |
| Gels are not curing properly. | Incorrect timer setting; gel applied too thick; incompatible gel polish; insufficient hand placement. | Select the appropriate timer for your gel type (e.g., 60s or 99s for thicker gels). Apply thinner layers of gel. Ensure the gel polish is compatible with UV/LED lamps. Make sure your entire hand/foot is fully inside the lamp. |
| Automatic sensor not working. | Obstruction of sensor; sensor malfunction. | Ensure nothing is blocking the infrared sensor light inside the lamp. Clean the sensor area if necessary. If the issue persists, contact customer service. |
8. Specifications
- Model: SUN X20 MAX
- Brand: JODSONE
- Power: 320W
- Light Beads: 72 UV/LED beads
- Input Voltage: 110 Volts (AC)
- Dimensions (L x W x H): 8.66 x 8.07 x 4.33 inches (22 x 20.5 x 11 cm)
- Weight: Approximately 1.04 Pounds (0.47 kg)
- Timer Settings: 10s, 30s, 60s, 99s (Low Heat Mode)
- Features: Automatic Sensor, LCD Display, Detachable Base

Figure 7: Product dimensions for space planning.
9. Warranty and Support
JODSONE is committed to providing quality products. For any questions, concerns, or warranty inquiries regarding your JODSONE UV LED Nail Lamp, please contact JODSONE customer service. They typically respond within 24 hours.
Please refer to your purchase documentation or the official JODSONE website for the most up-to-date warranty information and contact details.
Manufacturer: JODSONE


