
1. Introduction
Thank you for purchasing the DigitConvert C190B Film Scanner. This device is designed to help you preserve your old memories by converting various film and slide formats into high-resolution 22MP JPEG digital photos. With its 5-inch LCD screen and user-friendly interface, scanning and editing are made simple and convenient. Please read this manual thoroughly before operating the device to ensure proper use and optimal performance.

Figure 1: The DigitConvert C190B Film Scanner in operation, connected to an external monitor.
2. Package Contents
Please check the package contents to ensure all items are present:
- Digital Film Scanner (Main Unit)
- USB Cable
- HDMI Cable
- Power Adapter
- Cleaning Brush
- Positive Film Holder (50mm slide holder)
- 110 Negative Film Holder
- 110 Positive Film Holder
- Super 8 Holder
- 135 Negative Film Holder
- User Manual
- 12-Month Warranty Card

Figure 2: Complete package contents of the DigitConvert C190B Film Scanner.
3. Product Overview
3.1 Interfaces

Figure 3: Rear interfaces of the scanner, including HDMI, SD Card, and USB ports.
- HDMI Output Interface: Connects to an external monitor or TV for larger viewing.
- SD Card Interface: Insert an SD card (up to 64GB FAT32 or EXFAT format, not included) to save scanned images.
- Type-C USB Interface: For connecting to a computer for data transfer or to the power adapter for power supply.
3.2 Controls
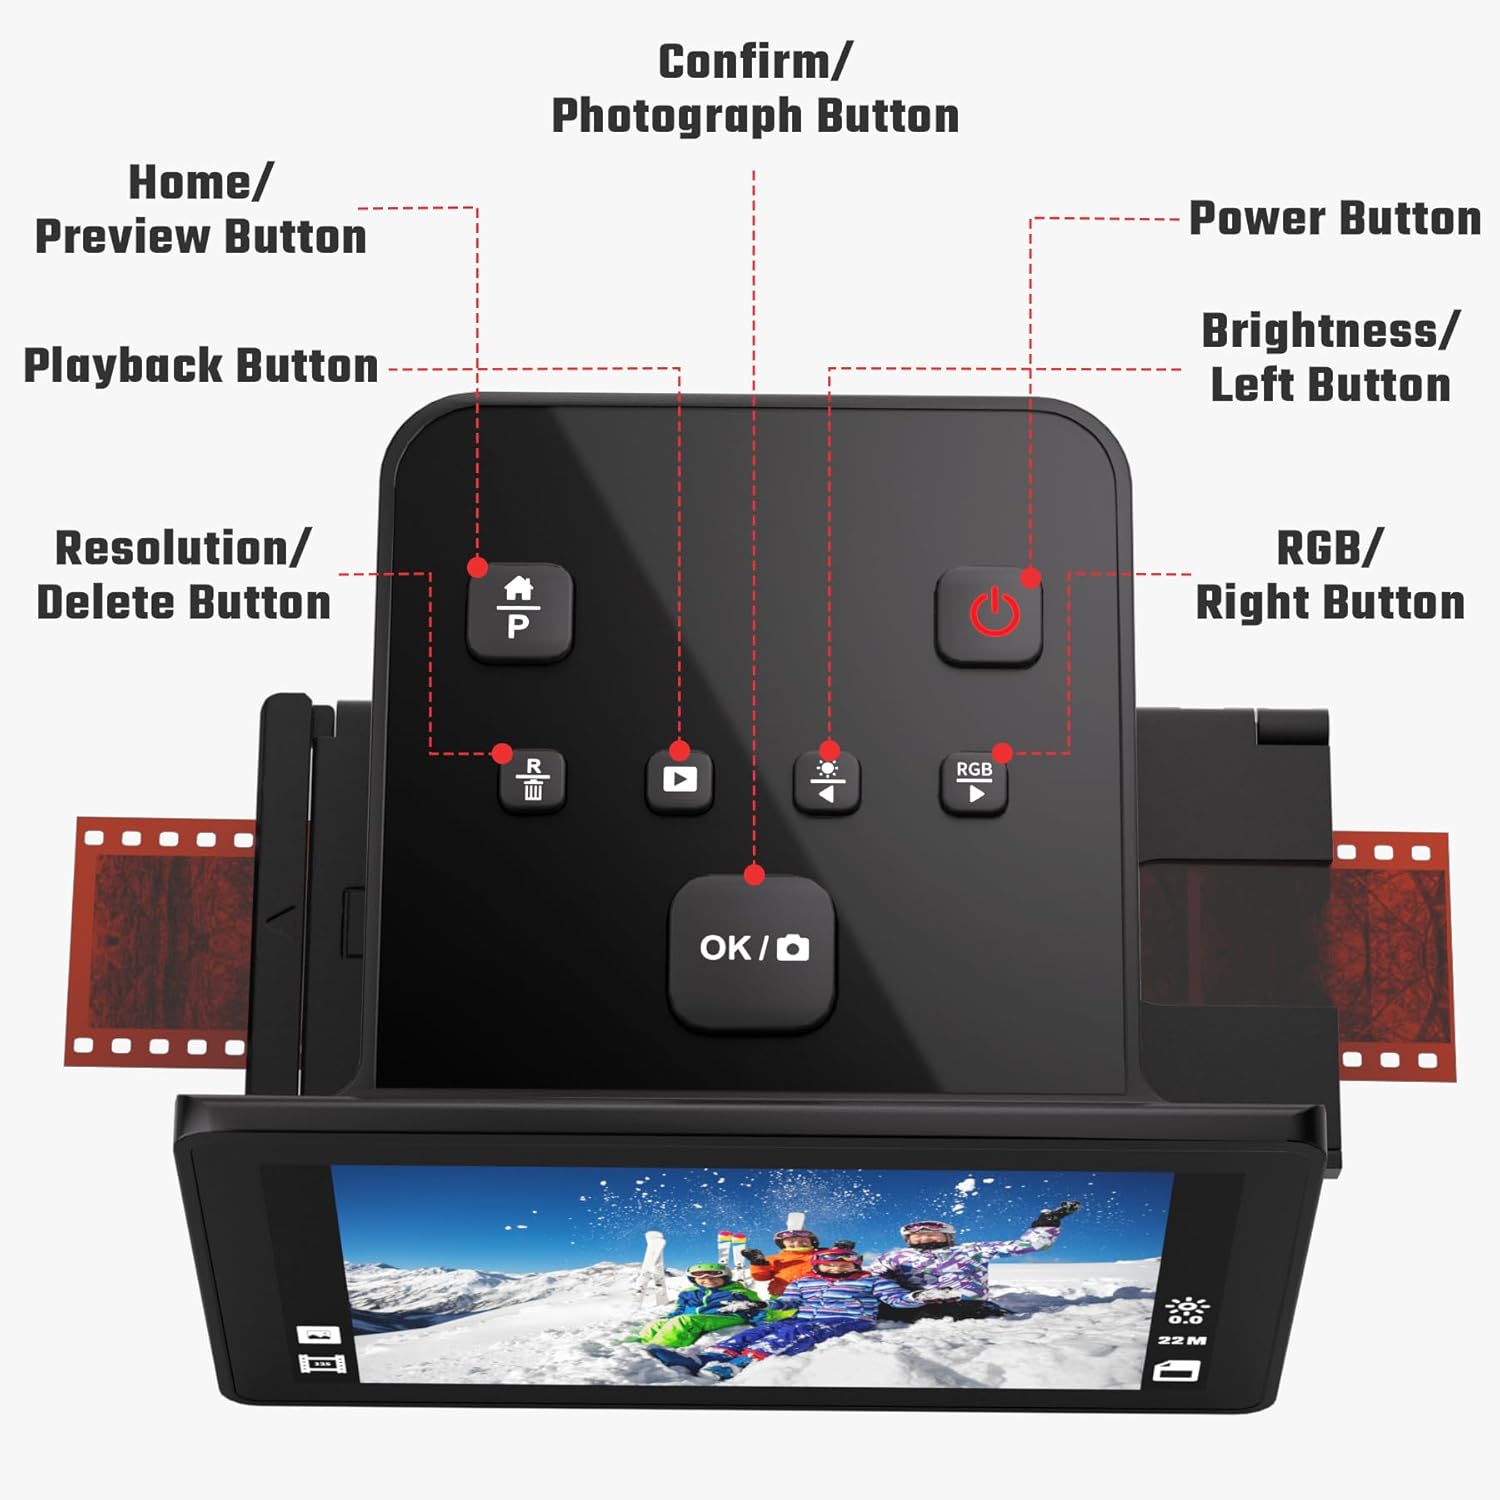
Figure 4: Top control panel of the scanner.
- Power Button: Turns the device on/off.
- Home/Preview Button: Returns to the main menu or previews images.
- Playback Button: Enters playback mode for viewing saved images.
- Resolution/Delete Button: Adjusts scanning resolution or deletes selected images.
- Confirm/Photograph Button (OK): Confirms selections or captures a photo.
- Brightness/Left Button: Adjusts brightness or navigates left in menus.
- RGB/Right Button: Adjusts RGB color balance or navigates right in menus.
3.3 5-Inch LCD Display
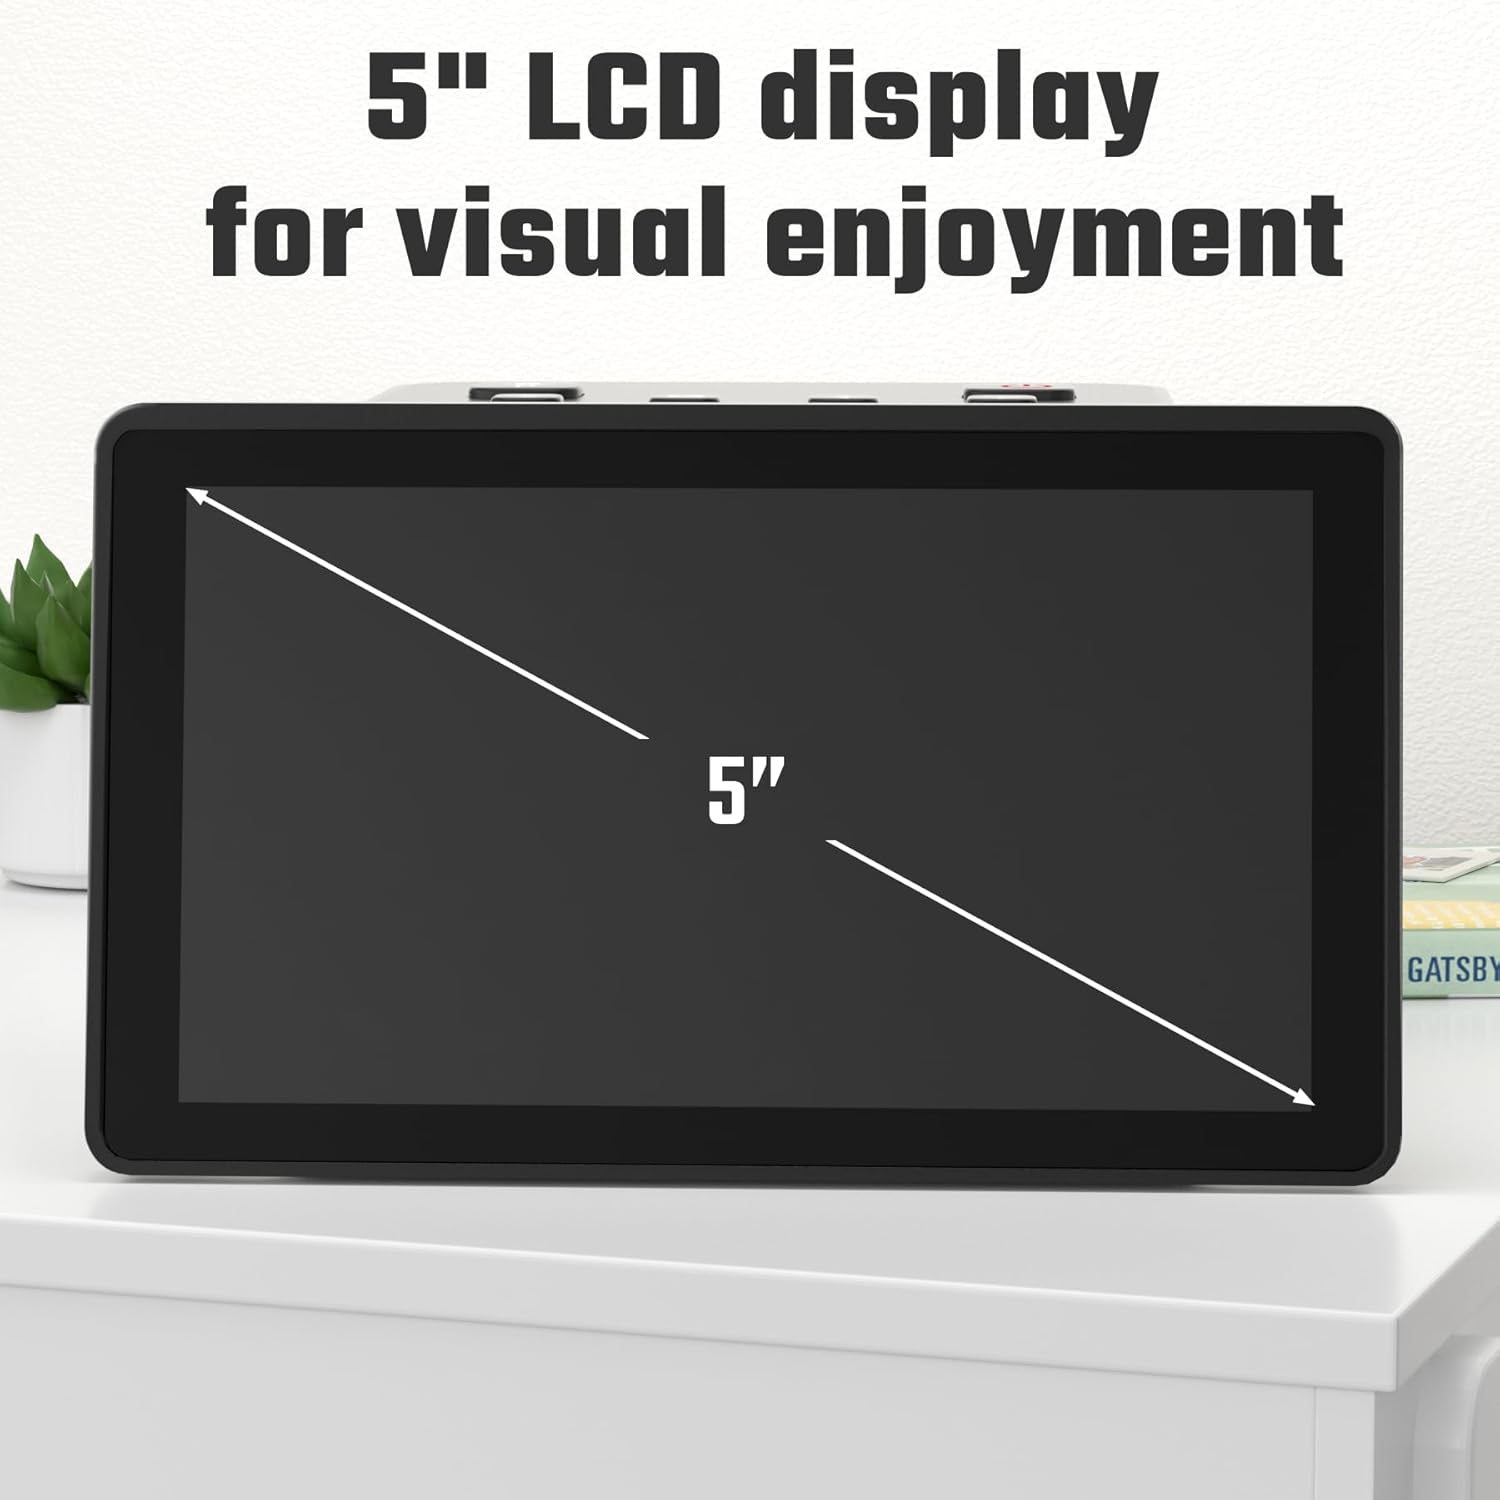
Figure 5: The scanner features a large 5-inch HD LCD display for instant preview and editing.
The large 5-inch HD LCD screen provides a wide viewing angle for instant previewing and editing of negatives and slides directly on the device. It also features a gallery mode for easy browsing of scanned images.
4. Setup
- Power Connection: Connect the USB cable to the scanner's Type-C USB interface and the other end to the power adapter. Plug the power adapter into a wall outlet. Alternatively, you can connect the USB cable to a computer's USB port for power.
- Insert SD Card (Optional): If you wish to save images to an SD card, insert a compatible SD card (up to 64GB FAT32 or EXFAT) into the SD card slot.
- Turn On: Press the Power Button to turn on the scanner.
- Connect to TV/Monitor (Optional): For a larger view, connect the HDMI cable from the scanner's HDMI output to an HDMI input on your TV or monitor.
5. Operating Instructions
5.1 Selecting Film Type and Resolution

Figure 6: The scanner supports various film and slide types.
- From the main menu, select 'Film Type' using the navigation buttons and press OK.
- Choose the correct film type (e.g., 35mm, 110, 126, Super 8) and whether it's a color negative, B&W negative, or slide.
- Set the desired resolution (14MP or 22MP interpolation) in advance.
5.2 Inserting Film/Slides

Figure 7: Inserting film into the scanner using the appropriate film holder.
- Open the appropriate film holder (e.g., 135 negative film holder, 50mm slide holder).
- Carefully place your film strip or slide into the holder, ensuring it is aligned correctly.
- Close the film holder.
- Insert the loaded film holder into the scanner's side slot. The specially designed adapters support continuous loading.
5.3 Scanning and Editing
- Once the film is inserted, the image will appear on the 5-inch LCD screen.
- You can edit photos instantly during the scanning process using the control buttons: mirror, flip, adjust exposure, and RGB color balance.
- When satisfied with the image, press the 'Confirm/Photograph' (OK) button to capture and save the digital photo.
6. Data Transfer
6.1 Transferring to Computer via USB

Figure 8: Connecting the scanner to a PC for data transfer.
To export photos stored inside the film scanner to your computer:
- Connect the scanner to your computer with the included Type-C to USB data cable. (Note: The HDMI cable cannot be used for data transmission).
- Turn on the device. The computer's USB interface can typically power the film scanner.
- Select 'USB' function in the scanner's menu interface.
- After successfully connecting to the computer, you can view, edit, and export the captured pictures from the scanner's internal memory or inserted SD card.
6.2 Viewing on External Display via HDMI

Figure 9: Viewing scanned images on a TV via HDMI connection.
Connect the HDMI cable from the scanner to an HDMI input on your TV or monitor to view your scanned images on a larger screen.
6.3 Accessing Images on SD Card

Figure 10: Inserting an SD card for saving and transferring images.
If you saved images directly to an SD card, you can remove the SD card from the scanner and insert it into a compatible card reader on your computer or other device to access the files.
7. Maintenance
To ensure the longevity and optimal performance of your film scanner, regular cleaning is recommended:
- Cleaning Film/Slides: Before inserting, gently wipe your film strips and slides with the included cleaning brush to remove any dust or debris. This prevents imperfections from appearing on your scanned images.
- Cleaning Scanner Lens: Use the cleaning brush to carefully clean the scanner's internal lens and film path to ensure clear scans.
- External Cleaning: Wipe the exterior of the scanner with a soft, dry cloth. Do not use liquid cleaners or abrasive materials.
8. Troubleshooting
If you encounter any issues with your DigitConvert C190B Film Scanner, please refer to the following common solutions:
- Device Not Powering On: Ensure the USB cable is securely connected to both the scanner and a working power source (power adapter or computer USB port). Try a different USB port or power outlet.
- Image Quality Issues (Dust/Spots): Clean your film/slides and the scanner's internal lens using the provided cleaning brush. Dust on the film or lens can cause spots on scanned images.
- Cannot Transfer Files to PC: Ensure you are using the correct Type-C to USB data cable (not the HDMI cable). Make sure the scanner is powered on and 'USB' mode is selected in its menu. Try connecting to a different USB port on your computer.
- Film Holder Stuck: Ensure the film or slide is correctly seated within the holder and that the holder is inserted straight into the scanner slot. Do not force the holder.
- Incorrect Colors/Inverted Image: Verify that the correct film type (e.g., color negative, B&W negative, positive slide) is selected in the scanner's menu. Adjust RGB settings if needed.
If the issue persists, please contact customer support for further assistance.
9. Specifications
| Feature | Detail |
|---|---|
| Brand | DigitConvert |
| Model Number | C190B |
| Scanner Type | Slide & Negative Scanner |
| Scanner Resolution | 22MP (Interpolated) / 14MP (Native) |
| Display | 5-inch HD LCD Screen |
| Supported Film Types | 35mm, 135, 110, 126 Negatives & Slides, Super 8 Slides |
| Output Format | JPEG |
| Internal Memory | 128MB (Built-in) |
| External Memory | SD Card (up to 64GB FAT32 or EXFAT, not included) |
| Connectivity | USB, HDMI |
| Power Source | USB (via computer or power adapter) |
| Dimensions | 13.7cm (5.4in) x 10.5cm (4.1in) x 7.6cm (3in) (Approximate) |
| Weight | 670 g (Approximate) |
10. Warranty and Support
Your DigitConvert C190B Film Scanner comes with a 12-month warranty card. Please retain your proof of purchase for warranty claims.
For technical support, troubleshooting assistance, or warranty inquiries, please refer to the contact information provided on your warranty card or visit the DigitConvert official website.