
1. Introduction
Thank you for choosing the Philips Dual Basket Air Fryer 3000 Series. This appliance is designed to provide a versatile and efficient way to prepare a wide variety of meals with up to 90% less fat. Featuring two independent cooking drawers and Rapid Air Technology, it allows for simultaneous preparation of different dishes, ensuring perfectly cooked results every time. Please read this manual carefully before first use to ensure safe and optimal operation.
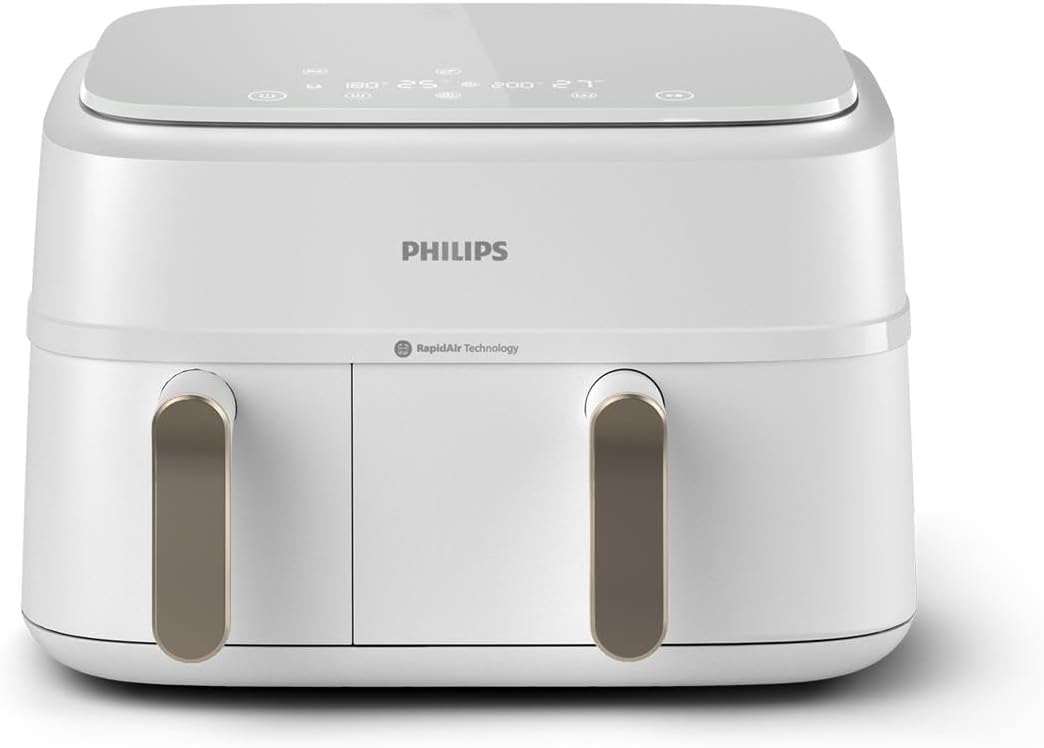
Figure 1.1: Philips Dual Basket Air Fryer 3000 Series (White Body/Champagne Handle)
This image shows the Philips Dual Basket Air Fryer 3000 Series from the front, highlighting its sleek white body and champagne-colored handles on the two distinct cooking drawers. The top panel features a digital display and touch controls.
2. Important Safety Information
Always follow basic safety precautions when using electrical appliances to reduce the risk of fire, electric shock, and injury.
- Read all instructions: Before operating the appliance.
- Hot surfaces: Surfaces may become hot during use. Do not touch hot surfaces. Use handles or knobs.
- Electrical safety: Do not immerse cord, plugs, or appliance in water or other liquid.
- Children: Close supervision is necessary when any appliance is used by or near children.
- Unplug when not in use: Unplug from outlet when not in use and before cleaning. Allow to cool before putting on or taking off parts.
- Ventilation: Do not block any ventilation openings. Ensure adequate air circulation around the appliance.
- Proper use: Do not use the appliance for anything other than its intended use.
- Power supply: Connect the appliance only to a grounded wall outlet. Ensure the voltage indicated on the appliance matches your local voltage.
3. Product Overview
Familiarize yourself with the components of your Philips Dual Basket Air Fryer.
- Main Unit with Control Panel
- Large Cooking Drawer (6L capacity)
- Small Cooking Drawer (3L capacity)
- Removable Crisper Plates (one for each drawer)
- Air Outlet Vent (rear of unit)
- Power Cord

Figure 3.1: Angled view of the Air Fryer
This image provides an angled view of the Philips Dual Basket Air Fryer, showcasing its two distinct cooking drawers and the integrated digital control panel on top. The 'Rapid Air Technology' emblem is visible on the front.
4. Setup and First Use
Before using your air fryer for the first time, follow these steps:
- Unpack: Remove all packaging materials, stickers, and labels from the appliance.
- Clean: Wash the cooking drawers and crisper plates thoroughly with hot water, dish soap, and a non-abrasive sponge. Rinse and dry all parts completely. Wipe the main unit with a damp cloth.
- Placement: Place the air fryer on a stable, horizontal, and heat-resistant surface. Ensure there is at least 10 cm (4 inches) of free space at the back and sides of the appliance, and 10 cm (4 inches) above it.
- Pre-heat (Optional): For the first use, it is recommended to run the air fryer empty for about 10 minutes at 200°C (390°F) to eliminate any manufacturing odors. Ensure the area is well-ventilated during this process.
5. Operating Instructions
Your Philips Dual Basket Air Fryer offers versatile cooking options with its intuitive controls and dual-zone functionality.
5.1. Basic Operation
- Plug in: Connect the power cord to a grounded wall outlet. The control panel will illuminate.
- Prepare food: Place the crisper plate into the cooking drawer. Add your ingredients to the drawer. Do not overfill.
- Insert drawer: Slide the cooking drawer back into the main unit until it clicks into place.
- Select settings: Use the touch control panel to select a preset program or manually set the temperature and cooking time for each drawer.
- Start cooking: Press the start button to begin the cooking process.

Figure 5.1: Touchscreen Control Panel
This image shows a hand interacting with the touchscreen control panel of the air fryer, highlighting the various preset options available for different food types such as fries, chicken, meat, veggies, fish, cake, and reheating.
5.2. Dual Basket Functionality
The Philips Dual Basket Air Fryer features two independent drawers (6L and 3L) allowing you to cook two different foods simultaneously at different temperatures and times.
- Independent Cooking: Set individual temperatures and times for each drawer.
- Synchronized Cooking: Use the 'Sync Finish' function to automatically adjust cooking times so both drawers finish cooking at the same moment. This is ideal for preparing a complete meal.
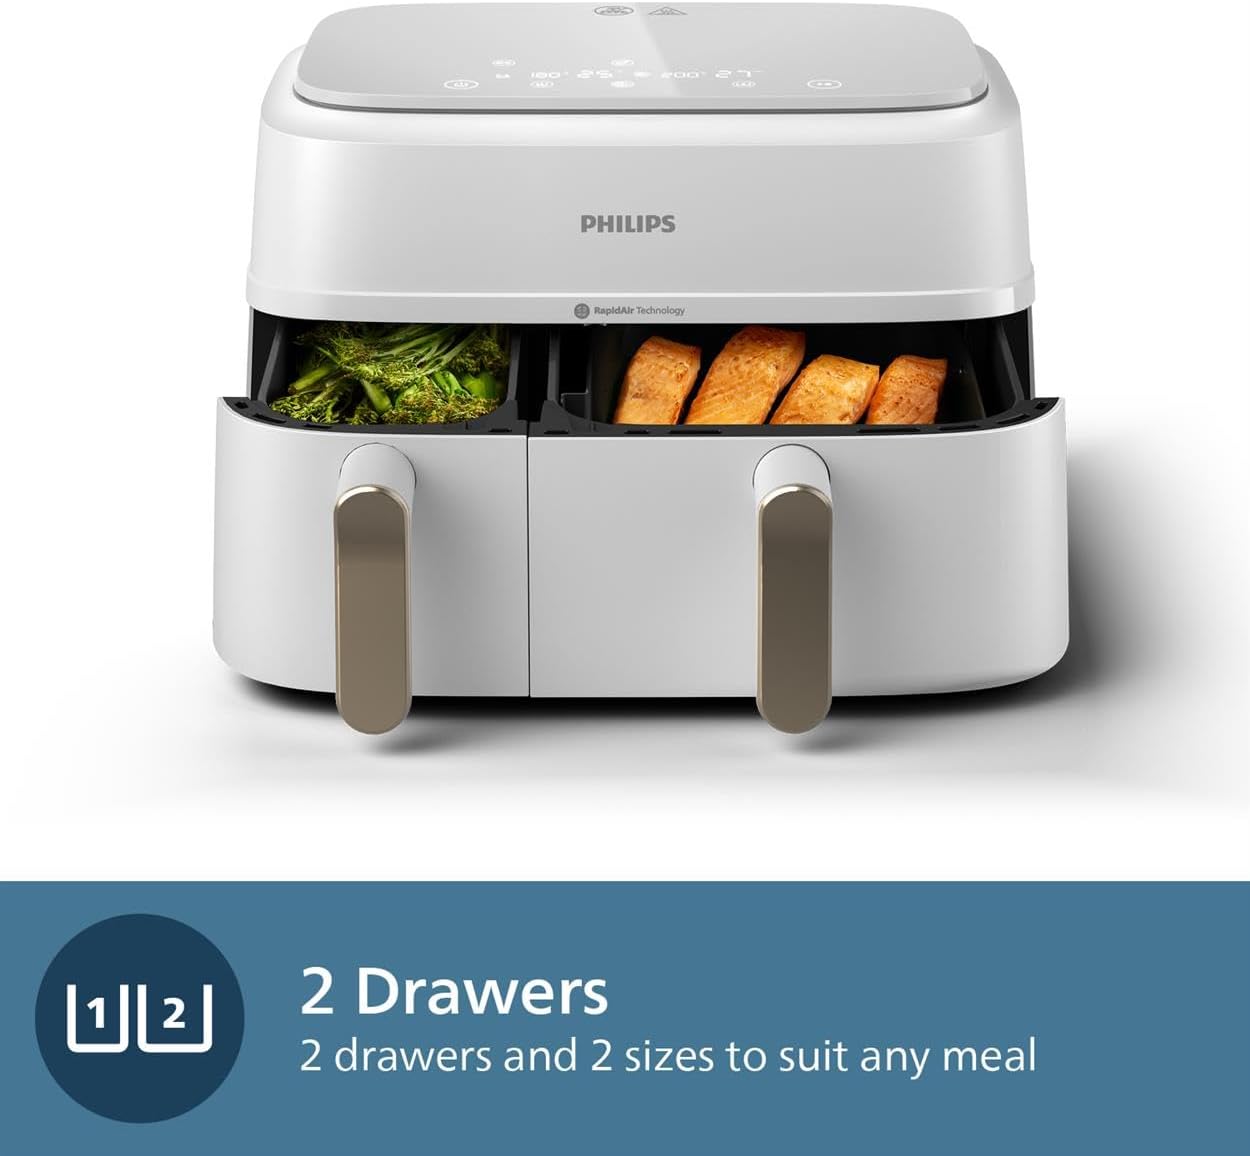
Figure 5.2: Dual Drawers in Use
This image displays the Philips Dual Basket Air Fryer with both drawers pulled out, revealing different food items (broccoli in one, salmon in the other), demonstrating its ability to cook two separate dishes simultaneously.

Figure 5.3: Synchronized Cooking Feature
This image highlights the synchronized cooking capability of the air fryer, showing the two drawers with food and an icon indicating that the appliance can auto-sync cooking times for both drawers to finish together.
5.3. Rapid Air Technology
The Philips Air Fryer utilizes Rapid Air Technology, which circulates hot air at high speed to cook food evenly and create a crispy exterior with a tender interior, using little to no added oil.

Figure 5.4: Rapid Air Technology in Action
This image provides an internal view of the air fryer's cooking chambers, illustrating the hot air circulation (represented by arrows) that defines Philips' Rapid Air Technology, ensuring optimal airflow for consistent cooking.
5.4. HomeID App Integration
Enhance your cooking experience by connecting your air fryer with the HomeID App. The app provides:
- Access to a wide variety of recipes tailored for your Philips air fryer.
- Step-by-step guidance for meal preparation.
- Personalized cooking recommendations.

Figure 5.5: HomeID App Interface
This image shows a hand holding a smartphone displaying the HomeID app interface, which features various recipes and cooking suggestions, demonstrating how the app can assist users in discovering and preparing meals.
6. Maintenance and Cleaning
Regular cleaning ensures optimal performance and extends the lifespan of your air fryer.
6.1. Cleaning After Each Use
- Unplug and Cool: Always unplug the appliance and allow it to cool down completely before cleaning.
- Wash Drawers and Plates: The cooking drawers and crisper plates are dishwasher safe. Alternatively, wash them with hot water, dish soap, and a non-abrasive sponge. For stubborn residue, soak them in hot water for 10-15 minutes.
- Clean Interior: Wipe the interior of the appliance with a damp cloth and mild detergent. Avoid abrasive cleaners or scouring pads.
- Clean Exterior: Wipe the exterior of the appliance with a damp cloth.
- Dry Thoroughly: Ensure all parts are completely dry before reassembling or storing the appliance.
6.2. Storage
Store the air fryer in a cool, dry place, away from direct sunlight and out of reach of children.
7. Troubleshooting
If you encounter issues with your air fryer, refer to the table below for common problems and solutions.
| Problem | Possible Cause | Solution |
|---|---|---|
| Air fryer does not turn on. | Appliance not plugged in; power outlet not working. | Ensure the power cord is securely plugged into a working outlet. Check the circuit breaker. |
| Food is not cooked evenly. | Too much food in the basket; temperature too low; cooking time too short. | Reduce food quantity; increase temperature/time; shake or flip food halfway through cooking. |
| White smoke coming from the appliance. | Grease residue from previous use; fatty ingredients. | Clean the drawers and crisper plates thoroughly. Remove excess fat from ingredients. |
| Appliance smells during first use. | Manufacturing residue burning off. | This is normal. Run the appliance empty for 10 minutes in a well-ventilated area. |
8. Specifications
| Feature | Specification |
|---|---|
| Brand | Philips |
| Model Number | NA353/10 |
| Colour | White Body/ Champagne Handle |
| Product Dimensions | 44.39 x 38.25 x 31.42 cm |
| Item Weight | 7.85 kg |
| Total Capacity | 9 Litres (6L large drawer, 3L small drawer) |
| Power/Wattage | 2750 watts |
| Voltage | 220 Volts |
| Special Features | Dual Zone Features, Rapid Air Technology, HomeID App Connectivity |
| Recommended Uses | Frying, Roasting, Baking, Grilling |
9. Warranty and Support
Philips products are designed and manufactured to the highest standards. For detailed warranty information and customer support, please refer to the warranty card included with your purchase or visit the official Philips website. You can also find support and frequently asked questions on the Philips support page for your specific model.
Online Support: www.philips.com/support
HomeID App: Download the HomeID App for additional recipes and support resources.


