1. Introduction
This manual provides comprehensive instructions for the installation, operation, and maintenance of your Xigmatek FENIX 240 ARCTIC AIO ARGB CPU Liquid Cooler. Please read this manual thoroughly before installation to ensure proper setup and optimal performance.
Package Contents:
- 240mm Radiator
- Pump/CPU Block
- Two High-Performance ARGB Fans
- CPU Socket Mounting Kit (for Intel LGA 1700/1200/115X and AMD AM5/AM4)
- Thermal Paste
- MINI ARGB Controller
- Tube Clips
2. Safety Information
Observe the following safety precautions during installation and operation:
- Ensure your system is powered off and unplugged before installation.
- Handle components carefully to avoid damage.
- Do not open the pump or radiator; it contains liquid coolant.
- Keep out of reach of children.
- Refer to your motherboard manual for specific fan and ARGB header locations.
3. Setup and Installation
Follow these steps to install your Xigmatek FENIX 240 ARCTIC AIO Liquid Cooler.
3.1 Prepare the Radiator and Fans
Attach the two 120mm ARGB fans to the 240mm radiator using the provided screws. Ensure the fan airflow direction is appropriate for your case (typically exhausting air out of the case or drawing cool air in).
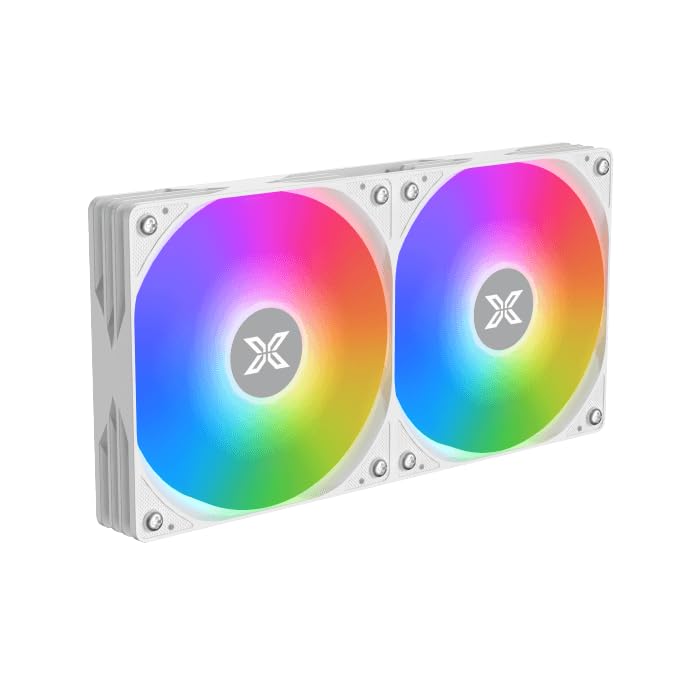
Image: Two ARGB fans are shown mounted on the white radiator, ready for installation.
3.2 Install the CPU Mounting Bracket
Select the appropriate mounting bracket for your CPU socket (Intel LGA 1700/1200/115X or AMD AM5/AM4). Follow the instructions in the mounting kit for your specific socket type to secure the backplate and standoffs to your motherboard.
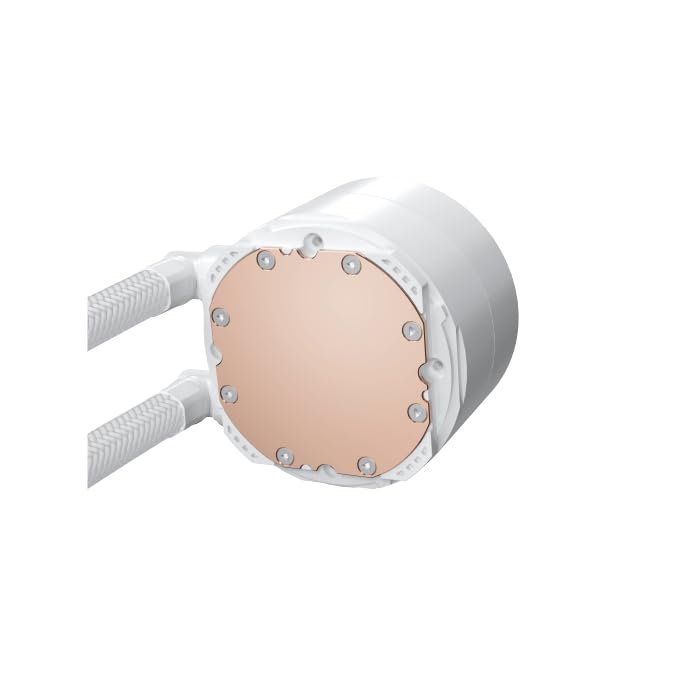
Image: The copper cold plate of the CPU pump block is visible, which makes direct contact with the CPU.
3.3 Apply Thermal Paste
Clean the CPU surface thoroughly. Apply a small amount of the included thermal paste to the center of your CPU's integrated heat spreader (IHS). A pea-sized dot is generally sufficient.
3.4 Mount the Pump/CPU Block
Carefully place the pump/CPU block onto the CPU, aligning it with the standoffs. Secure it with the provided thumb screws, tightening them in a cross pattern until snug. Avoid overtightening.

Image: The complete Xigmatek FENIX 240 ARCTIC AIO Liquid Cooler, showcasing the radiator, fans, and pump with ARGB lighting.
3.5 Install the Radiator
Mount the radiator and fan assembly into an available 240mm fan mount location in your PC case. Common locations include the top or front of the case. Use the appropriate screws to secure it.

Image: A close-up view of the radiator fins, highlighting the high-density aluminum construction for efficient heat dissipation.
3.6 Connect Cables
- Connect the pump's 3-pin or 4-pin power cable to a dedicated AIO_PUMP or CPU_FAN header on your motherboard.
- Connect the fan power cables to available fan headers on your motherboard or to the included MINI ARGB Controller.
- Connect the ARGB cables from the fans and pump to the MINI ARGB Controller. Then, connect the controller to a 5V 3-pin ARGB header on your motherboard for software control, or use the controller's built-in modes.
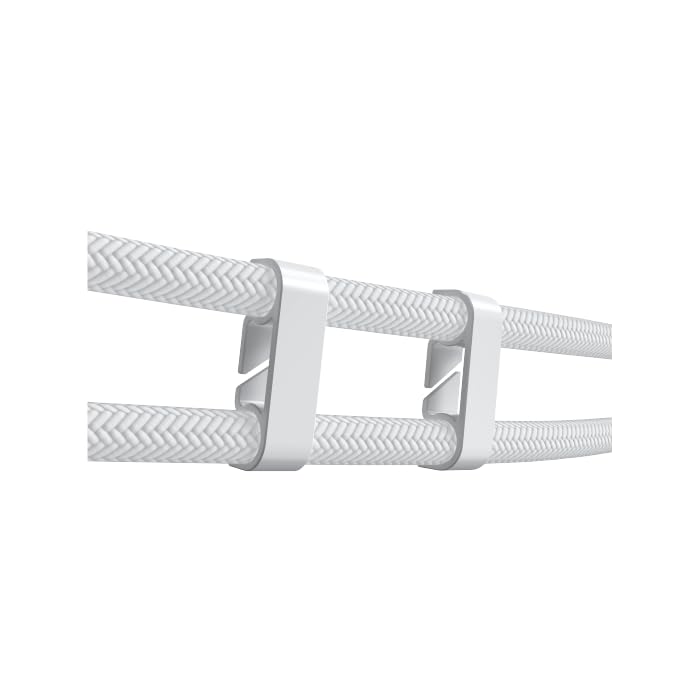
Image: Tube clips are shown securing the braided liquid cooler tubing, helping with cable management and preventing kinks.
4. Operating Instructions
Once installed, power on your system. The Xigmatek FENIX 240 ARCTIC AIO will begin cooling your CPU automatically. The pump and fans will adjust their speed based on CPU temperature, as controlled by your motherboard's BIOS settings or fan control software.
ARGB Lighting Control:
The integrated ARGB lighting can be controlled via the included MINI ARGB Controller or through compatible motherboard software (e.g., ASUS Aura Sync, MSI Mystic Light Sync, Gigabyte RGB Fusion, ASRock Polychrome Sync). Connect the controller to your motherboard's 5V 3-pin ARGB header to synchronize lighting effects.
5. Maintenance
Regular maintenance ensures optimal performance and longevity of your liquid cooler.
- Dust Cleaning: Periodically clean dust from the radiator fins and fan blades using compressed air. Ensure fans are not spinning during cleaning.
- Tubing Inspection: Check the tubing for any signs of kinks, leaks, or damage.
- Pump Noise: Monitor the pump for unusual noises, which could indicate an issue.
6. Troubleshooting
If you encounter issues, refer to the following common problems and solutions:
- High CPU Temperatures:
- Ensure the pump is running and connected to the correct header.
- Verify fans are spinning and correctly oriented.
- Check if the CPU block is securely mounted and thermal paste is properly applied.
- No ARGB Lighting:
- Confirm all ARGB cables are securely connected to the controller and motherboard (5V 3-pin header).
- Check motherboard software settings for ARGB control.
- Ensure the MINI ARGB Controller is powered.
- Unusual Pump Noise:
- Ensure there are no air bubbles trapped in the pump. Gently tilt your PC case to help dislodge any air.
- Verify the pump is running at an appropriate speed (check BIOS settings).
7. Specifications
| Feature | Specification |
|---|---|
| Model Number | EN42980 |
| Radiator Size | 240mm |
| Radiator Material | Aluminum |
| Cooling Method | Water |
| Fan Speed | Up to 1800 RPM |
| Air Flow Capacity | 82.8 Cubic Inches Per Minute |
| Noise Level | 29.8 Decibels |
| Voltage | 12 Volts (DC) |
| Wattage | 280 watts |
| Compatible Sockets | Intel LGA 1700/1200/115X, AMD AM5/AM4 |
| Product Dimensions | 12.91 x 8.11 x 5.71 inches |
| Weight | 3.62 Pounds |
8. Warranty and Support
Xigmatek products are manufactured to high-quality standards. For warranty information and technical support, please refer to the official Xigmatek website or contact your local distributor. Keep your proof of purchase for warranty claims.
For further assistance, visit: www.xigmatek.com


